10 Repetitive Photo Editing Tasks You Can Automate

Opening an image, making one predictable change, exporting it, and repeating the process is rarely the best use of an editor’s time. The bigger opportunity is not automating your creative judgment. It is automating the production work that happens after you have decided what the images need.
Good candidates have a clear rule and a result you can check: make every image 1200 pixels wide, generate three crop variants, keep product cutouts on square canvases, or replace outdated prices in a template library. More subjective decisions—whether a portrait feels natural or a crop tells the right story—still deserve your attention.
The following ten tasks combine practical editing advice with ways to automate the repetitive execution. Before running a large folder, test a small set containing your smallest image, largest image, different orientations, and a few difficult examples. Keep originals separate from exported derivatives, and save configurations only after approving the results.
1. Resize images for multiple delivery requirements
One finished photograph might need a large portfolio version, a smaller article image, and a thumbnail. Manually opening Image Size for every combination becomes unnecessary work once those requirements are defined.
Start by writing down the actual delivery requirement rather than choosing arbitrary dimensions. These are different instructions:
- Exactly 1200 pixels wide, with height changing proportionally.
- A longest edge of 2400 pixels, whether the image is portrait or landscape.
- Exactly 1200 × 1200 pixels, regardless of the original proportions.
The first two preserve aspect ratio. The third can distort an image unless its proportions already match. If you need a square photograph without stretching the subject, crop it to square before resizing.
Also separate pixel dimensions from print resolution. Adobe’s guide to image size and resolution gives a useful reminder: “For screen display, focus on pixel dimensions and ignore resolution settings.” Changing a resolution number alone does not create additional image detail.
Bulk Image Resizer lets you configure several independent resize rules in one operation. For example, you could generate a 1200-pixel-wide JPEG, a 600-pixel-wide WebP, and a larger proof from each source. Each rule can have its own dimensions, format, quality, and Photoshop resampling method.
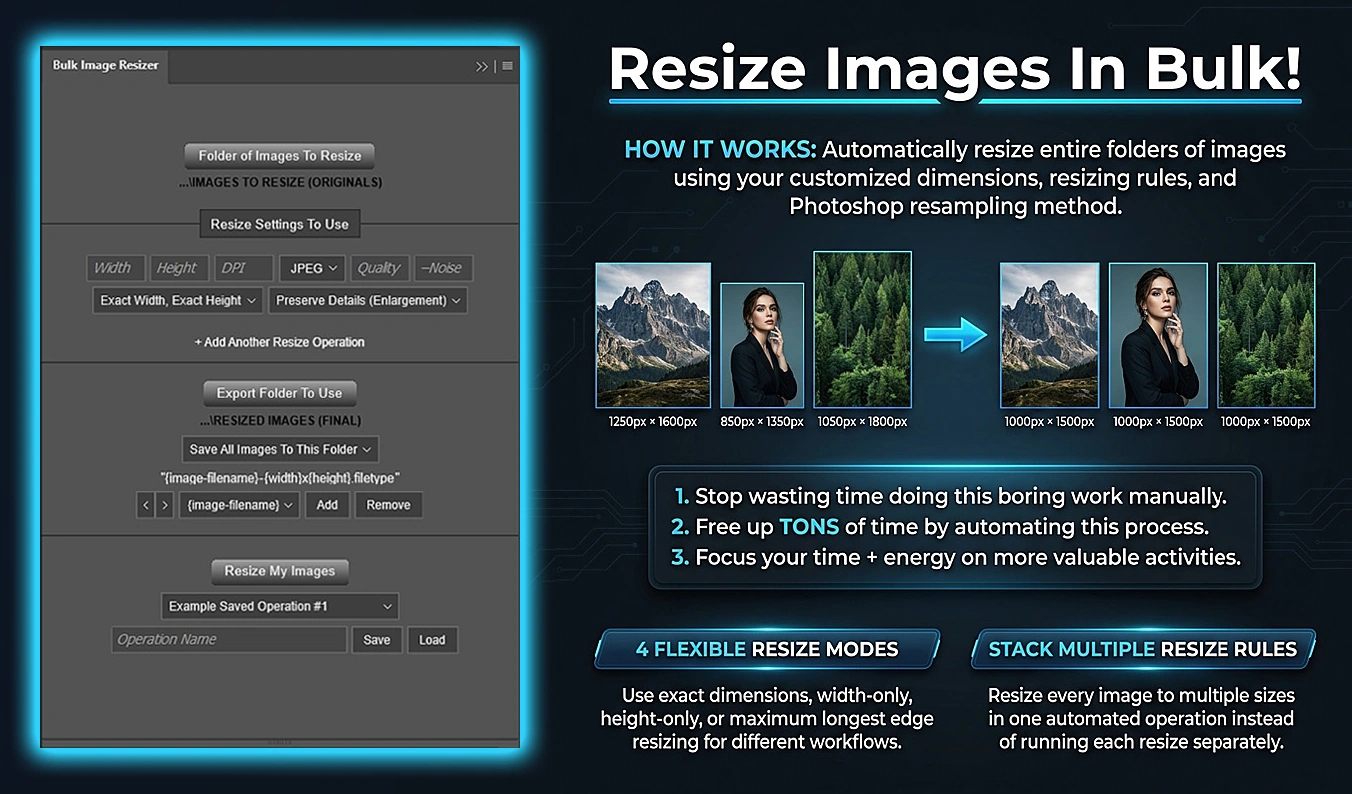
Importantly, those variants are generated independently from the original source state—not by repeatedly shrinking the preceding output. Grouping exports into a subfolder for each resize rule also makes delivery easier: all article images go together, all thumbnails go together, and no one has to sort hundreds of files afterward.
2. Generate consistent crop variants without stretching subjects
Cropping and resizing solve different problems. Resizing changes pixel dimensions; cropping changes which part of the photograph remains. Automating the wrong one can produce technically correct dimensions and visibly wrong images.
Consider a 4000 × 3000 photograph. Before any subsequent resizing, it can produce:
- A 3000 × 3000 square crop.
- A 2400 × 3000 crop at a 4:5 ratio.
- A 4000 × 2250 crop at a 16:9 ratio.
All three preserve the subject’s proportions, but they remove different parts of the photograph. That makes crop alignment the important creative decision. A centered crop may suit a centered product; a left-aligned crop may better preserve a person standing near the left edge.
Bulk Image Cropper can generate several independent crop variants from each original during one run. Its Aspect Ratio Crop mode supports nine alignment positions, so you can specify which region to retain rather than accepting a center crop everywhere. Outputs can be grouped by source image or crop rule.
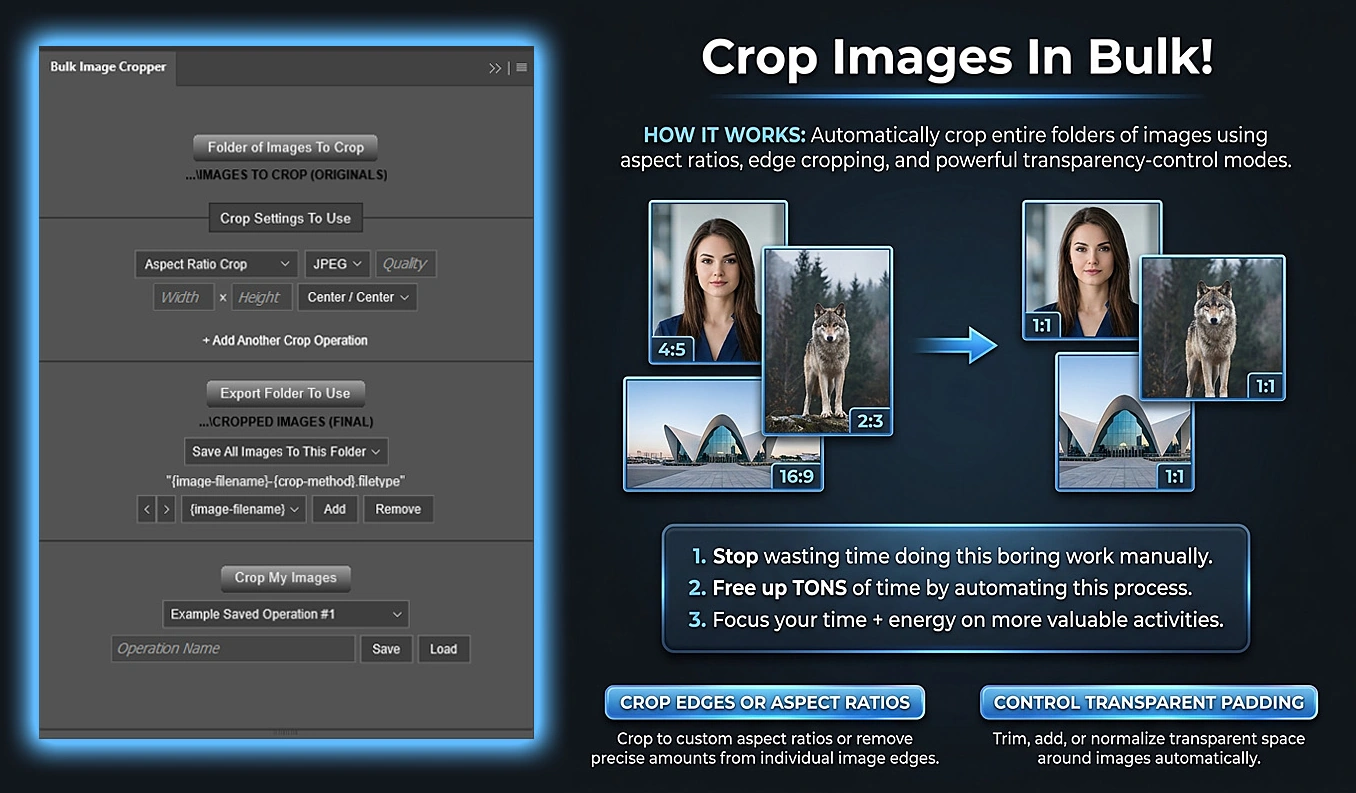
The ratio fields describe proportions, not final pixel dimensions. Entering 4 × 5 means “crop to this shape,” not “export at 400 × 500.” That distinction lets you establish composition first and delivery dimensions second.
For transparent artwork, the repetitive task may instead be cleaning canvas margins. Normalize Transparency establishes target padding around visible content; Trim Excess Transparency caps oversized margins; Add Transparent Padding guarantees minimum spacing. Choose the operation that matches the requirement rather than treating all three as interchangeable.
Review the crops most likely to fail: faces near an edge, products with projecting handles, and compositions with important text. If one anchor cannot serve the entire collection, divide the images into composition groups instead of forcing one rule onto everything.
3. Remove backgrounds and standardize the resulting cutouts
Background removal is often only the first step in preparing product assets. The remaining work—trimming empty canvas, adjusting edges, creating consistent dimensions, and positioning the subject—can take just as much repetitive effort.
Define the finished asset before starting. A tightly bounded transparent cutout and a product centered on a 2000 × 2000 canvas are different deliverables. For a catalog, bottom alignment may matter more than center alignment because it gives products a consistent visual baseline.
Bulk Background Remover combines Photoshop-native background removal with optional edge refinement, transparency trimming, and output normalization. Its Select Subject & Remove Inverse method creates a subject-revealing layer mask rather than simply deleting the surrounding pixels.
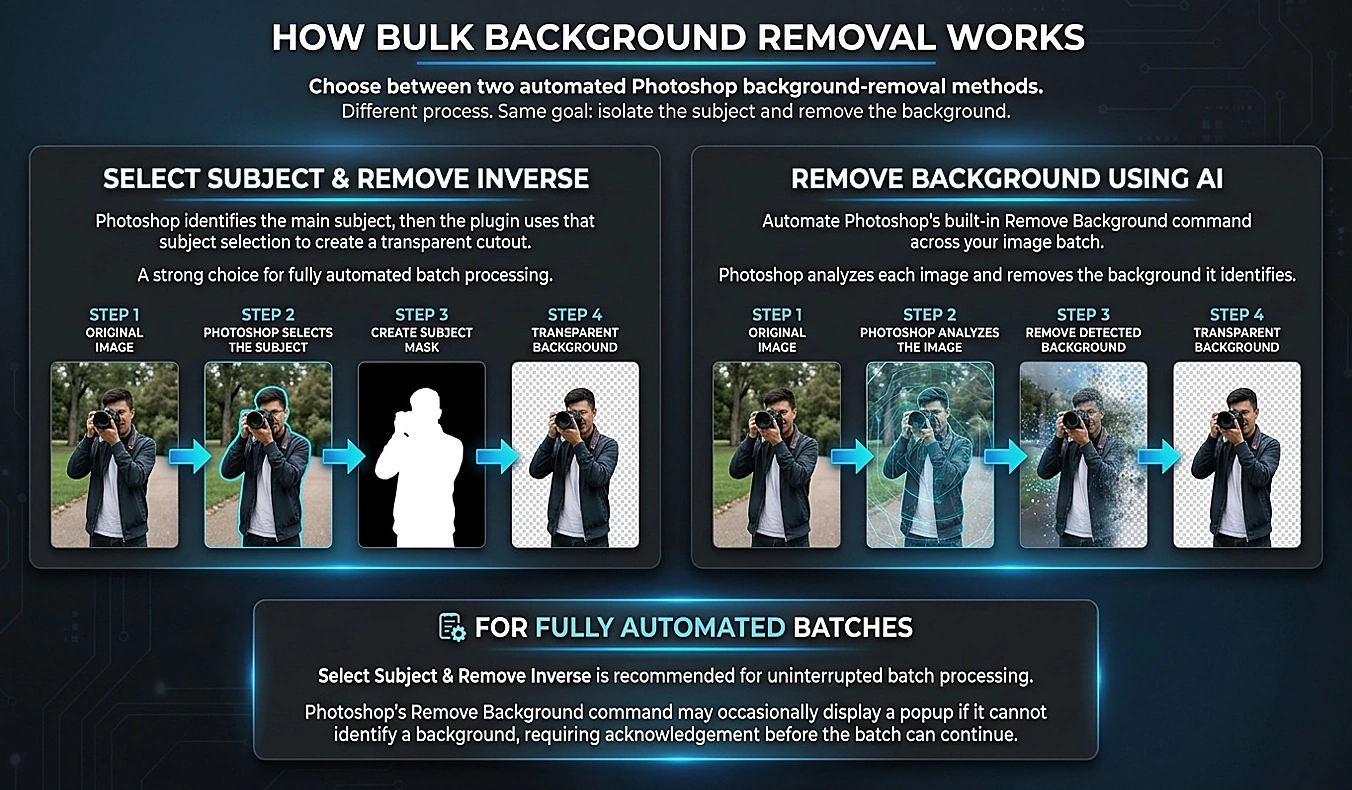
A practical product-image configuration could:
- Remove the background using Select Subject & Remove Inverse.
- Apply a tested Contract or Feather adjustment if the collection needs consistent edge cleanup.
- Normalize the result to a 2000 × 2000 transparent canvas.
- Align the cutout Center / Bottom and export PNG.
Pixel normalization proportionally reduces oversized cutouts when necessary, but it does not enlarge smaller subjects to fill the canvas. This is useful when you want standardized dimensions without automatically interpolating small source images. It also means that identical canvases do not necessarily produce identical apparent product sizes.
Keep edge inspection separate from canvas inspection. Check hair, fur, thin straps, and reflective edges against both light and dark backgrounds. Adobe’s Select and Mask guide explains the preview modes and refinement tools that help with exceptional images. Automate the routine cutouts; give the difficult boundaries a targeted manual pass.
4. Upscale images that genuinely need more pixels
Upscaling should begin with a pixel shortfall, not a preference for larger files. Calculate what the destination requires, then compare it with the usable image after cropping.
For example, an 8 × 10-inch print requested at 300 pixels per inch needs 2400 × 3000 pixels. If your cropped source is 1600 × 2000, a 1.5× enlargement reaches those dimensions. There is no need to automatically turn that into a much larger 4× file.
Bulk Image Upscaler supports both traditional Photoshop resampling with custom enlargement factors and AI upscaling through Photoshop’s Firefly, Topaz Gigapixel, and Topaz Bloom options. Traditional methods can handle a specific multiplier such as 1.5× or 1.7×; the AI methods use fixed 2× or 4× variants.
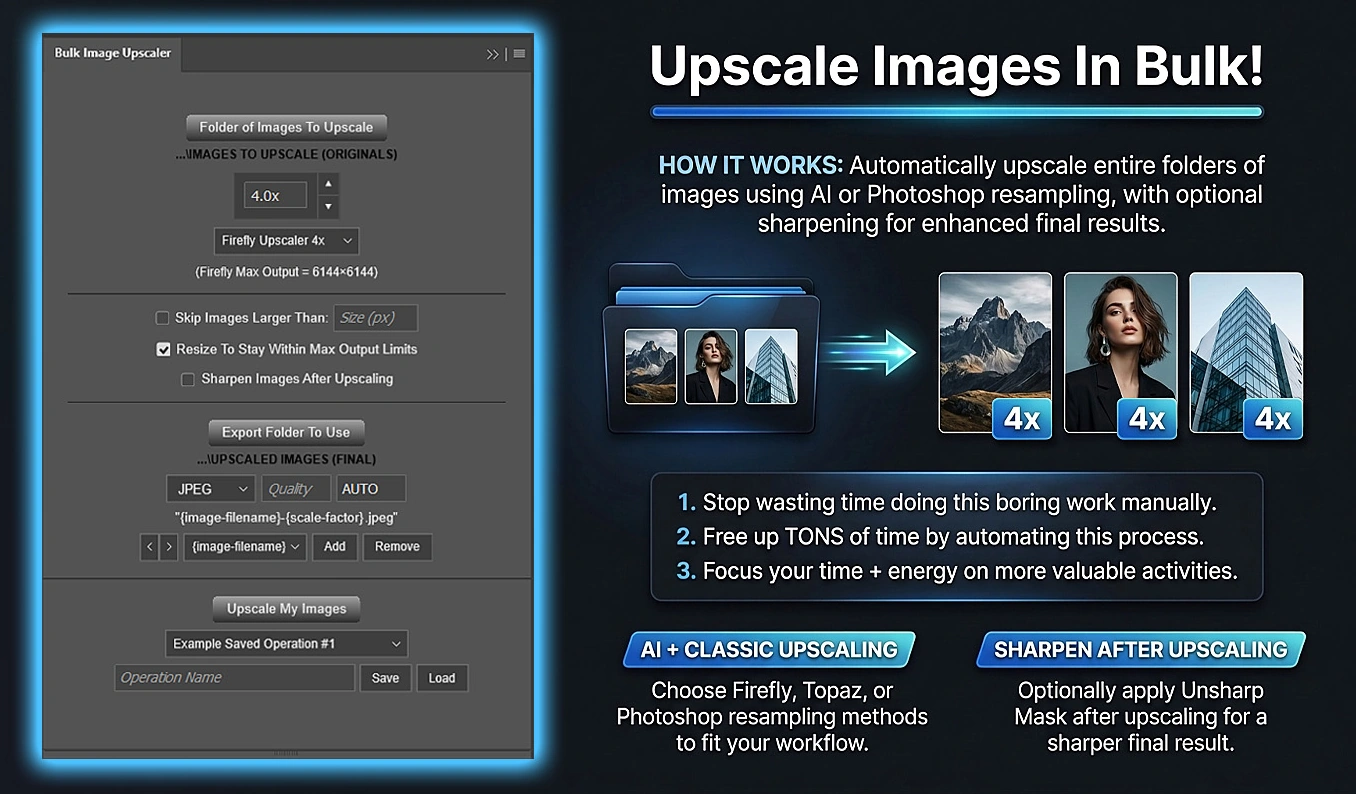
For a mixed folder, its source-size skip threshold can exclude images that are already large enough. Automatic AI output-limit handling also adapts requests that would exceed the selected model’s limits. Check the actual exported dimensions against your delivery brief rather than assuming every AI request will retain its initially selected multiplier.
Adobe’s Generative Upscale guide explains the model choices and output limits. The plugin’s AI methods use Generative Credits, while its standard Photoshop resampling methods do not.
Review enlargement for fidelity, not just apparent crispness. Compare product lettering, fabric patterns, facial features, and fine edges with the source. A visually convincing result is not automatically an accurate representation of every original detail, especially when creative enhancement is involved.
5. Apply output sharpening with settings that suit the image size
Output sharpening is a strong automation candidate because the destination often defines a repeatable treatment. A collection of similarly prepared web images can receive one approved sharpening configuration instead of hundreds of individual filter adjustments.
Set final delivery dimensions before evaluating output sharpening. Then inspect both a 100% view and the intended viewing size. Adobe’s Smart Sharpen guide explains the central distinction: Amount controls strength, while Radius controls the pixel neighborhood affected around an edge.
Bulk Image Sharpener automates Unsharp Mask and Smart Sharpen across a folder. It can sharpen the entire image, concentrate the treatment on Photoshop-detected subjects or backgrounds, or target a particular layer in structured Photoshop documents.
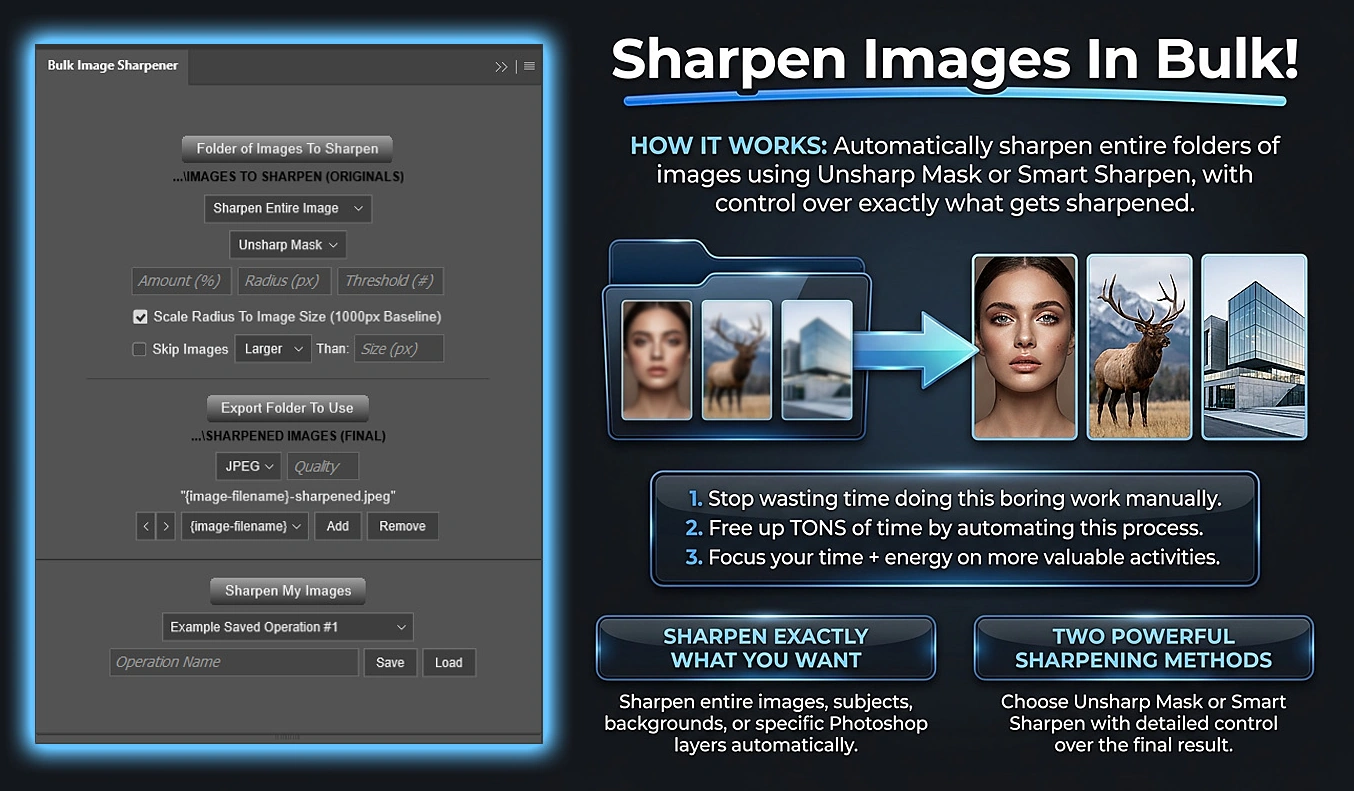
Its adaptive radius option is especially useful for collections that retain different resolutions. The configured radius uses a 1000-pixel longest-edge baseline. A 1-pixel baseline radius becomes 1 pixel on a 1000-pixel image and 3 pixels on a 3000-pixel image. With Smart Sharpen, the main, shadow, and highlight radii scale together.
That adapts the spatial scale of sharpening; it does not decide how much sharpening every photograph aesthetically needs. A smooth portrait and a detailed architectural image may still require different treatments. Group images by content and intended output, not only by resolution.
Approve settings on areas where problems become obvious: eyelashes, rooflines, high-contrast lettering, smooth skin, and noisy shadows. Look for bright edge halos and exaggerated grain. The useful automation is repeating a tested treatment—not repeatedly applying the strongest treatment available.
6. Add watermarks that adapt to image dimensions and purpose
Watermarking is not one universal task. A subtle portfolio logo, a client-proof overlay, and a repeated preview mark have different placement and visibility requirements.
For ordinary branding, define size and margins proportionally. A logo that occupies 12% of image width scales more sensibly across different resolutions than a fixed 300-pixel logo. Percentage-based padding can likewise maintain consistent spacing from the edges.
Bulk Image Watermarker supports text and image sources, nine-position Simple Watermarks, repeated Pattern Watermarks, and more pervasive Corner Lines and Crosshatch layouts. This lets you configure separate visual treatments for branding and proofs rather than compromising between the two.
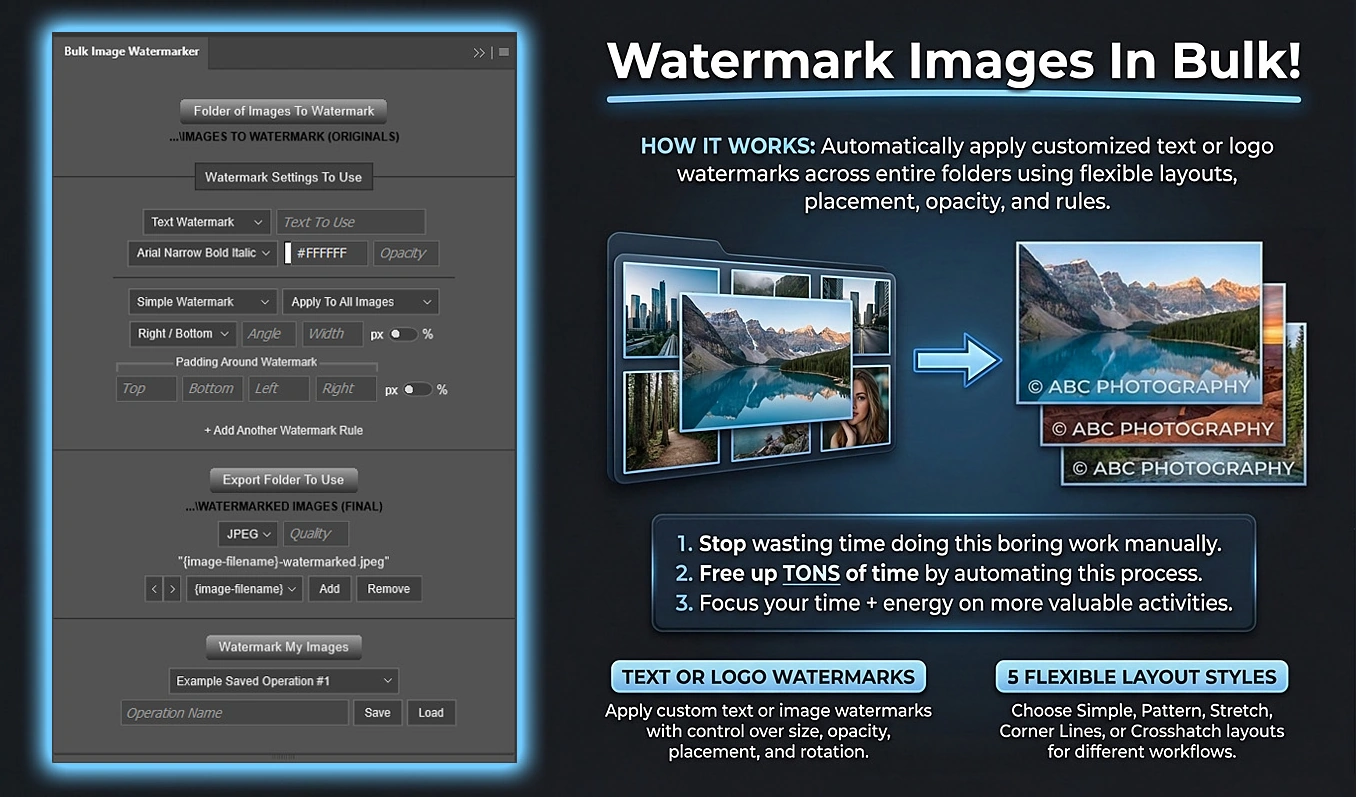
Its conditional rules are useful when one source folder needs different handling. For example, one rule can apply white text to images with average brightness below 50, while another applies black text at or above 50. Other conditions can target filenames containing “preview” or specific image orientations.
Multiple qualifying rules accumulate on the same image before one final export. A corner logo and a repeating proof message can therefore appear together; they are not automatically exported as separate alternatives.
Make one distinction during review: average image brightness is not the brightness directly underneath a corner logo. A mostly dark photograph can still contain a bright wall in the bottom-right corner. Test those mixed scenes before relying on automatic light/dark selection.
For delivery, keep clean finals and watermarked previews in separate destinations. Apply watermarks after establishing final dimensions, so the approved mark size and spacing correspond to what the recipient will actually see.
7. Meet filesize goals without repeated export experiments
“Make the files smaller” can mean three different things: use a consistent quality setting, reduce each source by a percentage, or bring every output near a fixed filesize. Choose the goal before automating the export.
A fixed quality does not imply a fixed filesize. A photograph of a smooth background and one filled with foliage can respond differently to the same compression settings. When filesize is the requirement, repeated guessing and checking is exactly the work worth automating.
Bulk Image Compressor provides Standard Compression, Target Reduction %, and Target Filesize. The target-based modes test encoded JPEG or WebP candidates, measure their actual filesizes, and search for an appropriate quality separately for each image.
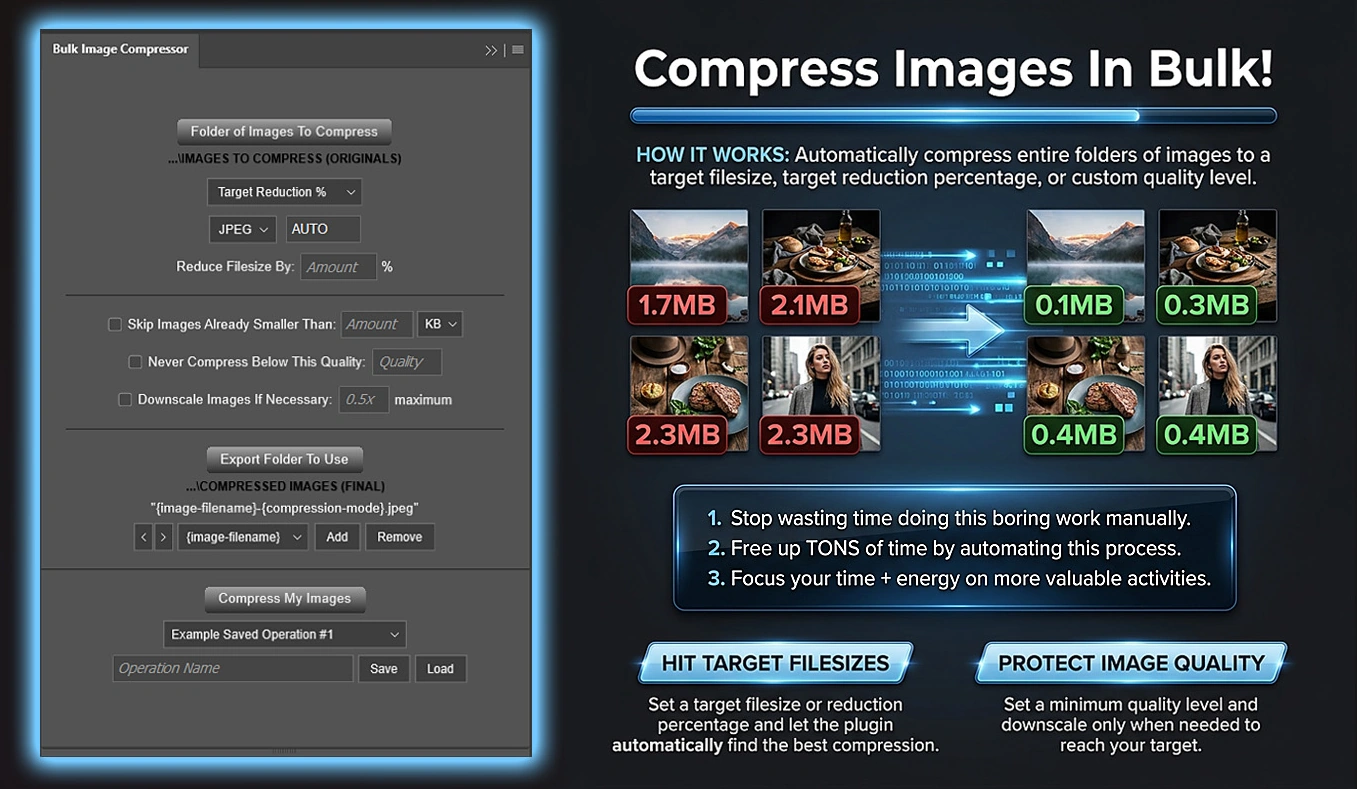
Its quality-first approach preserves pixel dimensions where possible. You can establish a minimum quality and permit proportional downscaling only when quality adjustment cannot reach the target. For example, a 0.75× downscaling allowance sets a boundary: the image may remain larger than that if less reduction is sufficient.
Leave headroom when an upload limit is strict
The target modes treat results within ±10% as successful. Consequently, a 500 KB target is not equivalent to a guarantee that every file will remain below a 500 KB upload limit.
For a strict 500 KB ceiling, a 450 KB target leaves useful headroom: its upper tolerance is 495 KB. Still verify the finished files, because a best-effort result can miss the target when the permitted quality or downscaling settings prevent a closer match.
Google’s image-performance guidance makes the accompanying visual check explicit: “When using lossy compression, always confirm that the compressed image meets your quality standards.” Inspect gradients, fine lettering, and high-contrast edges—not just the filesize column.
Run final compression after the edits, sharpening, and overlays are complete. You want to measure the file you will actually deliver, not an intermediate version whose contents will change again.
8. Replace artwork across a library of mockup photographs
Mockup production becomes repetitive quickly: open a scene, replace its artwork, export, repeat for the next design, then repeat the whole collection in another scene.
The workload is easy to calculate. One hundred designs across nine scenes means 900 artwork-and-template combinations. The useful automation is generating those combinations consistently, including placement, export, and filenames.
Batch-Replace Smart Objects processes an artwork folder against either one PSD/PSB template or a folder of templates. A template with one Smart Object is targeted automatically; when several exist, you select the intended replacement layers.
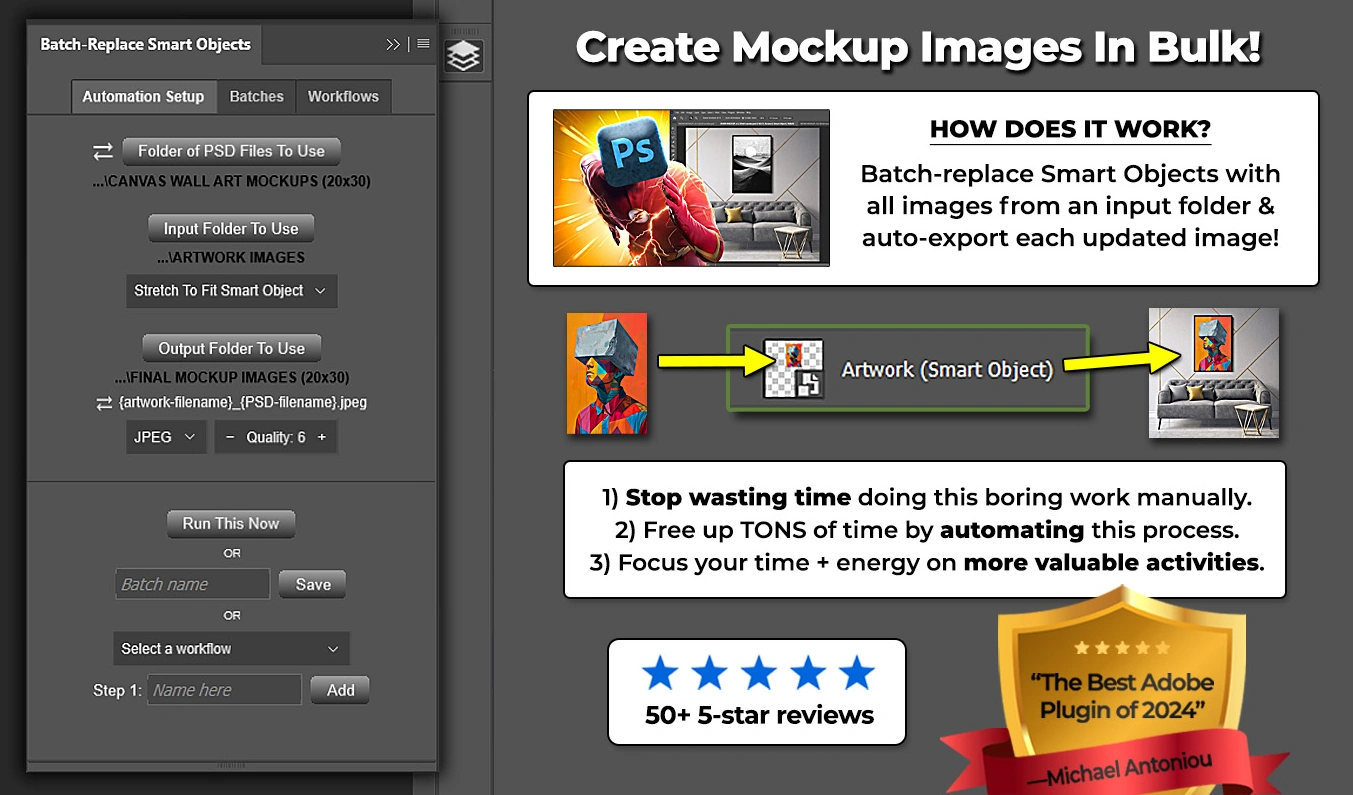
Choose placement according to the design requirement. Contain preserves the entire artwork but may leave unused space. Fill preserves proportions and covers the target while cropping overflow. Stretch fills the target exactly but can change proportions. That choice matters more than simply making the operation run.
Prepare one template correctly before expanding to hundreds of outputs. Establish the intended internal Smart Object canvas, remove unnecessary transparent margins, and convert the artwork to a Smart Object before applying the mockup’s outer perspective or distortion. Adobe’s explanation of Smart Object replacement describes how replacement retains the object’s transformations.
Test both a wide and a tall design in every scene. A placement that looks excellent in one frame can crop important content in another. When scenes need different placement or export settings, the plugin’s saved multi-step Workflows can preserve those distinct configurations.
Finally, remember that selecting several Smart Objects places the same current artwork into all selected targets before one export. Use that for repeated product instances or multiple displays of the same design, and name templates clearly so generated filenames identify the scene.
9. Update repeated text in photo-based templates
Promotional photographs often live inside designed assets: product cards, event graphics, client proofs, price lists, and social templates. Updating the image may be straightforward while changing its labels creates another round of repetitive layout work.
The prerequisite is editable text. Lettering already flattened into a photograph is not a Photoshop text layer. Build reusable masters with clearly named layers such as Headline, Price, and Caption, and keep those layers editable.
Bulk Text Replacer applies Original Text → Replacement Text rules across supported files containing editable Photoshop text layers. You can search all text layers or restrict a rule to an exact layer name, then choose whether to match the entire layer or text within it.
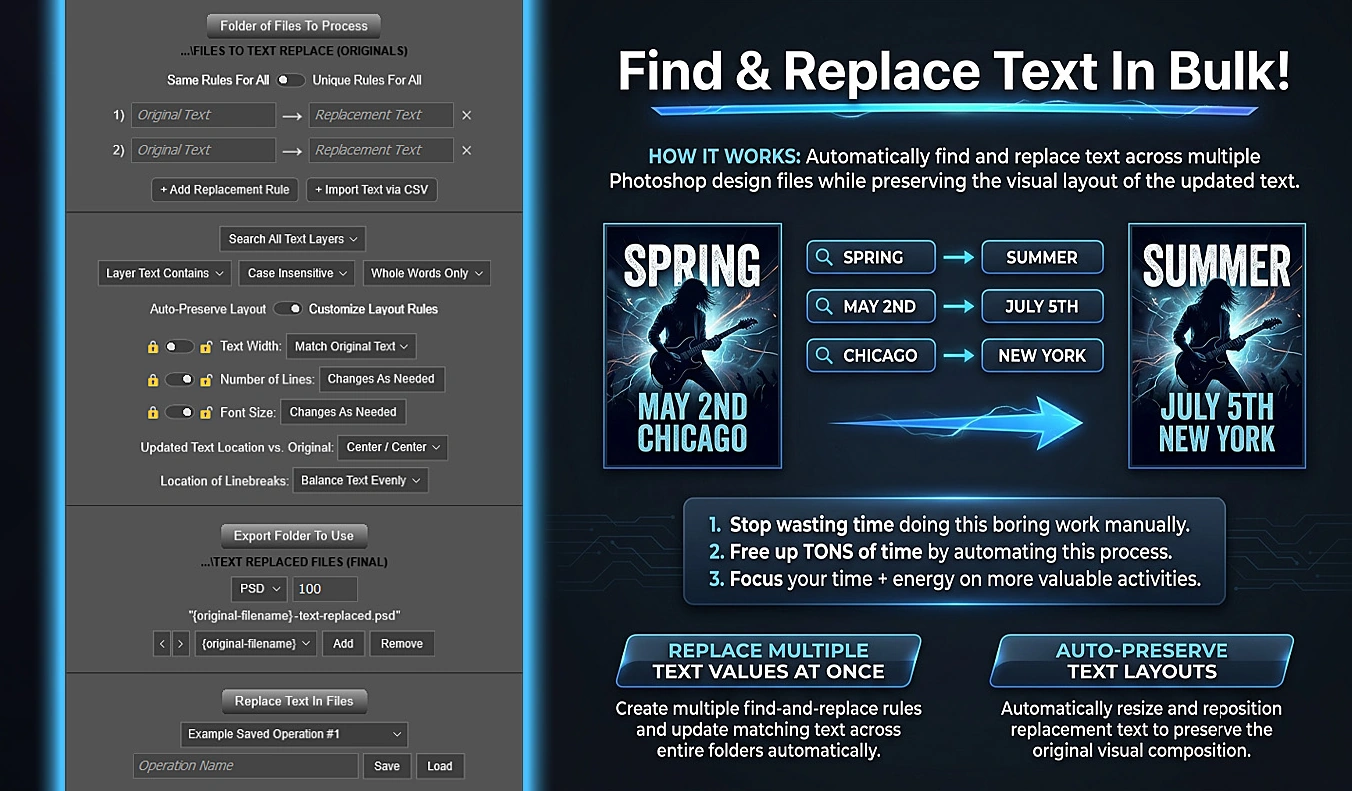
That targeting deserves attention. Replacing a short word everywhere can affect unrelated captions. An entire-layer match on a specifically named Price layer is much more deliberate than searching every layer for a common number.
The time-saving feature is not merely inserting new wording. Auto-Preserve Layout keeps the replacement within the original rendered width, lets it re-wrap, adjusts font size toward the original visible height, and restores its center position. For stricter designs, custom rules can hold a headline to one line while allowing font size to change, or preserve description width and font size while allowing more lines.
For larger updates, import a two-column CSV with the headers ORIGINAL TEXT and REPLACEMENT TEXT. Treat it as a replacement map applied across the source files, and assign different changes to distinct named layers where possible. Rules evaluate the original text snapshot rather than acting as a cascading chain that searches text created by earlier rules.
Export a PSD when the revised template needs to remain editable. Review the longest replacement, a short replacement, and any multiline copy before approving the whole collection; those examples reveal layout problems much faster than checking only an average-length label.
10. Reduce noise across comparable high-ISO photographs
Noise reduction is another genuinely useful photography task to automate, particularly for event, indoor, and low-light collections. It is different from sharpening: the objective is suppressing unwanted grain or color artifacts while retaining meaningful texture.
Lightroom Classic’s Denoise feature provides a practical workflow for supported raw and DNG formats. You can establish a treatment on a representative photograph and apply it to a selected group rather than processing each image individually. Adobe documents background processing for these multi-image AI adjustments.
Group the images thoughtfully first. Photographs from the same camera, with similar ISO values and comparable exposure corrections, make a better starting group than everything from an entire shoot. A heavily lifted, underexposed frame may need different treatment from a well-exposed frame at the same ISO.
- Choose a representative image containing both a smooth shadow area and fine detail.
- In the Detail panel, enable Denoise and adjust its strength while inspecting a 100% view.
- Open Copy Settings, deselect unrelated settings, and select the Denoise setting.
- Select the comparable photographs in the Filmstrip and paste the selected treatment.
- Let processing complete, then check several results before exporting the group.
Adobe’s copy-and-paste settings instructions explain how to transfer only the selected adjustments. That matters: applying noise reduction should not accidentally replace photographs’ individual exposure, white balance, or crop decisions.
Adobe recommends applying Denoise before tools such as AI masks and removal. During review, look beyond the smoothness of the background. Check whether eyelashes, hair, fabric, and fine lettering still look believable. The cleanest-looking result is not necessarily the best one if useful texture has disappeared.
You do not need to apply all ten tasks to every image. Start with the operation you repeat most often and whose success you can define clearly. When combining stages, use lossless working files where appropriate, establish composition and dimensions before final output sharpening, and reserve lossy compression for delivery. The goal is fewer repetitive decisions—not fewer thoughtful ones.