8 Common Photoshop Mistakes Print-On-Demand Sellers Should Avoid

A design can look excellent in Photoshop, upload without an error, and still make a disappointing product. The problem might be insufficient detail at the actual print size, an unwanted background, or artwork positioned where a seam will interrupt it.
Other mistakes cost time rather than print quality: rebuilding the same size variants, babysitting individual AI jobs, and manually exporting hundreds of mockups. A better POD workflow protects the artwork first, then automates the repeatable production work. These eight mistakes cover both sides.
Photoshop Mistake #1: Starting With a Generic Canvas Instead of the Product’s Specifications
A familiar canvas size is not a universal print specification. Before creating a design, identify the actual product, print provider, print location, and relevant size variant. Then check the requirements for that combination.
Make a short production brief containing:
- The required or recommended pixel dimensions and resolution.
- The accepted upload format and color profile.
- The printable area, safe area, and bleed requirements where applicable.
- Any product-specific restrictions involving seams, handles, pockets, or other interruptions.
Download the provider’s template when one is available. Printify’s design-template instructions, for example, explain how templates identify print areas, safe zones, and bleed lines, and why template and background layers should be hidden before export.
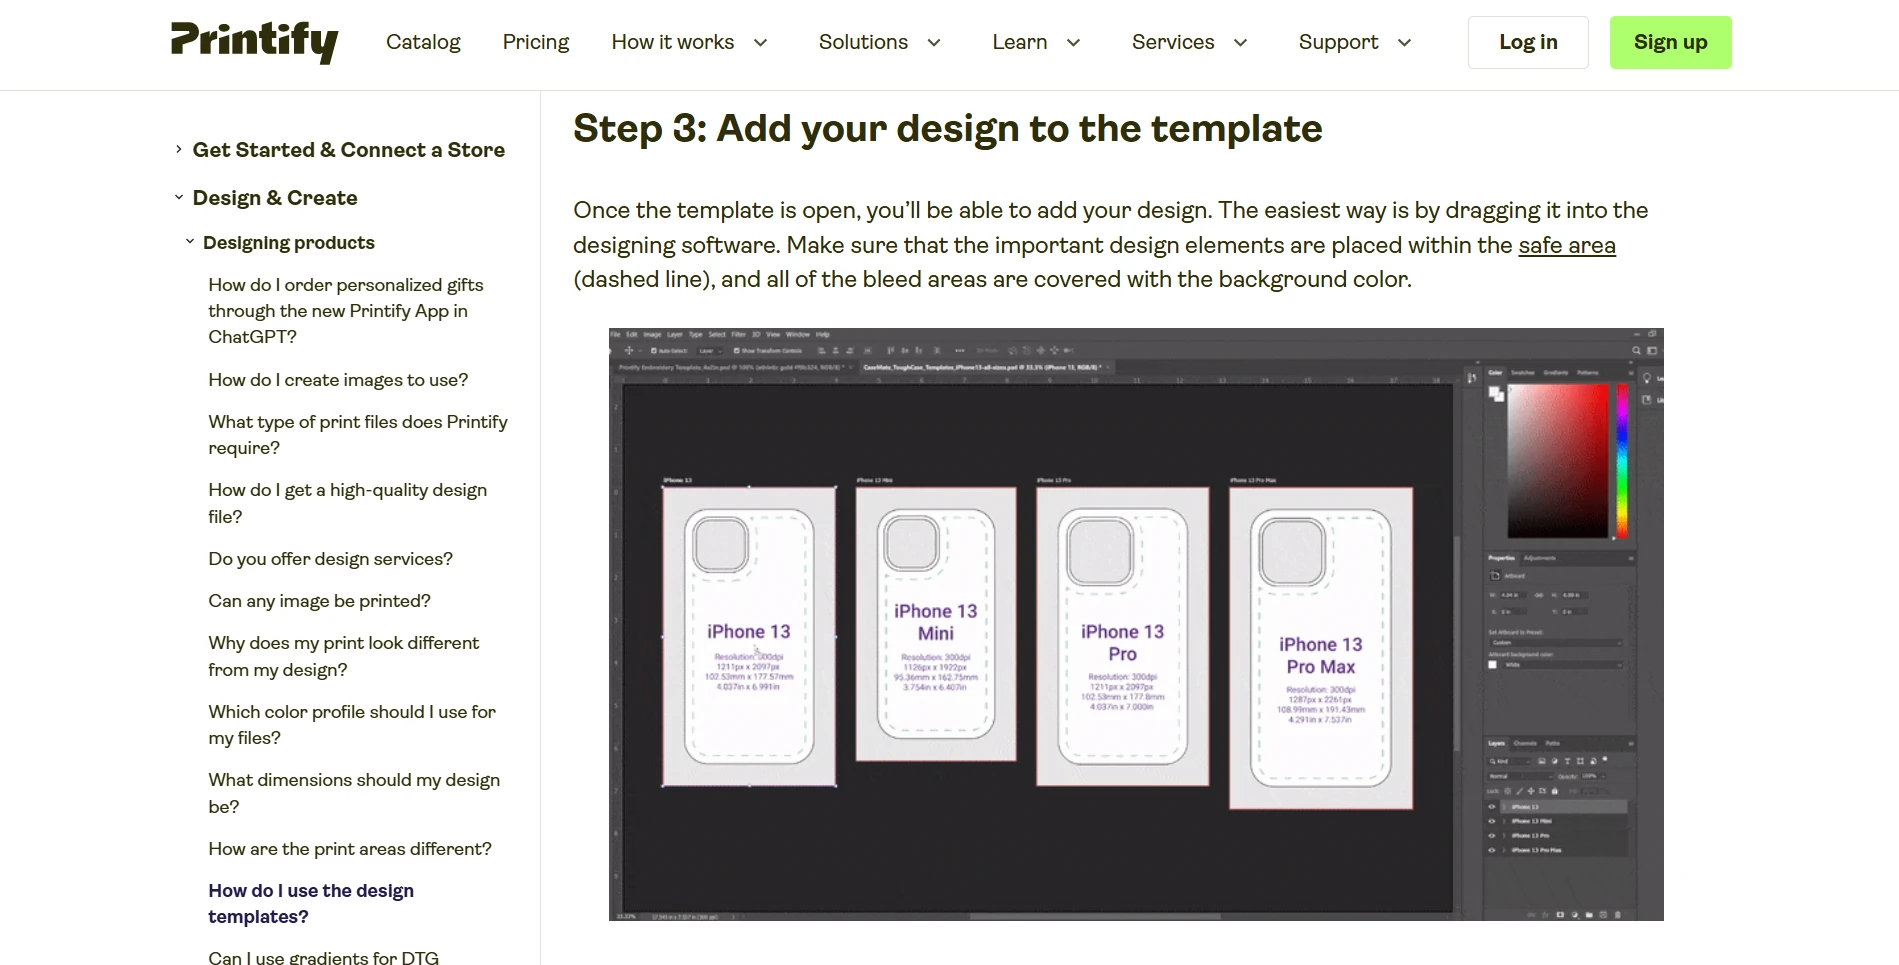
Those boundaries have different jobs. The safe area is where important content belongs. Bleed provides extra coverage beyond the intended visible boundary. Extending a background into bleed does not mean extending your headline into it. Printify’s guide to safe areas and bleeds also explains why all-over-print placement can vary and why size variants may need separate adjustments.
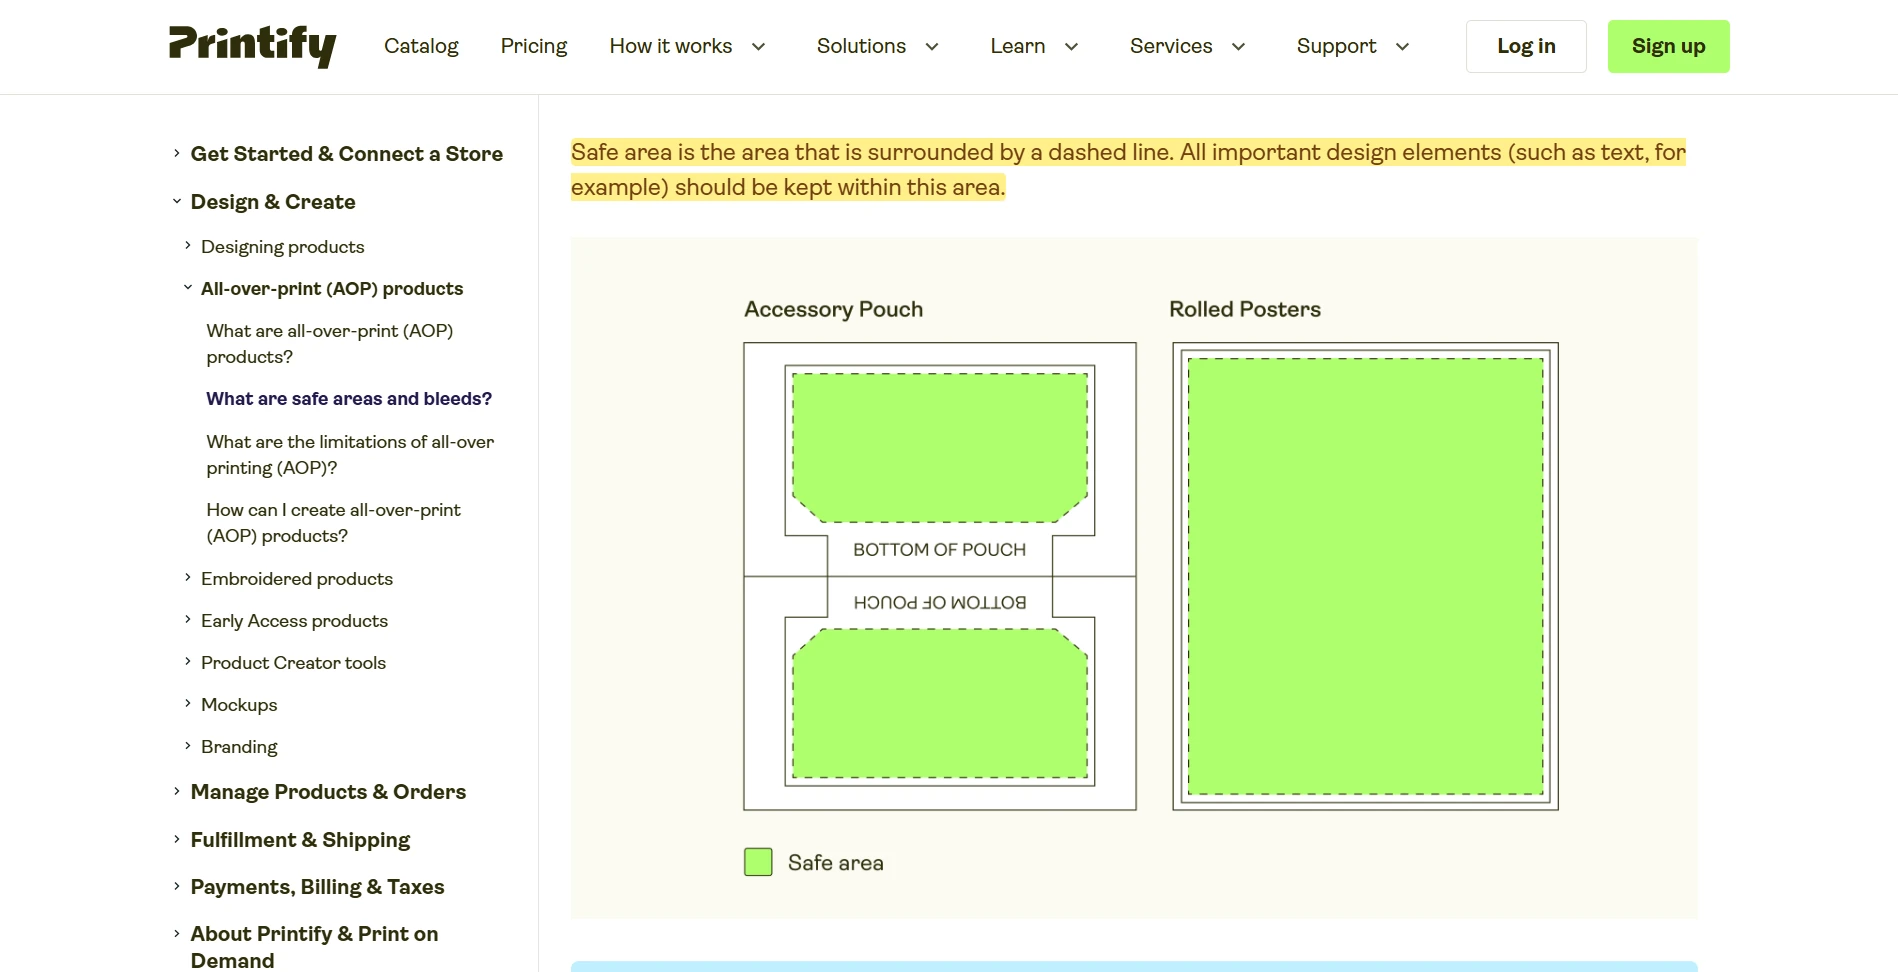
For a wraparound illustration, extend expendable background material through the required bleed while keeping faces, lettering, and other essential elements comfortably inside the safe area. Do not compose a crucial detail so precisely against a boundary that a small production shift ruins the design.
One final check: reopen the exported file. A correctly prepared Photoshop document is not enough if its template markings accidentally made it into the upload.
Photoshop Mistake #2: Changing the DPI Number and Calling the Artwork Print-Ready
Typing “300” into the Resolution field is not a quality upgrade by itself. The useful question is how many pixels you have for the physical area the artwork will occupy.
The relationship is simple: required pixels equal print size in inches multiplied by the target pixels per inch. Although POD documentation often uses “DPI” for file preparation, this calculation concerns the image’s pixel density at its intended printed size.
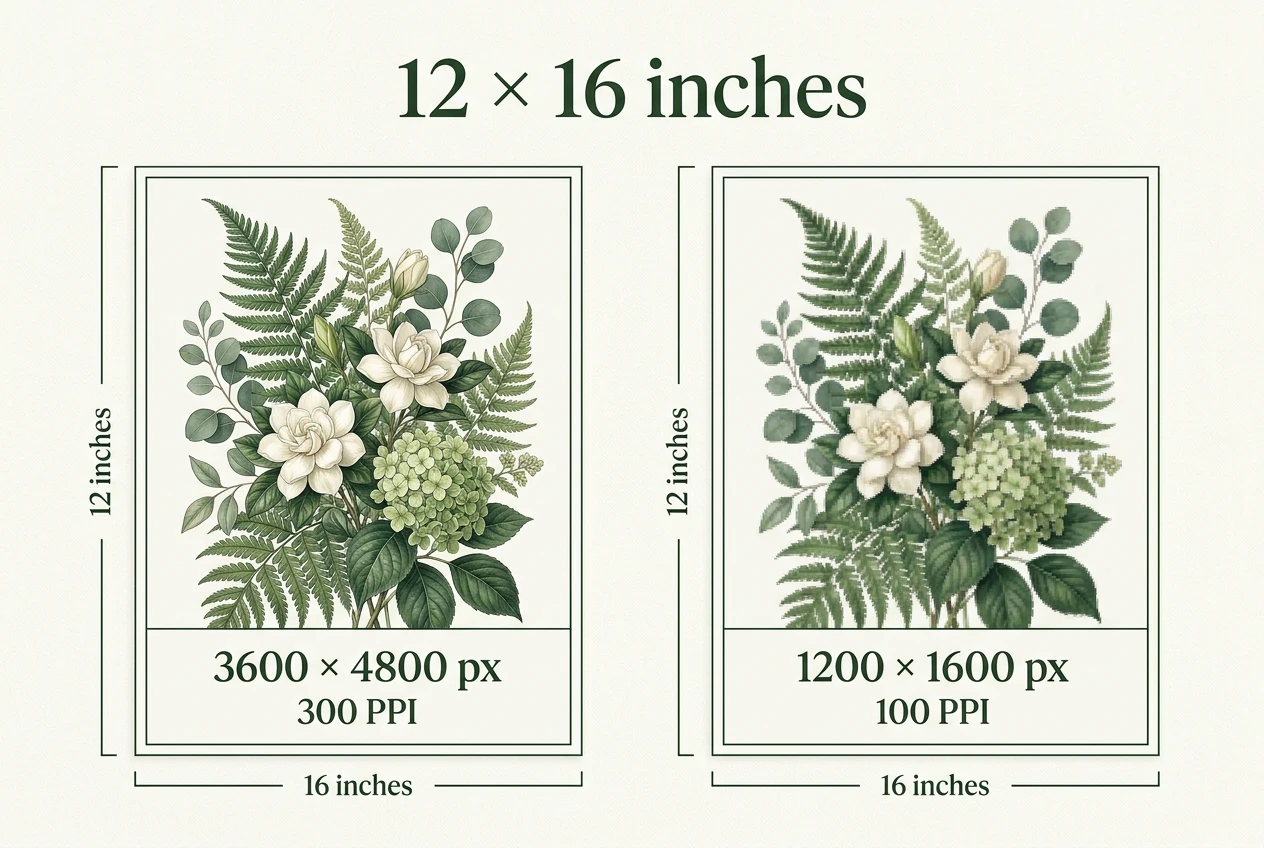
Suppose a product requires artwork measuring 12 × 16 inches at 300 pixels per inch. That calls for 3600 × 4800 pixels. A 1200 × 1600 image placed at that same physical size supplies only 100 pixels per inch.
In Photoshop, open Image > Image Size and inspect the pixel dimensions. With Resample disabled, changing resolution changes the relationship between physical size and pixel density; it does not add image data. With Resample enabled, Photoshop can calculate additional pixels, but a larger file is not automatically a more detailed original. Adobe’s explanation of image size, resolution, and resampling makes this distinction clear.
Use the product’s actual resolution requirement rather than assuming every POD item needs the same number. Then inspect the final artwork for soft lettering, compression artifacts, broken outlines, and other defects before approving it.
For type-heavy designs, keep text editable in the master and render it at the required output size. Enlarging a small, flattened screenshot of lettering should not be the default production method.
Photoshop Mistake #3: Approving Transparency Only on a White Background
A white rectangle can disappear against Photoshop’s white canvas and become painfully obvious on a navy shirt. Conversely, a file can have a genuinely transparent background and still contain unwanted pale fringes or low-opacity effects.
Start by checking the delivery format. PNG supports transparency; JPEG does not. Printful’s print-file preparation checklist recommends PNG for designs that need transparent backgrounds and calls attention to leftover edge pixels.
Use a simple inspection routine:
- Place temporary white, black, and contrasting colored layers beneath the artwork, switching between them to inspect its edges.
- Look at the design at 100% zoom, especially around lettering, distressed textures, shadows, and previously removed backgrounds.
- Hide the inspection layers, export the transparent file, and reopen that export to confirm the background and edges.
Do not judge transparency solely from the layer’s Opacity setting. A layer at 100% opacity can still contain partially transparent pixels.
For direct-to-garment printing, distinguish an empty background from semi-transparent artwork. Printful’s visual guide to transparency in DTG files shows how fades and other semi-transparent elements can interact poorly with the white underbase, particularly on dark fabrics.
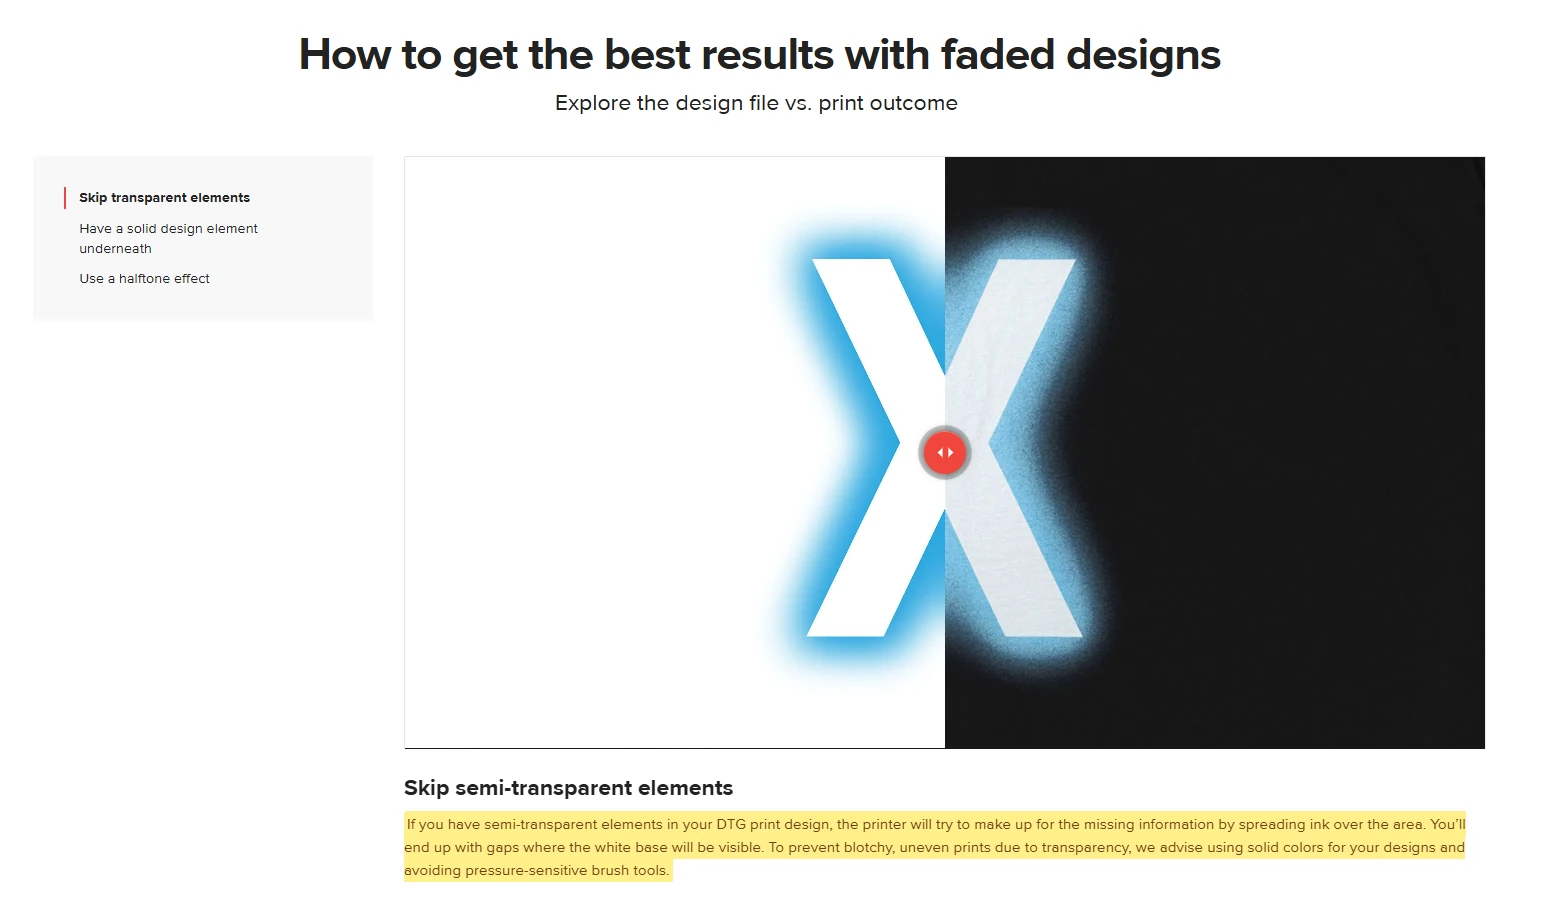
That does not mean every design must become a solid silhouette. It means an attractive screen effect needs a deliberate print treatment. Test the effect, adapt it to the printing method, or replace it with a more suitable construction rather than assuming the monitor preview will carry over unchanged.
Photoshop Mistake #4: Converting Everything to CMYK—or Trusting Screen Color
“It is being printed, so it must be CMYK” is not a reliable upload rule. The correct delivery profile is the one your fulfillment provider requests.
For example, Printful’s DTG file guidelines recommend sRGB IEC61966-2.1 and explain that its printing system handles the subsequent conversion. Preparing an arbitrary CMYK file instead is not an improvement simply because CMYK is associated with printing.
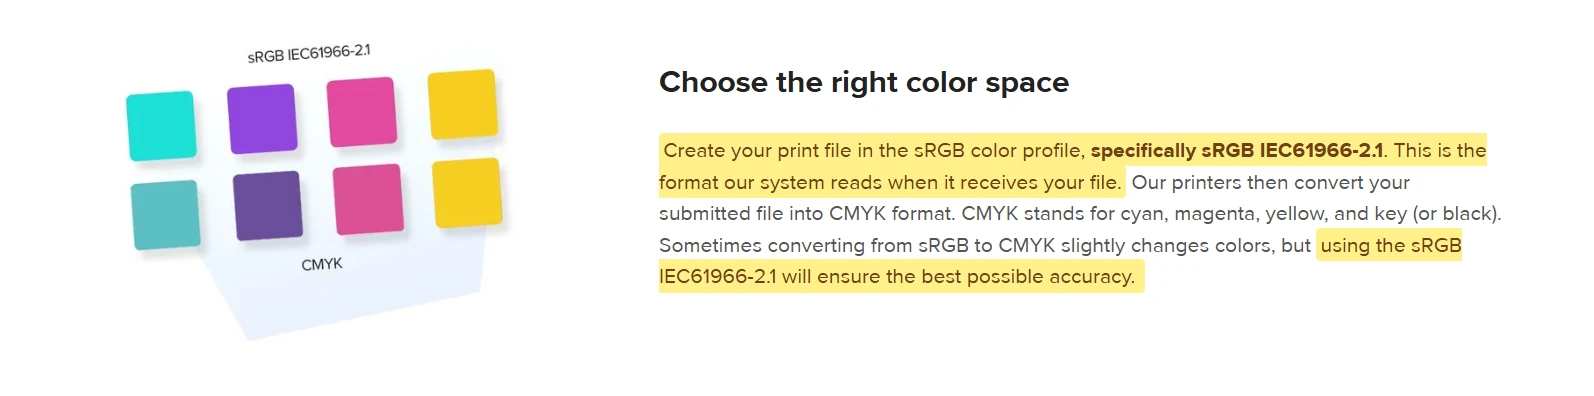
When a correctly profiled master needs conversion to the requested destination profile, use Photoshop’s Edit > Convert to Profile. Do not treat Assign Profile as an interchangeable command. As Adobe explains in its color-profile instructions, assigning a profile changes how existing color values are interpreted, while conversion changes colors for the destination space.
The other half of this mistake is expecting a profile to guarantee a screen-to-product match. Printful notes that fabric choice affects DTG results and recommends ordering a physical product to inspect the outcome.
For a color-sensitive launch, order the actual product and color you intend to sell. Evaluate the features that matter to that design: separation between dark tones, visibility of fine lines, readability of small text, and whether important colors remain distinct.
Keep notes with the approved file. “Looks good on the monitor” is not a useful production record. “Approved on this garment color, with this provider, using revision 03” is.
Photoshop Mistake #5: Turning the Only Master File Into a Flattened Deliverable
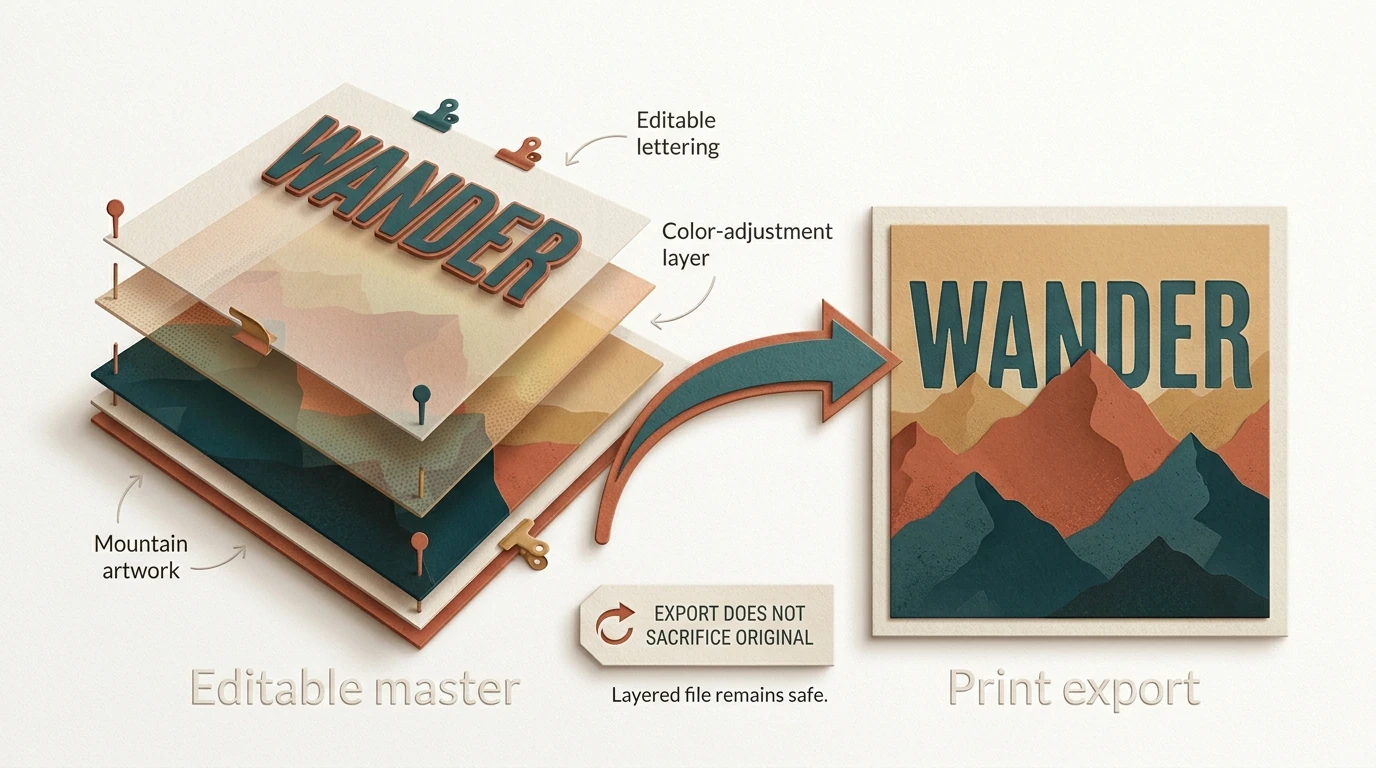
The upload file and the editable master serve different purposes. A flattened export may be exactly what the provider needs, but it should not become your only surviving version of the design.
The cost appears later: a phrase needs correcting, a customer requests a different color, or the composition needs adapting to a narrower print area. If everything has been flattened together, a small revision becomes a reconstruction job.
Build the master around reversible decisions:
- Keep lettering as editable text until the delivery workflow requires otherwise.
- Use layer masks to hide unwanted content rather than permanently erasing it.
- Use adjustment layers for revisable tonal and color changes.
- Use Smart Objects for placed artwork that needs repeated transformations.
These are established non-destructive Photoshop techniques, not unnecessary complexity. They preserve the ability to revise a commercially useful design.
Separate your files into masters, production exports, and listing mockups. Keep original assets and relevant license records alongside the master, and include a design identifier and revision number in filenames.
Also choose one approved source for each production run. If your print upload uses revision 04 but the listing images still show revision 02, good Photoshop technique has not prevented a bad customer experience.
Photoshop Mistake #6: Rebuilding the Same Resize and Crop Variants by Hand
If every new collection needs the same product sizes and aspect ratios, repeatedly entering those settings is avoidable production work. The better approach is to establish approved rules, save them, and apply them to each new artwork folder.
First separate two decisions that are often confused: cropping changes the composition by removing area; resizing changes pixel dimensions. Forcing a portrait illustration into square pixel dimensions is not the same as making a square crop.
Save the required output sizes as a reusable resize operation
Bulk Image Resizer: Automated Batch Resizing lets you stack several independent resize rules in one Photoshop batch. Each rule can have its own dimensions, DPI, export format, and applicable Quality setting.
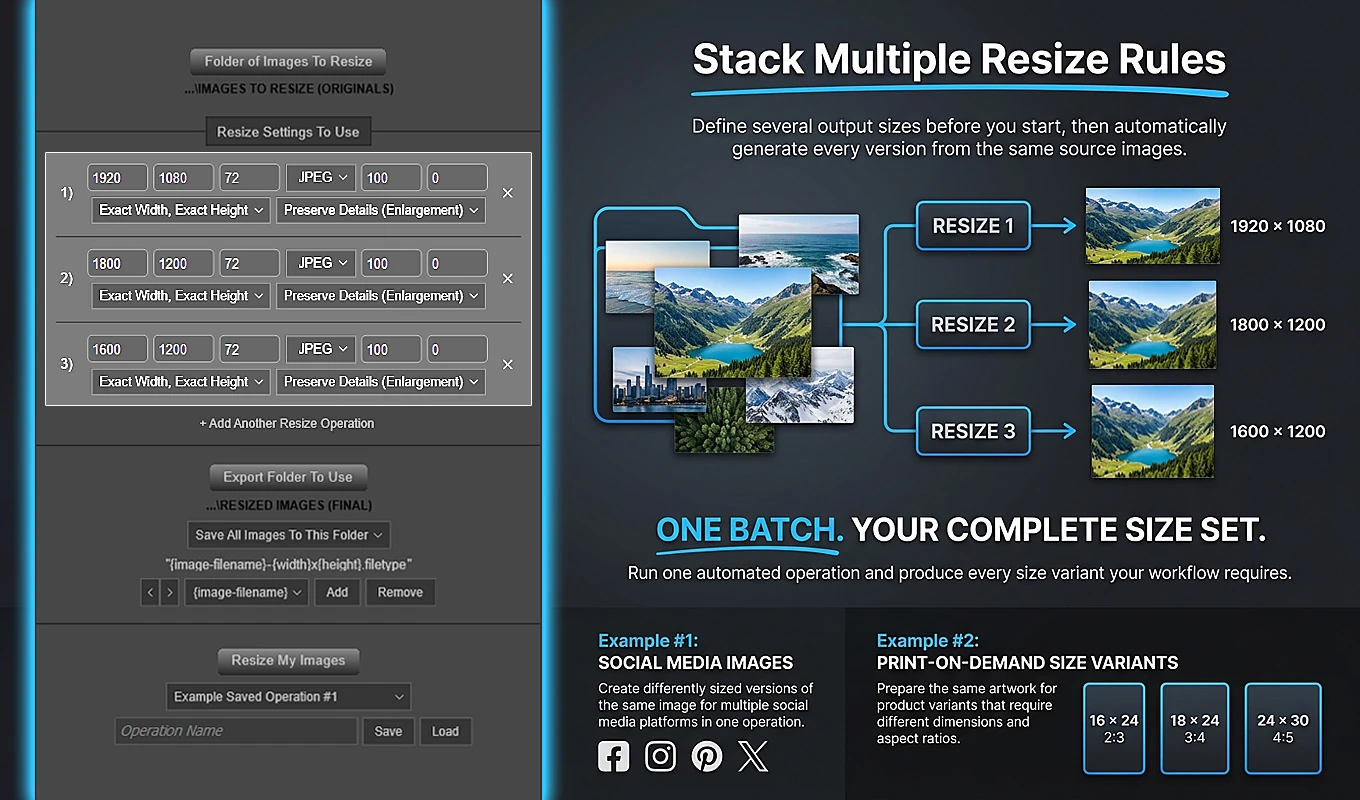
For a sufficiently large, approved 2:3 artwork master, a hypothetical wall-art operation could produce:
- 2400 × 3600 pixels for an 8 × 12-inch output at 300 pixels per inch.
- 3600 × 5400 pixels for a 12 × 18-inch output at 300 pixels per inch.
- 4800 × 7200 pixels for a 16 × 24-inch output at 300 pixels per inch.
Save that configuration with a descriptive product-family name. For the next collection, load it, select the new source folder, verify the export destination, and run it. Rule-specific output folders and filenames containing actual dimensions can keep the deliverables identifiable.
Each resize rule starts from the original source-document state, not from the previous rule’s smaller output. That avoids generating the largest version by enlarging a thumbnail created earlier in the batch.
Be deliberate with Exact Width, Exact Height: it can distort artwork whose proportions do not match. Use matching-ratio sources for exact dimensions, or a proportional sizing mode when only one dimension is fixed.
Save crop variants separately from size variants
Bulk Image Cropper: Automated Batch Cropping can generate multiple independent crop variants from each source image. You might save rules for square, 4:5, and 2:3 compositions, with the appropriate alignment for the artwork set.
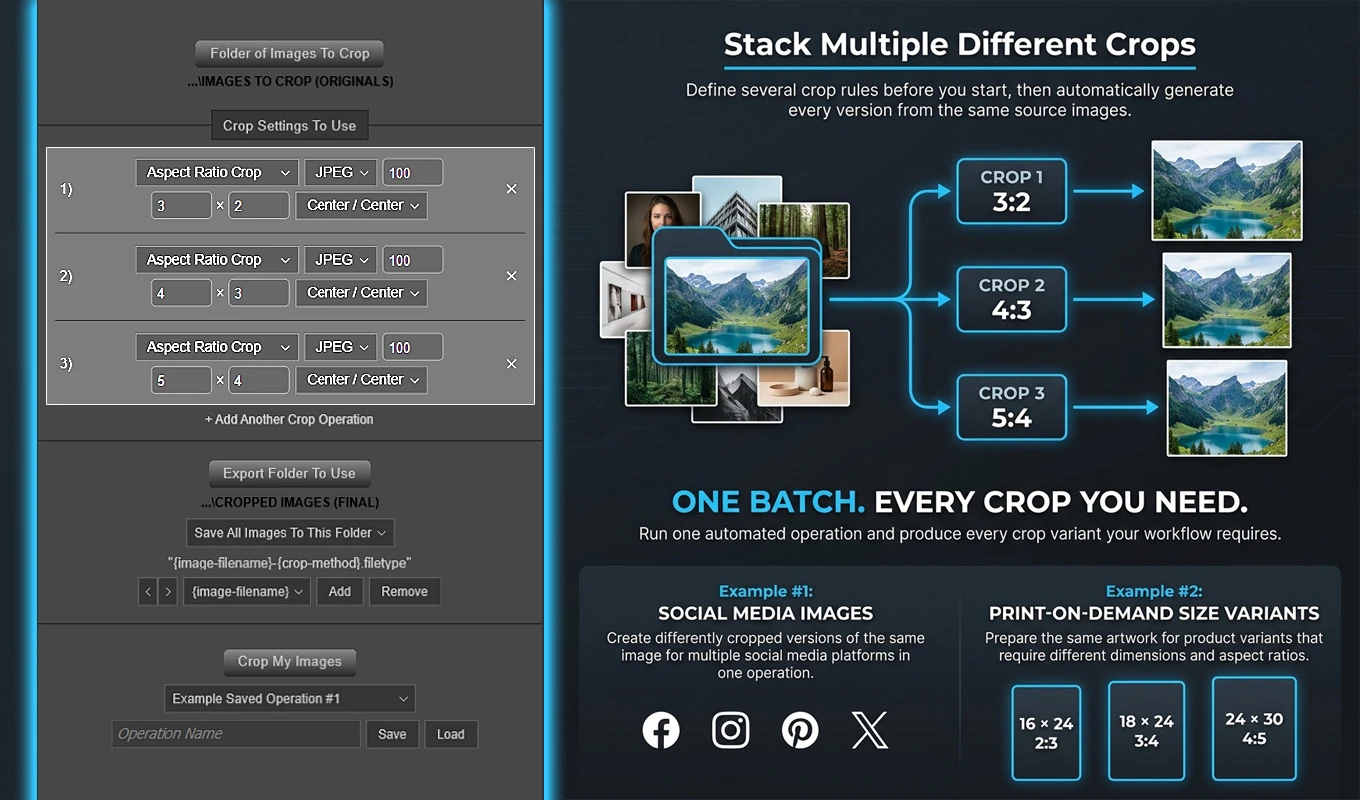
Its Aspect Ratio Crop values specify proportions, not final pixel dimensions. A 4 × 5 setting crops to that shape; it does not automatically produce a particular print size. Each rule starts from the original, so the portrait crop is not cut from an already-cropped square.
For transparent artwork with inconsistent outer margins, Normalize Transparency offers another useful preparation step: tightly trim the outer transparency, then establish target padding around the visible content.
When both cropping and resizing are needed, run the crop operation first, review the resulting compositions, and then resize the accepted outputs in a separate operation. A saved rule is repeatable, not perceptive: it cannot decide that a particular crop has cut off the punchline.
Photoshop Mistake #7: Running AI Jobs One at a Time and Waiting Between Every Step
Upscale one image. Wait. Export it. Open another. Repeat. Or enter one prompt, wait for generation, save its variations, and start again.
For a large POD collection, that routine ties your attention to a series of predictable handoffs. The mistake is not using a slow operation; it is requiring your presence to initiate every repetition.
Separate the work into three stages: prepare a queue, process it, and review the outputs. Keep creative decisions in the preparation and review stages rather than interrupting yourself for every export.
Queue the artwork folder for upscaling
Bulk Image Upscaler: Batch-Enhance Resolution applies one configured enlargement workflow across a source folder, exporting the results without saving over the originals.
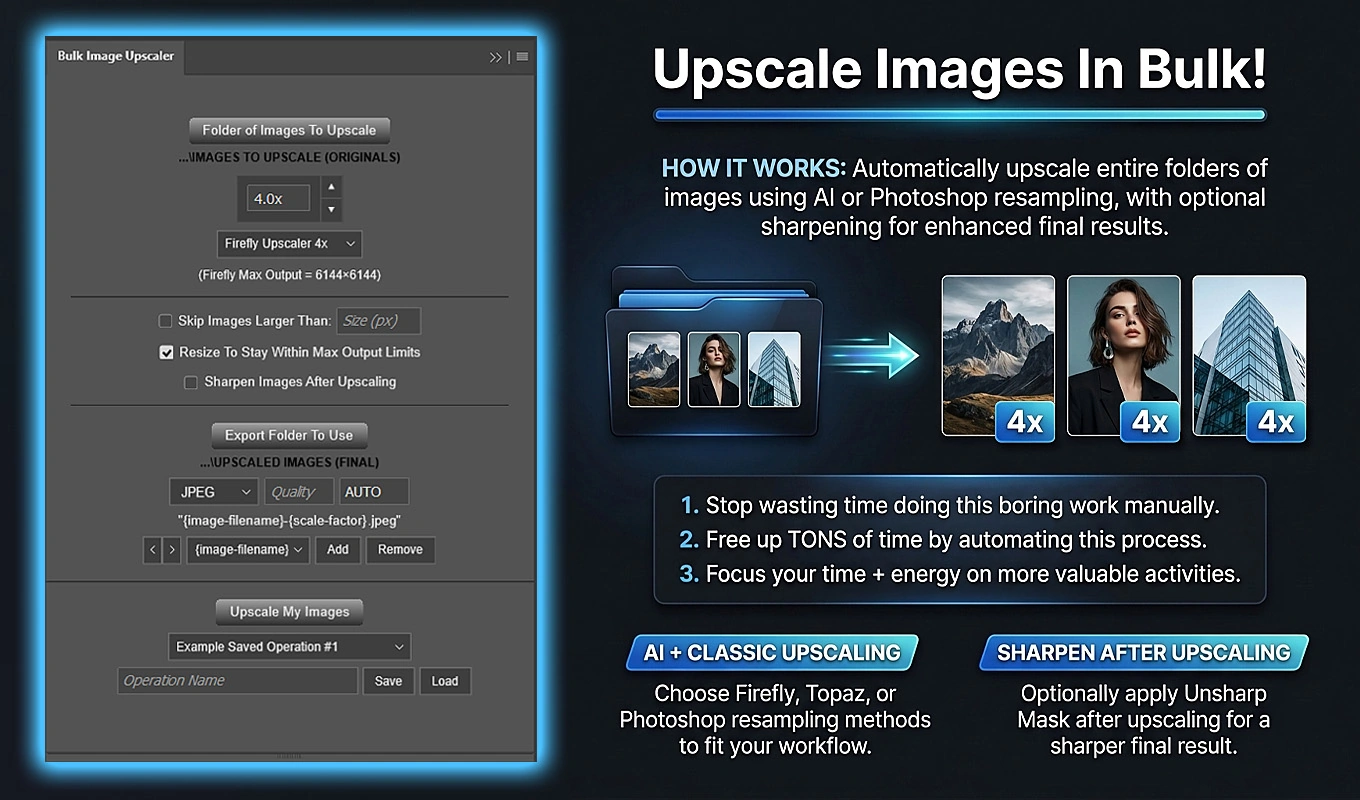
You can select Photoshop-based AI upscaling through Firefly, Topaz Gigapixel, or Topaz Bloom in 2× or 4× variants, or choose a standard Photoshop resampling method for a custom enlargement factor. For a mixed collection, its source-size skip setting can exclude images that are already larger than your chosen threshold.
The practical difference is that you configure the method and destination once instead of repeatedly opening, enlarging, naming, exporting, and closing individual files. The plugin also handles AI model output-size limits when necessary; verify the actual exported dimensions before assigning a physical print size.
Run a small representative folder first. Include fine lettering, textured artwork, and anything with delicate outlines. Approve the treatment before applying it to the whole collection. Upscaling should not become a way to postpone checking whether the underlying artwork is suitable.
Queue prompts instead of repeatedly pasting them into Photoshop
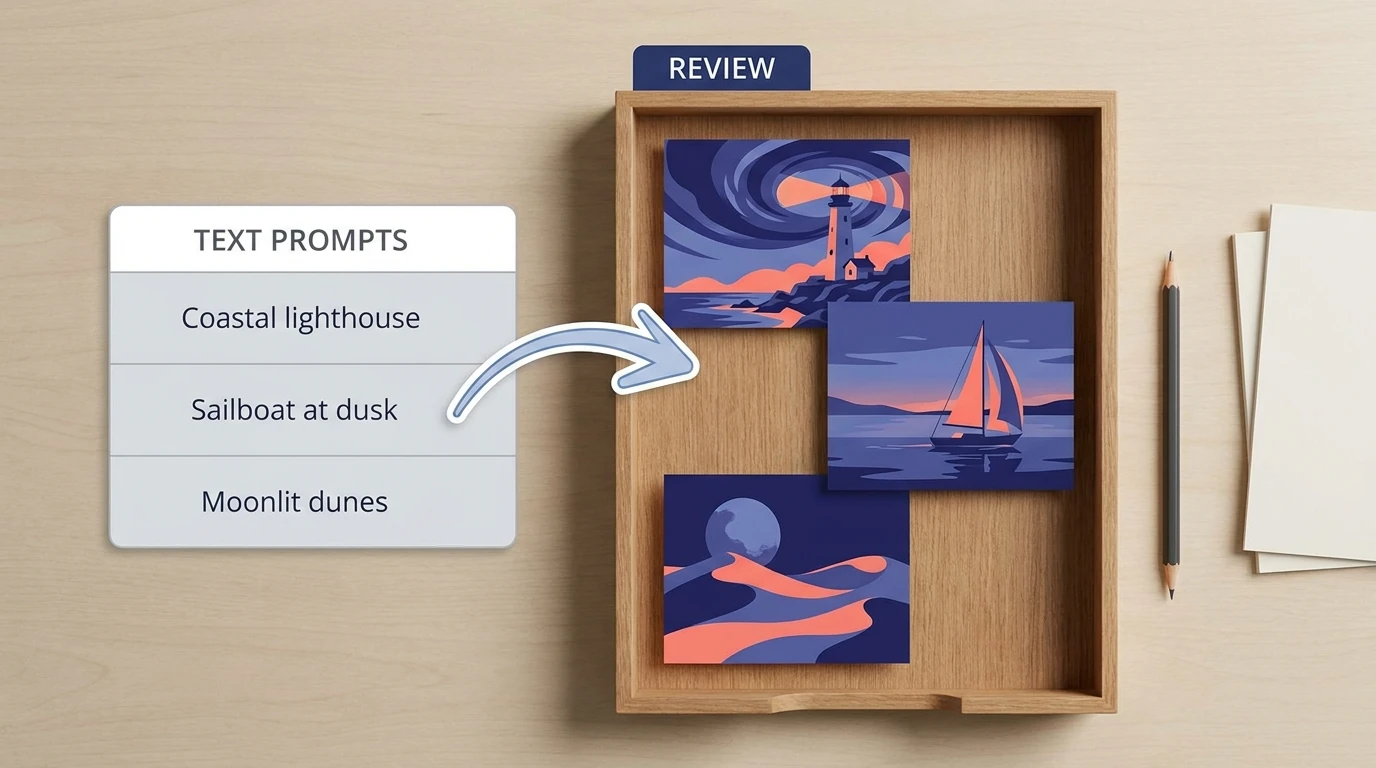
Bulk AI Image Creator: Batch Generative Fill automates Photoshop image generation from a CSV prompt list. Put TEXT PROMPTS in cell A1 and one prompt per row beneath it in Column A.
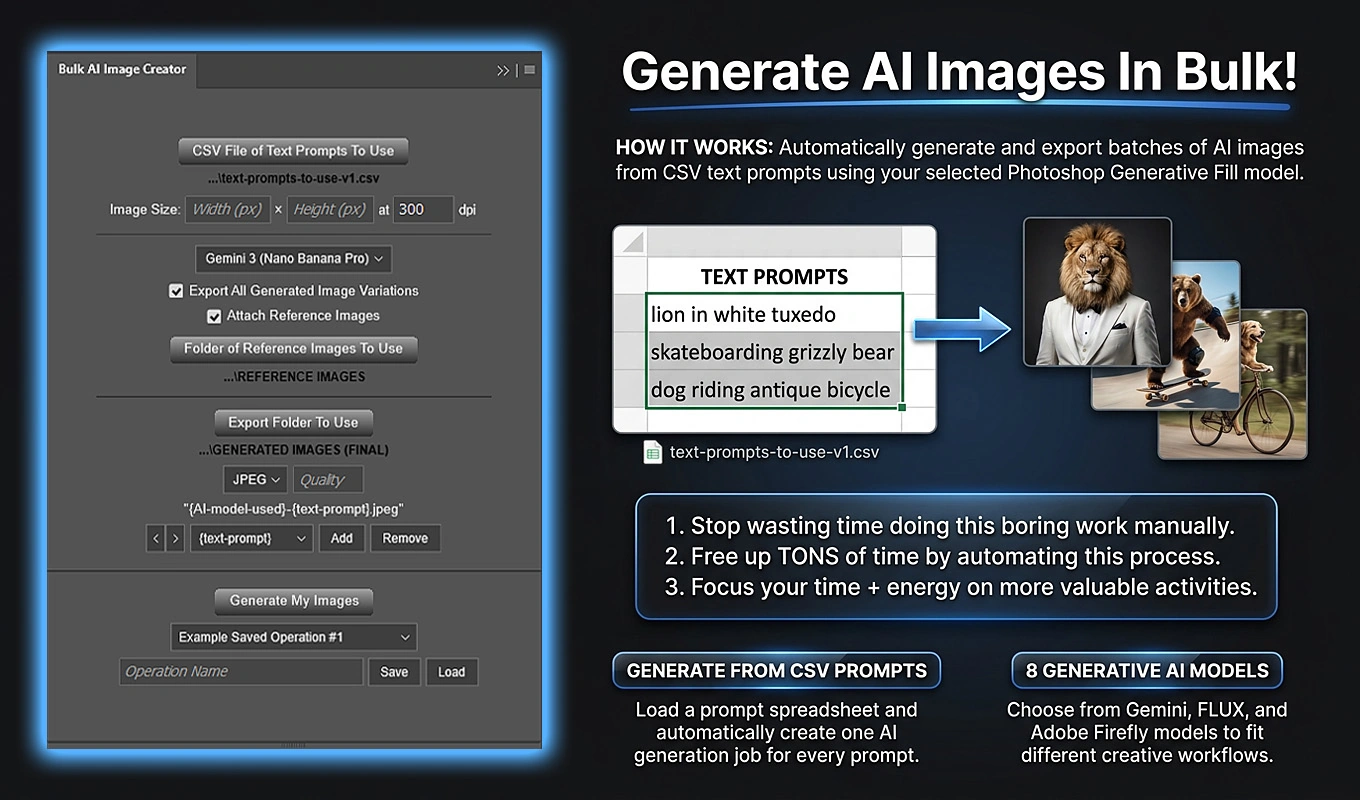
Choose the batch-wide model, image dimensions, DPI, export settings, and output folder. The plugin processes valid prompts sequentially and exports the results. Enable Export All Generated Image Variations to save every variation Photoshop returns, or disable it to export only the first.
This is particularly useful for developing a collection from a prepared prompt library: you can review an exported set rather than spend the session manually advancing from one generation to the next. Compatible models can also use the same one or two reference images across the batch for shared visual guidance.
Both generative workflows require conscious attention to Adobe Generative Credits; the plugins present an acknowledgement before the relevant AI operation begins. Test the settings before committing a large queue.
Automation removes repeated intervention, not the model’s processing time or the need for approval. Route generated images into a review folder and check lettering, anatomy, repeated objects, composition, and edge quality before promoting them into your production library.
Photoshop Mistake #8: Manually Rebuilding Every Product Mockup
Opening a mockup, entering its Smart Object, replacing the artwork, adjusting placement, exporting, and doing it all again is reasonable for testing one design. It becomes a production bottleneck when every approved design needs several listing scenes.
The key is to finish the scene setup once, then reuse it. Match the mockup’s artwork placement to the product you actually intend to sell before generating the collection.
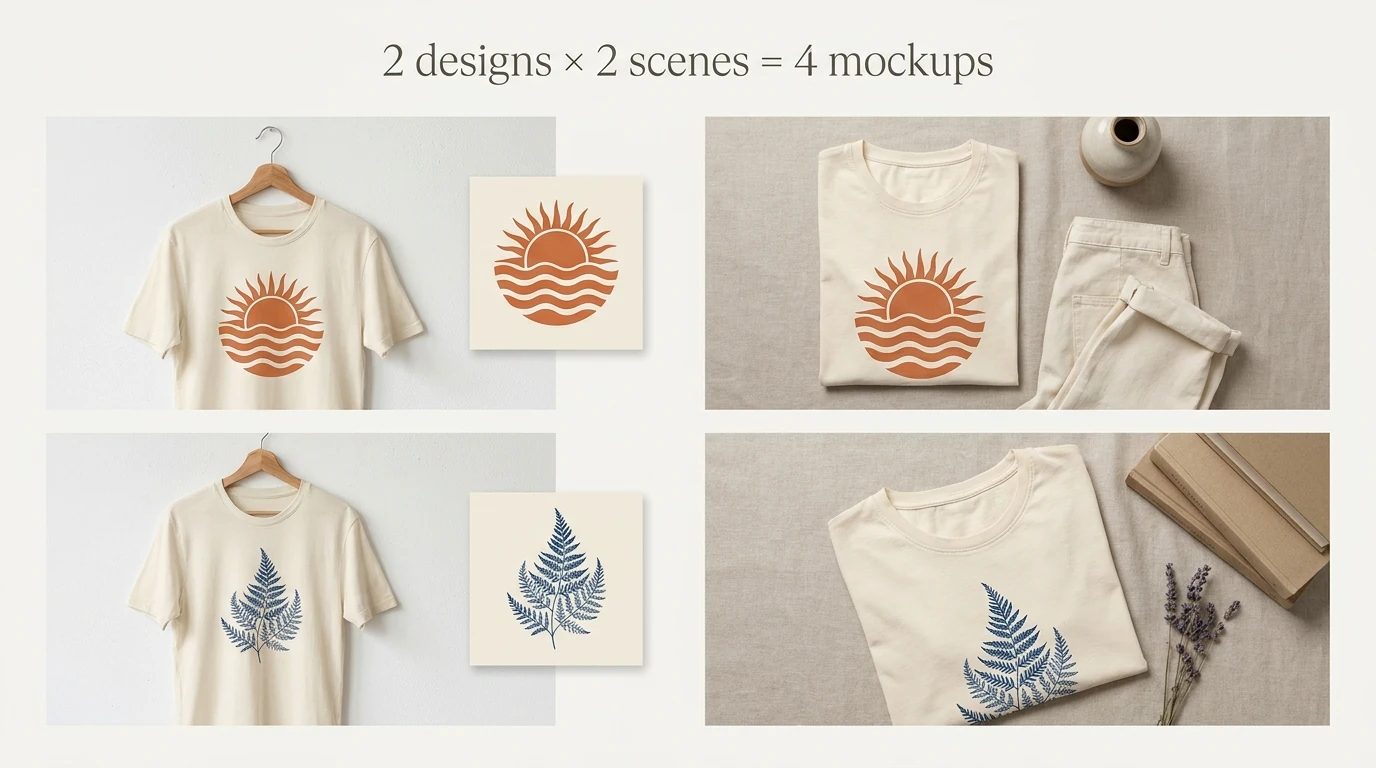
Batch-Replace Smart Objects: Mockups In Bulk combines an artwork folder with either one PSD/PSB mockup or a folder of templates, then replaces the target Smart Object contents and exports each artwork/template combination.
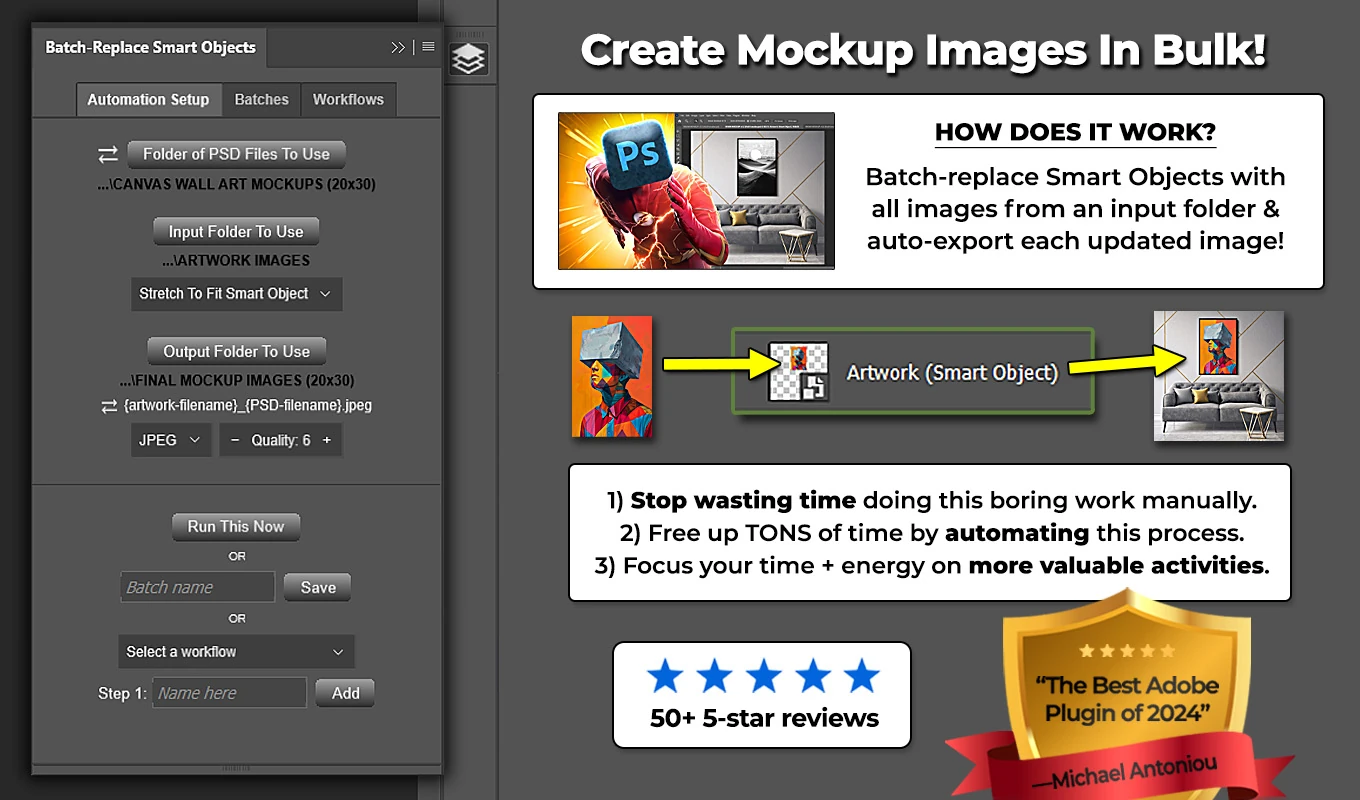
For example, 100 designs across six mockup scenes represent 600 combinations. You still need to prepare and approve the scenes, but you do not need to manually perform 600 replacement-and-export cycles. Output filenames identify both the artwork and the template.
Use the placement behavior intentionally. Contain Inside Smart Object preserves the complete artwork and its proportions, potentially leaving space. Fill Smart Object & Crop preserves proportions while covering the target area, but may remove content. Stretch To Fit can change proportions, so do not accept it automatically for a design containing carefully shaped lettering or illustrations.
For reliable template preparation, set the Smart Object’s internal dimensions correctly. If building the mockup yourself, convert the artwork layer to a Smart Object before applying the outer perspective or distortion. For templates with multiple Smart Objects, select the intended replacement targets and save that selection state.
Save a Batch for a recurring setup, or use a Workflow when different scenes need different placement or export configurations. Then make approval—not repeated exporting—the manual part of the job.
Before publishing the listing, check that:
- The mockup shows the same approved artwork revision as the print file.
- The design’s scale and placement agree with the intended production placement.
- No important artwork has been distorted or unintentionally cropped.
- The presentation does not promise a print size, finish, or placement the actual product cannot deliver.
The best POD Photoshop workflow is not the one with the fewest checks. It is the one that reserves attention for decisions that matter: product specifications, composition, print quality, and honest presentation. Establish those standards first, save the repeatable operations, and let automation handle the mechanical work between approvals.