9 Ways To Improve Your Photoshop Productivity

Improving your Photoshop productivity is not just about working faster with the mouse. It is about spending less time finding commands, rebuilding familiar layouts, correcting preventable mistakes, and repeating the same production steps across dozens of files.
The right improvement depends on where your time goes. During your next project, keep a simple tally of three things: commands you repeatedly hunt for, elements you recreate, and operations you repeat across files. That gives you a practical starting point instead of a long list of features to learn without a clear purpose.
The nine approaches below address those different bottlenecks—from shortcuts and workspace design to reusable templates, dependable Actions, and specialized batch workflows.
1. Build Keyboard Shortcuts Around Your Most Repeated Commands
You do not need to memorize every Photoshop shortcut. Start with the commands that interrupt your particular workflow most often.
If you regularly build composites, that might mean creating adjustment layers, grouping layers, and converting layers to Smart Objects. If you design promotional graphics, it might mean opening typography panels or working with guides. Your shortcut priorities should reflect your work, not somebody else’s cheat sheet.
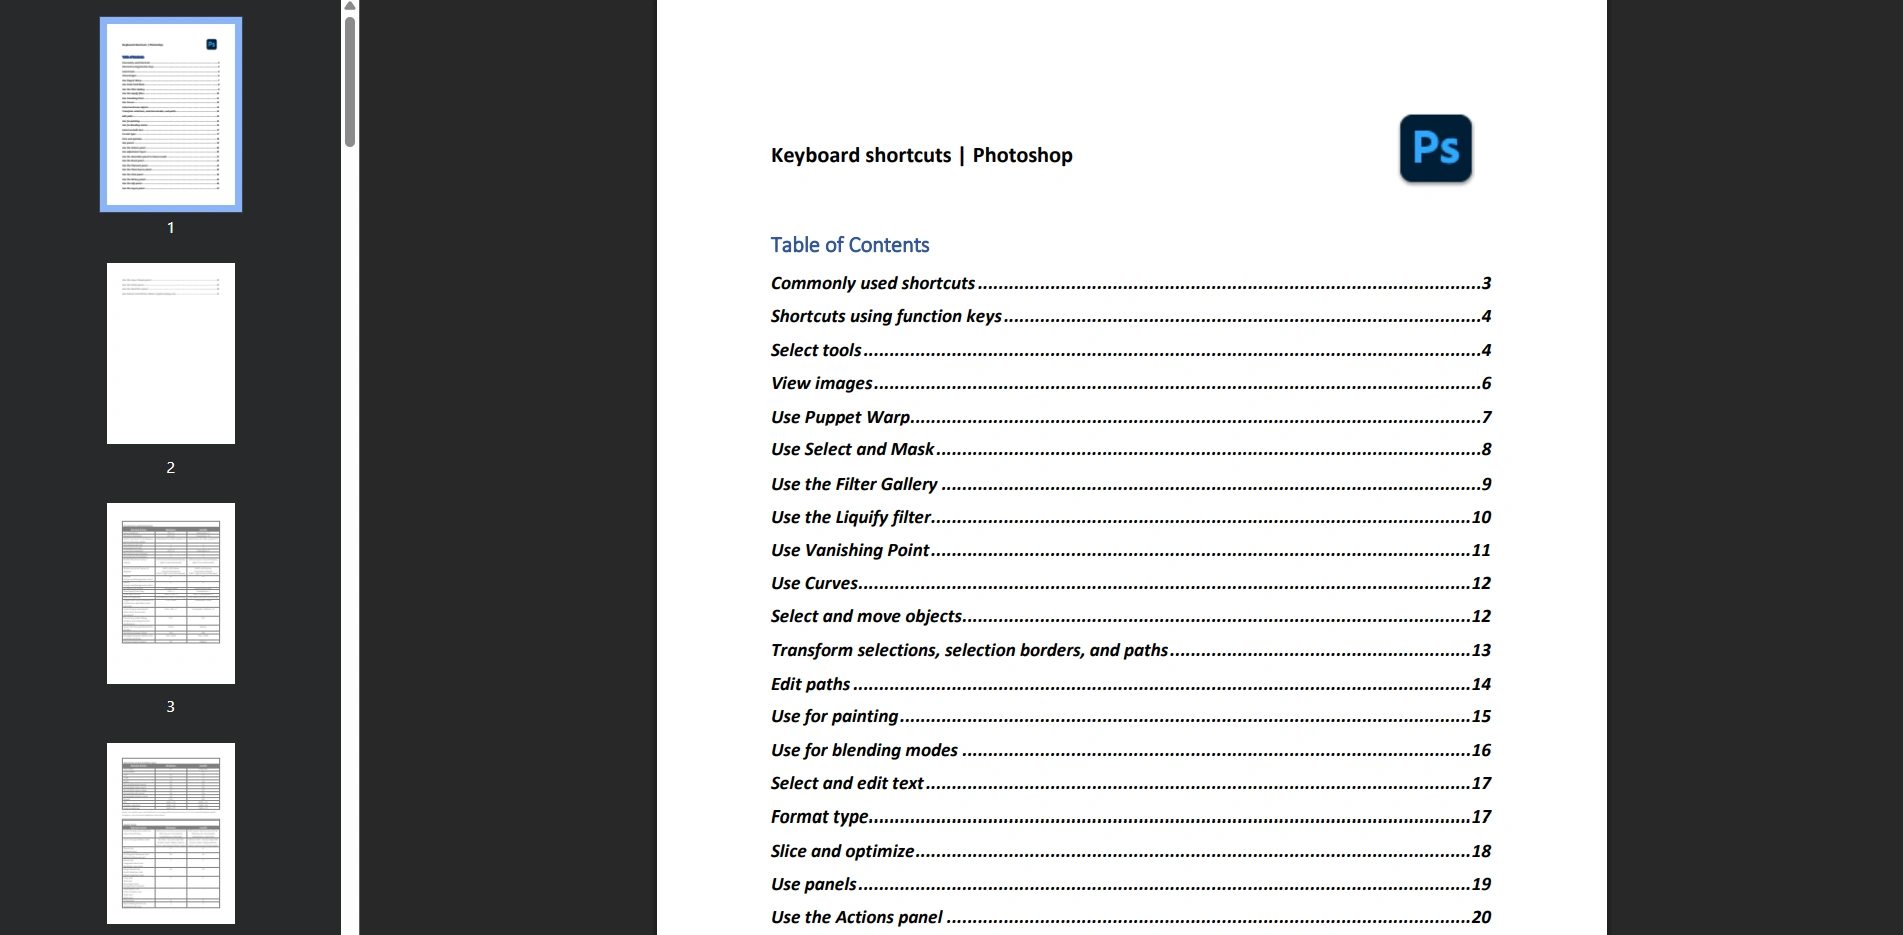
Open Edit > Keyboard Shortcuts to customize commands that Photoshop exposes in its shortcut editor. Adobe’s guide to customizing keyboard shortcuts explains the different categories, conflict warnings, and saved shortcut sets.
Use a small, deliberate setup process:
- Choose three frequently used commands that currently require menu navigation.
- Look for existing shortcuts before assigning new ones.
- Use memorable letter associations where practical, such as C in a modifier-based combination for creating a Curves adjustment layer.
- Check Photoshop’s conflict warning before replacing another assignment.
- Save a named custom set so your changes are identifiable and reusable.
Distinguish between similar commands. A shortcut for creating a Curves adjustment layer is not the same workflow as directly applying Curves to pixel content. Bind the operation you actually want to repeat.
For immediate gains, Adobe’s Photoshop shortcut reference includes several useful defaults:
- Spacebar-drag temporarily pans the canvas when you are not editing text.
- Ctrl + G on Windows or Command + G on Mac groups selected layers.
- Ctrl + J or Command + J duplicates the selected layer when there is no active selection.
Once you have customized your set, use the editor’s Summarize option to export a reference to your current assignments. Keep that nearby while learning them rather than repeatedly searching for shortcuts that may no longer match your configuration.
2. Save Workspaces for the Jobs You Actually Do
A workspace should make your next likely action easy to reach. It does not need to display every panel Photoshop offers.
Think about panel relationships, not just panel visibility. If you constantly move between Layers and Properties, keep both accessible. If you need Character and Paragraph controls together, do not arrange them so you must repeatedly switch between tabs to compare settings.
Try building separate workspaces around distinct production stages:
- Retouching: give Layers and Properties generous space, with brush-related controls nearby.
- Typography and layout: prioritize Layers, Character, Paragraph, and your frequently used color or asset panels.
- Production: keep Actions and the plugin panels you use for repetitive output work readily accessible.
These are starting arrangements, not universal prescriptions. A photographer working on a small laptop and a designer building layered campaigns on a large display will need different layouts.
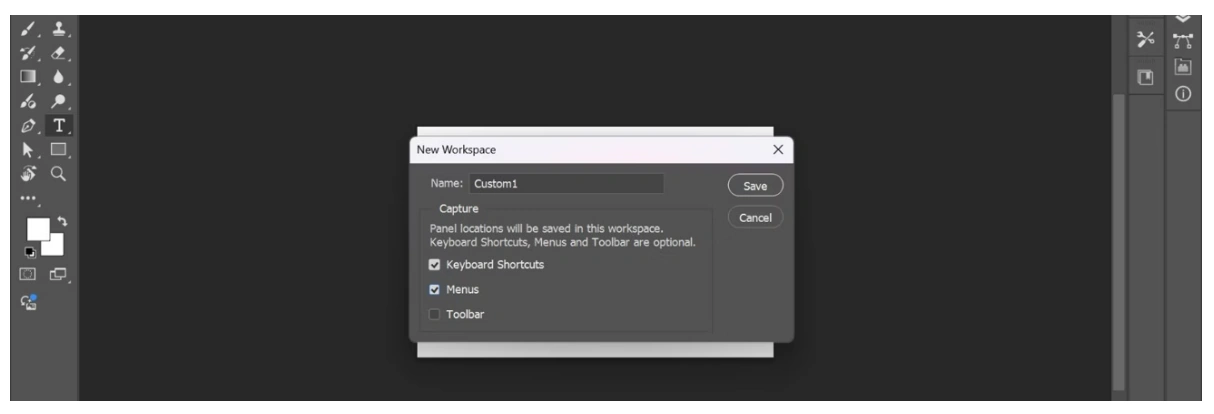
After arranging your panels, choose Window > Workspace > New Workspace. Photoshop can save the arrangement along with selected customization options, including keyboard shortcuts and menus. Adobe’s custom-workspace instructions walk through the process.
Test the workspace on a real project before considering it finished. Notice which panels you repeatedly reopen, which panel groups require constant tab switching, and whether your Layers panel is tall enough to navigate without excessive scrolling.
The objective is fewer interruptions. A visually tidy workspace that hides everything you need is not necessarily a productive one.
3. Start From Reusable Templates and Brand Assets
Starting from a blank document is useful when the design problem genuinely requires an original structure. It is less useful when you are rebuilding the same flyer hierarchy, promotional layout, or branded social graphic for the tenth time.
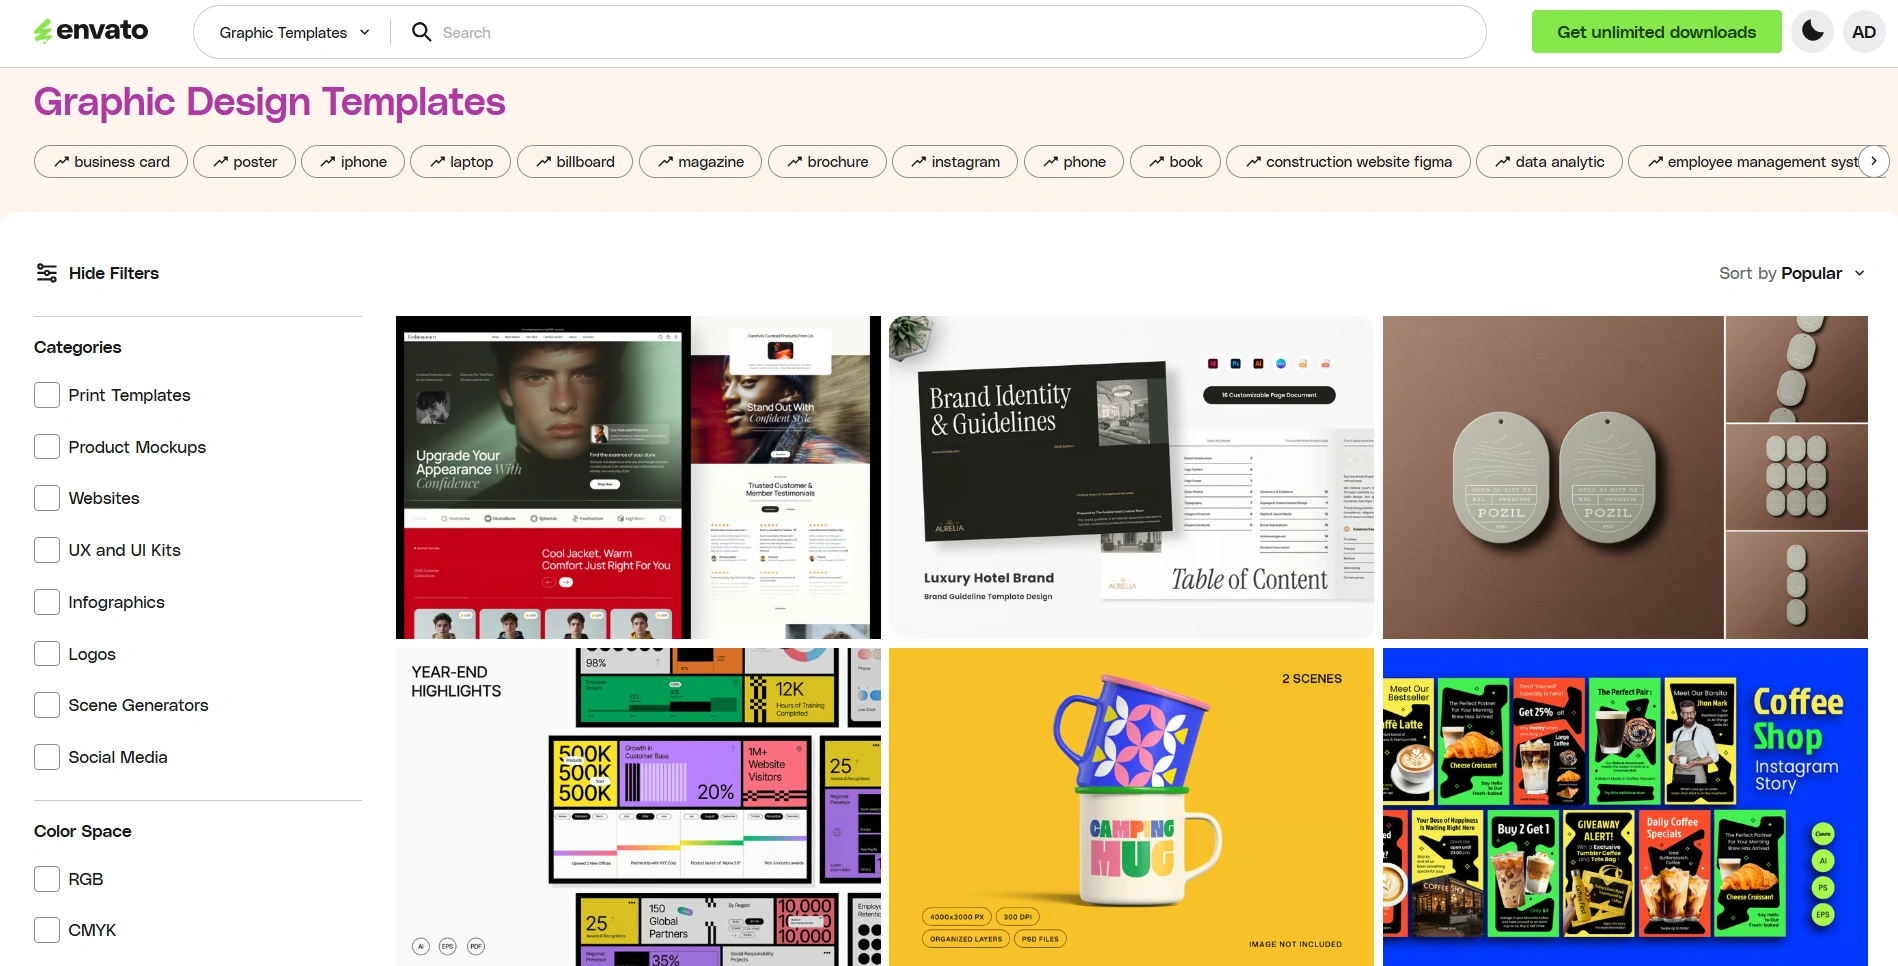
For suitable projects, browse Envato’s graphic-template library, commonly associated with Envato Elements, and Creative Market’s social-media templates. Envato’s catalog includes categories such as print templates and social media, with application filters including Adobe Photoshop. Creative Market also carries template collections, but check individual listings carefully because the catalog includes formats for other applications.
Evaluate a template by how easily you can adapt it—not just how attractive its preview looks.
- Confirm that the download includes Photoshop-compatible files rather than only another application’s format.
- Check for editable text, organized layers, and usable image placeholders.
- Review required fonts and whether the displayed photographs or graphics are included.
- Check dimensions, color mode, and any print-production requirements against your actual deliverable.
- Review the license for your intended use.
A useful stress test is to insert your longest realistic headline and your most awkwardly proportioned image before committing to the template. If those changes require dismantling the composition, the template may save less time than its preview suggests.
Your own completed projects can become even better starting points. Create clean master files with descriptive layer names, replaceable content, and no leftover client-specific wording. Keep a separate working copy for each new job.
For reusable ingredients rather than complete layouts, use Creative Cloud Libraries. Photoshop supports storing assets such as graphics, colors, character styles, and layer styles. A library organized by client or brand gives you a consistent place to retrieve approved ingredients instead of searching old project folders.
Use templates for repeatable structure and libraries for repeatable components. That combination leaves more time for the decisions that should change between projects.
4. Generate Mockup Collections Instead of Replacing Artwork One File at a Time
Mockup production becomes repetitive quickly. Once the scene is approved, much of the remaining work may consist of inserting artwork, checking its fit, exporting, naming the result, and repeating.
Before automating that work, standardize the template. Decide which Smart Objects should change, what their internal artwork dimensions should be, and whether the new artwork should remain fully visible or fill the available area.
Batch-Replace Smart Objects: Mockups In Bulk automates this artwork-and-template combination process. It can process an artwork folder through one PSD/PSB mockup or through the valid PSD/PSB templates directly inside a selected folder. For example, 40 artworks combined with six mockup scenes represent 240 finished combinations.
The placement choice matters more than simply getting the batch started:
- Contain Inside Smart Object preserves the complete artwork and its proportions, but may leave unused space.
- Fill Smart Object & Crop preserves proportions and covers the target area, but can crop important content.
- Stretch To Fit Smart Object matches the target dimensions exactly and can distort the artwork’s proportions.
- Place Original Image uses the artwork’s existing dimensions and resolution without intermediate resizing.
Contain and Fill also support placement anchors. That can help you preserve important content near an edge instead of automatically centering every composition.
Target selection is another important setup detail. A template with one Smart Object is targeted automatically. When several exist, select the intended layers and save the template with that selection, especially for folder-based processing. Selecting multiple targets inserts the same current artwork into all of them before exporting one completed mockup; it does not assign a different design to each target.
Inspect the Smart Object’s internal canvas before a large run. Unnecessary transparent space affects the sizing reference. Also ensure that perspective or distortion intended to carry across replacements was applied after converting the design layer into a Smart Object.
Use folder mode when the templates share one operation configuration. Use a saved Workflow when different scenes need different placement or export settings. Run a small representative artwork set first so you validate the template system before multiplying a mistake across the collection.

5. Record Small, Dependable Photoshop Actions
Not every repetitive task needs a specialized plugin. Photoshop Actions are useful for short, predictable sequences within your editing workflow.
The most dependable candidates have a clear starting state and a clear result. For example, you might create a standard adjustment-layer group that you then customize manually, or reproduce a familiar sequence of layer-organization steps.
Start with one modest action rather than trying to record an entire project.
- Open a disposable copy of a representative document.
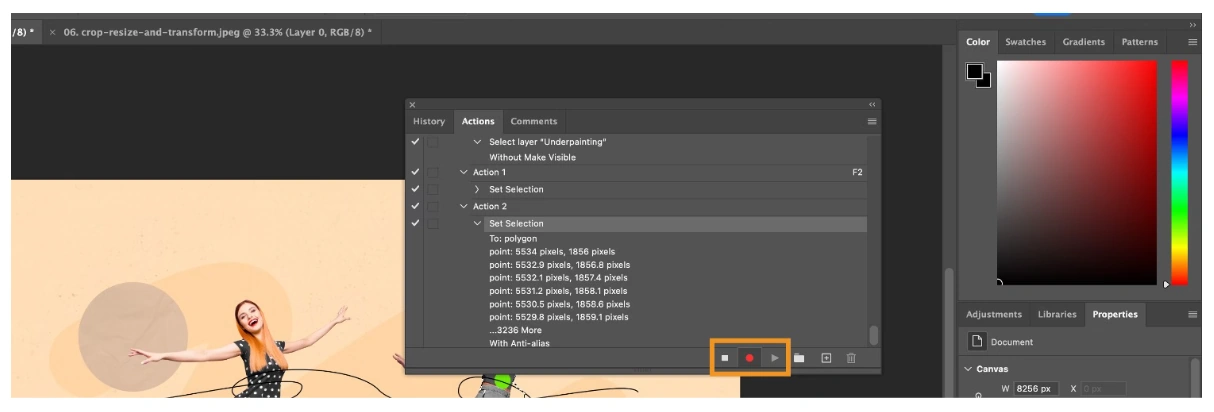
- Open Window > Actions. If your version displays the redesigned panel and you need the traditional recording interface, choose Classic Actions from the panel menu.
- Create a named action and begin recording.
- Perform only the repeatable setup steps.
- Stop recording before making image-specific creative decisions.
- Play the action on another test document and inspect the result.
Adobe’s action-recording guide explains recording, action sets, and function-key assignments.
For a practical first experiment, record the creation of a named group containing the adjustment layers you commonly start with. Leave the adjustments ready for individual tuning rather than assuming one set of correction values suits every image.
Test dependencies deliberately. Does the action require a particular layer to be selected? Does it assume a specific document structure? Try a file with different layer names and nested groups. If a required starting condition exists, document it instead of relying on memory.
Keep actions narrow enough to diagnose. “Create Color Adjustment Stack” is easier to verify and reuse than an action that attempts to set up, edit, finalize, and save a whole document.
Actions reduce repeated command sequences. Templates reduce repeated document construction. Use each for the kind of repetition it handles best.
6. Batch-Replace Copy While Controlling What Happens to the Layout
Updating text across Photoshop templates is rarely just a typing task. A longer product name can wrap unexpectedly. A shorter headline can lose visual weight. A changed price can drift away from its intended alignment.
Make your files easier to update by giving editable text layers consistent, descriptive names such as Headline, Product Name, and Price. That separates the content you intend to change from unrelated text elsewhere in the design.
Bulk Text Replacer: Batch-Update Text Layers applies Original Text → Replacement Text rules across supported files containing editable Photoshop text layers. It can search through nested layer groups or restrict a rule to an exact layer name.
For a straightforward template revision, you could target the Headline layer with Entire Layer Match, then use a separate rule for the Price layer. Layer-name matching is exact and case-sensitive, so standardize those names before relying on them across a template collection.
The layout strategy should reflect the design requirement:
- For a headline that should retain approximately its original visual footprint, Auto-Preserve Layout keeps the original rendered width, allows natural wrapping, adjusts font size toward the original rendered height, and restores the visible center.
- For a price that must remain on one line, use custom rules with fixed width, one fixed line, and adjustable font size.
- For description copy that must retain its typography, keep width and font size fixed while allowing the number of lines to change.
Auto-Preserve Layout is an approximation system, not a promise that every replacement will preserve the design perfectly. Test unusually long replacements and short labels, not just average examples.
For many replacement pairs, CSV importing removes repetitive rule entry. The file must contain exactly two columns headed ORIGINAL TEXT and REPLACEMENT TEXT, with non-empty values in both columns.
Use that CSV as a replacement map—not as an instruction to generate one output variant per spreadsheet row. The rules are evaluated within each processed document.
Also avoid treating multiple rules as a cascading find-and-replace chain. Rules evaluate the captured original text-layer content. A later rule targeting the same original layer can supersede an earlier change rather than combining with it. Distinct layer targets are a more predictable approach.
Export to PSD when the next production stage still needs editable Photoshop text, and save the operation once the matching and layout behavior have passed your test set.
7. Generate Every Required Image Size in One Pass
Repeatedly resizing the same source collection for different deliverables creates avoidable setup work. Define the required outputs first, then process them together.
For example, your own delivery specification might call for a 1600-pixel-wide JPEG and an 800-pixel-wide WebP preview. Write down the required dimensions, whether proportions must remain intact, the output format, and the destination before starting.
Bulk Image Resizer: Automated Batch Resizing supports multiple independent resize rules in one operation. Each rule can have its own dimensions, DPI, Photoshop resampling method, export format, and applicable quality setting.
Its sizing modes address different requirements:
- Exact Width, Auto Height standardizes width while preserving proportions.
- Auto Width, Exact Height standardizes height while preserving proportions.
- Maximum Longest Edge handles portrait, landscape, and square images proportionally.
- Exact Width, Exact Height forces both dimensions and can stretch or compress the image if the target proportions differ.
Two details prevent common mistakes. First, Maximum Longest Edge sets the longest edge to the chosen value; it is not a downscale-only ceiling. Smaller images can be enlarged. Second, resizing is not cropping. Requesting square dimensions does not automatically produce a thoughtfully recomposed square image.
Use the original masters as your inputs. The plugin’s standard resize rules return to the original source-document state between variants, so the smaller result is not produced by resizing an already-resized version.
Plan the output organization too. Grouping by source image is useful when someone needs all variants of one asset. Grouping by resize rule is useful when uploading a whole collection of one particular size or format. Include actual output dimensions in filenames so the variants remain identifiable outside their folders.
After validating one representative batch, save the operation. The real productivity gain is not only producing several sizes now; it is avoiding the same configuration work when the next collection arrives.

8. Standardize Watermarking With Reusable Rules
Watermarking becomes inefficient when every image requires the same sequence of placing a logo, scaling it, moving it away from the edge, changing opacity, and exporting.
Start by defining the purpose of each output. Public-facing branding and client-proof protection may need different treatments. Keep those delivery decisions separate from your clean master files.
Bulk Image Watermarker: Automated Batch Logos supports both text and image watermarks, with reusable rules controlling layout and eligibility.
For ordinary branding, Simple Watermark offers nine alignments, rotation, width, and independent edge padding. Percentage-based width is useful for mixed resolutions because it scales relative to the current image width instead of applying one absolute logo size to every file.
For proofs, Pattern Watermark can repeat text or a logo across the image. You can also combine rules: one might place a corner logo on every image, while another adds repeated proof text only when the filename contains “preview.” Both qualifying rules become part of one exported image.
Brightness conditions can help adapt watermark treatment. You can configure a light watermark for brightness below a threshold and a dark watermark for brightness at or above it. The brightness measurement comes from the document histogram, so it describes overall image brightness—not necessarily the local area behind a corner logo. Test images with mixed light and dark regions.
Rules are sequential and cumulative, not separate output variants. Validate the complete rule stack, particularly when using conditions. If no rule applies to an image, the plugin does not export it.
When combining resizing and watermarking in your production process, remember that these are separate operations. The Watermarker’s final export format and quality are global settings. If different delivery sets need different final formats, use separate watermark operations for those sets.
Save approved branding and proof configurations so each new batch starts from an established treatment rather than another round of manual logo placement.

9. Diagnose Photoshop Slowdowns Before Changing Your Hardware
Workflow improvements cannot eliminate every delay if Photoshop itself is struggling. But changing performance settings blindly can introduce new problems without resolving the original bottleneck.
First identify what is slow: opening files, painting, transforming layers, switching documents, or exporting. Use the same representative document and operation when comparing changes.
Adobe’s Photoshop performance guide explains the Efficiency indicator, available from the pop-up menu at the bottom of the document window. Values below 100% indicate that Photoshop has exhausted its available RAM and is using scratch storage.
Work through the relevant checks rather than applying every possible tweak:
- Close unnecessary large documents before changing memory allocation.
- Review Performance preferences and leave memory available for the operating system and other applications. Adobe advises against allocating more than 85% of system memory to Photoshop.
- Adjust memory allocation in small increments, restart Photoshop, and repeat the same test.
- Choose cache settings suited to your typical documents rather than copying settings from a workflow unlike yours.
- Review History States cautiously. Reducing them saves resources but also reduces your available undo depth.
Check temporary storage as well. Adobe’s scratch-disk setup instructions explain choosing drives and prioritizing faster storage. Make sure the selected drive has sufficient free space before starting a large production run.
Do not sacrifice an editable master simply to make a document easier to handle. Preserve the source structure you need for future revisions, and create separate delivery files.
Finally, judge productivity by more than execution speed. Include setup time, hands-on repetition, correction work, and output checking. Before expanding any automated workflow, test a small set containing the longest text, smallest source, unusual proportions, and other likely exceptions.
You do not need to implement all nine changes at once. Choose the bottleneck you encounter most often: menu hunting calls for shortcuts, repeated construction calls for templates, repeated command sequences call for Actions, and repeated file production calls for a batch workflow. Make that one improvement dependable, then move to the next. The goal is less routine work between you and the creative decisions that deserve your attention.