Best AI Tools for Product Photographers

The best AI tools for product photographers solve specific production problems: matching a campaign’s look, cleaning dust from surfaces, preparing transparent cutouts, developing lifestyle scenes, or rescuing images that need more resolution. Those jobs require different tools—and different levels of scrutiny.
A convincing image is not necessarily an accurate product image. A skincare bottle can look beautifully photographed while carrying the wrong label, an altered cap, or invented embossing. The useful question is therefore not just “How good does the AI look?” but “How much work does it remove without changing what the client sells?”
These are the strongest task-specific picks for a practical product-photography workflow:
- Capture One Match Look: for bringing campaign photographs toward an approved visual reference.
- Adobe Lightroom and Camera Raw: for AI noise reduction and selective tonal adjustments before detailed retouching.
- Retouch4me Dust: for removing small particles from photographed products and surfaces.
- Bulk Background Remover: for producing isolated product assets with repeatable trimming, canvas sizes, and alignment.
- Bulk AI Image Creator: for exploring reference-guided product scenes across a structured list of campaign concepts.
- Bulk Image Upscaler: for batch enlargement when existing photographs or approved creative assets need additional pixels.
Rather than treating these as interchangeable alternatives, choose according to the stage of production that is costing you the most time.
Capture One Match Look: Best for Reference-Led Campaign Consistency
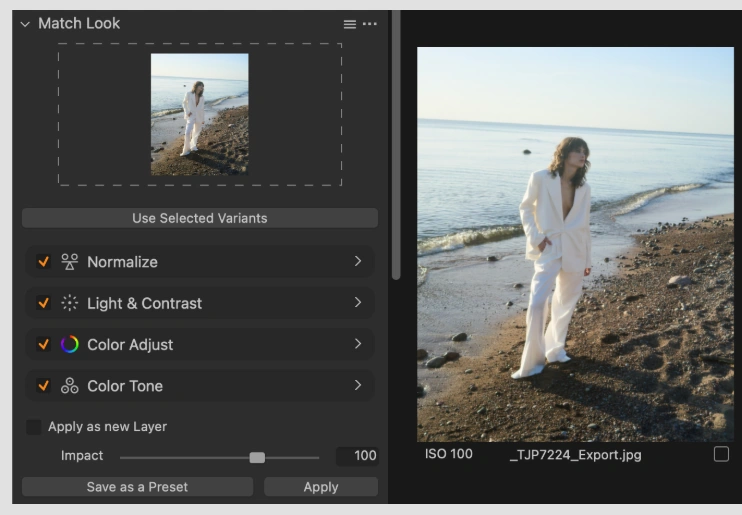
When a client approves one hero photograph and expects the rest of a campaign to feel related, Capture One’s AI-powered Match Look is a useful starting point. It analyzes reference imagery and applies adjustments through Capture One’s existing editing tools, leaving those adjustments available for inspection and refinement.
That makes it relevant to product photographers delivering coordinated collections: several fragrance compositions, a seasonal accessories campaign, or a series of food photographs with a shared tonal treatment. Its role is look development—not reconstructing products or generating replacement photographs.
Separate campaign styling from product-color accuracy
Match Look divides its adjustments into groups covering normalization, light and contrast, color adjustment, and color toning. You can enable or disable individual adjustments or groups. For color-sensitive products, that control matters more than the convenience of a one-click result.
For example, a warm reference photograph may suit a cosmetics campaign while pushing a peach-colored carton toward orange. Consider starting with the light-and-contrast adjustments while leaving color adjustment and color toning disabled. Then judge the product against the approved master rather than assuming that a pleasing match is a faithful match.
Choose a reference with comparable lighting and composition whenever possible. A backlit amber bottle and a front-lit white carton present very different tonal problems; expecting one reference to resolve both invites unnecessary correction.
One easily missed detail: the Impact slider does not change the exposure and white-balance adjustments in the Normalize group. Reducing the overall look’s strength therefore does not necessarily undo those changes.
If your objective is baseline exposure and white-balance consistency rather than creative styling, Capture One’s separate Normalize workflow can match a sampled reference area, such as a gray card or suitable chart patch. That is a conventional correction tool, not another AI feature, but it may be the more appropriate solution.
Match Look is worth considering when reference-led campaign editing is a recurring task. It is less compelling as a reason to adopt a second RAW editor if your existing workflow already produces consistent, approved color.
Adobe Lightroom and Camera Raw: Best for Cleaner Files Before Retouching
Adobe Camera Raw’s AI Denoise, also available in Lightroom, addresses a different problem: noise in supported source files. It is especially relevant to available-light product photography, higher-ISO location work, and photographs whose shadows need substantial adjustment.
For a well-exposed, low-ISO studio photograph, denoising may add little value. For a restaurant tabletop photograph captured under practical lighting, it may provide a cleaner foundation before surface cleanup and local corrections.
Run a texture test rather than judging only smooth backgrounds. Compare the original and processed image around woven fabric, brushed metal, fine paper grain, embossed lettering, and small printed text. The goal is to reduce distracting noise without turning genuine material texture into an unnaturally uniform surface.
Check file compatibility before making this your rescue tool for client-supplied assets. Adobe documents specific supported RAW and DNG categories; Camera Raw’s AI Denoise is not a universal filter for ordinary JPEG, TIFF, or PSD files.
Use AI masks to adjust the photograph, not replace it
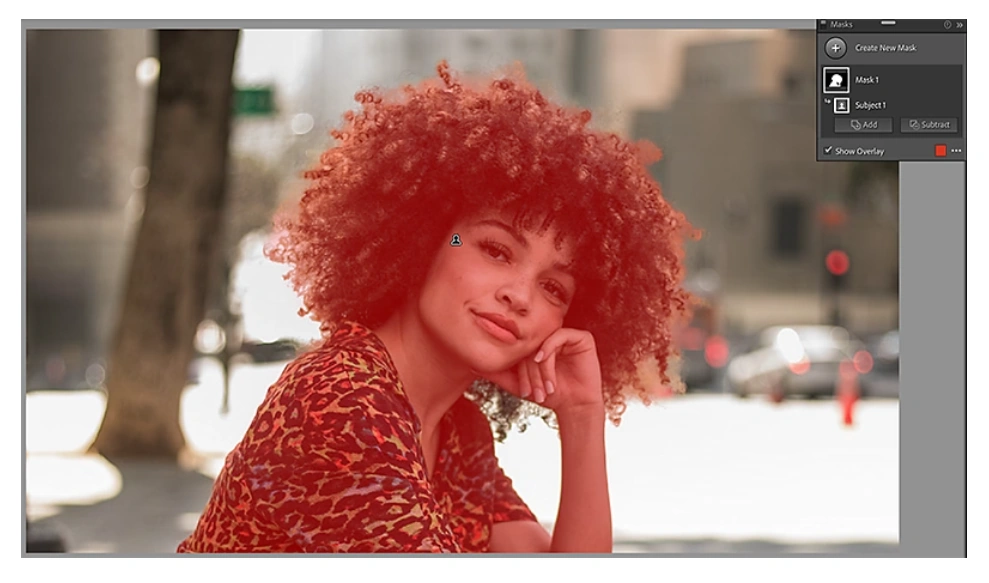
Lightroom Classic’s AI-assisted masking tools are useful when the product needs a different tonal adjustment from its surroundings. Select Objects lets you indicate an object by brushing or drawing over it, while mask intersections can narrow an adjustment using criteria such as luminance.
A practical example is a dark bottle with a bright label. Select the bottle, intersect that mask with a luminance range targeting its darker areas, and make a restrained shadow or exposure adjustment. This gives you a more selective starting point than brightening the entire frame and washing out the label.
Inspect the mask around handles, transparent packaging, reflective edges, and gaps between components. An automatically identified object still needs checking before you synchronize or repeat the treatment across a set.
These masks are for local photographic adjustments. They are not the same deliverable as a transparent product cutout. Use them when you want to retain the photographed setting while improving the relationship between product and background.
For photographers already working in Adobe’s RAW ecosystem, these features are sensible first options to evaluate before purchasing another tool. Apply them where the source needs help, not automatically to every capture.
Retouch4me Dust: Best for Repetitive Product-Surface Cleanup
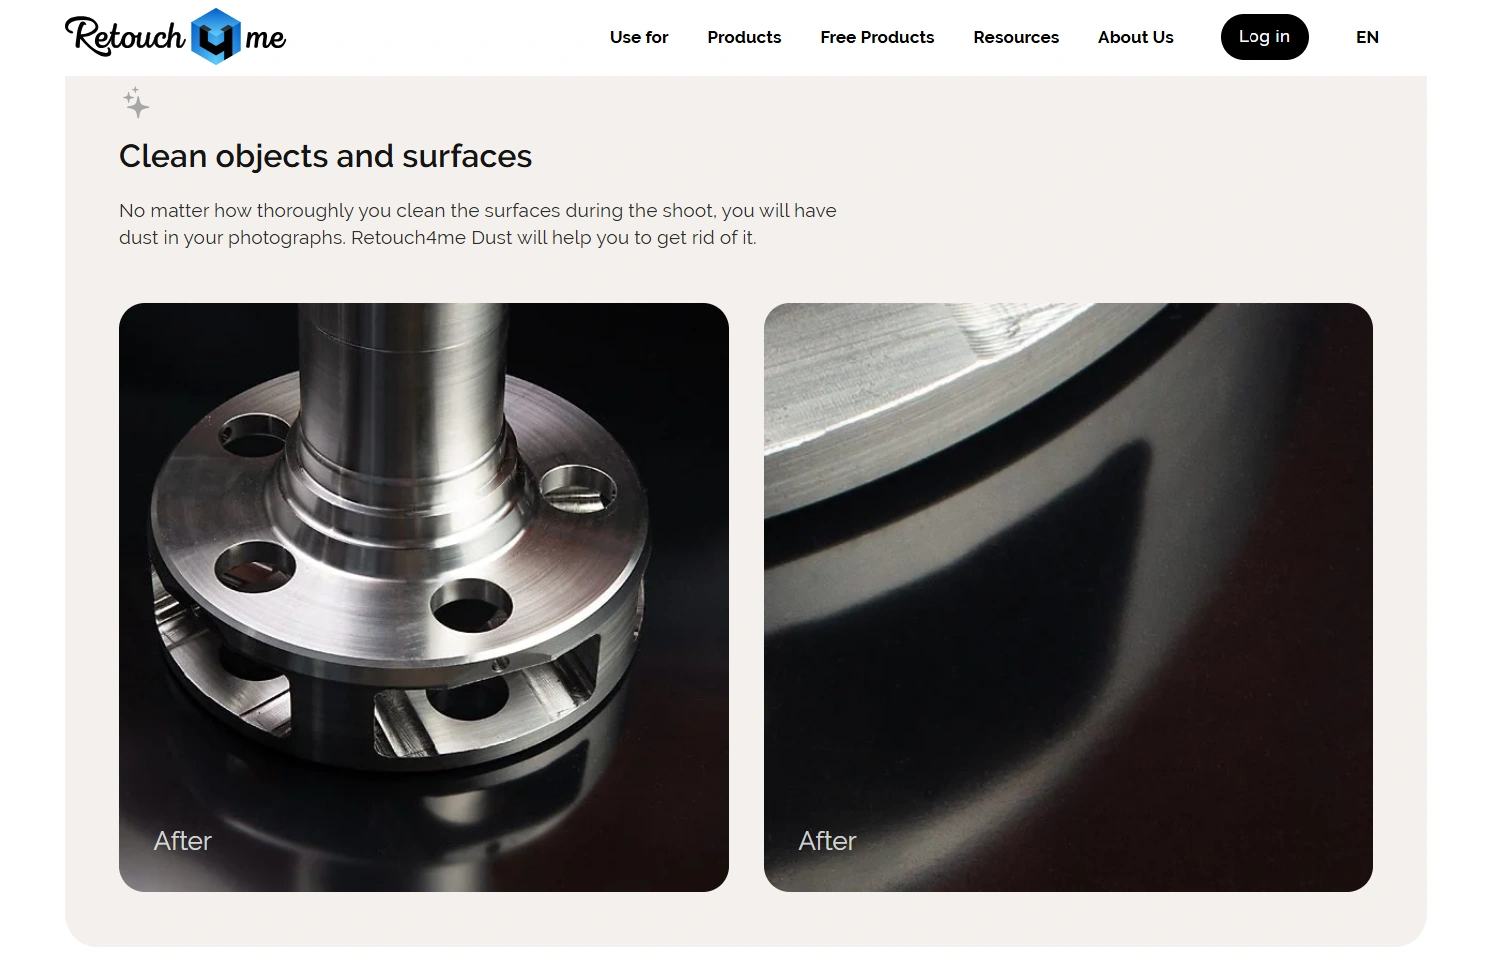
Retouch4me Dust is unusually relevant to product photography because its specific job is detecting and removing small particles from objects and surfaces. It is not primarily a portrait-beautification tool repurposed for catalog work.
Consider dark cosmetic packaging, glossy appliance panels, black textiles, or tabletop arrangements photographed close enough to reveal every speck. Cleaning products before capture remains essential, but tiny particles can still become a substantial retouching task.
The important distinction is between unwanted contamination and authentic surface detail. Dust removal should eliminate lint on a bottle—not the bottle’s intentional speckled finish. It should remove loose particles from fabric—not erase the weave.
Build your evaluation around three questions:
- Does it remove the distracting particles that would otherwise require individual corrections?
- Does it leave legitimate texture, small lettering, decorative marks, and fine edges intact?
- How much manual repair remains after the automatic pass?
Keep an untouched version and compare at full resolution, particularly on textured products. When evaluating any automated cleanup, check both what disappeared and what changed around it. A clean-looking thumbnail can conceal softened printing or damaged texture.
Retouch4me offers a demo and describes Dust as a perpetual-license product. Use the demo on your own difficult photographs rather than relying only on the manufacturer’s examples.
This is a strong specialist addition when surface cleanup dominates your editing time. If the real problem is an unclear product silhouette, insufficient resolution, or inconsistent lighting, dust removal will not address the bottleneck.
Bulk Background Remover: Best for Building Reusable Product Cutouts
A well-prepared isolated product photograph can serve several downstream jobs: catalog layouts, promotional compositions, website graphics, packaging presentations, and campaign artwork. Bulk Background Remover: Automated Cutouts is useful because it automates the production steps around that asset, not just the initial removal command.
The Photoshop plugin processes supported images directly inside a selected folder. Its default method, Select Subject & Remove Inverse, runs Photoshop’s Select Subject, checks for a meaningful selection, and creates a Reveal Selection layer mask. The background is hidden through the mask rather than simply deleted.
Choose the output according to its next use
For a reusable compositing asset, Crop To Remaining Pixels trims fully transparent outer canvas around the product. It does not cut through visible product pixels, add padding, or resize the subject.
For a standardized catalog asset, Normalize Output Size is more useful. You might choose a 2000 × 2000-pixel canvas with Center / Bottom alignment so products share a canvas size and their lower edges sit consistently.
The sizing behavior deserves attention: oversized cutouts are reduced proportionally to fit, but smaller cutouts are not enlarged. An 800 × 600-pixel cutout placed on a 2000 × 2000 canvas remains 800 × 600. Consequently, matching canvas dimensions and alignment does not guarantee identical product occupancy across a catalog.
Ratio normalization solves another job. A 4:5 setting expands transparent canvas around the trimmed product to reach that shape without cropping or distorting visible subject content. It is useful when you need a common composition ratio but do not require identical pixel dimensions.
Optional Feather, Contract, or Expand refinement can adjust the subject mask. Test the treatment on representative files before applying it broadly: a contraction that improves a rigid carton edge may remove useful detail from brush bristles or textured fabric.
Plan for the exceptions before running the folder
The alternate Remove Background Using AI method invokes Photoshop’s native Remove Background command. Photoshop can display a blocking popup when it cannot identify a background, and the plugin cannot reliably suppress it. For unattended production, Select Subject & Remove Inverse is the more suitable starting choice, although subject detection still depends on the photograph.
Skip Images Containing Transparency is a true skip. Qualifying files receive no further refinement, cropping, normalization, or export. Do not enable it expecting already-transparent PNGs to pass through into the delivery folder.
PNG is a straightforward cutout-delivery choice; PSD can retain the processed Photoshop working result. However, visible source layers are merged during preparation, so PSD or PSB output should not be treated as preservation of the original layer stack. The original source files are closed without saving.
For product photographers, the strongest use case is an approved folder of studio photographs that needs repeatable isolation and asset preparation. Reflective, translucent, or fine-edged products still deserve individual inspection before those cutouts become campaign masters.
Bulk AI Image Creator: Best for Reference-Guided Product Campaign Exploration
The most interesting generative workflow for a product photographer starts with an actual photograph of the client’s product—not a text description of something vaguely similar.
Bulk AI Image Creator: Batch Generative Fill automates Photoshop generation across a CSV of prompts. With a compatible Gemini or FLUX model, it can supply one or two reference images alongside every prompt, giving the model visual guidance from your photographed product.
This makes it useful for exploring how one product might appear across different environments: a fragrance on a dressing table, a skincare bottle in a bathroom composition, or a coffee package in several seasonal campaign settings. The resulting images are candidates for review—not guaranteed pixel-faithful reproductions of the reference product.
Build a batch around one product and a controlled brief
Choose reference photographs that clearly communicate the product’s silhouette, proportions, material, color, and packaging. A second photograph might clarify another angle or a detail that is difficult to see in the first. Avoid contradictory versions of the packaging or mixed colorways unless that ambiguity is intentional.
The same reference set applies to every prompt in the operation. There is no CSV column for assigning different products or reference images row by row. For reliable organization, run separate batches for separate SKUs, packaging versions, or colorways.
A practical setup is:
- Create a spreadsheet with TEXT PROMPTS in cell A1 and one prompt per row beneath it in Column A. Leave other columns empty and export it as CSV; the spreadsheet export can handle quoting prompts that contain commas.
- Select a reference-compatible model, such as Gemini 3 (Nano Banana Pro), subject to its availability through Photoshop. The plugin’s Firefly options do not use its reference-image workflow.
- Enable Attach Reference Images and select a folder containing one or two supported reference files.
- Choose batch-wide image dimensions and an export folder for that product. Leave Export All Generated Image Variations enabled when you want to review every alternative Photoshop returns.
- Run a small initial batch, acknowledge the Generative Credits confirmation, and inspect the results before expanding the prompt list.
For a photographed amber skincare bottle, your prompt rows could explore:
- A photorealistic campaign image of the reference bottle on pale limestone beside a folded cream towel, with soft window light from the left and open space on the right for advertising copy.
- A photorealistic campaign image of the reference bottle on a dark bathroom shelf, with restrained warm lighting, minimal props, and a clearly visible front label.
- A photorealistic campaign image of the reference bottle on a neutral studio pedestal, with a soft contact shadow, an uncluttered composition, and no added text.
These prompts specify environment, lighting, composition, and copy space rather than merely asking for a “luxury product photo.” Constraints give you a more useful basis for judging whether a result meets the brief.
Protect the distinction between product guidance and product fidelity
Reference images guide generation; they do not lock the original product pixels in place. Check label spelling, logo geometry, cap construction, dimensions, seams, transparency, material finish, and any printed product claims against the real photograph.
If the deliverable requires literal preservation of the photographed product, use a different approach: generate an empty setting, then manually composite the approved product photograph into it in Photoshop. Match perspective, lighting, reflections, and contact shadows during that compositing step. Bulk AI Image Creator does not automatically perform that assembly.
For concept development and client-approved creative imagery, reference-guided batches can provide a useful range of scenes to evaluate. For an accuracy-critical listing image, keeping the real product photograph intact is the safer starting point.
The plugin uses Photoshop’s generative system, not an independent image-generation backend. Review Adobe’s current Generative Credits guidance and your account’s model access before planning production volume. The plugin requires acknowledgement but does not predict an exact credit total.
Exported variation counts are determined dynamically. Saving only the first variation reduces output-file volume; it does not guarantee that Photoshop generated only one alternative or that credit consumption is lower. Keeping the prompt and model in filenames helps review separate model trials, but retain the original CSV because prompt-derived filename text is sanitized and truncated.
Bulk Image Upscaler: Best for Controlled Batch Enlargement
Upscaling earns its place when you have a specific pixel shortfall: a tight crop from an otherwise good photograph, an older client asset, or an approved creative image that needs a larger delivery version. It is not automatically necessary just because an image is heading to print.
Bulk Image Upscaler: Batch-Enhance Resolution automates folder-wide enlargement through Photoshop. It combines Firefly, Topaz Gigapixel, and Topaz Bloom methods in fixed 2× and 4× variants with eight conventional Photoshop resampling choices supporting factors from 1.1× to 25.0×.
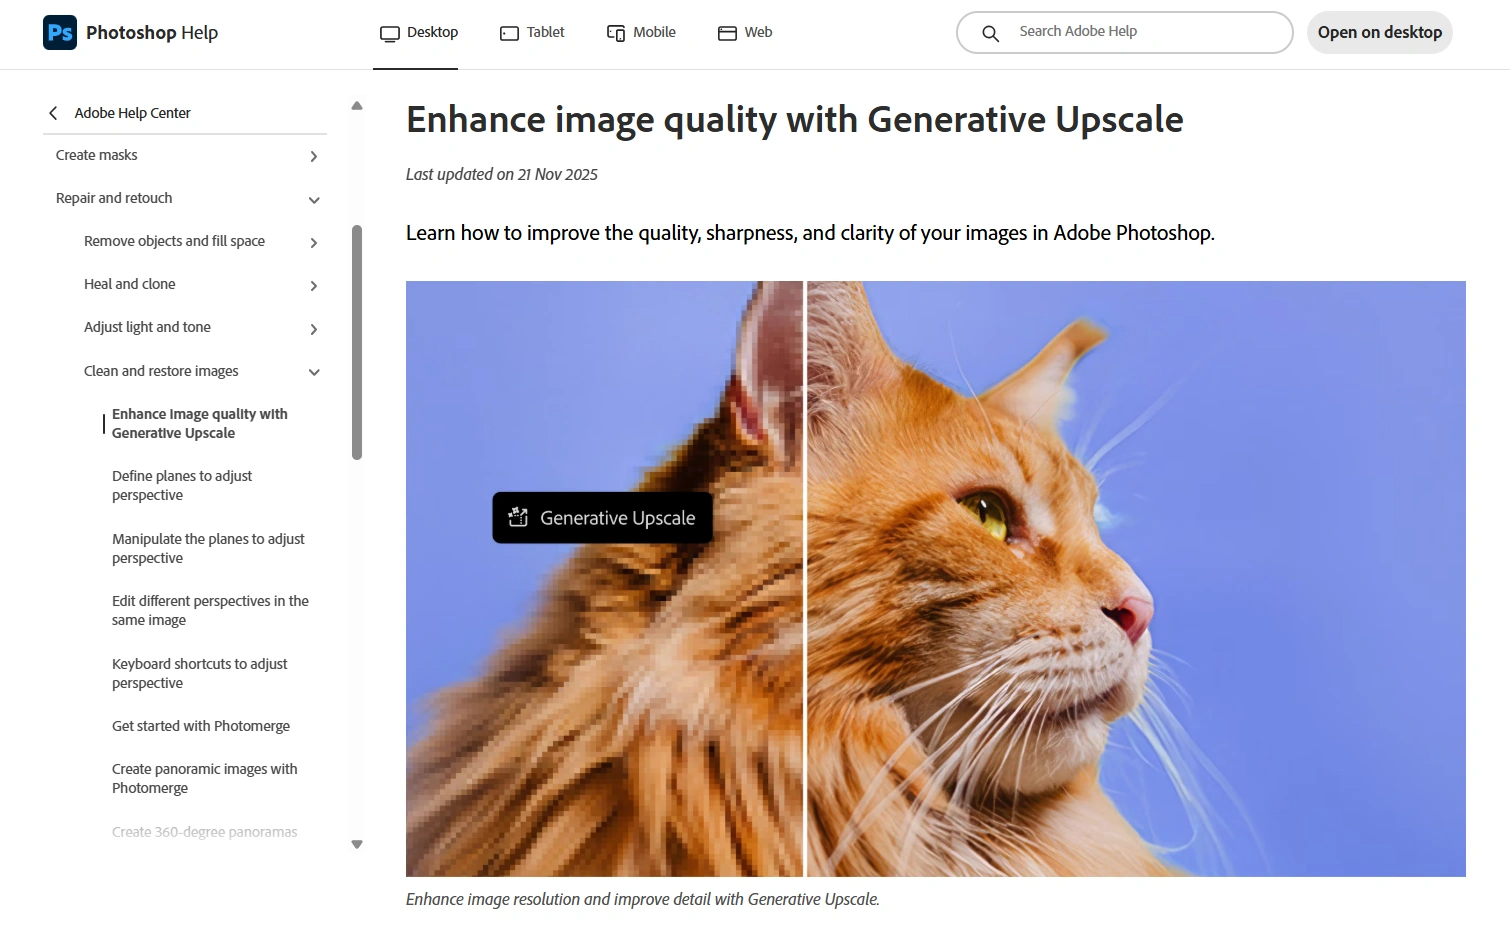
For product photography, the important choice is between enlarging the image and creatively interpreting its detail. Adobe’s Generative Upscale documentation describes Gigapixel as preserving existing detail and Bloom as adding new creative detail. That distinction makes Bloom a more cautious choice for packaging text, manufactured surface patterns, and other accuracy-sensitive features.
No method should be treated as proof that missing lettering or microscopic texture has been recovered correctly. Compare the enlarged result with the source and reject changes that misrepresent the product.
Understand why a requested 4× image may become 2×
The plugin automatically handles AI output limits. Its relevant constraints are:
- Firefly: no more than 6144 pixels on either output dimension.
- Topaz Gigapixel: no more than 56,000,000 total output pixels.
- Topaz Bloom: no more than 9,000,000 total output pixels.
When a 4× request exceeds a model’s limit, the plugin can switch that image to the corresponding 2× method to preserve more source information. If even 2× would exceed the limit, it proportionally reduces the working source only as much as necessary before the AI operation.
For example, a 4000 × 3000 photograph would become 16000 × 12000 at 4×—192 megapixels, beyond Gigapixel’s limit. A 2× result is 8000 × 6000, or 48 megapixels, which fits. This also illustrates why Gigapixel’s limit should not be interpreted as a fixed maximum length for each side.
Use actual output dimensions in filenames and verify them at delivery. After automatic limit handling, the nominal multiplier is not a promise that the final image is that many times larger than the untouched original.
The source-size skip threshold is useful for mixed folders containing both undersized and already-large assets. It checks original image dimensions, not projected output size. Original files are preserved, and enlarged derivatives are exported separately.
AI methods use AUTO DPI and require a Generative Credits acknowledgement. Conventional methods allow configurable DPI. In either case, changing DPI metadata is not a substitute for having the pixel dimensions your client actually needs.
Choose a Small Stack—and Test It Against Real Deliverables
You do not need all six tools for every assignment. A photographer producing faithful catalog images may benefit most from a RAW editor, selective surface cleanup, and cutout preparation. A photographer delivering frequent campaign concepts may place more value on reference-guided generation. Upscaling belongs in the workflow only when an approved asset lacks sufficient resolution.
Keep faithful product masters separate from creative derivatives
A useful production sequence is:
- Develop the capture into an approved photographic master, checking exposure, color, material texture, and label readability.
- Remove unwanted surface contamination without erasing intentional product detail.
- Create and inspect an isolated product asset when the brief requires compositing or transparent delivery.
- Branch into campaign work: either explore reference-guided generated images or manually place the real product into generated settings.
- Enlarge only the selected assets that need additional pixels, then check the final exports.
These are separate applications and operations, not a promised one-click integration. Exporting, reviewing, and choosing what enters the next stage are part of the workflow.
Build an acceptance test before committing a catalog
Evaluate tools on a small set that represents your difficult work: clear packaging, a glossy product, fine printed text, textured fabric, a dark object, and a product with narrow gaps or delicate edges. Include ordinary easy photographs as well, so you can see whether the tool adds unnecessary work where little correction was needed.
Check the outputs at full resolution and at the intended delivery size. Record:
- Whether the product still matches the approved shape, color, packaging, and SKU.
- Whether fine text and manufactured details remain accurate.
- Whether masks retain holes, handles, thin edges, and appropriate transparency.
- Whether the image needs manual repair after the automatic operation.
- Whether dimensions, filenames, format, and metadata meet the delivery brief.
Measure total effort per approved deliverable—not just time until the software produces an image. Include review, rejected generations, credit usage, edge repair, and client revisions. A fast first pass is valuable only when it shortens the whole job.
Check destination requirements before delivering synthetic campaign imagery. For example, Google Merchant Center’s image requirements specify metadata identifying generative-AI imagery and instruct merchants not to remove relevant embedded metadata. The promoted plugins’ WebP export pathways exclude XMP and EXIF metadata, so do not assume that required provenance survives that export. Verify the actual delivery file and use an export and metadata workflow that meets the destination’s requirements.
The best AI toolkit for a product photographer is the smallest one that removes a recurring bottleneck while preserving the client’s product. Start with the task that consumes the most production time, test it on your hardest images, and expand only when the next tool solves a clearly different problem.