Does AI Upscaling Improve Print Quality?
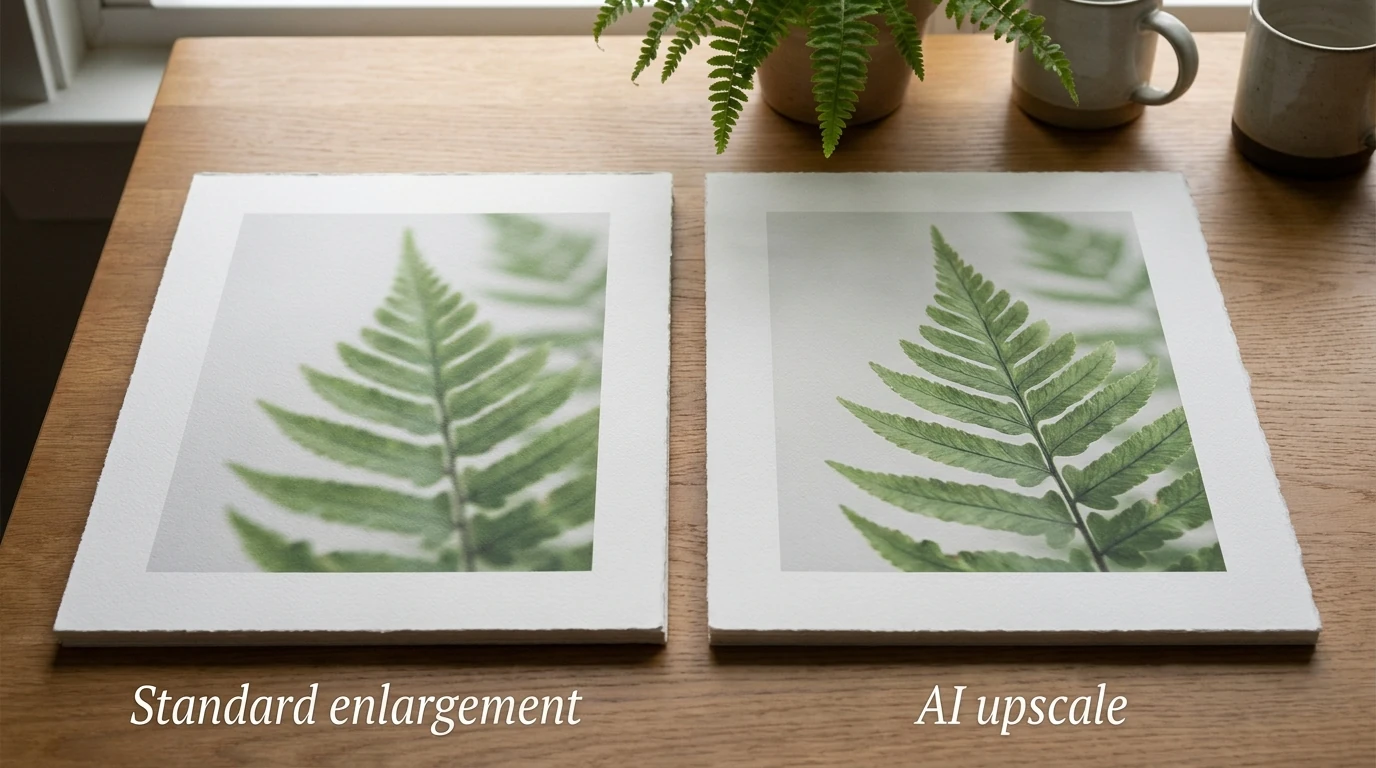

Yes—AI upscaling can improve print quality when an image does not have enough resolution for the size you want to print. A successful upscale produces a larger image with cleaner-looking edges and more convincing fine detail, making an enlargement look less soft or pixelated.
But “more pixels” and “a better print” are not automatically the same thing. The source image, enlargement method, physical print size, and treatment of fine detail all matter. The useful question is not simply whether AI makes the file bigger. It is whether the improvement survives onto paper without changing something important in the image.
1. The biggest improvement comes when resolution is the bottleneck
Consider an 1800 × 1200-pixel photograph intended for a 12 × 8-inch print. At that size, it supplies 150 pixels per inch. A 2× upscale produces 3600 × 2400 pixels, enough to supply 300 pixels per inch at the same physical size.
That gives the enlargement process more pixels with which to describe edges and textures. AI super-resolution can go beyond smoothing the existing pixels by inferring plausible fine detail—a capability demonstrated in research on perceptual image super-resolution. When the result is convincing, the printed image can look more clearly defined than a conventional enlargement of the same source.
The important condition is that insufficient resolution was actually limiting the print. An already-detailed photograph that comfortably meets the requirements for a small print may gain little from upscaling. A photograph ruined by severe motion blur has a different problem: increasing its dimensions does not establish what the camera failed to record.
Think of AI upscaling as a way to make a usable image hold up at a larger size—not as a substitute for a good photograph or scan.
2. Calculate the print’s pixel requirements before choosing an enlargement
Start with the finished print, not the largest multiplier available in the software. Adobe’s explanation of printed image resolution makes the essential distinction: pixel dimensions describe how much image data you have, while pixels per inch describe how densely those pixels are distributed across the print.
The two calculations you need are straightforward:
- Required pixels = print dimension in inches × target pixels per inch.
- Effective pixels per inch = available pixels ÷ print dimension in inches.
Calculate both width and height using the image area you actually intend to print. At 300 PPI, these common sizes require:
- 8 × 10 inches: 2400 × 3000 pixels.
- 12 × 18 inches: 3600 × 5400 pixels.
- 16 × 20 inches: 4800 × 6000 pixels.
- 24 × 36 inches: 7200 × 10800 pixels.
These are useful planning targets, not a universal pass-or-fail standard. For example, Bay Photo’s file-preparation guidance recommends 200–300 PPI at print size. Ask your chosen provider what it recommends for the specific product rather than assuming every print must meet exactly 300 PPI.
Viewing distance also changes the requirement. A photograph examined in someone’s hands deserves a different assessment from wall art normally seen across a room. Epson’s guidance on resolution and output size explicitly accounts for viewing conditions. It also distinguishes image resolution from printer resolution: a printer’s DPI specification describes output dots, not the number of image pixels you must supply per inch.
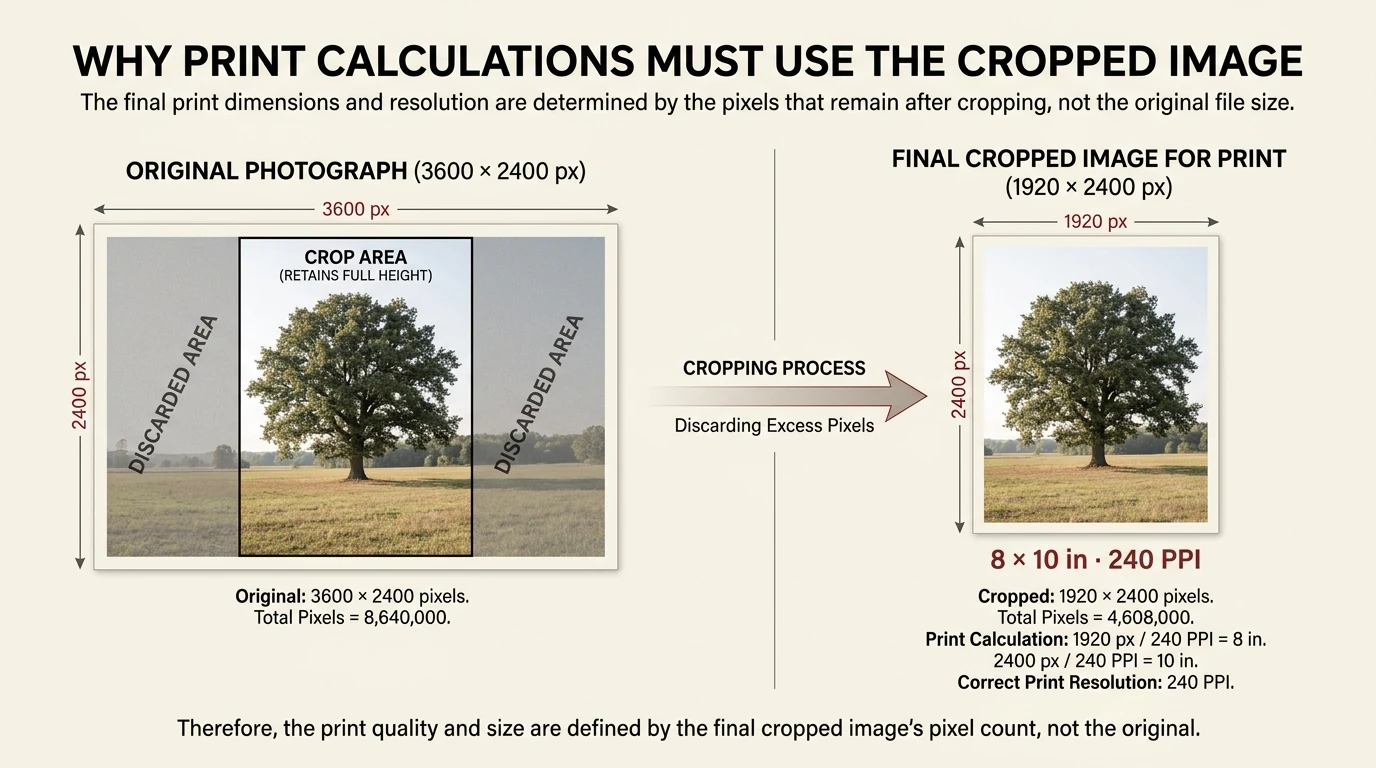
Finally, account for the crop. A 3:2 photograph does not fill an 8 × 10-inch rectangle without cropping or borders. Work out the pixels remaining after the intended crop; the original file’s dimensions can otherwise make your calculation overly optimistic.
3. AI adds a different kind of detail than ordinary interpolation
Both conventional enlargement and AI upscaling create additional pixels. The difference is how they decide what those pixels should contain.
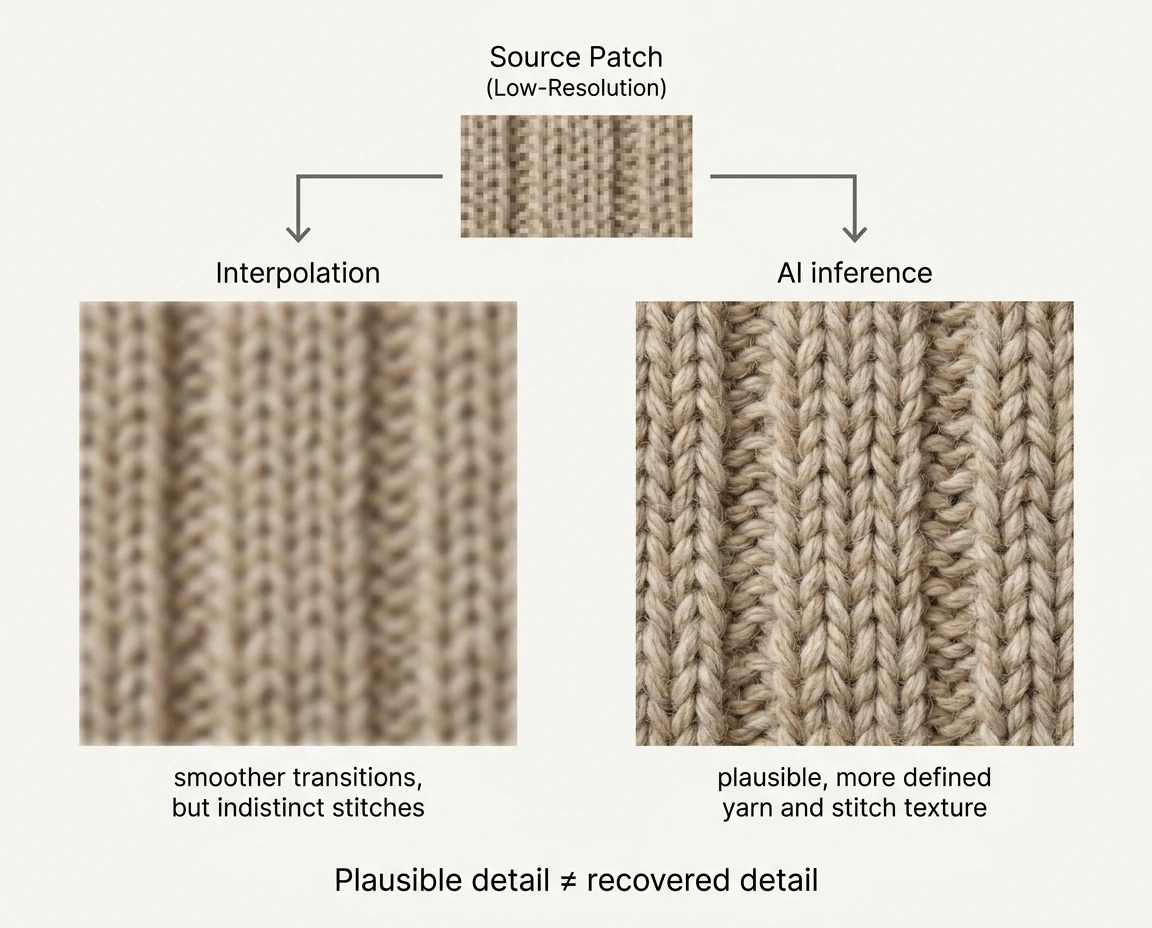
Conventional resampling estimates between existing pixels
Methods such as bicubic interpolation calculate new pixel values from the surrounding image data. They can make an enlarged image smoother and reduce the crude appearance of simply duplicating pixels. Photoshop also offers enlargement-oriented methods such as Preserve Details and Bicubic Smoother; Adobe’s resampling-method guide explains their intended uses.
These methods remain useful. For a modest enlargement, a clean source, or artwork whose appearance you want to keep restrained, a conventional result is worth comparing rather than dismissing.
Generative upscaling can infer plausible texture
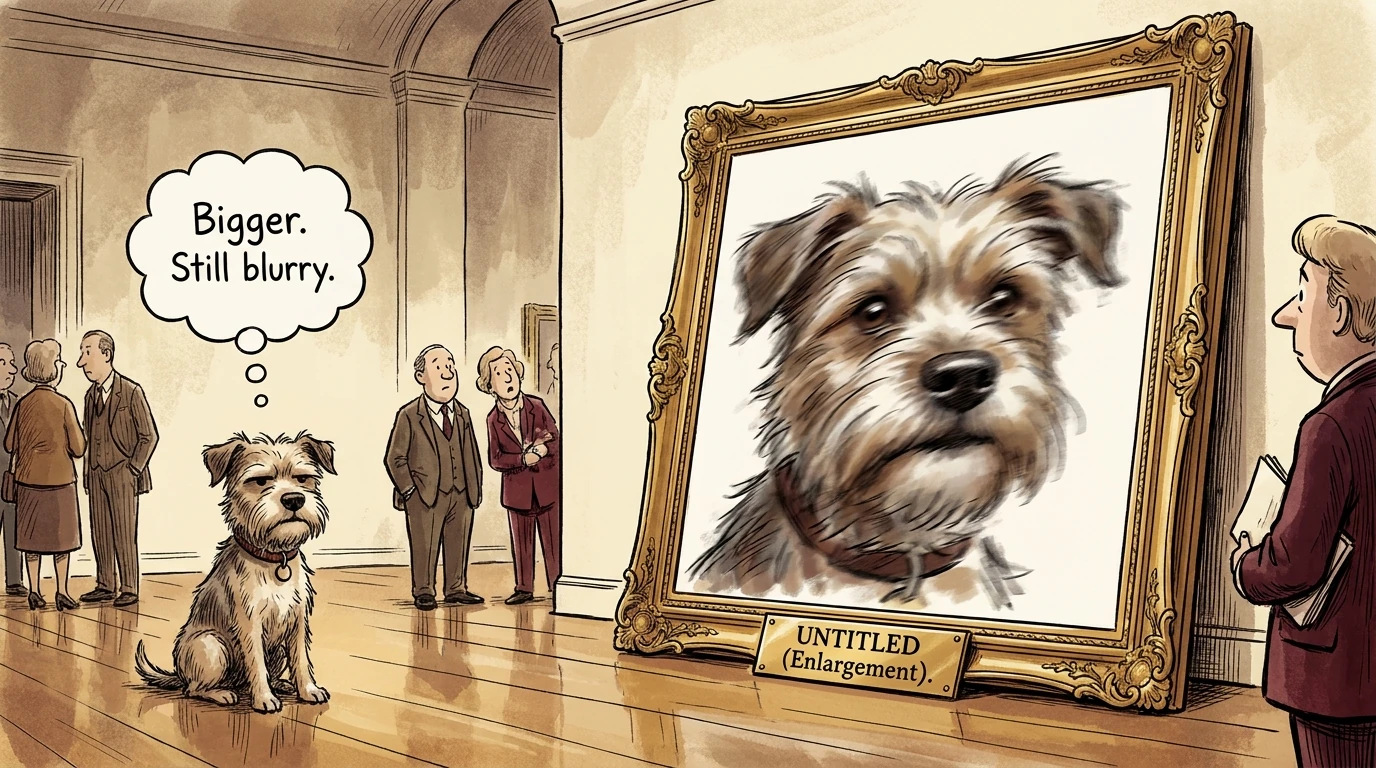
AI generative methods use learned image patterns to infer what a higher-resolution version might look like. Instead of merely smoothing a patch of hair or foliage, they can produce a more detailed-looking interpretation of it.
That is also why “more detailed” does not necessarily mean “more historically accurate.” Research on the perception–distortion tradeoff distinguishes visual realism from faithfulness to an original image. A result can look convincing without reproducing every detail that was actually present in the scene.
For printing, the practical standard is therefore twofold: does the enlargement look better, and does it still look right? Natural-looking texture is useful. A sharper-looking face that no longer resembles the person is not an improvement.
4. Garbage in still matters—but there is no universal minimum image size
The garbage-in, garbage-out principle applies most strongly when important information is already missing. A tiny, heavily compressed thumbnail gives an upscaler much less reliable material than a clean photograph with recognizable edges and textures.
As a numerical example, a 400 × 300-pixel image printed at 12 × 9 inches starts at roughly 33 PPI. Even a 4× enlargement only produces 1600 × 1200 pixels, or about 133 PPI at that size. The multiplier sounds substantial, but the starting point still matters.
Rather than imposing an arbitrary minimum pixel count, examine what the source actually contains:
- Can you distinguish the important features before enlargement?
- Are edges reasonably clear, or smeared by movement and missed focus?
- Is the texture part of the subject, or mostly compression blocks and noise?
- Do you have an original camera file, a better export, or a physical photograph that could be rescanned?
Look for a better source before processing a worse one. Retrieve the original attachment rather than using a screenshot of it. Export from the original artwork rather than enlarging its web preview. If a physical photograph contains detail absent from an old scan, consider rescanning it.
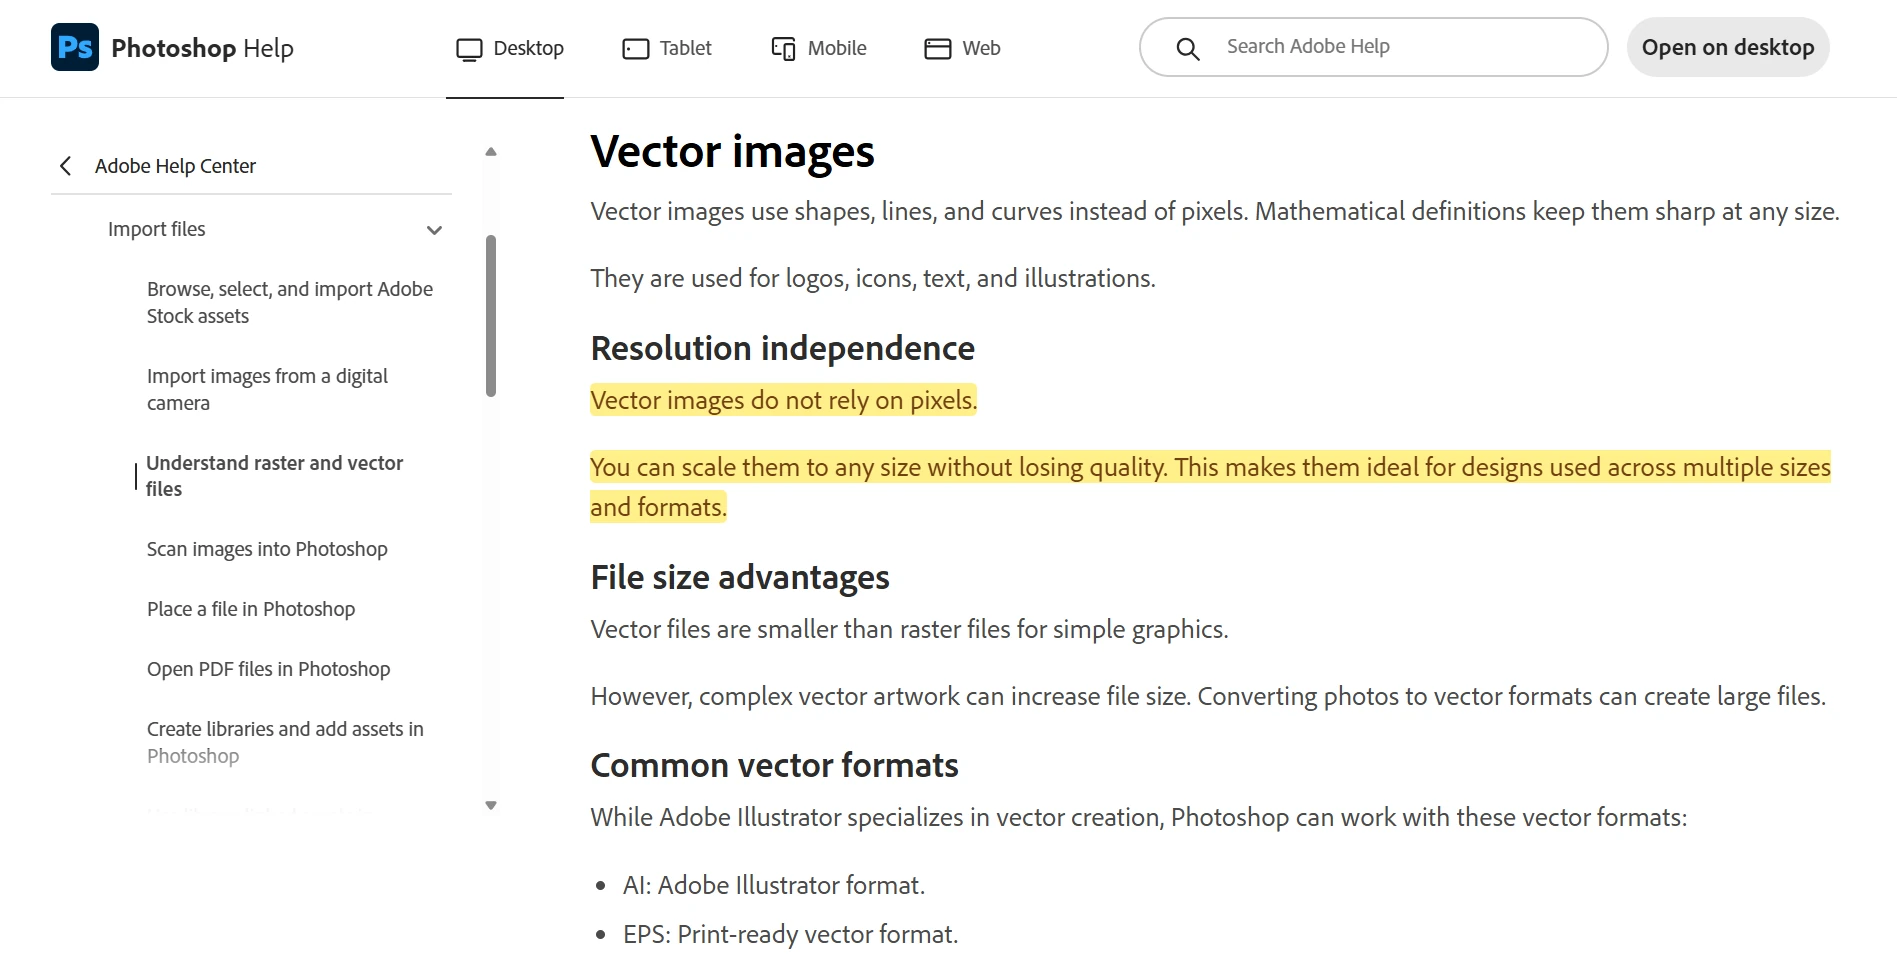
Some subjects also call for a different solution. For logos, lettering, diagrams, and geometric artwork, use the original vector or editable file whenever possible. As Adobe’s raster-and-vector guide explains, vector artwork is resolution-independent. There is little reason to ask AI to guess a letterform when the original can describe it precisely.
For scanned paintings and drawings, make preservation part of the review. Check whether pencil marks, brushwork, paper grain, and signatures remain faithful. The best-looking photographic texture is not necessarily the right texture for an artwork reproduction.
5. Run a print-size test, not a contest at 400% zoom
A monitor preview is useful for finding problems. A physical proof is more useful for deciding whether the treatment improves your print.
The most informative comparison is not “original at 100% versus upscale at 100%.” Those views show the subject at different magnifications. Compare the same scene area at the same intended physical size.
Build a small, controlled comparison
- Keep an untouched source and make separate working versions.
- Prepare one conventional enlargement and one AI enlargement for the same intended print size.
- Keep color treatment, paper, and any additional output sharpening consistent so you can judge the enlargement itself.
- Inspect important areas on screen for altered shapes, halos, and unnatural texture.
- Print matching sections at the scale they will occupy in the finished piece.
For example, an 18 × 12-inch image prepared at 300 PPI measures 5400 × 3600 pixels. An 1800 × 1200-pixel crop from that prepared file represents a 6 × 4-inch portion of the final print. Printing that crop at 6 × 4 inches lets you examine the enlargement without paying for the entire 18 × 12-inch piece.
Upscale the full image first, then extract the proof area. For the other versions, print the corresponding scene area at the same physical size. Do not shrink the entire composition onto a small sheet and treat that as a test of large-print detail: shrinking also makes defects less conspicuous.
Choose a demanding area, not the easiest one. Include an eye and nearby skin for a portrait, fine branches against the sky for a landscape, or both delicate marks and a smooth wash for an artwork reproduction.
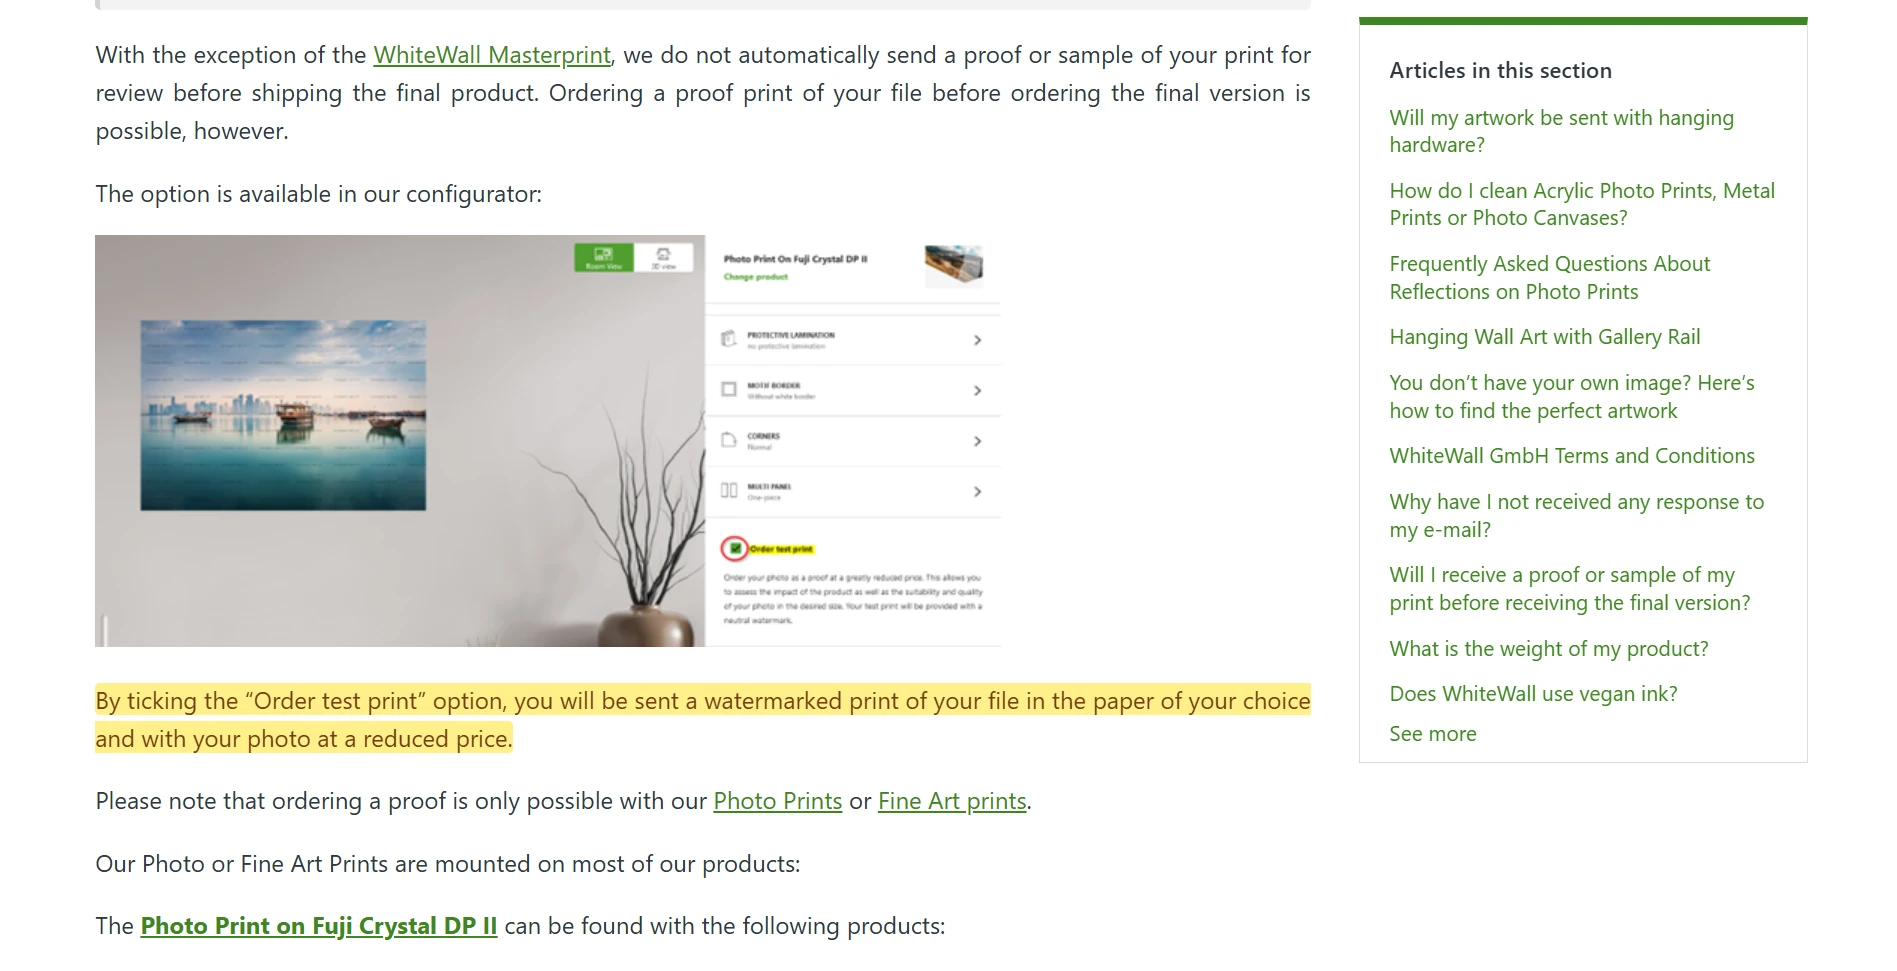
If you are ordering through a lab, ask about proofs on the intended material. For example, WhiteWall offers an optional watermarked test print for Photo Prints and Fine Art prints. Confirm the proof’s scale if you are using it to evaluate detail rather than simply color and overall appearance.
Approve the version that looks better at the intended viewing distance and remains believable on closer inspection—not whichever preview looks most aggressively sharpened.
6. Protect the improvement through sharpening, color, and export
Once you have a convincing enlargement, avoid letting the remaining preparation steps undermine it.
Make output sharpening a separate decision
Upscaling and sharpening do different jobs. Sharpening increases contrast around edges; it does not independently restore missing image information. Excessive sharpening can introduce halos, jagged edges, and exaggerated noise, as Adobe’s sharpening overview explains.
Evaluate the upscale before adding another sharpening pass. If it needs finishing, judge that treatment at the final output size and resolution—the approach described in Adobe’s output-sharpening lesson. Do not assume every AI result needs the same extra sharpening.
Use the intended paper and a color-managed workflow
A successful detail test does not approve the color. Use your printer or lab’s instructions for color space and profiles, and evaluate the image on the material you plan to order.
For screen-based color checking, WhiteWall’s downloadable ICC profiles are an example of a useful complementary resource. They support soft proofing for specific products. WhiteWall explicitly says these profiles are for simulation, not for converting or embedding into the submitted image.
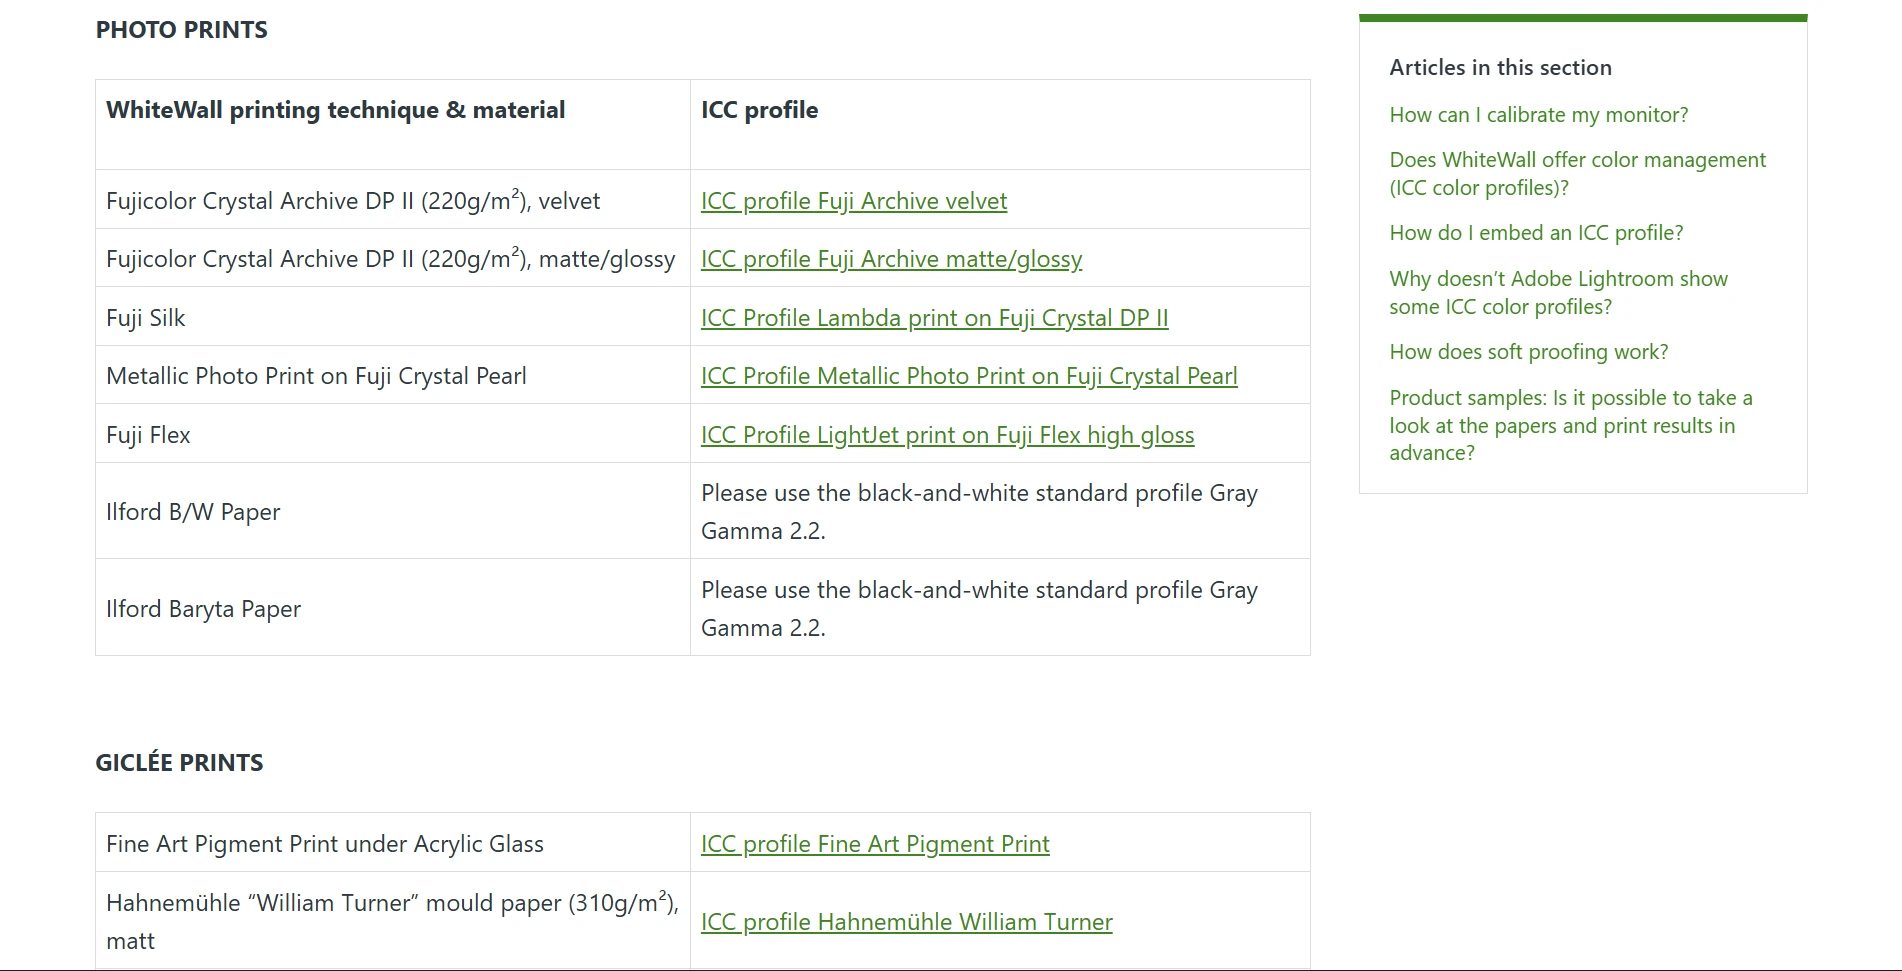
If you print at home with Photoshop managing colors, follow Adobe’s color-management instructions: choose the appropriate printer-and-paper profile and turn off the printer driver’s competing color-management adjustments. Letting both systems independently manage the conversion can undermine an otherwise carefully prepared file.
Deliver the format the printer actually requests
Do not assume TIFF automatically produces a better print than a properly prepared JPEG. Bay Photo, for example, states that its accepted JPEG, PNG, and TIFF files yield identical print results on its equipment when pixel dimensions, bit depth, and color space are equivalent.
Keep an editable master, then make the delivery file according to the provider’s specifications. The right export is the one that preserves your approved result and fits the production workflow—not necessarily the largest file.
7. Once the proof works, automate the rest of the collection
Testing a few images is worthwhile. Repeating the same opening, enlargement, sharpening, naming, and exporting steps across a whole collection is a different kind of work—and a good place for automation.
Bulk Image Upscaler: Batch-Enhance Resolution is a third-party Photoshop plugin that applies a configured enlargement-and-export workflow across the supported images in a selected folder. It is particularly relevant once you have established which treatment produces a print you are happy with.
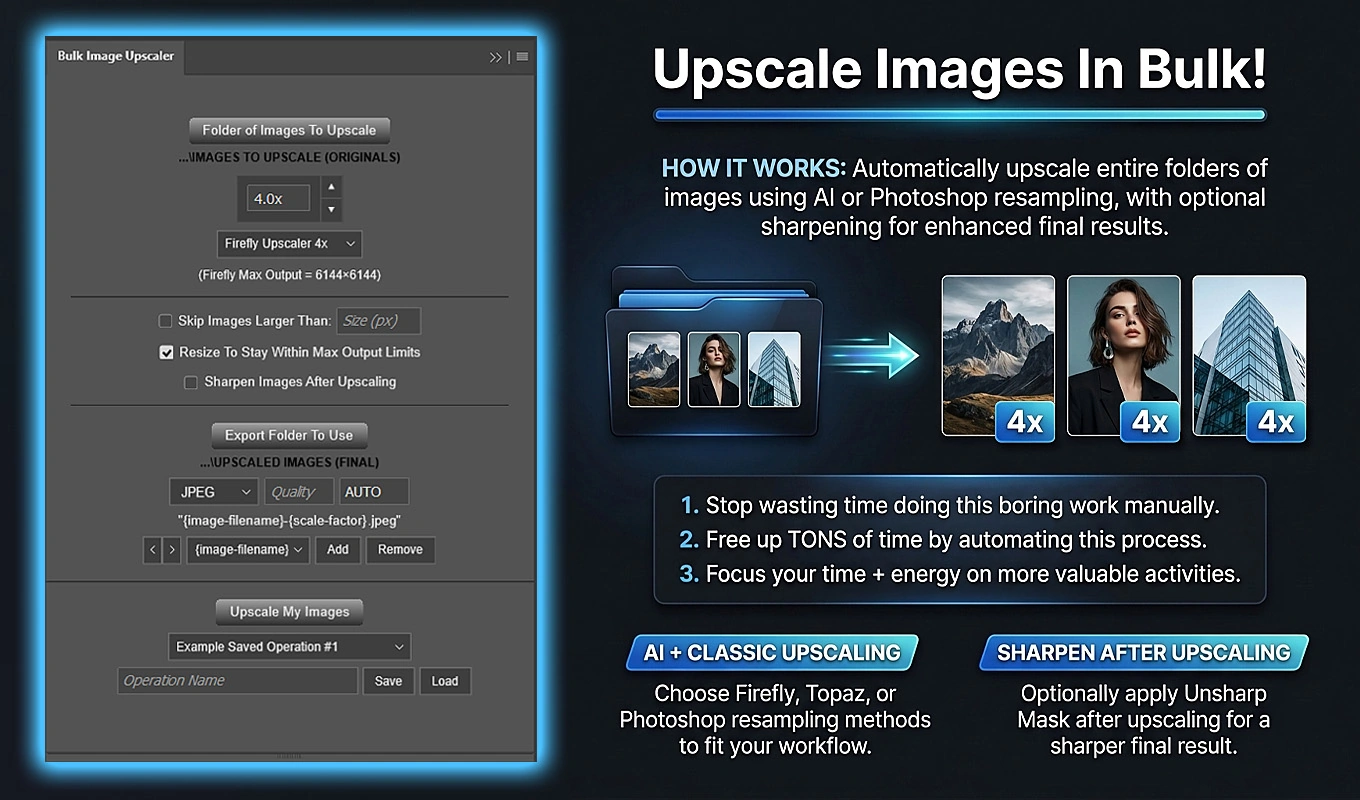
The plugin provides Firefly Upscaler, Topaz Gigapixel, and Topaz Bloom in fixed 2× and 4× variants. It also includes eight standard Photoshop resampling methods with custom enlargement factors from 1.1× to 25.0×. That lets you use the same batch interface for an AI treatment or a conventional enlargement, depending on what your proof established.
A practical print-production setup is to:
- Group images with similar source quality and enlargement requirements into a folder.
- Select the method and scale factor you approved during testing.
- Apply relevant model controls, such as optional Face Detail Recovery when using Topaz Gigapixel for portraits.
- Enable post-upscale Unsharp Mask only if that finishing pass improved your proof.
- Choose the export format and an output filename that includes the source name and final pixel dimensions.
- Save the operation for the next collection that needs the same treatment.
Each operation uses one selected method and primary scale configuration, so grouping similar jobs is more useful than sending an unrelated mixture through one preset. A set of portraits intended for the same print size is a better batch than portraits, pixel art, and scanned lettering requiring different judgments.
The plugin exports separate files and closes the source documents without saving changes, preserving the originals for future print sizes or alternative treatments. Its AI workflows require a Generative Credits acknowledgement; standard Photoshop resampling methods do not.
The value is not skipping quality control. It is avoiding repetitive production work after quality control has established a worthwhile result.
8. Check the exported dimensions—not just “4×” or “300 DPI”
Before sending an enlarged file to print, inspect what was actually exported. A multiplier describes a processing request; the finished pixel dimensions determine how much resolution is available at your chosen print size.
This matters with AI models because they have output-size limits. Bulk Image Upscaler automatically handles those limits: an oversized 4× request can become a corresponding 2× operation, and the source can be proportionally reduced first if necessary. That helps keep mixed-size batches moving, but it also means you should not assume every exported image is four times its original dimensions.
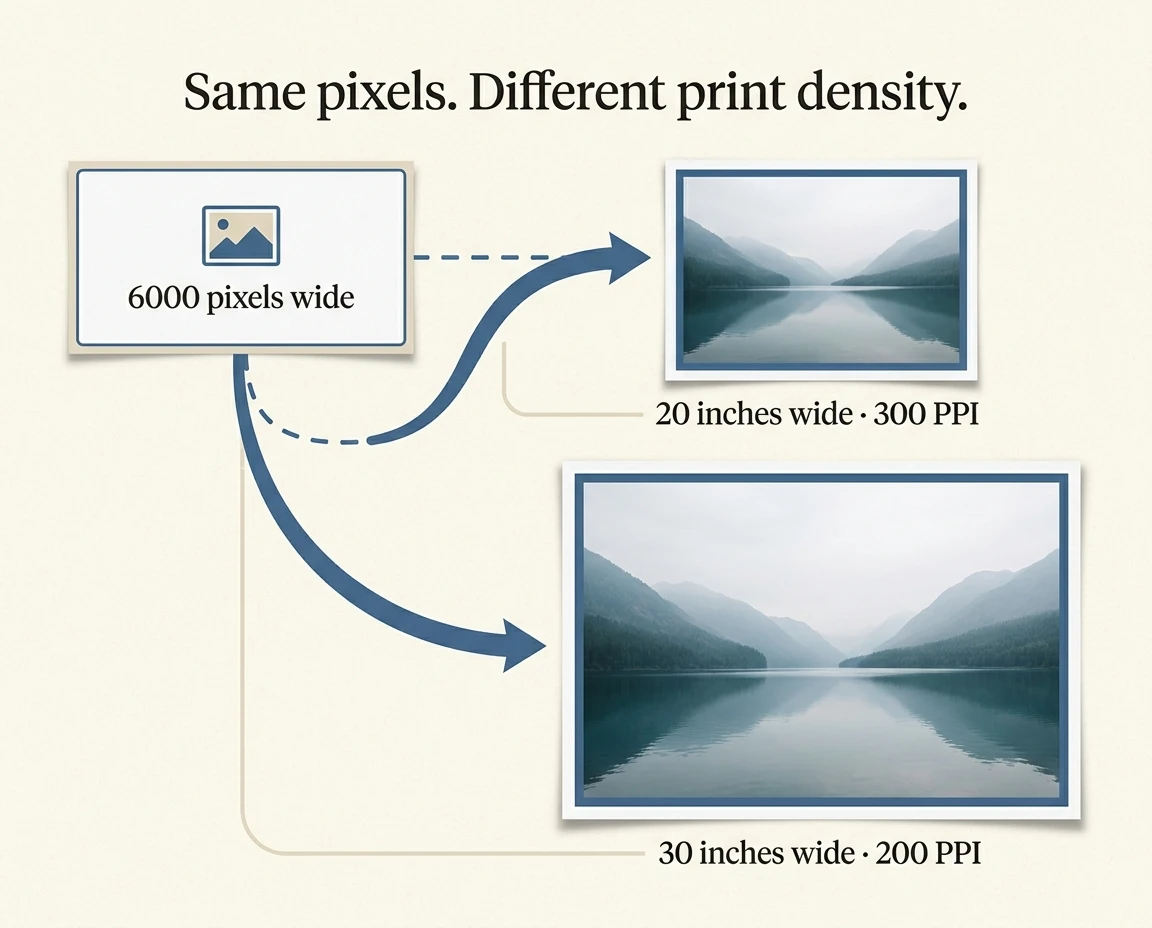
Use the actual width and height in your final calculation. A 6000-pixel-wide image supplies 300 PPI across 20 inches, but 200 PPI across 30 inches. The same file supports different print densities depending on how large you place it.
Also, changing a resolution label does not create detail. Adobe’s guide to image size and resampling explains that changing print dimensions or resolution without resampling leaves the pixel count unchanged. Bulk Image Upscaler’s AI methods keep its DPI field at AUTO; assess the resulting pixels against your intended print dimensions rather than treating that field as a quality rating.
For a final check in Photoshop, turn Resample off in Image Size, enter the intended physical print dimensions, and read the resulting PPI. This measures what the file already provides without enlarging it again.
At print time, check placement and scaling too. Adobe’s printing guidance recommends controlling scaling in one place rather than applying competing scaling settings in Photoshop and the printer driver.
9. Make the decision based on the print you want to buy
Use AI upscaling when you have an otherwise usable image, a genuine resolution shortfall, and a proof that shows a worthwhile improvement. That is where the technology can turn a marginal enlargement into a much more satisfying print.
Print without additional AI processing when the original already supplies sufficient detail and the enhanced version offers no visible benefit at the intended size.
Find a better source—or choose a smaller print—when enlargement makes important features less trustworthy, amplifies existing defects, or still cannot produce an acceptable result. For text, logos, and editable artwork, returning to the original design is usually a more sensible first move than asking a model to reconstruct it.
So, does AI upscaling improve print quality? Yes, it can, and the improvement can be substantial when limited resolution is the problem. Calculate the pixels you need, start with the best source available, and approve a print-scale proof. Then automate the treatment that earned its place on paper.