How To Add Consistent Photographer Branding To An Entire Folder Of Photos
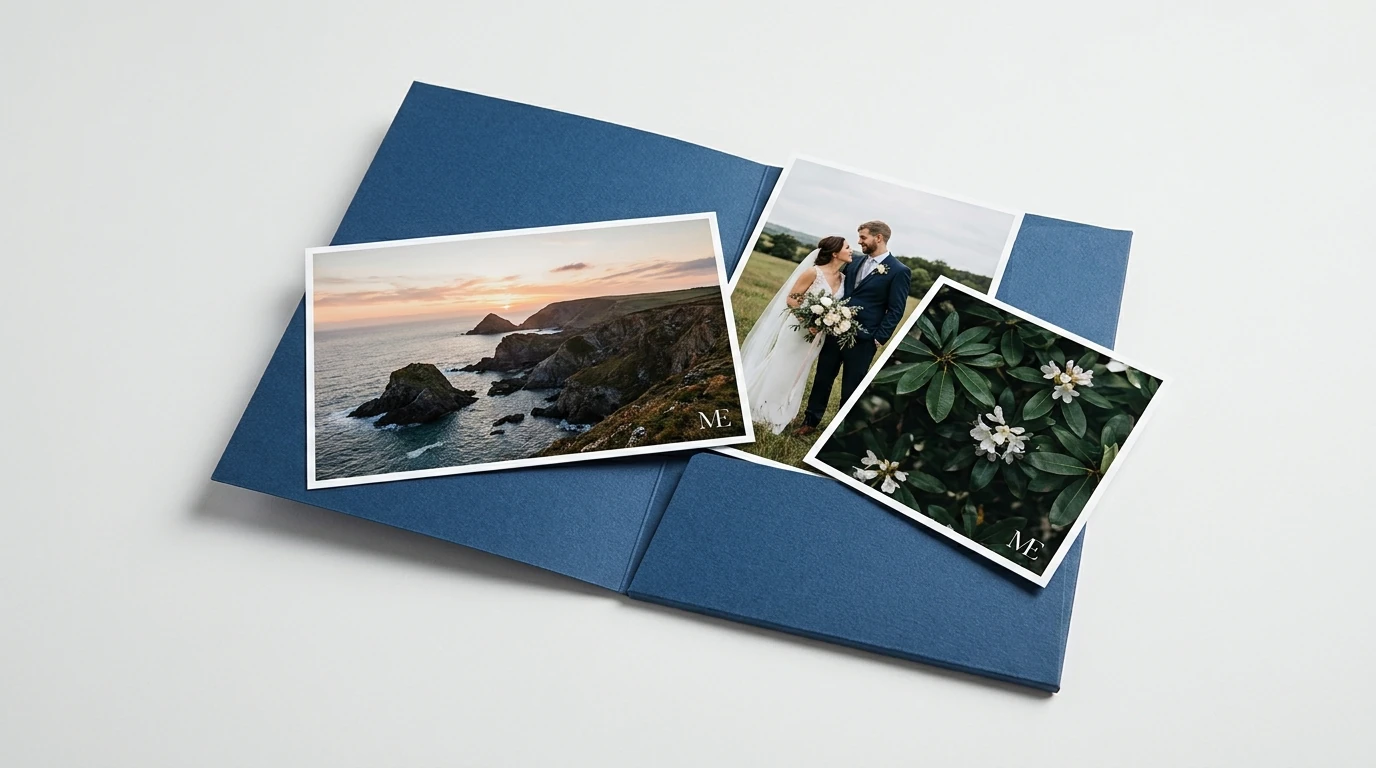

To brand an entire folder of photos consistently, define one logo or text treatment, give it repeatable sizing and placement rules, and apply those rules to every image in a batch. The important part is making the branding look consistent across different photos—not simply placing an identical number of pixels on every file.
Bulk Image Watermarker: Automated Batch Logos is a Photoshop plugin that automates this workflow. You can use a logo, create a text signature, control its size and margins, and export branded copies while preserving your originals. You can also adjust the treatment automatically for different image orientations or brightness levels.
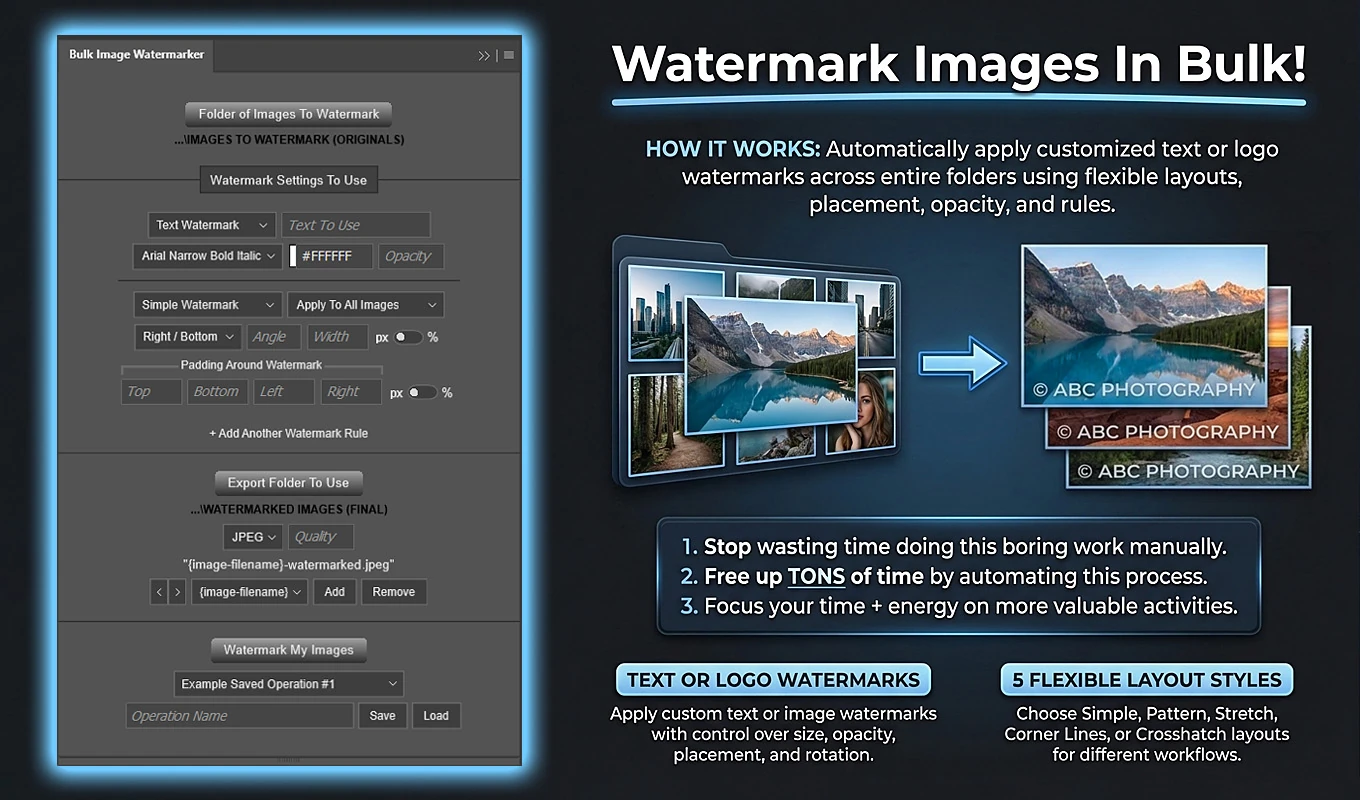
The following workflow starts with a straightforward corner logo, then shows how to handle the variations that commonly appear in a photography collection.
1. Prepare the photo folder and your branding asset
Start with the photos you actually intend to deliver or publish. Complete your editing, cropping, and any required delivery-size resizing first. Bulk Image Watermarker primarily adds watermark content within the existing canvas; it does not normally change the photo’s dimensions.
If your shoot starts as RAW files, first prepare supported image files such as JPEG or TIFF. The plugin also accepts formats including PNG and PSD. Put the intended photos directly inside one source folder: it processes supported files in that folder, not arbitrary nested subfolders.
Next, choose the identity you want viewers to see:
- A logo or wordmark supplied as an image file.
- A text signature, such as your name followed by “Photography.”
- A combination of a logo and a separate attribution line.
For a logo, use a source file that already has the appearance you want. A transparent-background logo is usually preferable to one enclosed in an unwanted white rectangle. If you need both light and dark versions, prepare those as separate assets.
Install Bulk Image Watermarker through Adobe Exchange or Adobe’s Creative Cloud plugin marketplace, then open it from Photoshop’s Plugins menu. Keep a separate destination folder ready for the branded copies so they are easy to distinguish from your clean photographs.
2. Separate visual consistency from identical pixel dimensions
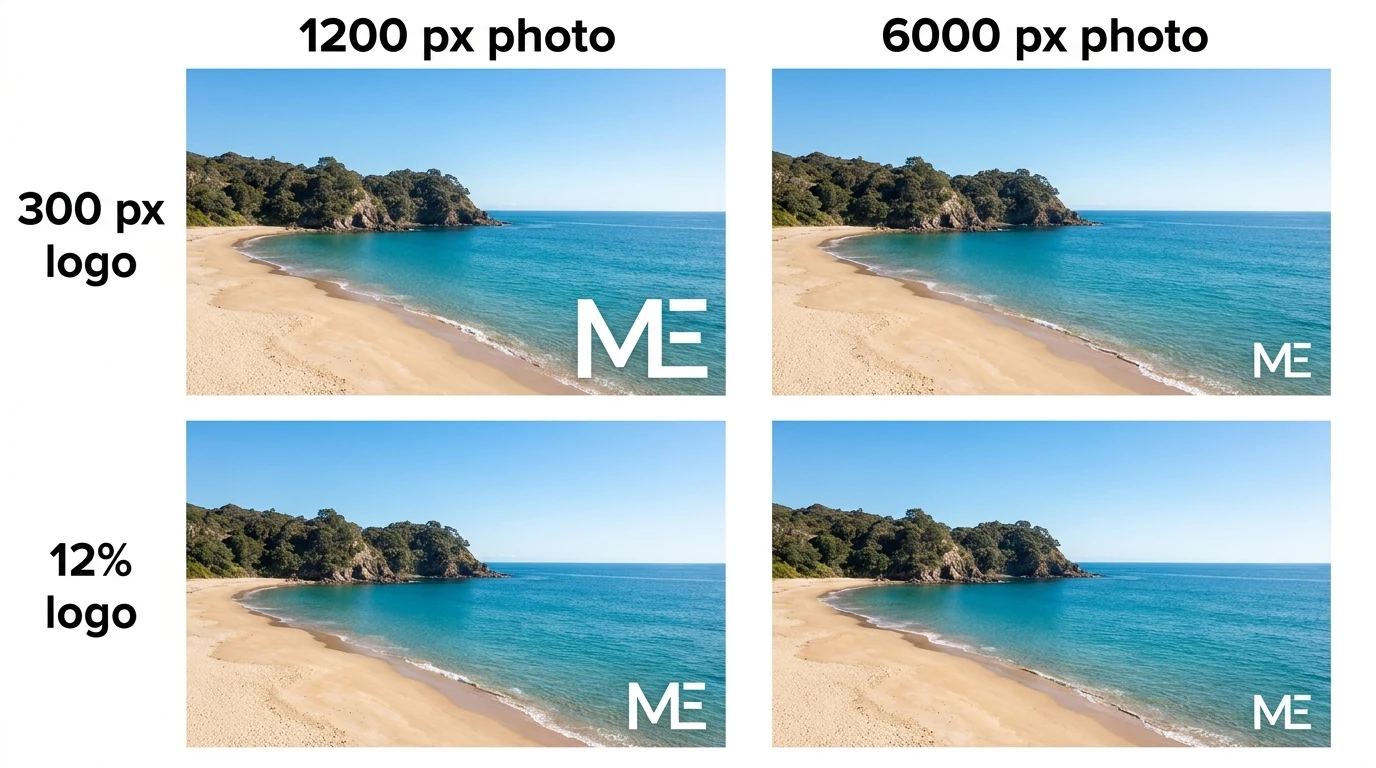
A fixed-width logo is not always a consistently sized logo in visual terms. A 300-pixel-wide mark occupies a quarter of a 1200-pixel-wide image, but only a twentieth of a 6000-pixel-wide image. The same setting can therefore look dominant on one photo and almost disappear on another.
Percentage-based width solves this particular problem. In the Simple Watermark layout, percentage width is calculated from the current image’s width.
- On a 1200-pixel-wide photo, a 12% watermark has a target width of 144 pixels.
- On a 6000-pixel-wide photo, the same 12% setting produces a target width of 720 pixels.
The watermark scales proportionally, preserving its own aspect ratio. This makes percentage width a useful starting point for a collection containing different resolutions.
Margins can also be relative. With percentage padding, left and right margins use the photo’s width, while top and bottom margins use its height. A 3% bottom margin therefore adapts to each photo rather than remaining a fixed pixel distance from the edge.
Fixed pixels are still useful when every delivery image has the same dimensions and you want an exact absolute size. For mixed-resolution collections, however, percentage width and padding generally provide a more coherent starting standard. Mixed portrait and landscape compositions may need an additional adjustment, which you can handle with orientation-specific rules.
3. Build a bottom-right logo rule in Photoshop
For ordinary photographer branding, Simple Watermark is the most direct layout: it places one text or image watermark on the photo, with control over width, rotation, alignment, and edge padding.
Here is a practical starting recipe for a discreet corner logo. Treat the numbers as an initial design choice to evaluate against your own photographs, not as a universal branding standard.
- Select Folder of Images To Watermark and choose your prepared photo folder.
- In Watermark Rule #1, set Watermark Style to Image Watermark.
- Click Image To Use and select your logo file.
- Choose Simple Watermark as the layout.
- Set Alignment to Right / Bottom and Angle to 0°.
- Set Width to 12 and select % for the width unit.
- Select percentage padding and enter 3 for Top, Bottom, Left, and Right.
- Start with Opacity at 70, then adjust after inspecting sample outputs.
- Leave the application setting on Apply To All Images.
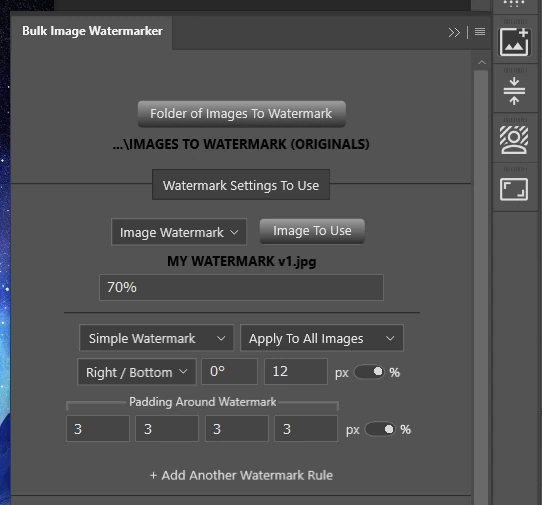
This establishes a proportional logo width, an unrotated presentation, and a repeatable bottom-right position. If that corner regularly contains important subjects in your work, choose another alignment. Simple Watermark supports nine positions, including centered and edge-centered placements—not just the four corners.
The padding is a boundary constraint rather than a guarantee that any requested size will fit. If a watermark is too large for the usable padded area, the plugin can scale it down proportionally. With a modest corner-logo recipe, this safeguard helps the placement behave more robustly across different image dimensions.
4. Use a text signature instead of—or alongside—a logo
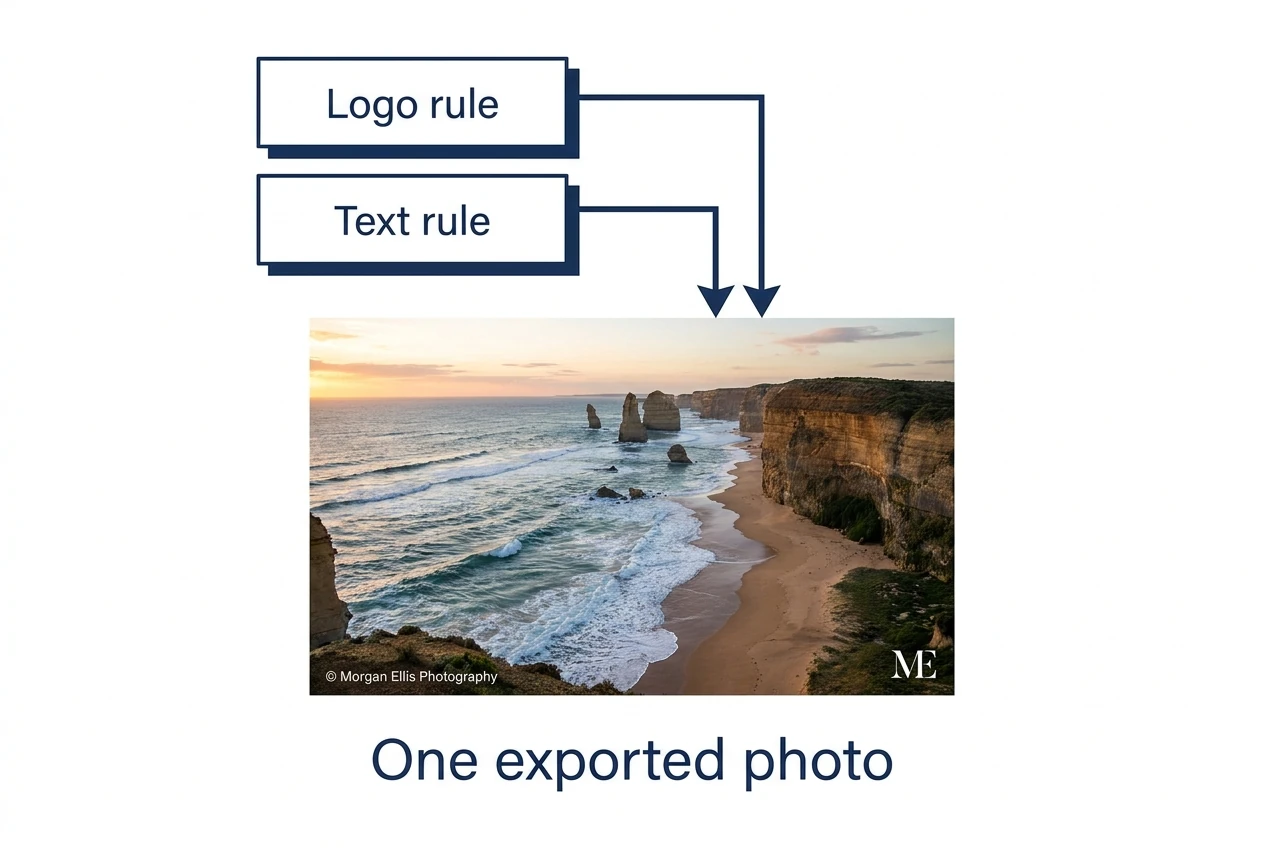
If your photographic identity is primarily your name, you do not need to create a separate graphic. Change Watermark Style to Text Watermark and enter the exact attribution you want, such as “© Morgan Ellis Photography.”
Choose a font from those available to Photoshop, set a hexadecimal text color, and configure opacity. You can then use the same Simple Watermark alignment, percentage width, and padding approach as the logo recipe.
For example, white text using #FFFFFF can provide a restrained signature on darker photographs. Keep the wording, capitalization, and typeface fixed across the collection. Changing the length of the text while keeping the same target width changes how the lettering fits within that width, so settle the wording before approving its size.
If you want both a logo and a separate attribution line, click + Add Another Watermark Rule. You might place the logo at Right / Bottom and a smaller text credit at Left / Bottom.
These rules are cumulative. If both qualify, both are added to the same working image, which is exported once. Adding another rule does not create a separate alternative version of the photograph.
5. Keep the brand recognizable across different photographs
One treatment may work across a carefully controlled series. A mixed wedding gallery, travel collection, or event shoot can contain much greater variation. The aim is to preserve the identity while adapting only the parts needed for visibility and composition.
Use light and dark treatments where necessary
A white signature can disappear against a pale sky; a black signature can disappear into a dark suit. For a text-only branding setup, a useful starting pair of rules is:
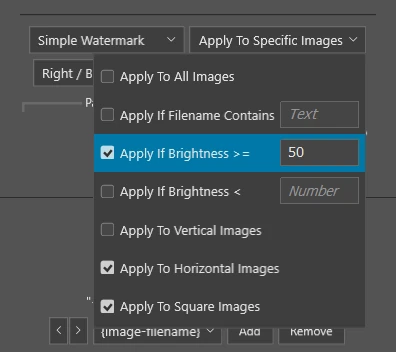
- White text, #FFFFFF, with Apply If Brightness < set to 50.
- Black text, #000000, with Apply If Brightness >= set to 50.
Keep the wording, font, target width, alignment, and padding consistent between the two. For image logos, select separate light and dark logo files instead—the text-color control does not recolor an Image Watermark.
The brightness decision uses an average calculated from Photoshop’s document histogram. It does not measure only the area directly beneath the logo. A generally dark photo can still have a bright bottom-right corner, so inspect representative results before relying on the treatment across the full collection.
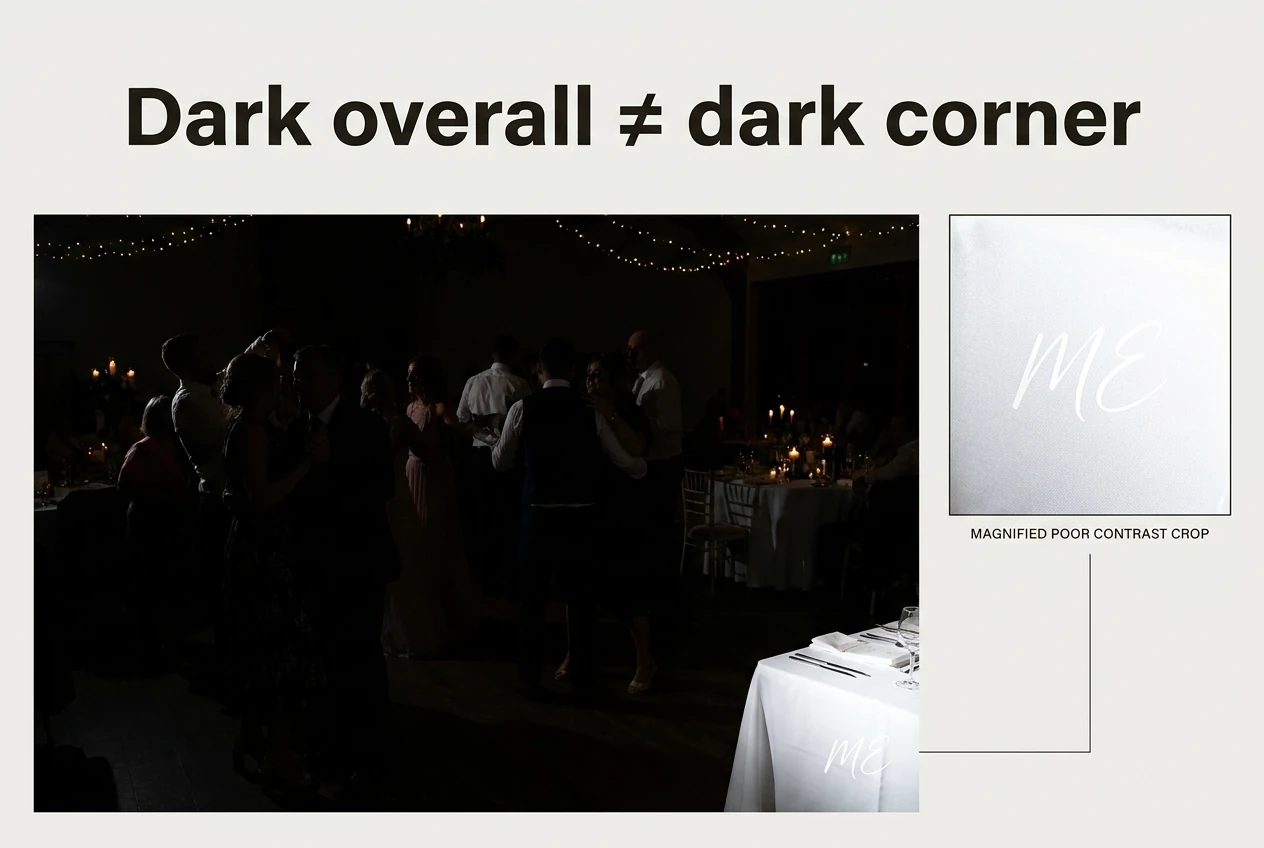
Rules also run sequentially on the current working document. Test the complete rule stack, particularly on photographs near your brightness cutoff, rather than treating it as a separate, guaranteed-exclusive color-switching mode.
Adjust proportions for portrait and landscape compositions
Percentage width follows image width, but that does not make every composition feel identical. A wide landscape and a narrow portrait may benefit from different logo-width percentages even when they use the same asset and margins.
You can create one rule for Apply To Vertical Images and another for Apply To Horizontal Images, then tune each against representative photos. Include a square-image rule if your collection contains square crops, or select Square alongside another orientation where the same treatment works.
Multiple selected orientations within one rule use OR logic: Vertical plus Square accepts either. If you combine orientation with brightness or a filename condition, those different condition categories must also match. Configure each new rule fully, because additional rules start from the normal defaults rather than copying the previous rule’s settings.
6. Export the folder as branded delivery copies
Once the branding is configured, choose the destination, output format, and naming pattern. These are global operation settings: individual watermark rules do not each have their own export format.
- Click Export Folder To Use and select your destination folder.
- Choose the output format. JPEG is a practical choice for ordinary shareable photo copies; use another supported format when your delivery requirements call for it.
- Set Quality where applicable. For a JPEG test, 90 is a reasonable starting value to evaluate against your delivery needs.
- Keep or customize the filename format. The default source-name-plus-watermarked pattern makes the derivative files easy to recognize.
- Click Watermark My Images to validate and begin processing.
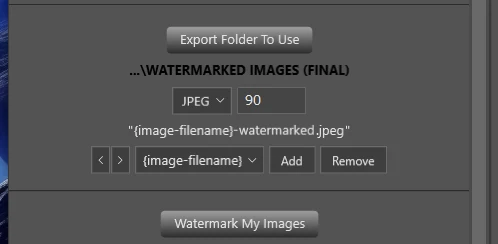
For example, a source named IMG_4821.jpg can become IMG_4821-watermarked.jpg when exported as JPEG with the default naming pattern. Existing output names receive numbered alternatives rather than being silently replaced.
The plugin opens each source photo, evaluates the watermark rules in order, adds every qualifying watermark, and exports the combined result. It then closes the source document without saving, preserving the original file.
There is one important detail when using conditional branding: if no rule applies to a photo, that photo is not exported. A portrait-only and landscape-only rule set, for instance, leaves square images without an output unless another rule covers them. Keep Apply To All Images for a simple universal treatment, or deliberately cover every image category you intend to deliver.

During processing, the Watermarking Your Images... progress modal shows progress by source image. You can stop the operation with Cancel Operation or the Escape key.
7. Prove the branding on a representative mini-batch
Before committing an entire collection, create a small test folder containing copies of representative photographs and run the actual export workflow on that folder. This tests the finished files, not just the appearance of one manually prepared example.
Include the variations that could change the result:
- A bright image and a dark image.
- Portrait, landscape, and square photos where relevant.
- The smallest and largest image dimensions in the collection.
- A photo with a busy background near the intended logo position.
- A photo with a face, hand, dress detail, or other important subject near that edge.
- Images near any brightness threshold used by your rules.
Judge the exports at their expected viewing size. A signature can look elegantly restrained when zoomed in but become unreadable when the entire photo is displayed. Conversely, a mark that feels modest on a large monitor may dominate a small delivered image.
Check four things: whether the identity is readable, whether its apparent size feels consistent, whether the margins look intentional, and whether it avoids distracting from the photograph. Also confirm that every test image you expected to receive an output actually received one.
If a result fails, change the rule responsible rather than fixing individual exported photos by hand. Adjust width, opacity, alignment, padding, or application conditions, then rerun the small batch. Once it passes, select the full source folder and your final export destination before starting the complete job.
8. Save the approved setup for your next collection
After approving the branding and confirming the final folder selections, enter an Operation Name and click Save. Use a descriptive name such as “Studio branding — corner logo — JPEG” so you can distinguish it from a client-proof or alternative delivery setup later.
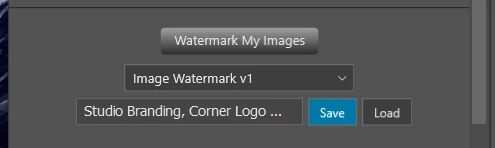
A Saved Operation preserves the watermark rules, selected assets, text and font settings, opacity, layout, sizing, padding, conditions, export settings, and filename components. It also remembers the source and destination folders.
For the next photography collection, select the saved operation and click Load, then check the folder selections before running it. Update them to the new shoot and delivery location. If a saved logo file or folder has moved or become inaccessible, select it again when prompted.
The result is a repeatable photographer-branding workflow: one approved identity, deliberate sizing and placement, tested variations where needed, and a folder of branded copies without altering your clean originals. Start with one Simple Watermark rule in Bulk Image Watermarker, validate it on a small collection, and save the setup once it represents your work the way you want.