How To Automate AI Upscaling Across Images With Different Starting Resolutions

To automate AI upscaling across images with different starting resolutions, you need a batch workflow that checks each image against the selected AI model’s output limit. Applying the same 4× request blindly is not enough: it may work for a small image but exceed the model’s capacity for a larger one.
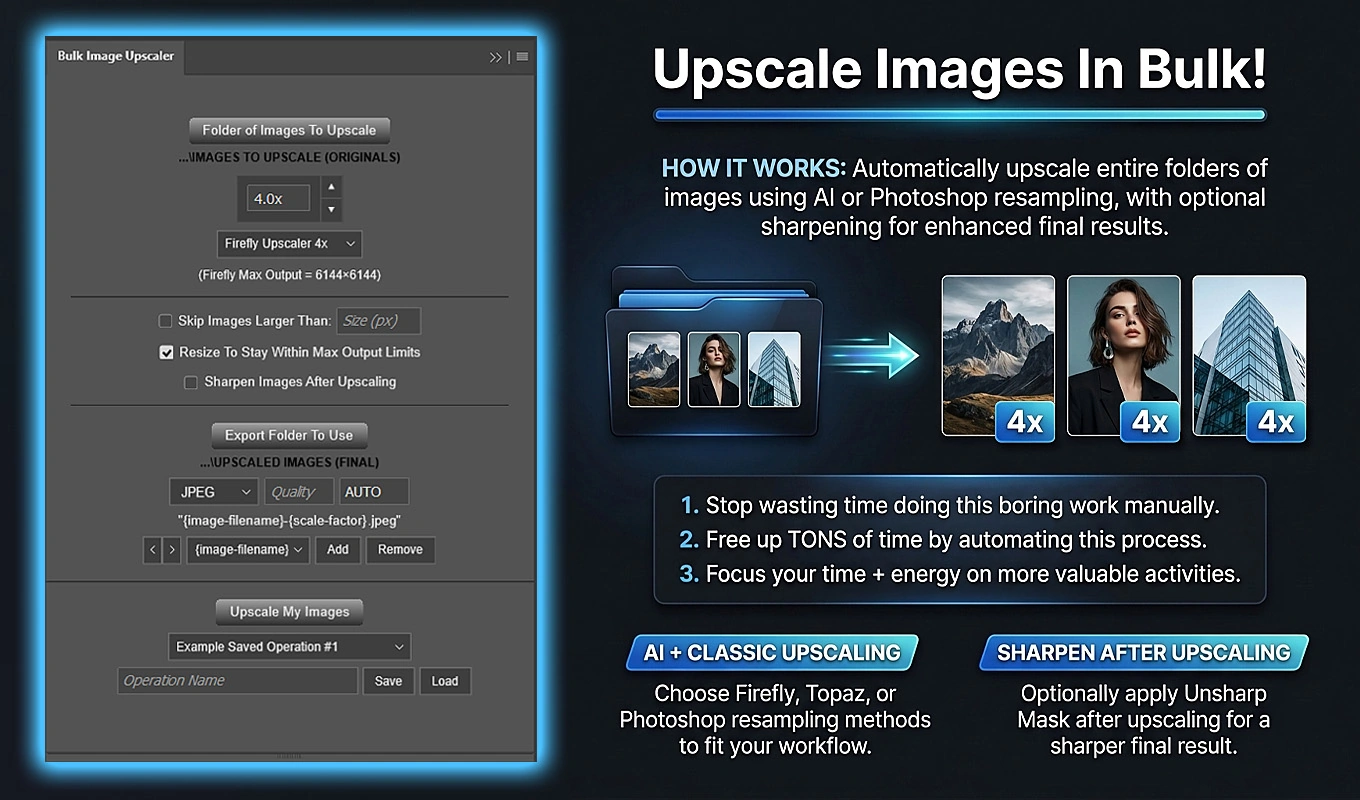
Bulk Image Upscaler: Batch-Enhance Resolution provides this workflow inside Photoshop. You select a source folder, choose an AI model and a 2× or 4× variant, configure the export, and run the batch. Its automatic output-limit handling evaluates each source individually, keeping the requested enlargement when it fits and adjusting oversized requests when necessary.
You do not have to resize every source to matching dimensions first. The important distinction is between using one consistent workflow and expecting every image to receive an identical effective enlargement.
1. Start With Pixel Dimensions, Not DPI
For AI output-limit calculations, “starting resolution” means the source image’s width and height in pixels. A 1200×800 image and a 4000×3000 image create very different output requests, even when both are set to the same DPI.
An enlargement factor applies to both dimensions. At 2×, a 1200×800 source becomes 2400×1600. At 4×, it becomes 4800×3200. Because both dimensions increase, 2× produces four times the original pixel count, while 4× produces sixteen times the original pixel count.
This explains why mixed-resolution folders need per-image checks. A multiplier that is comfortably within the model’s limit for one source can exceed it for another.
DPI is a separate document-resolution setting, not a way to bypass an AI model’s pixel limit. Bulk Image Upscaler fixes its DPI field to AUTO when an AI method is selected. Start your planning with source pixel dimensions and the model’s output ceiling, rather than trying to solve an oversized request by changing DPI.
2. Prepare One Source Folder and One Photoshop Batch
Install Bulk Image Upscaler through Adobe Exchange or Adobe’s Creative Cloud plugin marketplace, then open it from Photoshop’s Plugins menu. The AI workflows require an installed Photoshop version that supports Generative Upscale; the plugin checks for that support before allowing them to run.
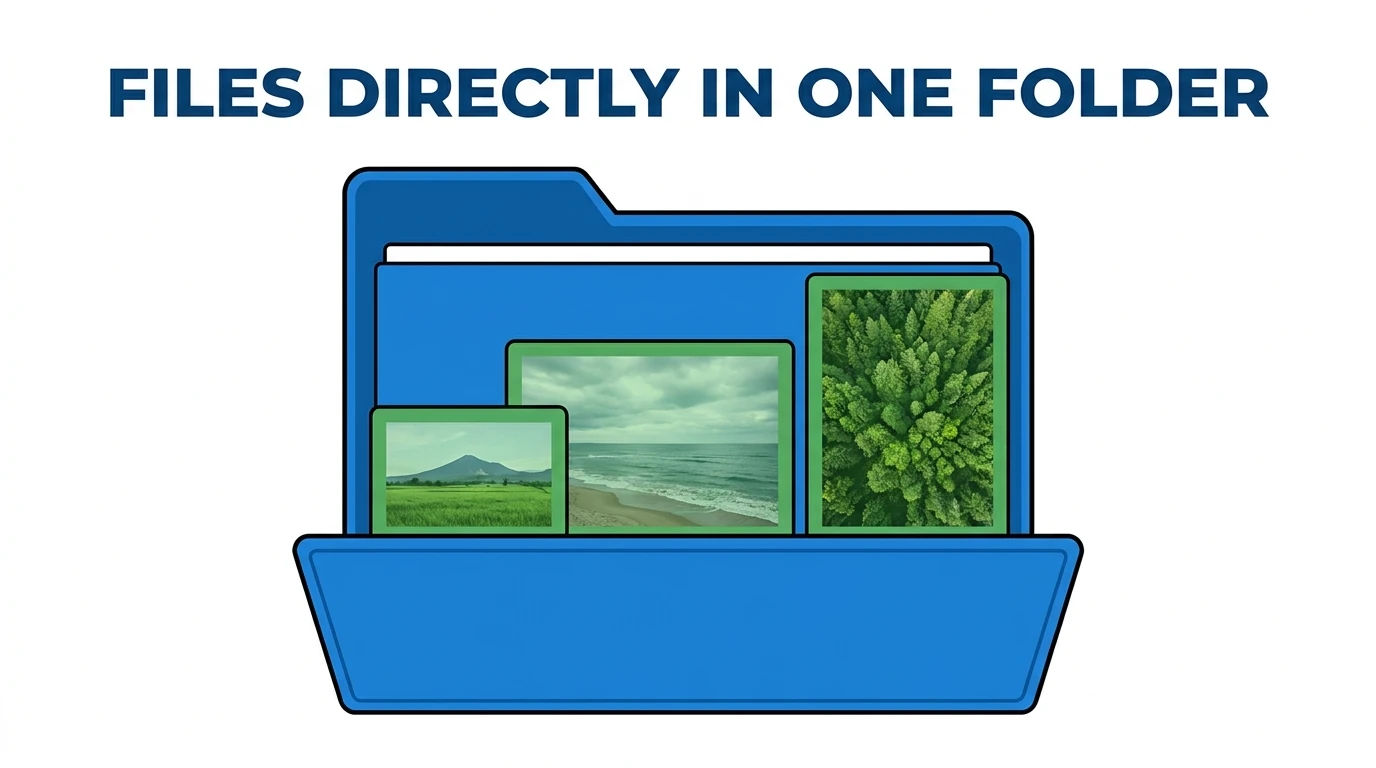
Use Folder of Images To Upscale to select your source directory. The plugin processes supported images directly inside that folder, including formats such as JPEG, PNG, TIFF, PSD, and WebP. It does not recursively collect images from nested subfolders, so place the files intended for this operation directly in the selected folder.
You can leave differently sized sources together. There is no need to create separate folders solely because some images are small, some are medium-sized, and others are much larger.
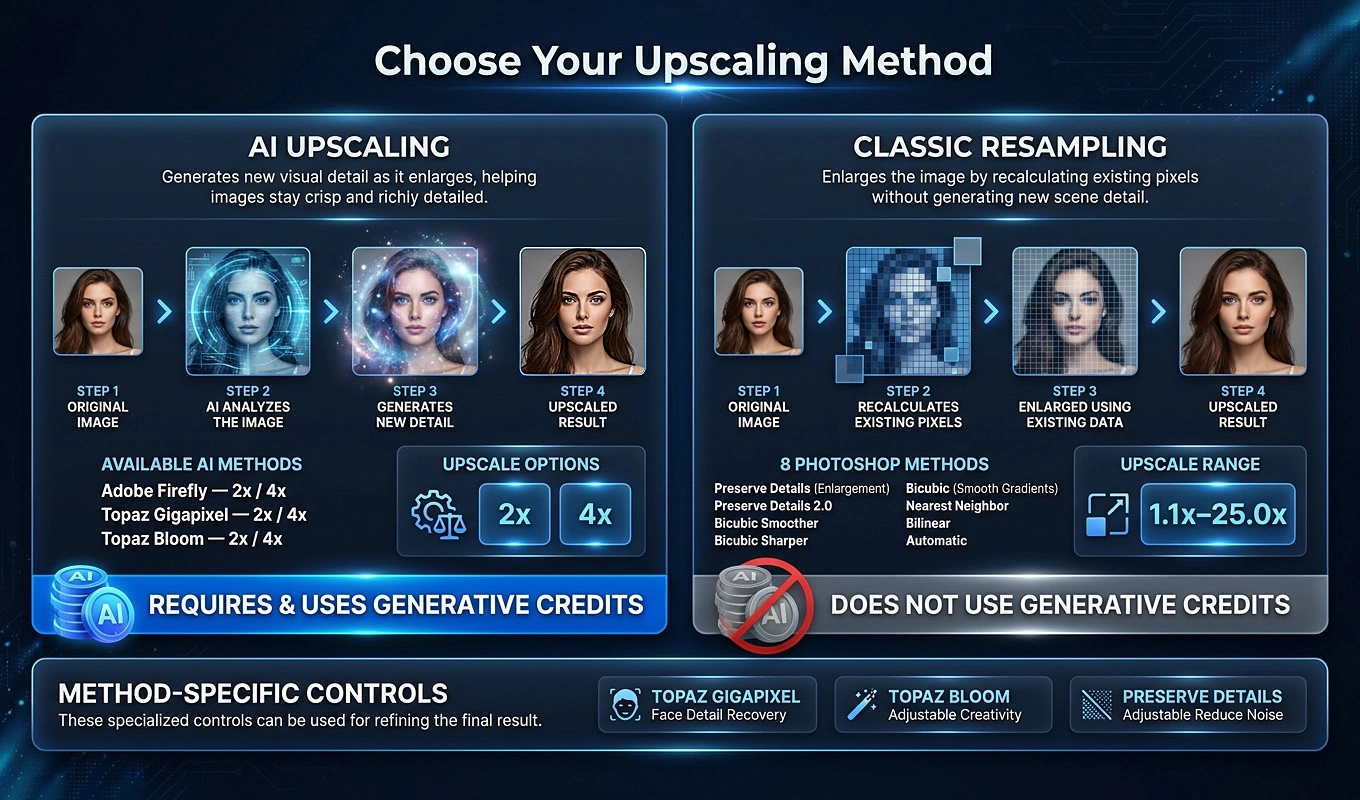
One operation uses one primary AI model family and scale configuration. For example, you can request Firefly Upscaler 4x across the folder, with automatic limit handling adapting individual images within the Firefly family. This is not a system for assigning Firefly to one file and Gigapixel to another inside the same operation.
The plugin reads the folder’s current contents when the operation begins, rather than freezing the file list when you first select it. Keep that in mind if files are added or removed while you are preparing the batch.
3. Know the Output Ceilings for Each AI Model
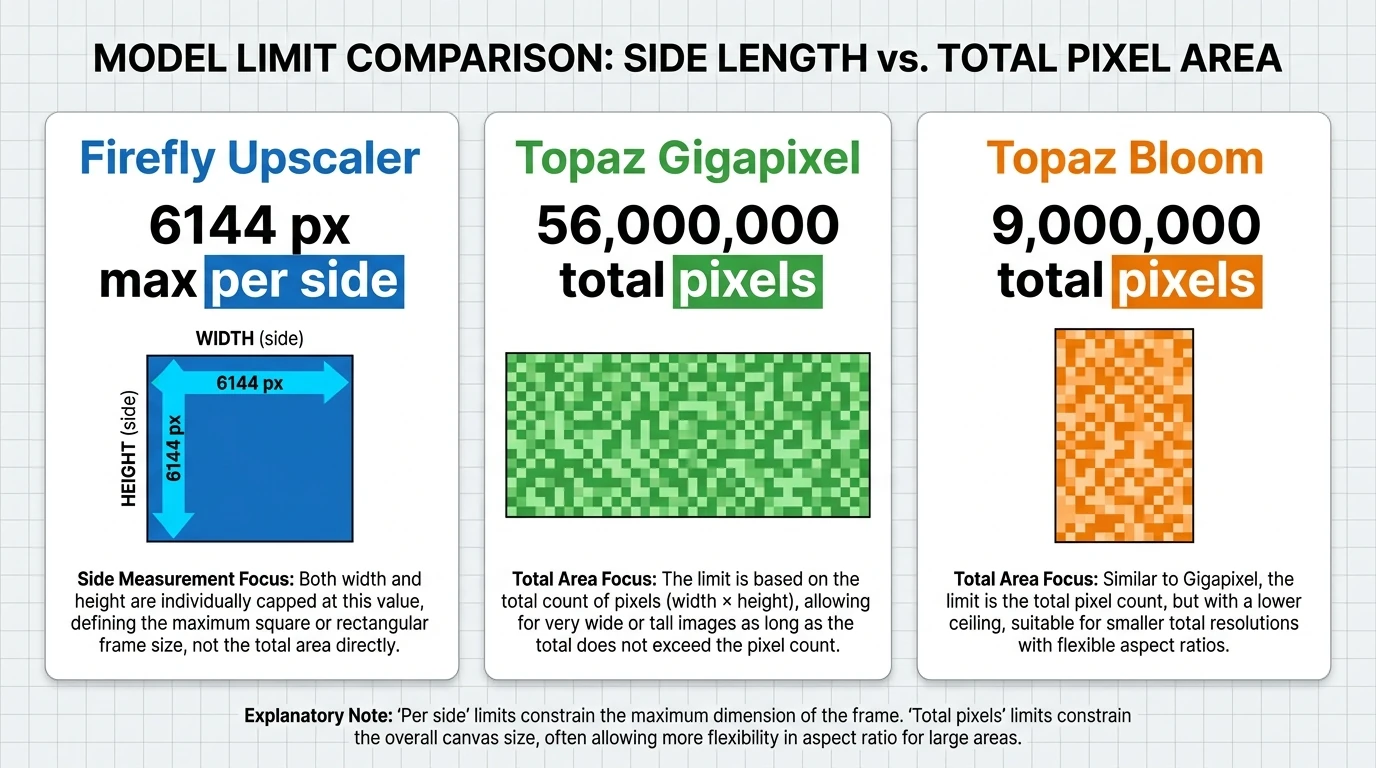
Bulk Image Upscaler exposes three AI model families through Photoshop’s Generative Upscale functionality. Each has a 2× and a 4× selection, but their output restrictions are different:
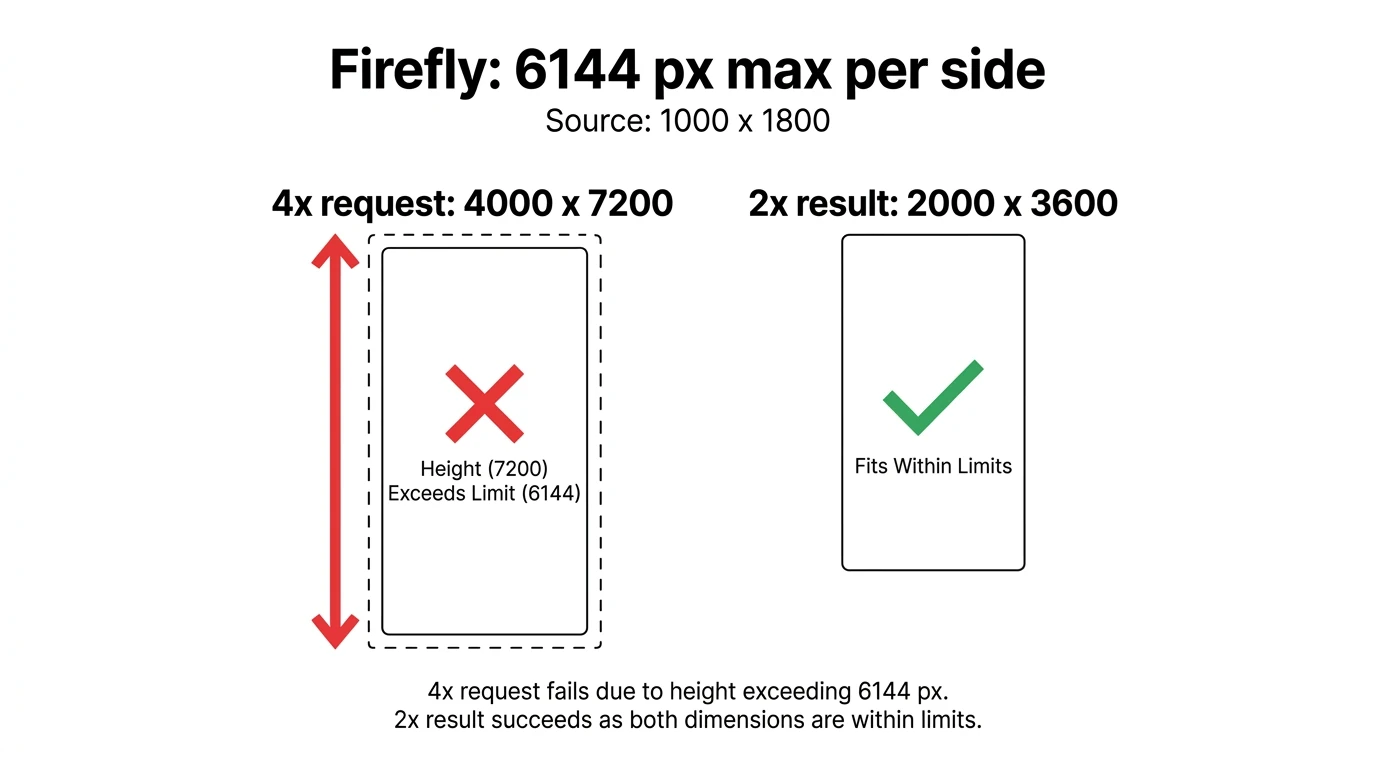
- Firefly Upscaler: the output must stay within 6144 pixels in width and 6144 pixels in height.
- Topaz Gigapixel: the output must stay within 56,000,000 total pixels.
- Topaz Bloom: the output must stay within 9,000,000 total pixels.
The distinction between a dimension limit and a total-pixel limit matters. Firefly checks each side. Gigapixel and Bloom check the output’s total pixel area, so a wide rectangular image can have a longer side than the square-size equivalent shown in the interface.
The plugin displays Gigapixel’s limit as approximately 7483×7483 and Bloom’s as 3000×3000. Those are square-image equivalents, not universal per-side restrictions for those two models.
The available method-specific controls also differ. Gigapixel offers optional Face Detail Recovery, which is relevant for images containing people. Bloom exposes Creativity from 0 through 10. Firefly has no additional method-specific control in this plugin.
Selecting an AI method automatically synchronizes the scale factor with its 2× or 4× variant. AI methods do not accept arbitrary enlargement factors such as 1.7× or 3.5×.
4. Let Automatic Limit Handling Adapt Each Image
The key capability for mixed-resolution automation is Resize To Stay Within Max Output Limits. It is enabled by default for AI methods and must remain enabled. If you attempt to disable it, the plugin restores the setting and explains that it is a required Smart Default.
This feature resolves oversized requests in a specific order:
- If the requested enlargement fits the selected model’s limit, the plugin leaves the source dimensions and requested scale unchanged.
- If a requested 4× result would exceed the limit, it evaluates the corresponding 2× variant and uses it when that preserves more original source information.
- If even 2× would exceed the limit, it proportionally reduces the source just enough for the 2× operation to fit, then performs the AI upscale.
The source pre-resize uses Photoshop Bicubic interpolation and preserves aspect ratio. It takes place in the working document; the original source file is not rewritten.
This order matters. Shrinking a large source aggressively just to retain a nominal 4× multiplier would discard more source pixels than using 2× on a larger version of that source. The plugin prioritizes retaining source information rather than preserving the originally selected multiplier at all costs.
The adjustment is evaluated for each image. A small source can still receive 4× while a larger source in the same folder receives the corresponding 2× operation.
5. Follow a Firefly 4× Batch Across Four Starting Sizes
Suppose you select Firefly Upscaler 4x and your folder contains the following four images. With no source-size skip excluding them, the output-limit handling produces these outcomes:
- 1200×800 source: the requested 4× output is 4800×3200. Both sides fit within 6144 pixels, so the operation remains 4× without a source pre-resize.
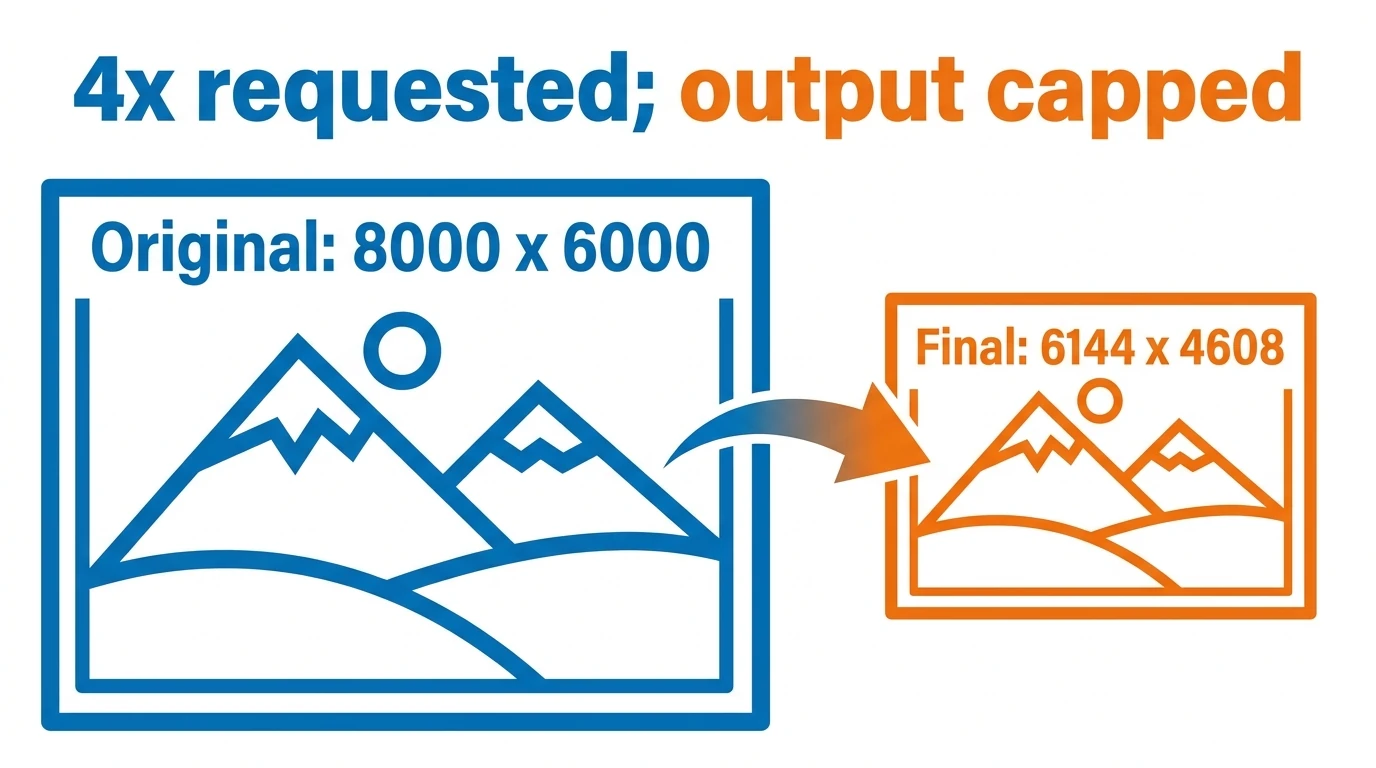
- 2000×1500 source: the requested 4× output would be 8000×6000. The width exceeds Firefly’s limit, but 2× produces 4000×3000. The corresponding 2× method can therefore use the original source dimensions.
- 1000×1800 portrait source: the requested 4× output would be 4000×7200. The height exceeds the limit. At 2×, the result is 2000×3600, which fits without reducing the source.
- 4000×3000 source: even 2× would produce an oversized 8000×6000 output. The source is proportionally reduced to 3072×2304, allowing the 2× operation to produce 6144×4608.
The portrait example is important: checking only image width would miss its oversized height. Firefly requires both dimensions to fit.
This batch also shows why you should not pre-resize all four sources to a common size. The smallest image already supports the full requested 4× enlargement, while the two middle examples can retain all their source pixels at 2×. Only the largest example needs a source reduction.
6. Check Rectangular Topaz Images by Total Pixels
Gigapixel and Bloom require a different calculation from Firefly. For those models, multiply the proposed output width by the proposed output height and compare the result with the model’s total-pixel limit.
Gigapixel: A Longer Side Can Still Fit
A 2000×1000 source enlarged at 4× becomes 8000×4000. That is 32,000,000 output pixels, below Gigapixel’s 56,000,000-pixel ceiling.
Although the output width exceeds 7483 pixels, the request fits the underlying total-pixel constraint. Treating the interface’s 7483×7483 display as a strict limit on each side would incorrectly classify this image as oversized.
Bloom: The Same Principle Applies at a Smaller Ceiling
A 1000×500 source enlarged at 4× becomes 4000×2000. That is 8,000,000 pixels, which fits Bloom’s 9,000,000-pixel limit despite the width exceeding 3000 pixels.
By contrast, a 1500×1000 source at 4× would become 6000×4000, or 24,000,000 pixels. The corresponding 2× output is 3000×2000, or 6,000,000 pixels, so it can fit without a source pre-resize.
You do not need to perform these calculations manually for every file when using the plugin. Understanding them helps you interpret the results correctly and choose representative images for testing.
7. Treat 4× as a Requested Multiplier, Not a Promised Final Size
A mixed-resolution AI batch does not normalize every image to the same output dimensions. Different starting sizes normally produce different ending sizes, and automatic limit handling can change the effective operation for individual files.
A 4× selection therefore does not guarantee that every export will be four times the original source width and height. An oversized request can become 2×. If the source must also be reduced before that operation, the final dimensions are twice the adjusted source dimensions, not twice the original file’s dimensions.
There is another consequence worth understanding: if the original source already exceeds the selected model’s output capacity, a limit-compliant AI result can have fewer pixels than the original. Automatic handling keeps the request within the model’s constraints; it cannot make the model generate beyond those constraints.
Define what counts as a usable result before running the full batch. If your delivery requires a minimum pixel size, check that requirement against the actual exports. If it requires every image to have exactly the same width and height, this scale-based upscaling workflow alone does not establish that common target size.
8. Skip Sources That Do Not Need Enlargement
Automatic output-limit handling answers, “How can this image be processed within the selected model’s limits?” Skip Images Larger Than answers a different question: “Do I want to upscale this source at all?”
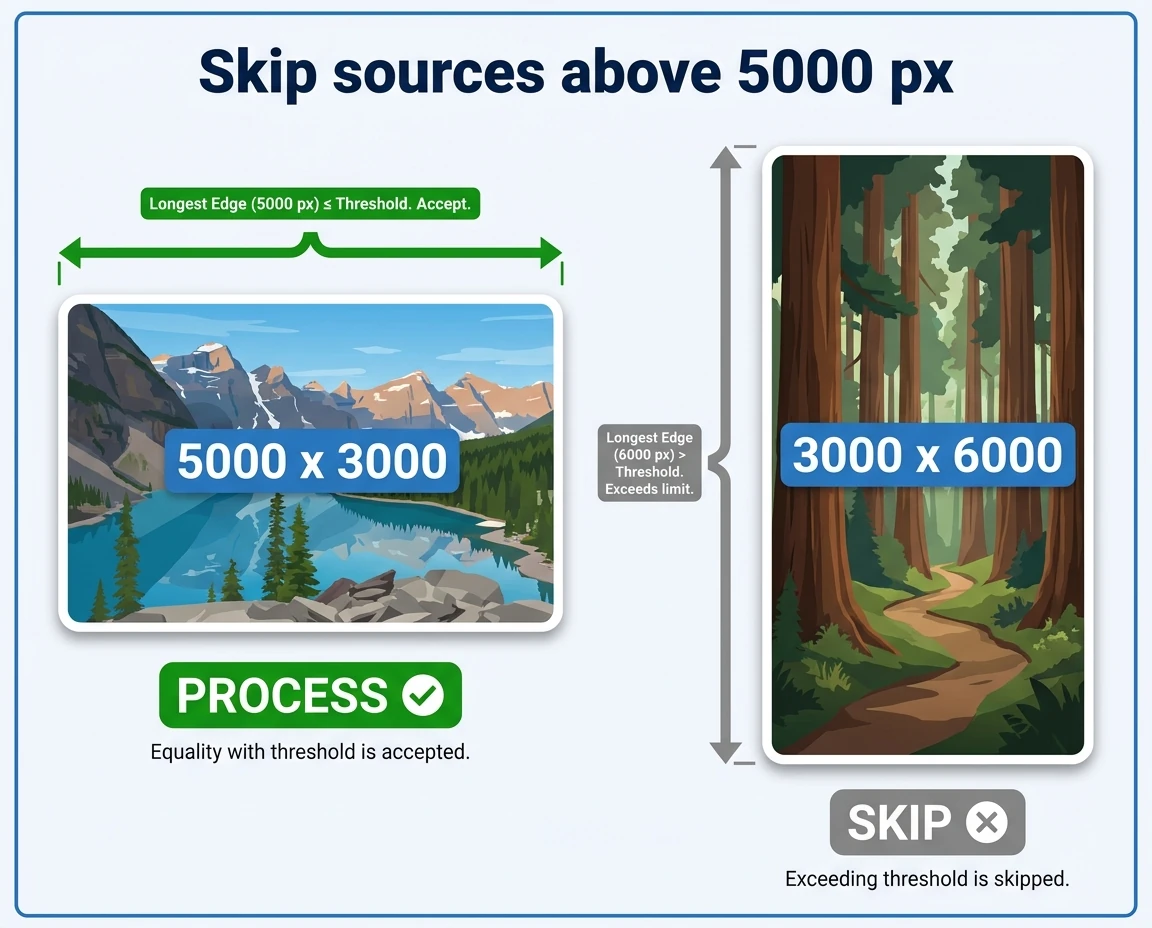
Enable Skip Images Larger Than and enter a source-size threshold. The plugin skips an image if either its original width or original height exceeds that value. The threshold acts as a maximum source longest edge, not a maximum output size.
For a 5000-pixel threshold:
- A 4000×3000 source is eligible for processing.
- A 3000×6000 source is skipped.
- A 7000×2000 source is skipped.
The accepted threshold range is 1 through 100,000 pixels, using an integer. A source whose longest edge equals the threshold is not excluded by this setting; it must exceed the threshold to be skipped.
Use this control when your folder contains already-large images that do not need enlargement. It can avoid unnecessary AI processing and Generative Credit use. Do not use it as a substitute for model-limit handling, because the source threshold and the AI output ceiling measure different things.
9. Make Exported Filenames Describe the Actual Results
When some images receive 4× and others receive 2×, filenames become a useful way to inspect the batch without opening every output.
Use Export Folder To Use to choose the destination, then select the delivery format. JPEG, PNG, and WebP are among the supported export options. JPEG and WebP provide adjustable Quality settings; PNG remains lossless, with its Quality control affecting compression.
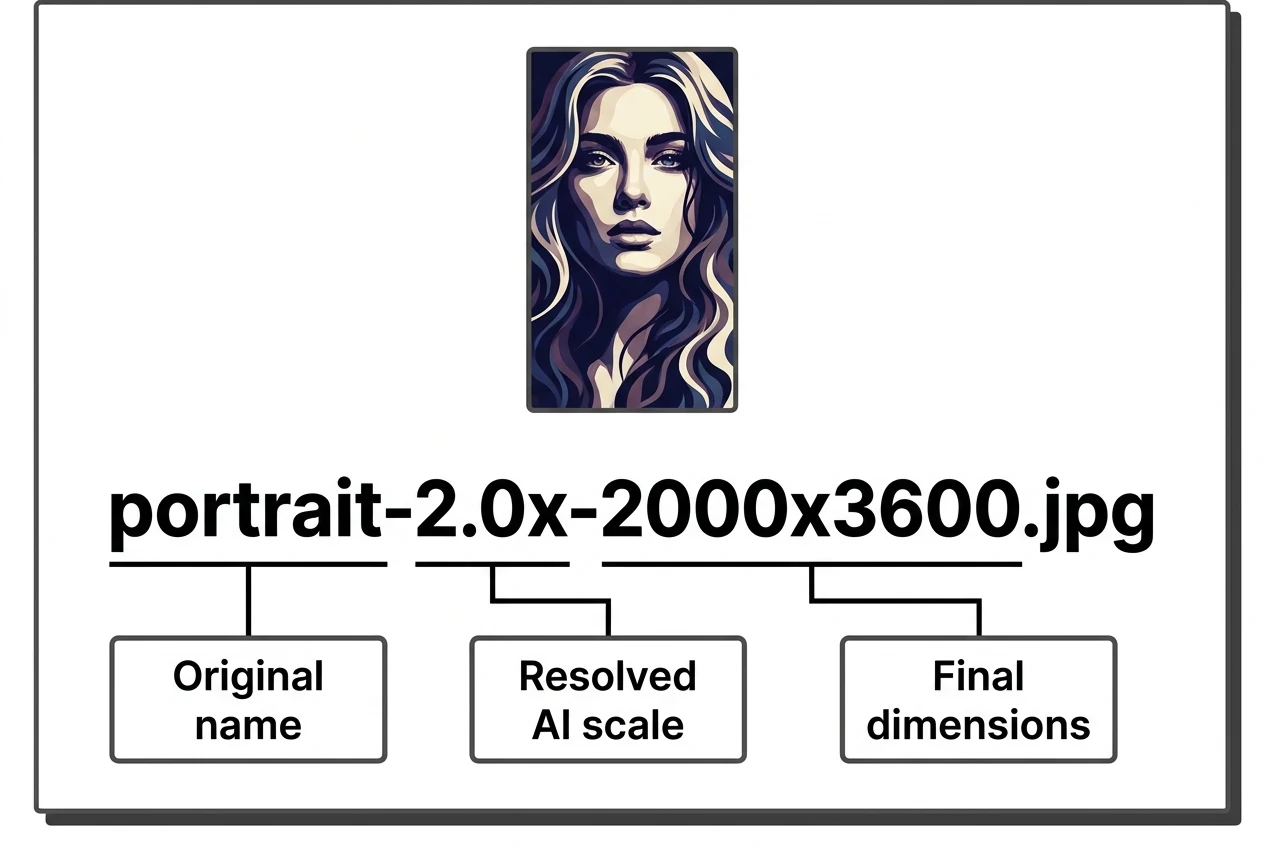
In the filename builder, a practical component order is {image-filename}, {scale-factor}, and {width}x{height}. The plugin joins the components with hyphens and adds the selected format’s extension.
For the portrait in the Firefly example, a source named portrait.jpg could produce portrait-2.0x-2000x3600.jpg. For the largest source, a name such as large-2.0x-6144x4608.jpg records the actual AI factor and final dimensions.
These values reflect the resolved operation, not just the initial 4× request. Remember that the 2.0x token describes the AI operation after any necessary source pre-resize; it does not necessarily describe the final size relative to the original file.
If you also want the method recorded, add {upscaling-method}. That component uses the method’s internal identifier. Existing output names receive numbered suffixes rather than being unintentionally overwritten, which is useful when testing or repeating a batch.
10. Test a Representative Mix Before the Full Run
A test containing only the smallest source will not reveal how the workflow handles larger files. Build a small temporary source folder with copies representing the situations in your actual batch:
- A small image expected to fit at the requested 4× scale.
- An image whose 4× output would exceed the limit but whose 2× output fits.
- An image that requires a source pre-resize even at 2×.
- A relevant content example, such as a portrait when testing Gigapixel Face Detail Recovery.
For Firefly, include a tall image as well as a wide one. For Gigapixel and Bloom, consider total pixel area rather than selecting test files solely by longest edge.
Inspect the test exports in Photoshop at 100% zoom and at the intended viewing or delivery size. Compare useful detail, faces where relevant, edges, textures, and visible artifacts. Dimensions tell you whether the file meets a size requirement; they do not, by themselves, establish whether the visual result is suitable.
These AI trial runs also use Generative Credits. Keep the sample purposeful, verify the resolved dimensions and filenames, and then apply the tested configuration to the production folder.
11. Save the Verified Mixed-Resolution Workflow
Once the test produces acceptable results, reselect the full production source folder and the intended export folder. Enter an Operation Name and click Save.
A saved operation preserves the relevant configuration, including the selected model and scale, source-size skip setting, method-specific controls, export settings, filename components, and folder selections. This makes the workflow reproducible without reconstructing the settings for every incoming batch.
Use a descriptive name that identifies the important choices, such as “Gigapixel 4x — Face Recovery — Skip Above 5000 — PNG.” The name should help distinguish this configuration from another operation with a different model or skip policy.
For future work, select the saved operation and click Load. The plugin restores its configuration and attempts to restore folder access. If a saved folder has moved or can no longer be accessed, you will need to choose it again.
Because source contents are read at run time, a recurring intake folder can contain a new set of differently sized images while the saved processing policy remains consistent.
12. Launch the Batch and Monitor Its Processing Stages
Before launching, confirm the source folder, export folder, AI method, skip threshold, and filename pattern. Then click Upscale My Images.
The plugin validates the operation and requires a Generative Credits acknowledgement for all six AI selections. In the Confirm Before Proceeding dialog, you must actively select the acknowledgement checkbox before Confirm can proceed.
Credit use can depend on the model, operation settings, and number of images. Review the batch with that in mind; selecting a folder is not, by itself, a commitment to begin processing.
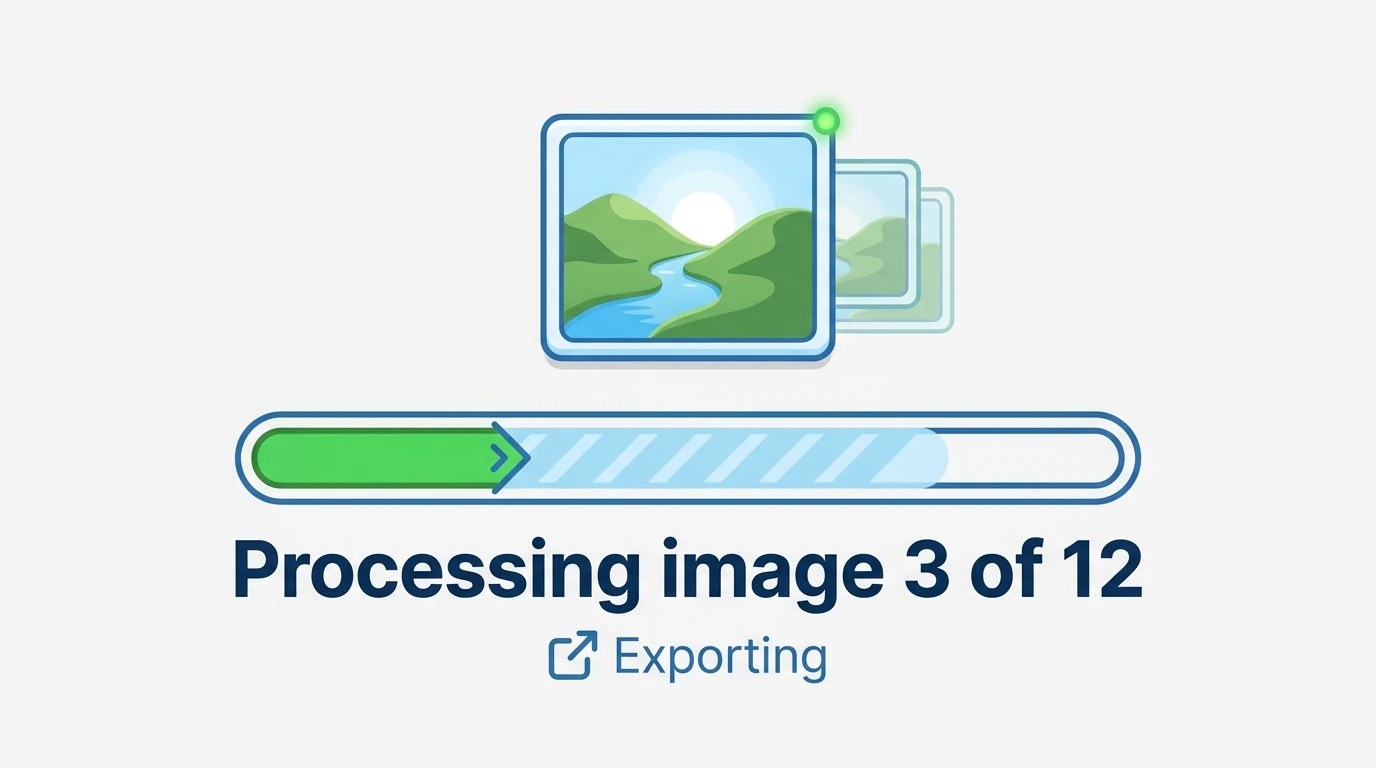
During the operation, the plugin opens each supported source, checks whether it should be skipped, resolves any model-size restriction, performs the AI upscale, exports the result, and closes the source document without saving changes.
The Upscaling Your Images... progress modal shows status information, a progress bar, and an image counter. Use it to follow the operation rather than manually opening and checking the next source’s dimensions yourself.
You can cancel with Cancel Operation or the Escape key. Cancellation is checked between major processing stages, and Photoshop may temporarily block normal plugin interaction while a generative command is executing. Expect cancellation to depend on the current processing stage rather than always interrupting an AI command immediately.
13. Review the Enlarged Outputs as a Delivery Set
When processing finishes, the exported results are directly inside the selected output folder. Review them as a set, separating two questions: did the workflow produce the expected dimensions, and are the images visually suitable for their destination?
A focused final check should include:
- Confirming that expected sources have corresponding outputs, accounting for images intentionally excluded by the skip threshold.
- Checking dimension-bearing filenames against any minimum delivery-size requirement.
- Reviewing representative 4×, fallback 2×, and pre-resized results rather than inspecting only one processing category.
- Checking important content, such as faces or fine textures, before approving the batch for use.
The originals remain available because the plugin exports new files and closes source documents without saving the enlarged versions over them. Keep those originals alongside your saved workflow so individual images can be revisited when necessary.
For a folder with varied starting resolutions, the practical advantage of Bulk Image Upscaler is not forcing every image through an identical oversized request. It is applying one defined AI workflow while resolving each image’s output constraints automatically—then giving you separately exported, clearly named results to review and deliver.