How To Automate Cropping An Entire Print-On-Demand Design Catalog For Different Product Formats
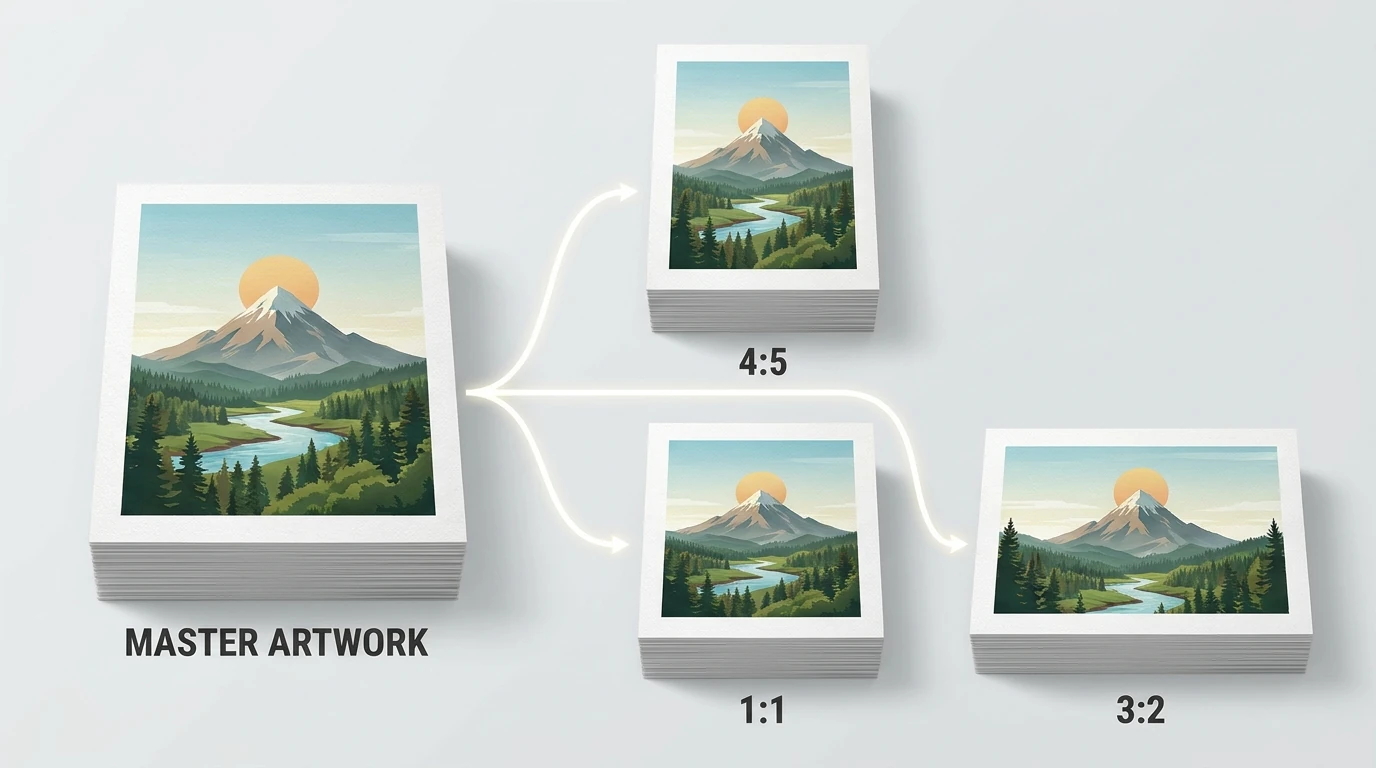

Turning one design catalog into artwork for several print-on-demand product formats is rarely just a cropping task. It is the same cropping, exporting, naming, and sorting task repeated across hundreds of designs. A square print, a portrait poster, and a transparent apparel graphic may all need different treatment—even when they originate from the same artwork.
Bulk Image Cropper: Automated Batch Cropping is a Photoshop plugin that automates that repetitive work. You select a source folder, configure independent crop rules for the required variants, and export the results into an organized output location. Each rule starts from the original design, so creating one product variant does not compromise the next.
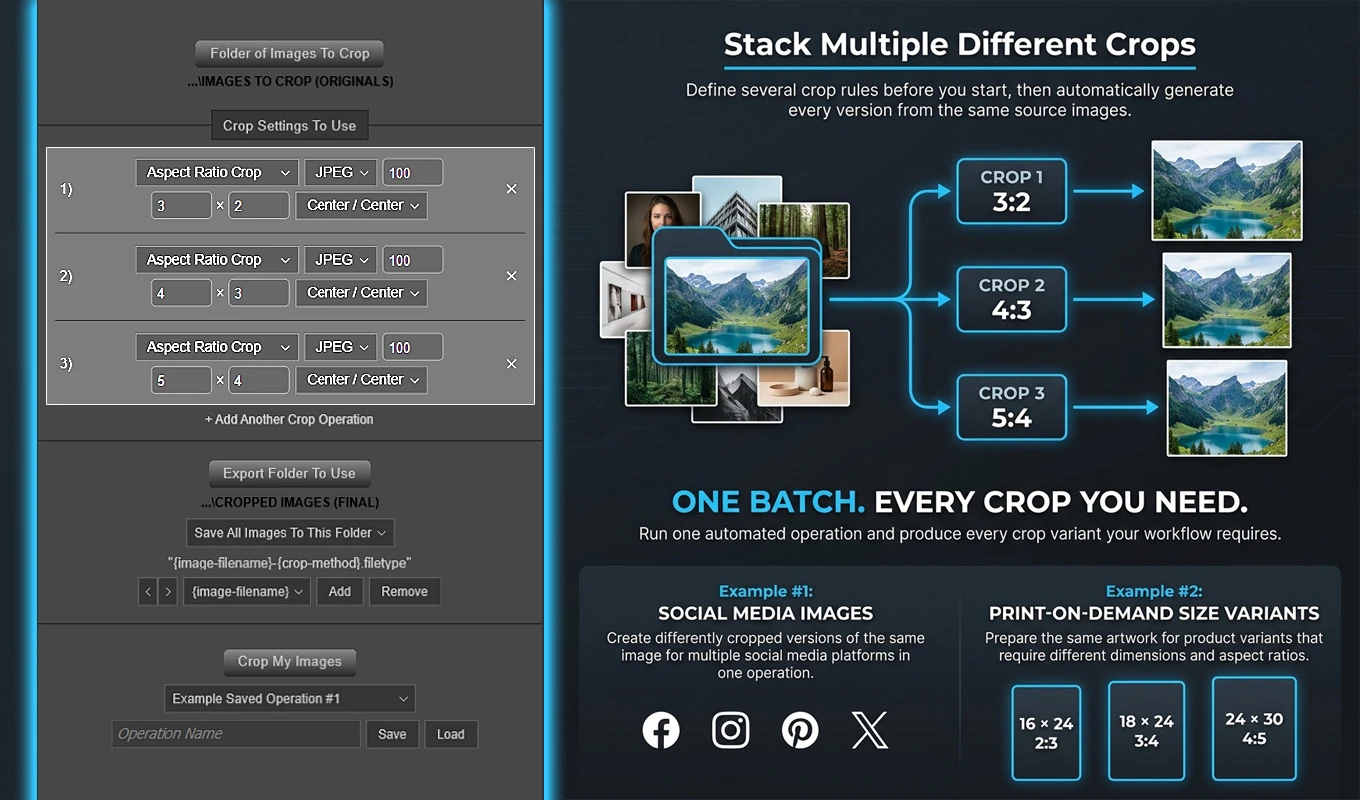
The practical approach is to define your product requirements first, group compatible artwork, test the rules, and then process the catalog. Here is how to build that workflow without confusing an automated crop with a finished, supplier-approved print file.
1. Define the crop specification for each product format
Start with the artwork requirements for the products you actually sell. “Make a version for posters” is too vague to automate reliably. “Create a centered 4:5 crop from this full-bleed artwork collection” is a usable instruction.
For each product format, record:
- The required canvas proportion and minimum pixel dimensions.
- Whether the artwork should fill the canvas or retain a transparent background.
- Which content must remain visible, including lettering, borders, signatures, and important subjects.
- Any safe-area, bleed, or placement requirements in the supplier’s template.
- The accepted export filetype.
A hypothetical wall-art collection might need 4:5 portrait, 1:1 square, and 3:2 landscape variants. Those are example proportions, not universal print-on-demand specifications. Use the ratios required by your own products.
Transparent graphics need a different specification. A shirt graphic might need consistent space around the visible artwork rather than a crop that fills a rectangular canvas. That distinction determines whether you should use Aspect Ratio Crop or one of the plugin’s transparency-padding modes.
For wraparound products or templates with seams, handles, folds, or other placement restrictions, a matching outer ratio is only part of the preparation. Keep the supplier’s template as the reference for final placement.
2. Treat aspect ratio and final print dimensions as separate requirements
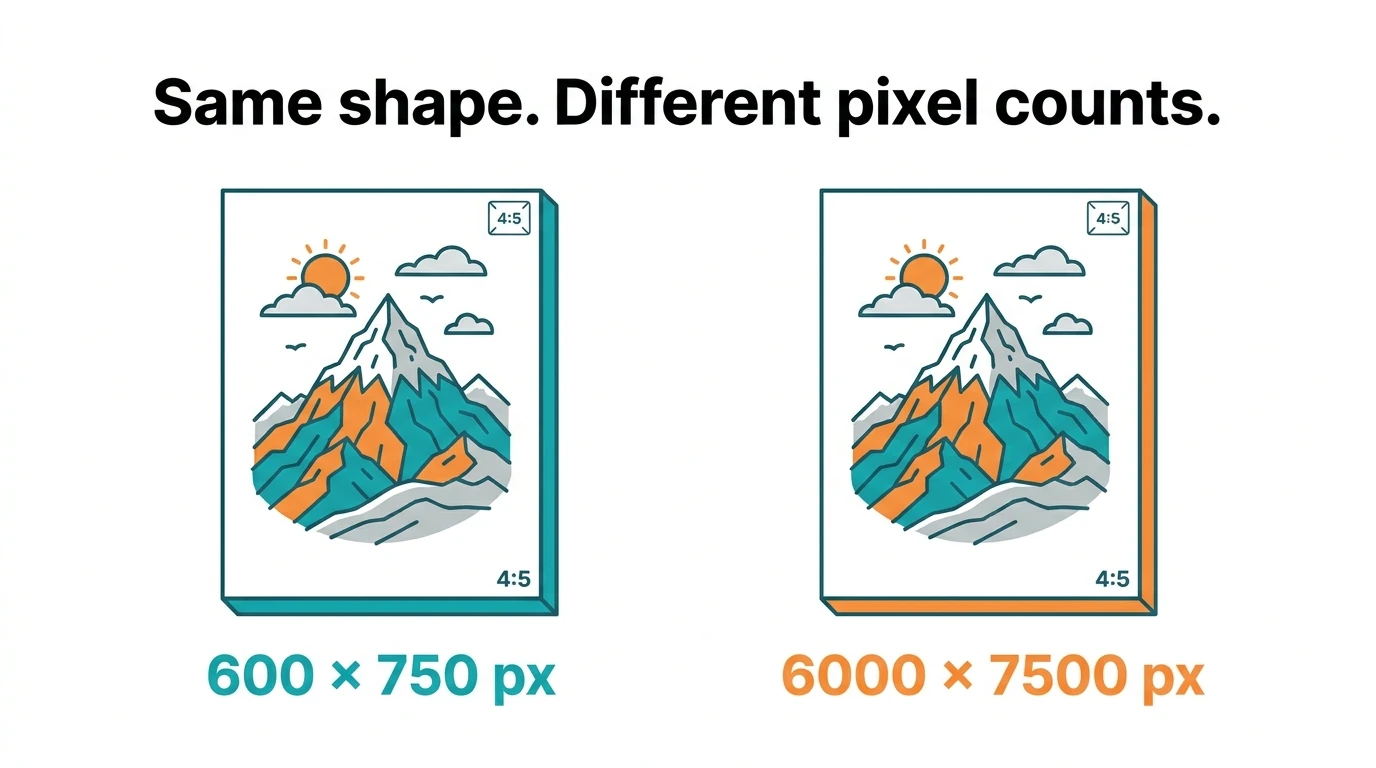
In Bulk Image Cropper, the Width and Height fields in Aspect Ratio Crop define proportions, not final pixel dimensions. Entering 4 × 5 does not create a 4-pixel-by-5-pixel image, and entering 4000 × 5000 does not resize the result to those dimensions. Both entries describe the same 4:5 shape.
The plugin removes excess image area until the canvas matches that shape. It does not scale the artwork to reach the numbers entered.
This matters for print-on-demand because a correctly proportioned file can still be too small for the intended print. Check the dimensions remaining after the crop against your supplier’s requirements. If a separate sizing step is necessary, handle that separately in Photoshop rather than expecting the crop settings to perform it.
Think of the workflow as two checks: first, does the composition have the right shape; second, does the resulting file contain enough pixels for the intended product? Passing the first check does not automatically pass the second.
3. Prepare catalog batches that can share the same rules
A reliable catalog batch contains designs that can reasonably receive the same treatment. Grouping by artwork structure is often more useful than grouping everything under a broad category such as “new designs.”
Useful source groups include:
- Full-bleed illustrations suitable for several rectangular crops.
- Centered transparent graphics that need consistent margins.
- Typography-led designs that require top-aligned crops.
- Images with the same known unwanted outer border.
Separate designs that need incompatible treatment. A tightly composed slogan graphic should not automatically receive the aggressive landscape crop intended for spacious background artwork.
Every supported image in the selected source folder receives every configured crop rule. The batch is not a product-eligibility system that chooses different rules for different designs. If only part of your catalog belongs on a particular product, place that group in its own batch.
The plugin processes supported files directly inside the chosen folder; it does not recursively traverse nested catalog folders. Either run those folders separately or prepare a dedicated source folder for the compatible designs. Keep the export location separate from that source folder so generated files do not become unintended inputs on a later run.
4. Set up a multi-format batch in Photoshop
Install Bulk Image Cropper: Automated Batch Cropping through Adobe Exchange or Adobe’s Creative Cloud plugin marketplace, then open it from Photoshop’s Plugins menu.
To assemble the batch:
- Click Folder of Images To Crop and select the prepared source folder.
- Configure the first crop operation, including its Crop Mode and mode-specific settings.
- Choose that rule’s export filetype and enter Quality where applicable.
- Click + Add Another Crop Operation for each additional output variant.
- Click Export Folder To Use and select the destination.
- Set the folder organization and filename format before starting the run.
The initial crop operation defaults to Aspect Ratio Crop, JPEG export, and Center / Center alignment. Its required inputs still need to be filled in. New operations also start with default settings, so check each added rule rather than assuming it copied the previous one.
For a full-bleed illustration batch, you could create three operations for portrait, square, and landscape outputs. For an isolated-graphic batch, you might instead configure transparency-padding variants. Build the rules around the source group rather than adding every available crop mode.
5. Create the full-bleed product variants with aspect ratio crops
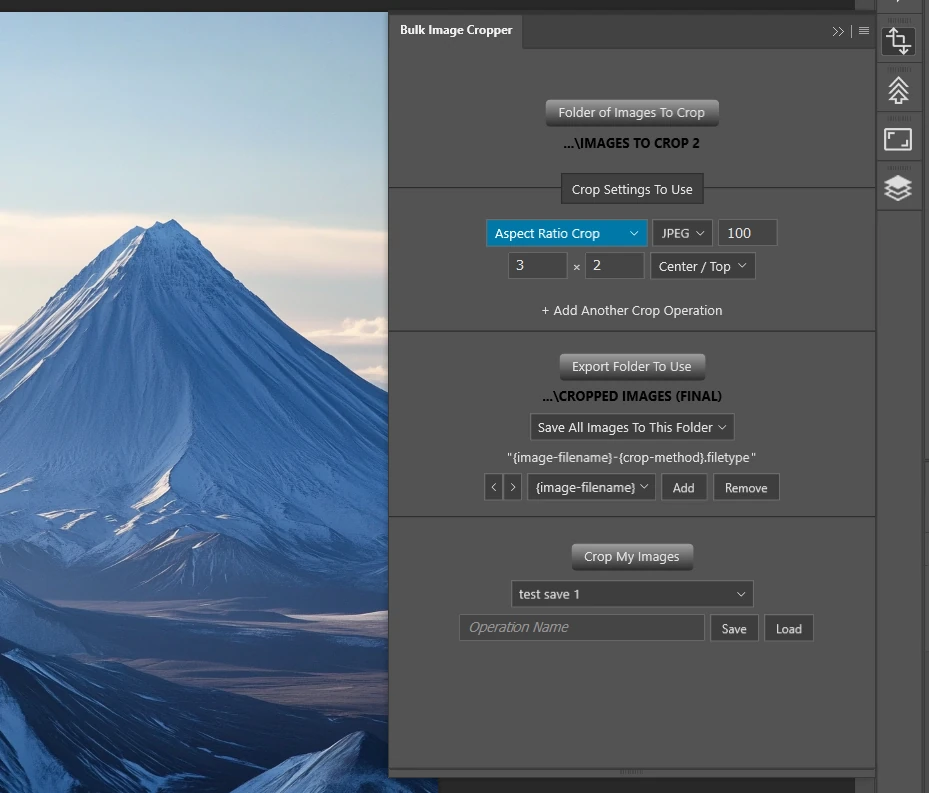
Aspect Ratio Crop is the appropriate starting point when artwork must fill a particular rectangular shape. Enter the target proportion and choose where the retained rectangle should be anchored.
For example, a 6000 × 8000 source image can produce these centered results:
- A 4:5 crop retains 6000 × 7500 pixels.
- A 1:1 crop retains 6000 × 6000 pixels.
- A 3:2 crop retains 6000 × 4000 pixels.
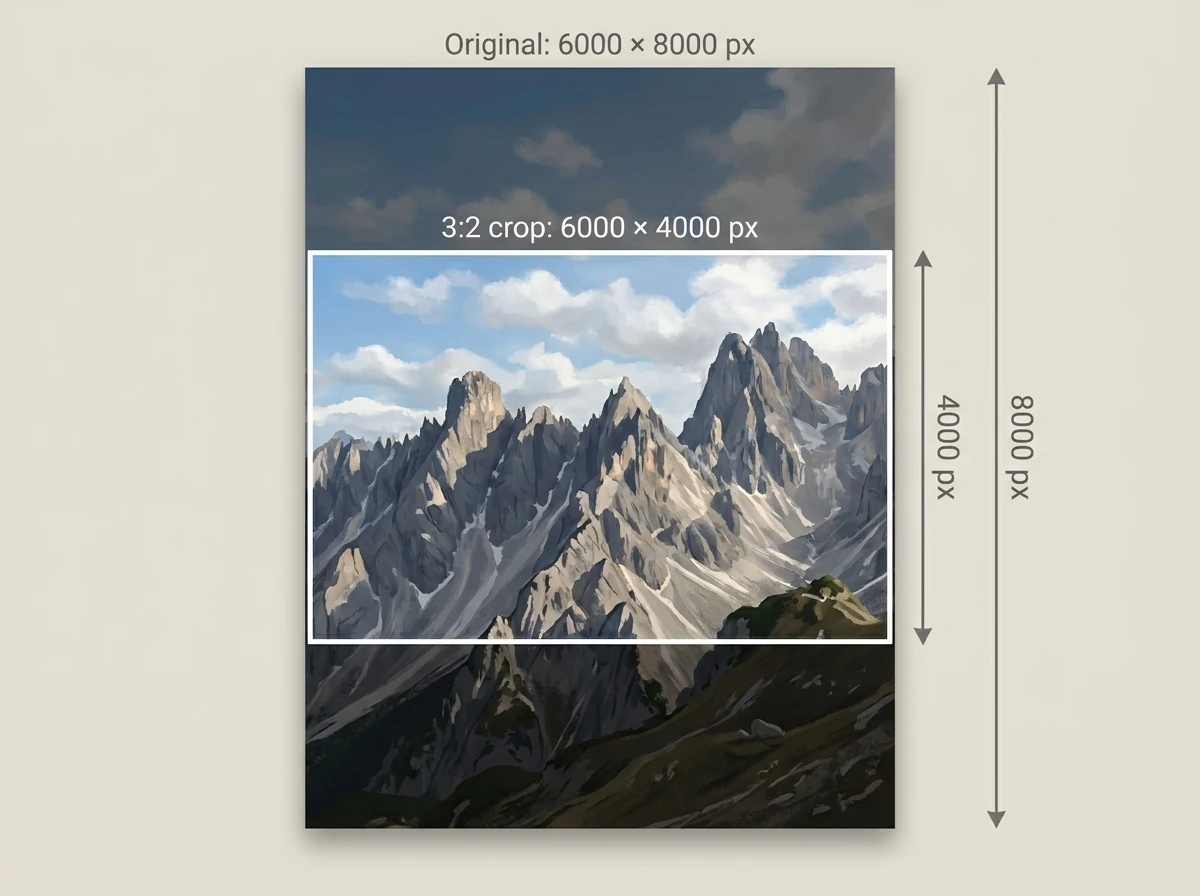
These examples show why a landscape version deserves particular attention when the master is portrait-oriented. The plugin can calculate the crop consistently, but a substantial portion of the composition must be removed.
Alignment controls which region survives. The nine available positions combine Left, Center, or Right with Top, Center, or Bottom. Center / Top, for example, can retain the upper portion of a design when the crop removes excess height. Right / Center can retain the right side when excess width must be removed.
Choose alignment according to subject placement. A centered emblem may work well with Center / Center, while a design with an important heading near the top may need Center / Top. A shared alignment is useful only when the designs in that batch have compatible compositions.
The aim is not to force every design onto every product. It is to automate the variants that can preserve an acceptable composition.
6. Understand why every variant starts from the original design
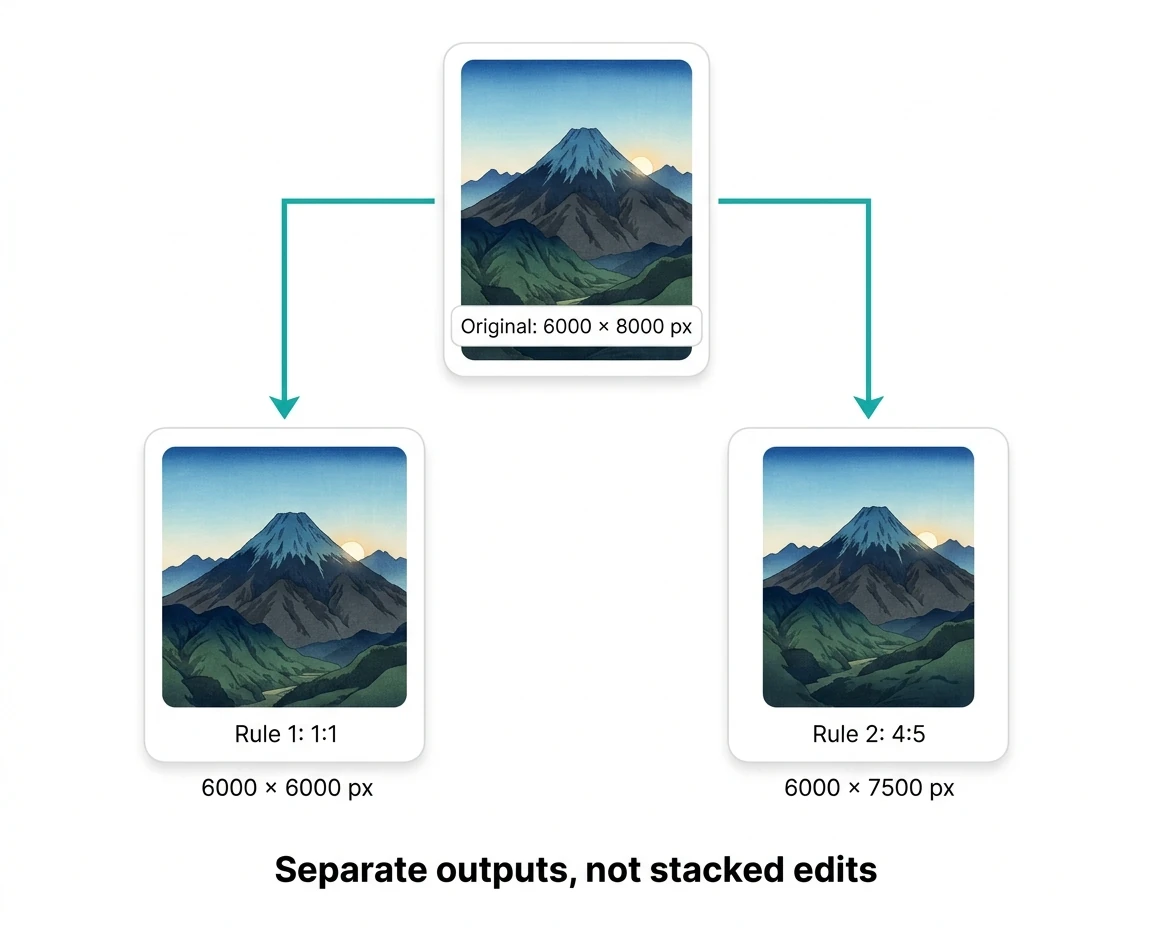
Multiple crop operations are independent. After exporting one rule’s result, Bulk Image Cropper returns the working document to its original source state before applying the next rule.
Suppose the first rule makes a square version of the 6000 × 8000 artwork, producing 6000 × 6000 pixels. The next 4:5 rule does not operate on that square. It starts from the original 6000 × 8000 image and can therefore retain the full 6000 × 7500 crop.
This is essential for catalog production. Otherwise, the order of your product variants would progressively discard source material and change later results.
Independence also means that stacking rules does not create a sequence of edits. A Normalize Transparency rule followed by an Aspect Ratio Crop rule produces two separate outputs—not one output that has received both operations.
If you genuinely need consecutive boundary adjustments, plan separate passes using the first pass’s exports as the next pass’s inputs. Recheck the result afterward: changing an aspect ratio can alter the padding, and adding padding can alter the aspect ratio.
7. Standardize transparent graphics without cutting into the artwork
Transparent apparel graphics, logos, and isolated illustrations often benefit more from margin control than from aspect-ratio cropping. Bulk Image Cropper provides three modes with different meanings for the Top, Bottom, Left, and Right settings.
Use Normalize Transparency for a consistent target
Normalize Transparency tightly trims fully transparent outer pixels, then adds the configured Target Transparent Padding around the visible content. Use it when inconsistent source margins should be replaced with a deliberate standard.
For example, if the tightly trimmed artwork measures 2400 × 3600 pixels, adding 200 pixels on every edge produces a 2800 × 4000 canvas. The visible artwork is not scaled; the canvas boundary changes around it.
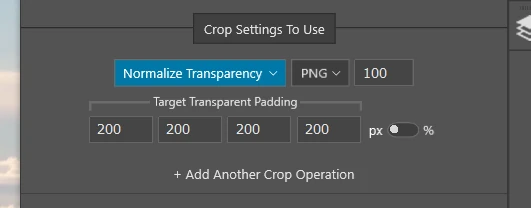
With percentage units, Normalize Transparency calculates padding from the tightly trimmed content dimensions. A 10% setting on every edge of that same artwork adds 240 pixels on the left and right and 360 pixels on the top and bottom.
Use Add Transparent Padding for a minimum margin
Add Transparent Padding ensures at least the configured amount of transparent space. An edge with 10 pixels of padding grows to a 50-pixel minimum; an edge already containing 100 pixels keeps its larger margin.
This is useful when you want a guaranteed buffer without reducing existing clear space.
Use Trim Excess Transparency for a maximum margin
Trim Excess Transparency caps oversized margins. With a 50-pixel maximum, an edge containing 200 pixels is reduced to 50, while an edge containing 20 pixels remains at 20.
For both the minimum and maximum modes, percentage values are based on the original document dimensions, unlike Normalize Transparency’s trimmed-content baseline.
These modes work with actual transparency; they are not background-removal operations. Also, consistent padding does not mean identical final canvas dimensions when the visible designs have different sizes or proportions. Transparent space is useful for artwork spacing, but it is not a substitute for printed bleed on a full-bleed product.
8. Remove known outer borders with edge cropping
Some catalogs have a predictable unwanted boundary: a fixed export border, a strip along one edge, or excess canvas that was introduced consistently during earlier preparation. Crop Edges Inwards lets you remove a specified amount from each side.
In pixel mode, removing 50 pixels from every edge of a 5000 × 7000 image produces a 4900 × 6900 result. Top, Bottom, Left, and Right are independent, so an unwanted strip on the bottom does not require cropping the other sides.
Percentage mode is useful when the unwanted area scales with the source dimensions. Removing 5% from both the left and right retains 90% of the original width. Top and Bottom percentages use image height; Left and Right percentages use image width. Opposite-edge percentages must total less than 100%.
This mode removes the amounts you specify. It does not inspect the image and decide which border is unwanted. Use it for a known, repeatable boundary—not as a substitute for checking whether a design fits a product composition.
9. Set an export format for each crop rule
Each crop operation has its own export filetype, so a single compatible source batch can produce different delivery formats where needed.
PNG is useful when the destination requires preserved transparency. JPEG can be appropriate for opaque, full-bleed artwork when the supplier accepts it. Follow the destination’s actual requirements rather than assuming that every product should receive the same format.
For JPEG and PNG, the plugin provides an editable Quality value from 0 to 100. JPEG quality controls lossy compression. PNG remains lossless; its Quality control changes compression rather than making the image more or less detailed. A higher PNG Quality setting corresponds to lower compression.
Do not let an export setting obscure a composition problem. Higher quality cannot recover lettering removed by a crop, increase the remaining pixel dimensions, or make an unsuitable aspect ratio fit a template. Approve the crop and the file requirements together.
10. Organize files so each variant stays identifiable
A multi-format catalog needs output organization that makes the relationship between design and product variant obvious.
Bulk Image Cropper offers three global organization choices:
- Save All Images To This Folder places every result together.
- Create A Subfolder For Each Image groups all variants from one source design.
- Create A Subfolder For Each Crop Rule groups all designs produced by the same rule.
For preparing one product format at a time, grouping by crop rule is often convenient. The generated folder names include relevant rule details, such as aspect ratio, alignment, padding settings, or export format. Grouping by source image is useful when reviewing all deliverables for one design together.
The filename builder can include the original image filename, crop method, actual final dimensions, export filetype, and Quality. A practical arrangement is the original image filename followed by crop method and final width × height.
Including dimensions helps distinguish results, but the crop-method component alone does not identify a particular aspect ratio. Both square and portrait Aspect Ratio Crop outputs use the method identifier aspect_ratio_crop. Rule-specific folders therefore provide useful separation even when filenames include dimensions.
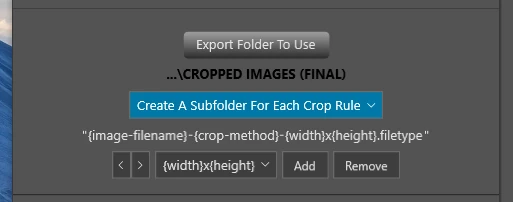
The filename format applies across the batch. Existing output names receive numbered alternatives rather than being overwritten, which protects earlier exports but also means repeated runs can accumulate multiple versions. Use a clean export folder when you need a clear release-level review.
11. Approve representative outputs before processing the catalog
Test the planned rules on a small selection that represents the catalog’s real variation. Include a design with long lettering, one with important content close to an edge, one with an off-center subject, and any unusual transparent margins.
Inspect the exported files, not just the source documents. For each product variant, check:
- Whether all essential artwork and text remain visible.
- Whether the alignment preserves the intended focal point.
- Whether the final pixel dimensions meet the destination’s requirements.
- Whether the background and transparency are appropriate for the product.
- Whether the artwork sits correctly within the supplier’s template and safe area.
- Whether filenames and folders make the variant easy to identify.
If one design needs a different alignment, move it into a suitable batch or handle its composition separately. Changing the shared rule to accommodate a single exception may make the rest of the catalog worse.
Approve both the visual treatment and the export organization during this trial. Discovering a naming problem after a handful of outputs is much easier to resolve than reorganizing an entire catalog afterward.
12. Run the full catalog and verify the operation count
Once the sample is approved, select the full compatible source folder, confirm the export location, and click Crop My Images. The plugin validates the required settings and checks that the folders are accessible before processing.
The source folder’s current contents are read when the operation begins. Files added or removed since folder selection therefore affect the batch. Confirm the folder contents immediately before starting, especially if it doubles as a staging area for new artwork.
The total workload is the number of supported source images multiplied by the number of crop operations. A collection of 300 designs with three configured variants produces 900 crop/export operations. That is a planning count, not a processing-time estimate.
The progress modal displays status, a progress bar, and a completed-operation count. You can stop the run with Cancel Operation or the Escape key while the modal is active.
For each source image, the plugin applies and exports the independent rules, then closes the working document without saving changes to the original source file. The original catalog remains unchanged.
After completion, compare the output against your expected workload and spot-check files from every rule. A fresh destination makes that review clearer because earlier numbered exports are not mixed into the new production set.
13. Save approved recipes for the next catalog release
After the workflow passes review, enter an Operation Name and click Save. The saved operation captures the crop rules, alignments, units, per-rule export settings, folder organization, filename format, and selected input and output folders.
Use names that describe the approved recipe, such as “Wall Art — Portrait Square Landscape” or “Transparent Graphics — Target Margins.” Separate recipes are useful when full-bleed artwork and isolated graphics require different preparation.
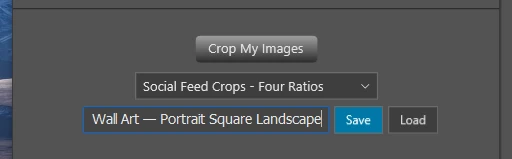
For the next release, load the saved operation, confirm or replace the source and export folders, and test any new artwork that falls outside the previously approved composition pattern. If a stored folder has moved or cannot be restored, the plugin asks you to select it again.
This makes the repeatable part of catalog production genuinely repeatable: the same approved boundary rules, export settings, and organization can be restored without rebuilding them by hand.
Bulk Image Cropper: Automated Batch Cropping, available through Adobe Exchange, provides a practical way to turn compatible source designs into multiple organized product variants. Define the requirements, approve the recipe, and let the plugin handle the repeated cropping and exporting—while you keep control of which designs belong on which products.