How To Automatically Enlarge An Entire Collection Of Wall Art Designs For Printing

To enlarge an entire wall art collection automatically, first determine the pixel dimensions your prints need. Then use Bulk Image Upscaler: Batch-Enhance Resolution in Photoshop to apply a suitable enlargement method, scale factor, and export configuration to a folder of designs.
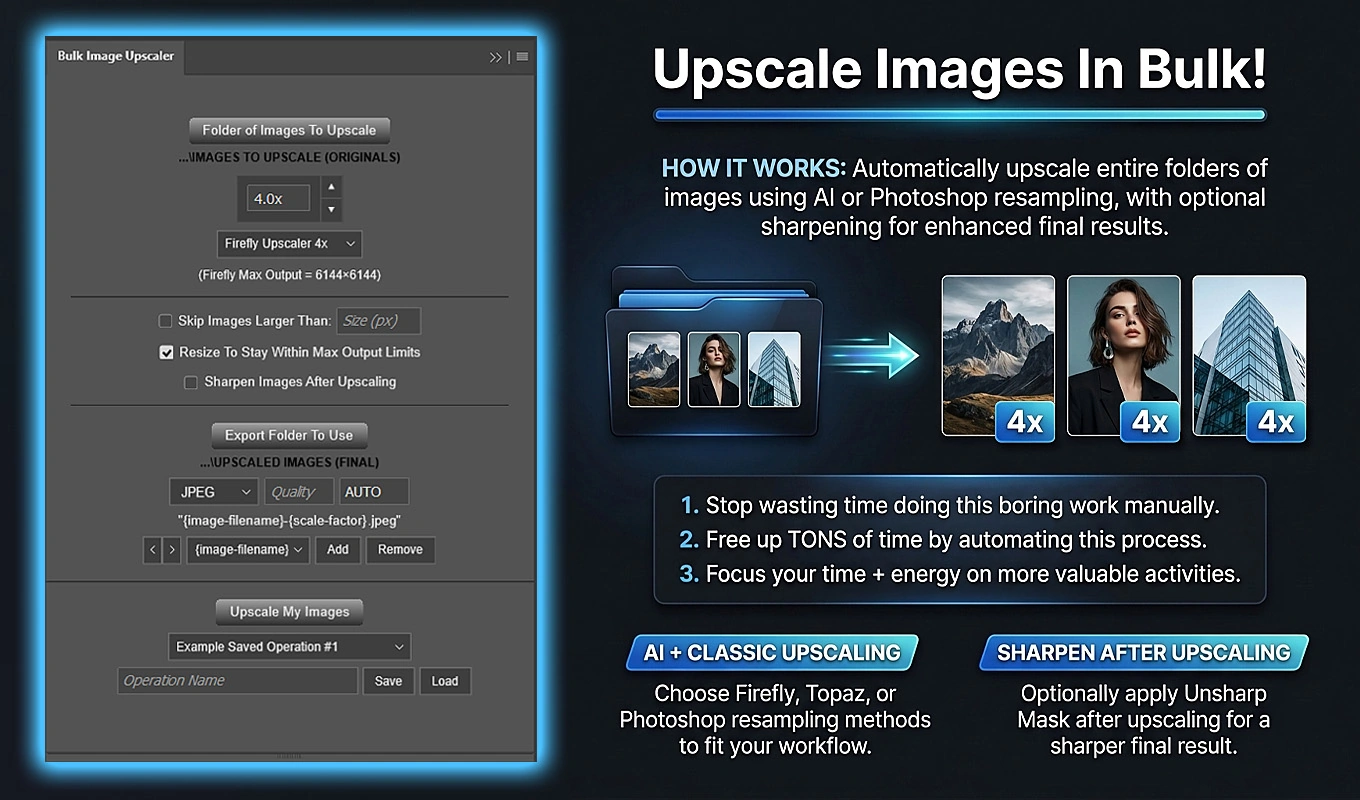
The plugin handles the repetitive sequence of opening each image, enlarging it, optionally sharpening it, exporting the result, and closing the source without saving changes. You configure the batch once rather than rebuilding that sequence for every artwork.
For printing, the important part is choosing a configuration that produces appropriately sized files while respecting the artwork. A larger file is useful only if its proportions, detail, and export settings also suit the intended print.
Turn Each Wall-Art Print Size Into a Pixel Target
Start with the requirements of your print provider, not an arbitrary enlargement percentage. You need to know the finished print dimensions, the requested image resolution, and whether the supplied file must include bleed.
The basic calculation is:
Required pixels = print size in inches × required pixels per inch.
For example, at 300 pixels per inch, these common wall-art sizes require:
- 8 × 10 inches: 2400 × 3000 pixels.
- 12 × 16 inches: 3600 × 4800 pixels.
- 16 × 24 inches: 4800 × 7200 pixels.
- 18 × 24 inches: 5400 × 7200 pixels.
- 24 × 36 inches: 7200 × 10800 pixels.
These are planning examples, not a rule that every wall print must use 300 pixels per inch. Follow the provider’s specifications for the particular product and printing process. If the provider accepts a different resolution, calculate the pixel target using that value.
Once you know the target, compare it with the source dimensions. A 1600 × 2400-pixel design needs a 3.0× enlargement to reach 4800 × 7200 pixels. That gives you a concrete batch setting for a 16 × 24-inch print at 300 pixels per inch.
Why Setting a File to 300 DPI Is Not Enough
A common mistake is changing a small image’s resolution label to 300 DPI and assuming it is now suitable for a large print.
Changing resolution metadata without resampling does not add pixels. A 1600 × 2400-pixel image still contains the same number of pixels afterward. At 300 pixels per inch, those dimensions correspond to approximately 5.33 × 8 inches—not 16 × 24 inches.
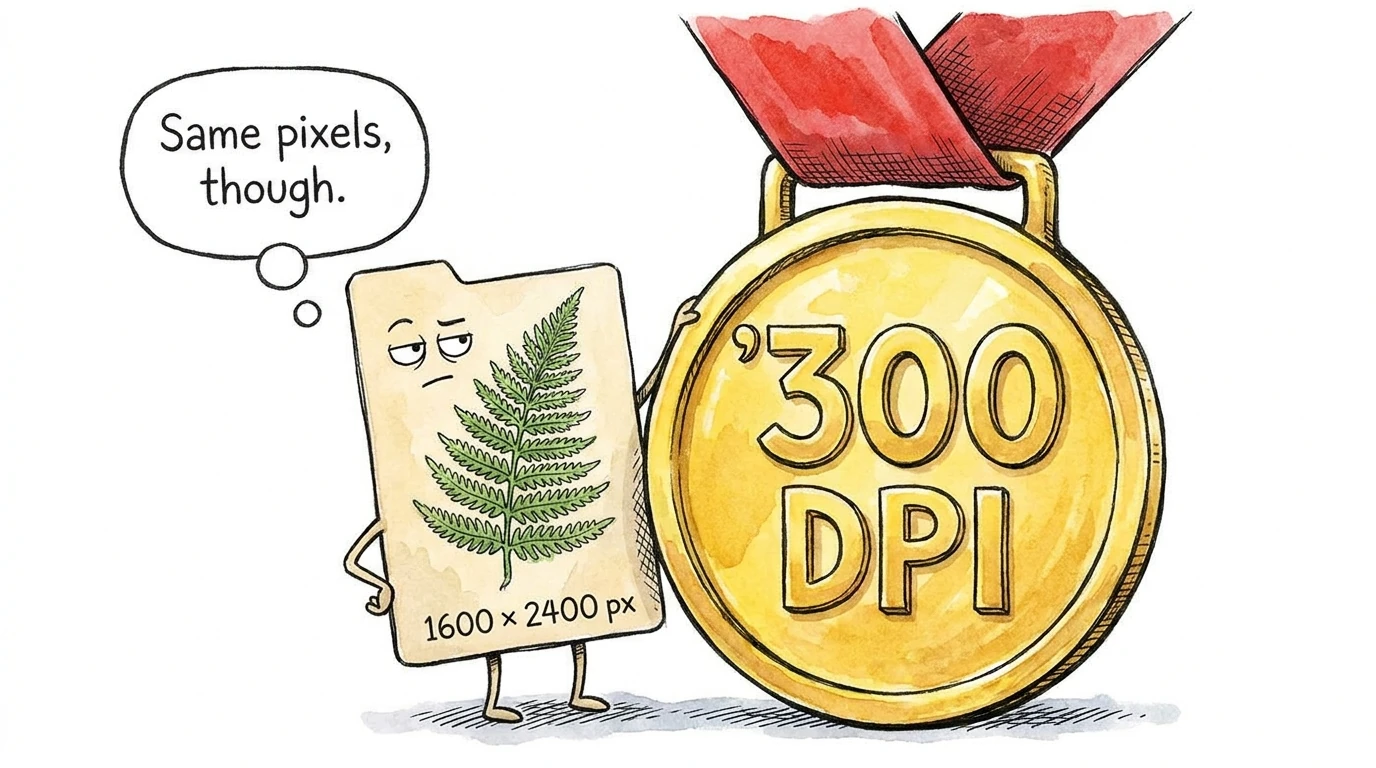
For the larger print, you need the actual pixel enlargement as well as the appropriate document-resolution setting.
Bulk Image Upscaler’s standard Photoshop resampling methods let you configure both: a scale factor determines the enlarged pixel dimensions, and the DPI field sets the document resolution as part of the Image Size operation. Its AI methods behave differently: they use fixed 2× or 4× factors, and their DPI field remains set to AUTO.
For a collection that needs a specific multiplier and an explicit 300 DPI setting, a standard Photoshop resampling method is often the most straightforward starting point.
Group Designs by Aspect Ratio and Required Scale
One Bulk Image Upscaler operation applies one primary method and scale-factor configuration across the selected folder. It does not independently calculate a different multiplier for every image to make all outputs the same fixed dimensions.
That makes the way you group your collection important.
If every source is 1600 × 2400 pixels, a 3.0× batch produces consistent 4800 × 7200-pixel outputs. If the folder also contains an 800 × 1200-pixel design, that file becomes 2400 × 3600 pixels under the same configuration. Its proportions match, but its final print capacity does not.
Group designs that share:
- The same aspect ratio.
- The same source dimensions, or at least the same required enlargement factor.
- A compatible enlargement method.
- The same intended export requirements.
Keep different print-ratio families distinct. A 2:3 design suits sizes such as 12 × 18 and 16 × 24 inches. A 3:4 design suits 12 × 16 and 18 × 24 inches. A 4:5 design suits 8 × 10 and 16 × 20 inches.
Upscaling preserves proportions; it does not turn one ratio into another. If you sell the same artwork in several ratio families, prepare those compositions separately before enlarging each group.
Choose an Upscaling Method That Respects the Artwork
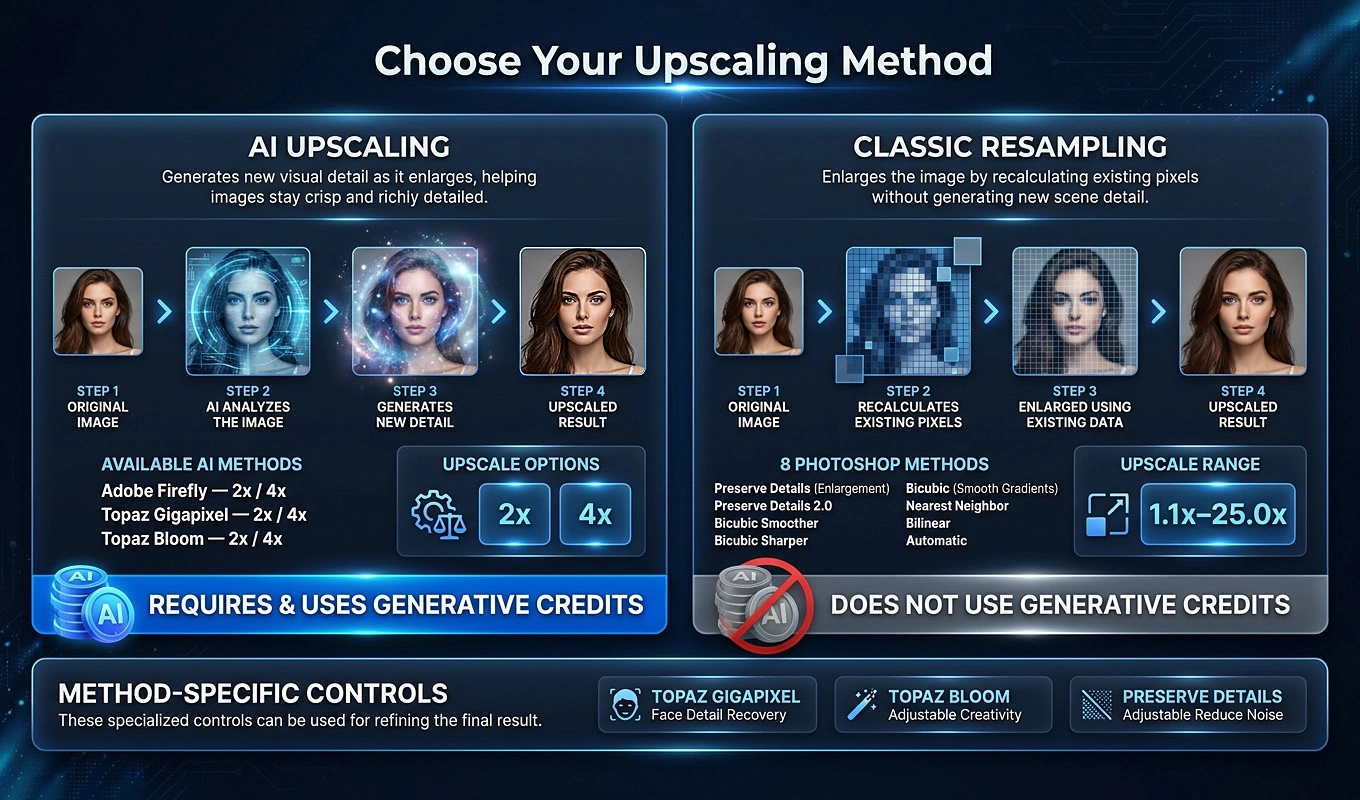
Bulk Image Upscaler provides six AI upscaling choices and eight standard Photoshop resampling methods. For wall art, the useful distinction is whether you need controlled enlargement of an existing design or want to evaluate a generative treatment of its detail.
The standard methods support scale factors from 1.1× through 25.0× in 0.1× increments. They include Preserve Details, Preserve Details 2.0, Bicubic Smoother, Nearest Neighbor, and other Photoshop interpolation choices.
For artwork containing lettering, geometric arrangements, logos, or deliberate linework, begin by testing a standard method. These designs often depend on preserving exact shapes rather than introducing a different interpretation of detail.
Preserve Details and Preserve Details 2.0 also expose a Reduce Noise setting. Bicubic Smoother is another enlargement-oriented option. Nearest Neighbor can be relevant when the artwork intentionally uses hard pixel boundaries, rather than smooth photographic or painted transitions.
The AI choices are Firefly Upscaler, Topaz Gigapixel, and Topaz Bloom, each available in 2× and 4× variants. They can be worth testing for suitable photographic, textured, or painterly artwork, but inspect the result before applying it to an entire collection. Pay particular attention to small lettering, signatures, repeated motifs, and fine contours.
The standard methods do not require the plugin’s Generative Credits acknowledgement. The AI methods do, and their fixed multipliers and output limits need to fit your print plan.
Plan Around AI Output Limits for Large Prints
Large wall-art files can reach an AI model’s output limit before they reach the dimensions your printer needs.
Bulk Image Upscaler accounts for these model-specific limits:
- Firefly: a maximum output width of 6144 pixels and maximum output height of 6144 pixels.
- Topaz Gigapixel: a maximum of 56,000,000 total output pixels.
- Topaz Bloom: a maximum of 9,000,000 total output pixels.
The Topaz limits are total-pixel constraints, not universal per-side restrictions. A rectangular output must be assessed by multiplying its width by its height.
Consider an 18 × 24-inch print at 300 pixels per inch. Its 5400 × 7200-pixel target contains 38.88 million pixels. That exceeds Firefly’s maximum height and Bloom’s total-pixel limit, but is below Gigapixel’s total-pixel limit. Whether a particular source reaches that target still depends on its dimensions and the available 2× or 4× operation.
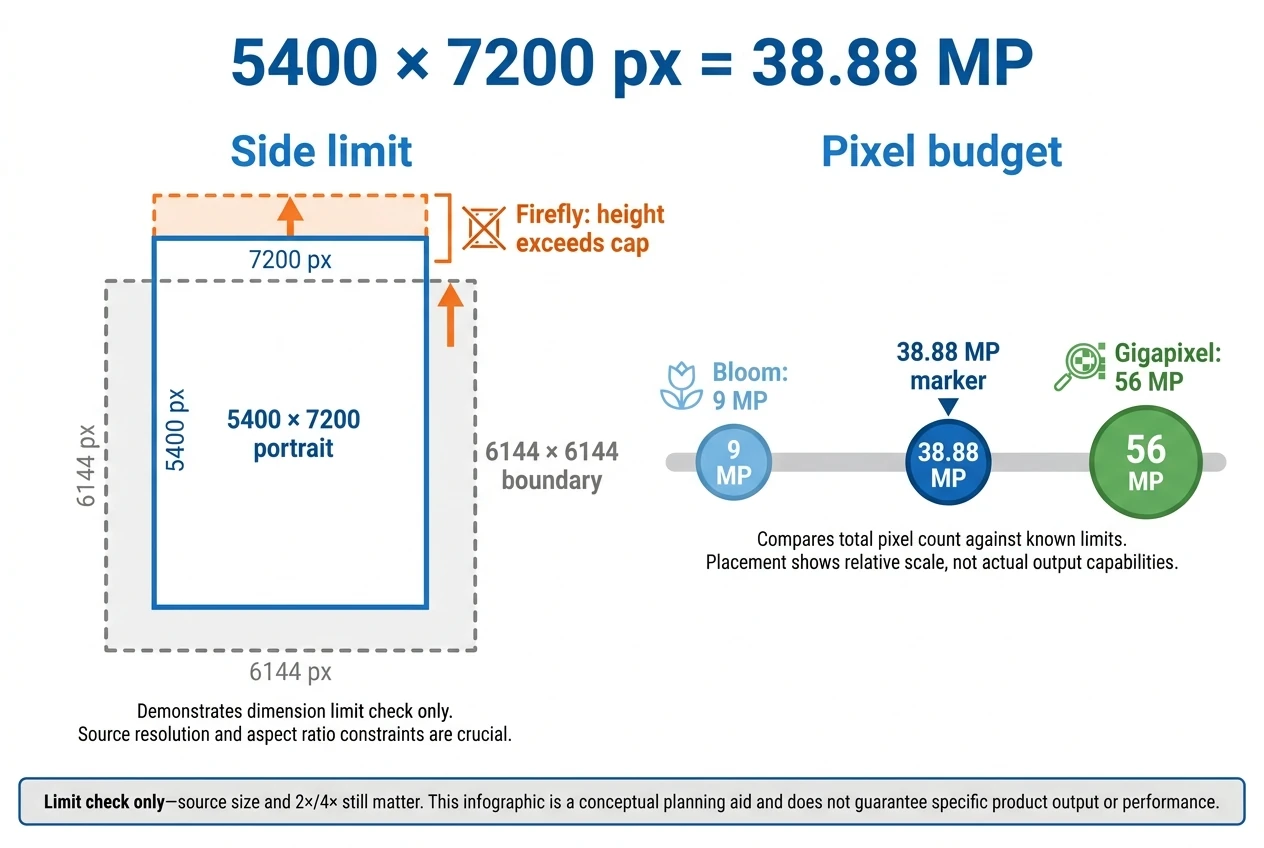
A 24 × 36-inch target at the same resolution contains 77.76 million pixels—above all three AI output limits. The standard Photoshop methods are not subject to these particular AI caps.
For AI batches, the plugin keeps Resize To Stay Within Max Output Limits enabled. When necessary, it can change an oversized 4× request to the corresponding 2× method. If even 2× would exceed the limit, it proportionally reduces the source just enough before applying the AI enlargement.
This helps the batch continue within model restrictions, but it means a selected 4× method does not guarantee an output four times the original dimensions. For printing, judge the result by its actual exported pixel dimensions, not just the multiplier you initially selected.
Example: Take a 24-Design Botanical Collection to 16 × 24 Inches
Suppose you have 24 botanical designs, each measuring 1600 × 2400 pixels. You want to offer them as 16 × 24-inch prints, and your print provider accepts PNG files at 300 pixels per inch.
Every design already has the correct 2:3 aspect ratio. The required output is 4800 × 7200 pixels, so the necessary multiplier is exactly 3.0×.
A suitable configuration to test would be:
- Upscaling method: Preserve Details 2.0.
- Scale factor: 3.0×.
- DPI: 300.
- Export filetype: PNG.
- Post-upscale sharpening: initially off while evaluating the enlargement.
- Filename components: source filename, scale factor, and final dimensions.
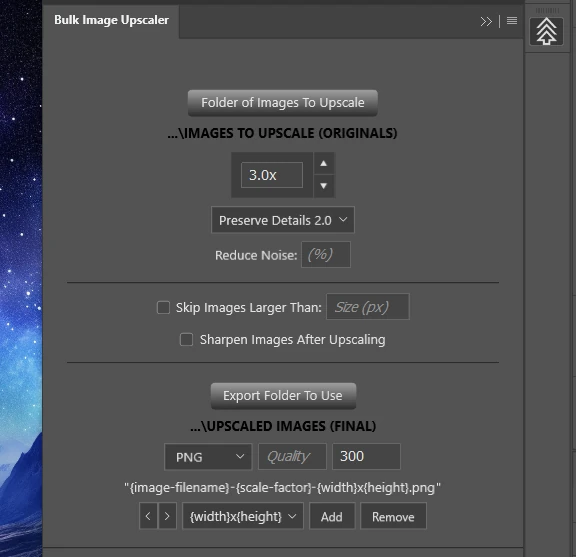
After testing the method on representative designs, place the full collection in the source folder and export into a separate print-master folder. An input named fern-01.png can produce an output named fern-01-3.0x-4800x7200.png.
The resulting files have the pixel dimensions needed for the stated print size and resolution. The original 1600 × 2400-pixel sources remain unchanged.
This is where folder automation becomes useful: the same deliberate enlargement and export configuration can be applied across all 24 designs without manually repeating the Photoshop Image Size and save sequence for each one. The remaining decision is whether the enlarged artwork meets your visual standard for sale.
Treat Post-Upscale Sharpening as a Finishing Choice
Bulk Image Upscaler can apply Photoshop’s Unsharp Mask after enlargement and before export. Enable Sharpen Images After Upscaling to reveal Amount, Radius, and Threshold.
For wall art, do not assume every collection needs the same sharpening treatment. A detailed photographic landscape, a soft watercolor wash, and a minimalist line drawing can respond very differently.
Start by inspecting the enlarged result without additional sharpening. If it needs a finishing pass, test the sharpening settings on representative designs before using them throughout the folder.
Look for visible halos around dark outlines, crunchy paper textures, exaggerated grain, or edges that have become harsher than the original style intended. The purpose is to support the printed artwork, not make every edge look maximally sharp on screen.
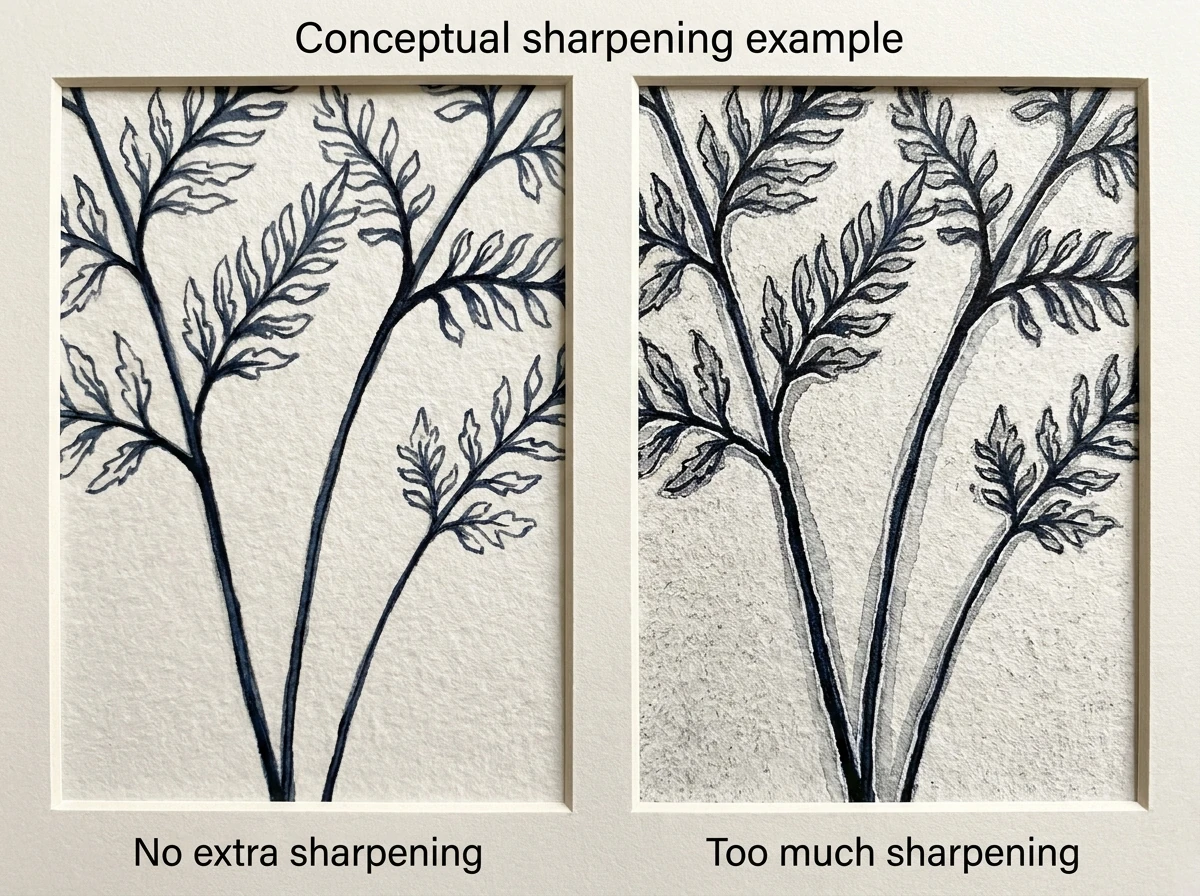
Once you approve a treatment, the plugin can incorporate it into the same batch. There is no need to open every exported image again solely to apply that finishing step.
Export Print Masters With Useful Filenames
Choose the export format your print provider actually accepts. Bulk Image Upscaler supports formats including PNG, JPEG, TIFF, and PDF, so the enlargement batch can also produce the required delivery format.
PNG remains lossless. Its user-facing Quality control changes compression behavior rather than turning it into a lossy format. JPEG uses a configurable 0–100 Quality value; inspect the chosen setting around delicate linework, gradients, and lettering. TIFF is another available option when it fits the provider’s submission requirements.
Do not assume that choosing a print-associated extension automatically satisfies every production requirement. Confirm the provider’s specifications for resolution, color, transparency, and file preparation separately.
Use the filename builder to make the exported files easy to identify. A practical pattern for print masters is:
{image-filename}-{scale-factor}-{width}x{height}
The plugin adds the extension for the selected format. You can also include DPI or the upscaling method when those distinctions matter to your archive.
The dimension components use the actual final output dimensions. This is especially helpful for AI batches where automatic limit handling may change the effective enlargement. The scale-factor component likewise reflects the actual operation, including a 4× request that becomes 2×.
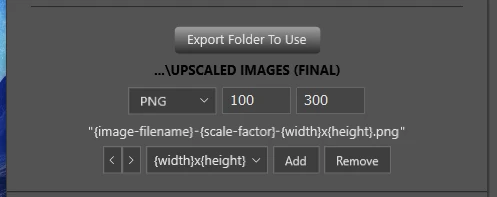
Existing output names receive numbered suffixes rather than being unintentionally overwritten. Even so, separate export folders for different print sizes make a collection easier to navigate and deliver.
Proof a Few Representative Designs Before the Full Run
A batch can be technically consistent while still applying the wrong visual treatment. Before processing the entire collection, use a small test folder containing designs that expose different potential problems.
Useful test subjects include:
- A typography-heavy design with small text.
- A piece with thin lines or detailed botanical contours.
- An illustration with broad gradients or soft washes.
- The smallest or least detailed source in the collection.
- A design containing a signature, fine texture, or repeated pattern.
Check the exported files, not only the source documents. Inspect detail at 100% view for artifacts, then assess the complete composition at a realistic viewing scale. Excessive magnification can distract from how a wall print will actually be seen.
Verify the pixel dimensions and intended physical size as well. For the earlier example, a 4800 × 7200-pixel export corresponds to 16 × 24 inches at 300 pixels per inch.
For a collection you intend to sell, a physical proof is valuable. It reveals how the enlargement, sharpening, paper, and printing process work together. Approve that result before committing to a large production order or publishing the files as finished print products.
Prepare the Full Collection in One Clean Source Folder
After approving the test, gather the full set of matching designs into a dedicated source folder. Bulk Image Upscaler processes supported files directly inside that folder; it does not recursively search nested subfolders.
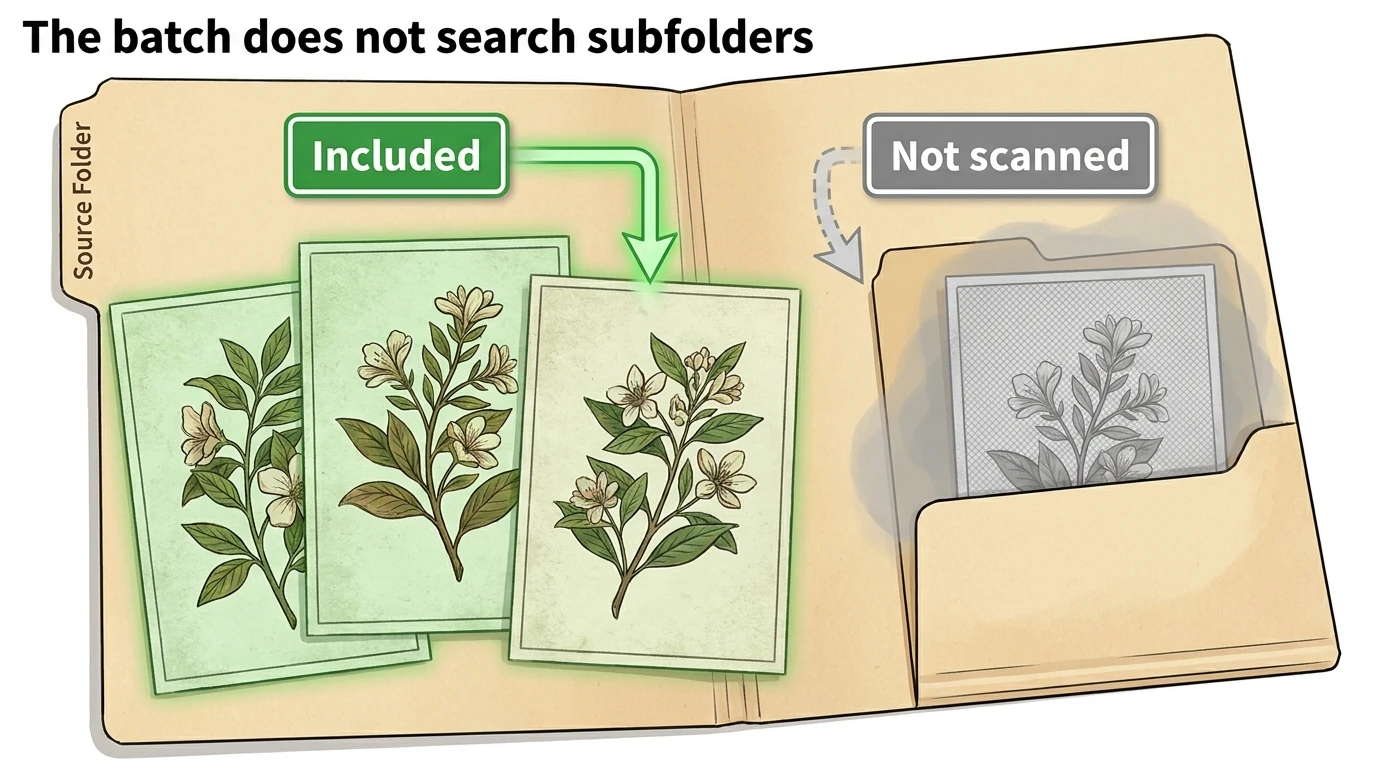
If your archive is arranged into separate folders for each artwork, assemble the files needed for this batch into one working folder. Include the actual artwork files, not room mockups, listing thumbnails, contact sheets, or preview images that happen to be stored nearby.
Keep the export folder separate from the source folder. This makes it easier to distinguish originals from print masters and avoids accidentally including previously enlarged exports in a later run.
The plugin reads the folder’s current contents when the operation begins. You can therefore finish assembling the collection before starting, even if you selected the source folder earlier.
For a mixed archive, the optional Skip Images Larger Than control can exclude sources whose width or height exceeds a chosen pixel threshold. Use it only when that longest-edge rule matches your intention. It checks original image dimensions; it is not a setting for forcing every output to a particular print size.
Run the Complete Wall-Art Batch in Photoshop
Install Bulk Image Upscaler: Batch-Enhance Resolution through Adobe Exchange or Adobe’s Creative Cloud plugin marketplace, then open it from Photoshop’s Plugins menu.
With the collection prepared and the test settings approved, run the production batch as follows:
- Select Folder of Images To Upscale and choose the clean source folder.
- Choose the Upscaling Method that worked best in your proof.
- Set the enlargement factor. Standard methods accept 1.1×–25.0× with one decimal place; AI methods use their fixed 2× or 4× variants.
- Configure any applicable method-specific setting, such as Reduce Noise for a Preserve Details method.
- Enable post-upscale sharpening only if you approved it during testing.
- Select Export Folder To Use and choose a separate destination for the print masters.
- Choose the export format and set Quality where applicable.
- For a standard method, enter the required DPI. For an AI method, leave the fixed AUTO value.
- Build the filename format, preferably including the source name and actual final dimensions.
- Click Upscale My Images.
The plugin validates the configuration before processing. If you selected an AI method, you must acknowledge the Generative Credits confirmation before the batch begins. AI processing also requires a Photoshop version that supports the relevant Generative Upscale functionality.
During the operation, the plugin opens each supported source, checks whether it should be skipped, performs the enlargement, applies optional sharpening, and exports the result. It then closes the source document without saving changes and moves to the next image.
A progress window shows the operation’s status and completed-image count. You can cancel from that window, although Photoshop may temporarily block plugin interaction while an AI command is executing.
Handle Bleed and Cropping as Separate Print-Preparation Requirements
Enlargement solves a pixel-dimension problem. It does not, by itself, solve every layout requirement for a finished wall print.
If the print provider requires bleed, use its full file specification when calculating the target dimensions. A file sized only for the trimmed print may not include the additional artwork area the provider expects.
Similarly, check whether important lettering, borders, or signatures sit too close to the intended trim. Upscaling enlarges those elements and their spacing proportionally; it does not redesign the composition to create safer margins.
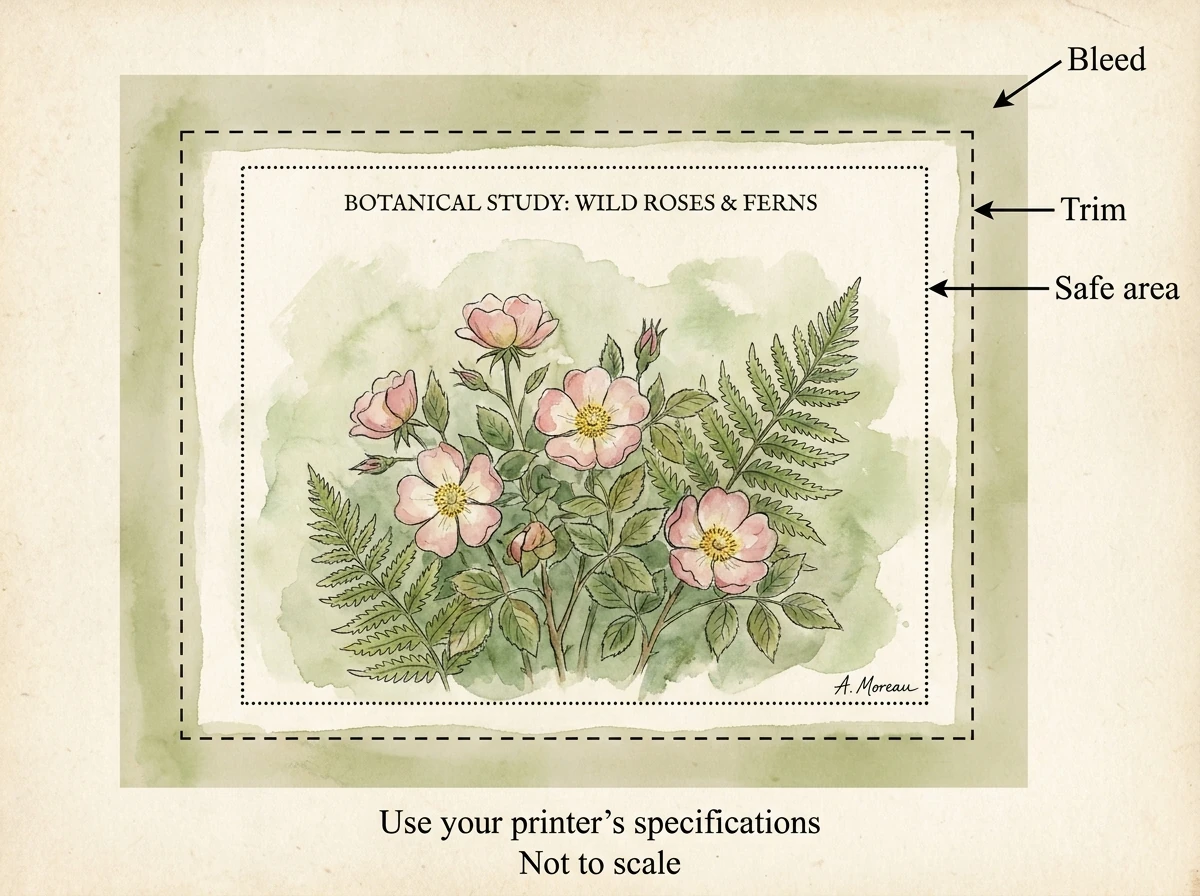
If a source has the wrong aspect ratio, settle the crop or layout before the enlargement batch. Do not stretch the artwork to make it fit. This is particularly important for coordinated wall-art sets, where inconsistent borders or differently cropped subjects can make otherwise matching pieces feel uneven.
Before handing off the finished collection, confirm that each export has the required dimensions, uses the correct ratio, and includes any provider-required bleed. The automated upscale creates the enlarged derivative; the final print specification determines whether that derivative is ready to submit.
Save the Configuration for the Next Collection
Once the workflow is approved, enter an Operation Name and use Save to store the configuration. Bulk Image Upscaler can save the method, multiplier, applicable method settings, sharpening, export format, Quality, DPI, filename components, and folder selections.
Use names that describe the production purpose, such as “2x3 Botanical Prints — 3x — PNG — 300 DPI.” A descriptive name is easier to recognize later than a generic label such as “Wall Art Settings.”
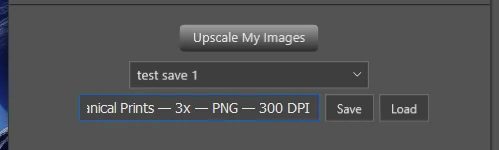
For the next matching collection, load the saved operation, confirm the folders, and check that the new sources have the expected dimensions and proportions. If a stored folder can no longer be restored, the plugin asks you to select it again.
The lasting benefit is not simply making one image larger. It is turning an approved print-preparation routine into a repeatable folder workflow. With Bulk Image Upscaler, you can keep your original designs intact while producing enlarged, consistently named print masters without repeating the same Photoshop operations for every piece in the collection.