How To Automatically Generate Different Crops For Instagram, Facebook, X, And Pinterest

One campaign photograph can need several different compositions: a portrait crop for Instagram, a square version for Facebook, a landscape image for X, and a taller vertical crop for Pinterest. Repeating those crops and exports manually becomes tedious when you have an entire folder of images.
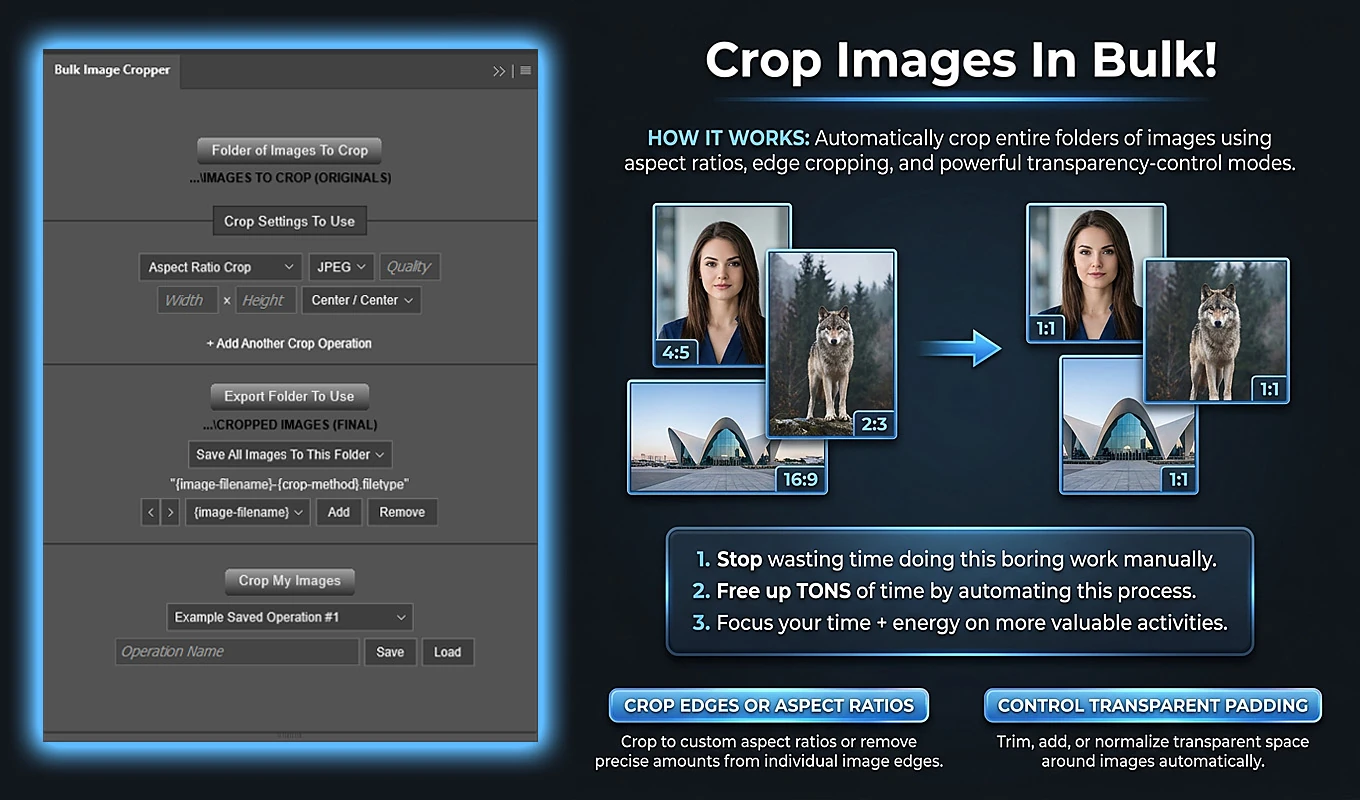
Bulk Image Cropper: Automated Batch Cropping is a Photoshop plugin that lets you configure those variants as separate crop operations and generate them in one automated batch. Each operation starts from the original image, so your Pinterest crop does not have to be cut from an already-cropped Instagram version.
The workflow below builds a practical four-ratio crop set, explains how to control the composition, and shows how to organize the resulting files for each destination.
1. Start With A Practical Ratio Set For Each Social Placement
Choose the placement you are preparing, not simply the platform name. An Instagram feed image and an Instagram Story serve different spaces, and Facebook also has multiple image placements.
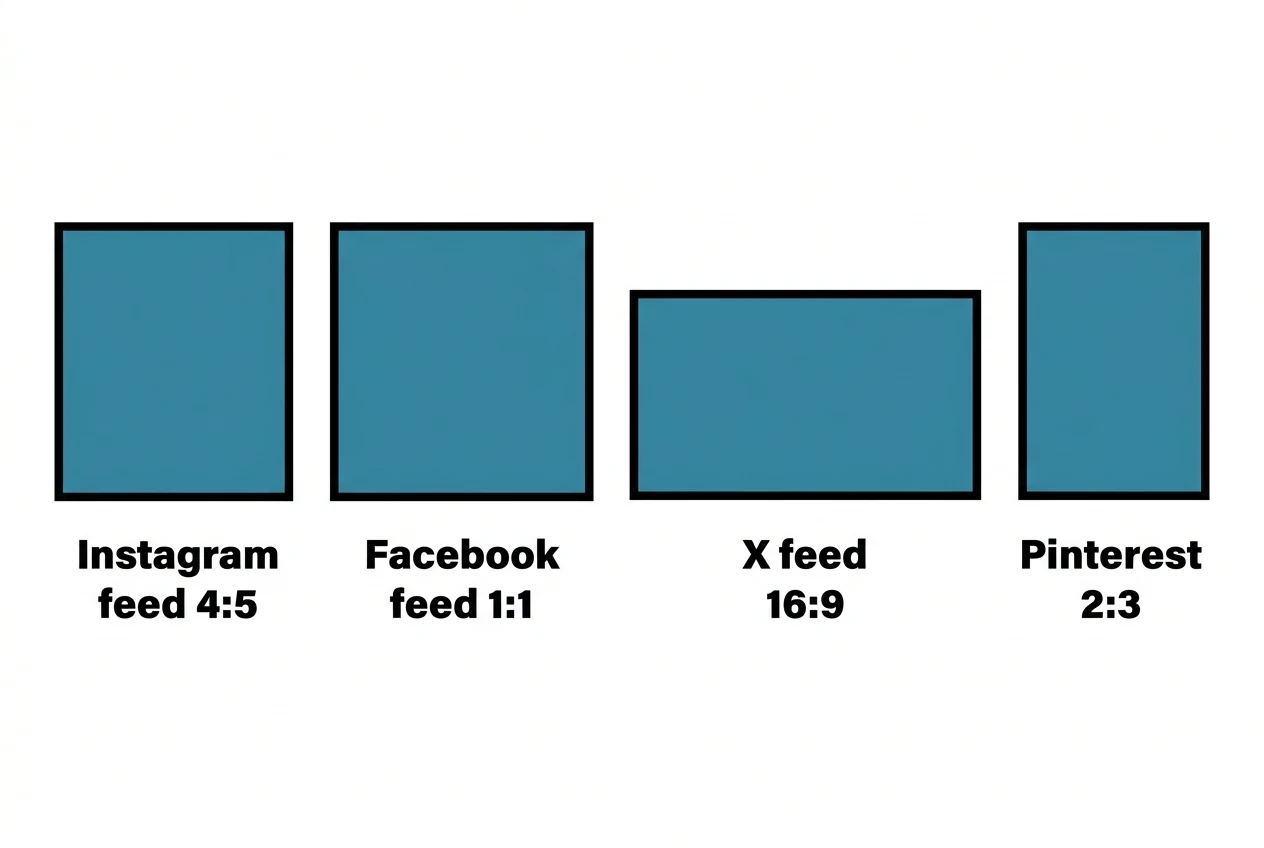
For a still-image campaign, this is a useful four-output starting set:
- Instagram feed: a 4:5 portrait crop. An example of matching pixel dimensions is 1080 × 1350.
- Facebook feed: a 1:1 square crop. An example is 1080 × 1080, which can also be useful for a square Instagram post.
- X feed: a 16:9 landscape crop. An example is 1200 × 675.
- Pinterest: a 2:3 vertical crop. An example is 1000 × 1500.
These are practical production choices, not an exhaustive list of accepted formats or a guarantee about every placement. Check the current requirements of the specific feed, ad, or other placement you intend to use.
If the campaign includes Instagram or Facebook Stories, add a separate 9:16 crop operation. For a landscape Facebook deliverable that calls for a 1200:628 shape, you can add another operation using 1200 for the ratio Width and 628 for Height.
You do not need duplicate operations just because two platforms are involved. If the same square image works for both destinations, generate it once and reuse it.
2. Understand The Difference Between A Crop Ratio And An Output Size
Bulk Image Cropper’s Aspect Ratio Crop mode uses its Width and Height fields to define proportions, not literal final pixel dimensions.
Entering Width 4 and Height 5 means “crop this image to a 4:5 shape.” It does not mean “export at 4 × 5 pixels,” and it does not automatically produce a 1080 × 1350 file. Entering 1080 and 1350 describes that same proportion, rather than instructing the plugin to resize the image.
For example, a 4000 × 3000 source cropped to 4:5 can produce a 2400 × 3000 result. The operation retains the full height and removes excess width. It does not scale the photograph down to a preset social-media size.
If your deliverable requires exact pixel dimensions, handle resizing as a separate Photoshop step after cropping. The pixel dimensions listed above are examples of each shape, not promised export dimensions from the crop settings.
3. Prepare Your Source Folder In Photoshop
Install Bulk Image Cropper: Automated Batch Cropping through Adobe Exchange or Adobe’s Creative Cloud plugin marketplace. Once installed, open it from Photoshop’s Plugins menu, restarting Photoshop first if necessary.
Click Folder of Images To Crop and select the directory containing your campaign images. The plugin processes supported files directly inside that folder; it does not recursively collect images from nested subfolders. Put the images intended for the batch together rather than selecting a parent folder containing several separate shoots.
For the initial setup, use a small test folder with representative images. Include a landscape photograph, a portrait photograph, and an image with an off-center subject if those occur in your real campaign. This gives you a useful sample for checking all four crops before running the full collection.
4. Create One Independent Crop Operation For Each Ratio
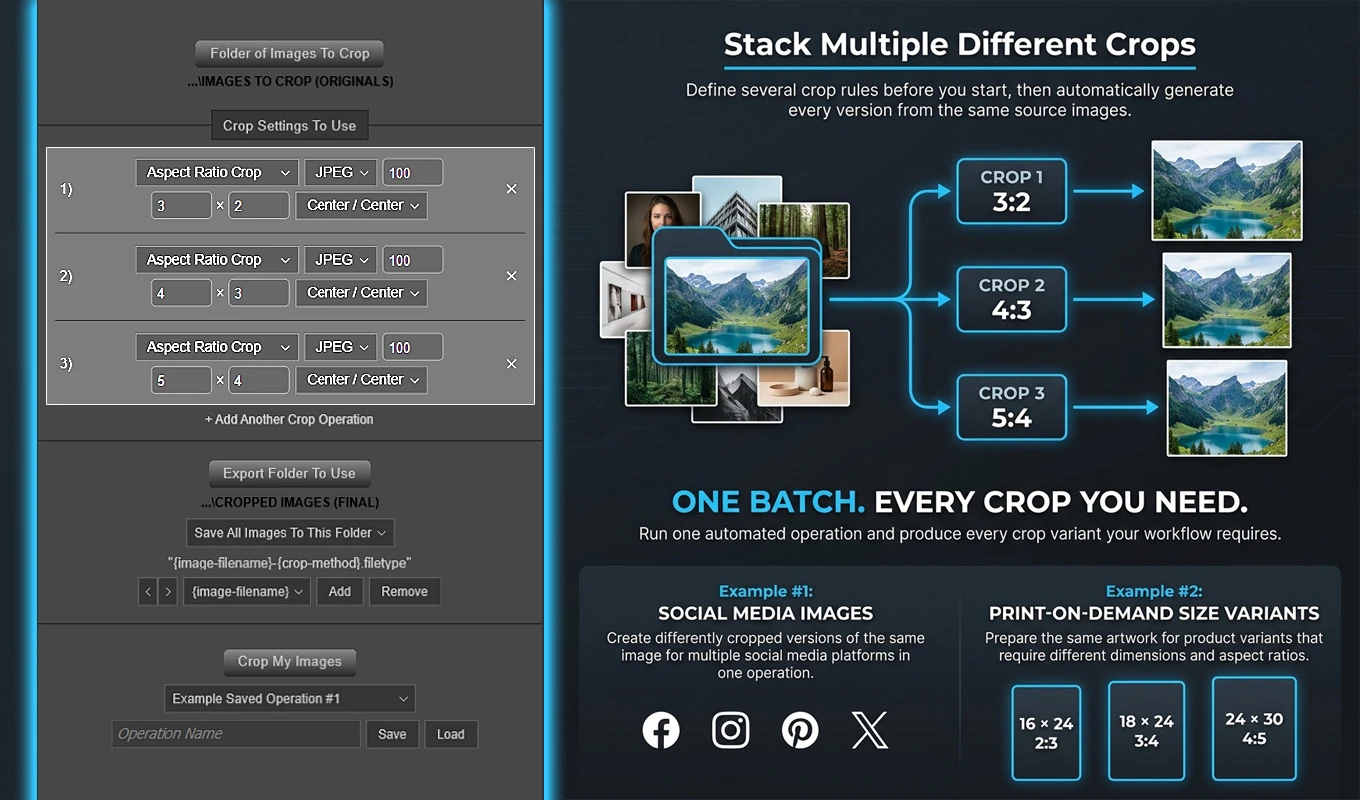
In Crop Settings To Use, configure the first operation as Aspect Ratio Crop. Enter the ratio values, then use + Add Another Crop Operation to create the remaining variants.
For the four-output set described above, configure:
- Instagram portrait: Aspect Ratio Crop, Width 4, Height 5.
- Facebook square: Aspect Ratio Crop, Width 1, Height 1.
- X landscape: Aspect Ratio Crop, Width 16, Height 9.
- Pinterest vertical: Aspect Ratio Crop, Width 2, Height 3.
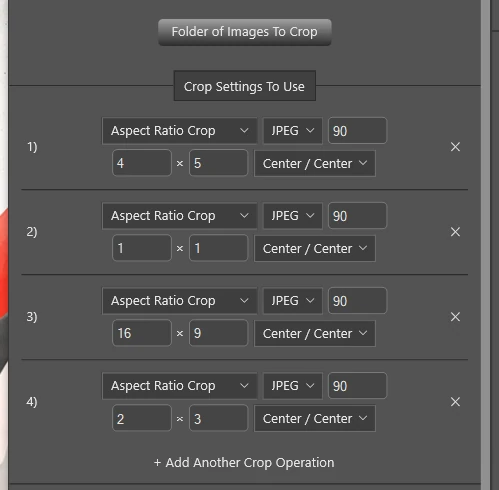
Each operation also has its own Alignment, export filetype, and applicable Quality setting. You can keep the same export settings across all four or adjust them individually.
The operations are independent, not cumulative. The square operation does not receive the result of the 4:5 crop, and the Pinterest operation does not receive the landscape crop. The plugin returns the working document to its original source state between rules.
This distinction preserves the available source area for every destination. A wide X image can retain width that the Instagram crop discarded, while the Pinterest crop can use the original image’s full height.
5. Position Each Crop Around The Subject
A matching ratio is only useful if the crop keeps the important content. Aspect Ratio Crop provides nine alignment positions, combining Left, Center, or Right with Top, Center, or Bottom. The default is Center / Center.
Alignment controls where the retained rectangle sits when excess image area must be removed:
- Left alignment preserves the leftmost available area when cropping horizontally.
- Right alignment preserves the rightmost available area when cropping horizontally.
- Top alignment preserves the topmost available area when cropping vertically.
- Bottom alignment preserves the bottommost available area when cropping vertically.
- Center alignment distributes the removed area between the opposing edges.
For example, if a person stands on the right side of a wide photograph, Right / Center may work better than Center / Center for a tall Pinterest crop.
Only the alignment on the cropped axis affects the result. When a landscape photograph becomes a portrait crop and retains its full height, the horizontal choice determines what survives. Choosing Top does not rescue a subject being cut off at the left or right edge.
You can use different alignments for different crop operations. The Instagram version might be centered while the Pinterest version is anchored right.
6. Choose Export Settings For The Generated Assets
For photographic campaign images, JPEG is a practical starting format. Select JPEG in each operation and enter a Quality value from 0 to 100. A value such as 90 can be a starting point for testing, rather than a universal requirement.
Inspect the exported result at its intended viewing size and check the file size against the destination’s requirements. The Quality setting controls the export configuration; it is not a target file-size control.
PNG is useful when your cropped deliverable needs lossless output or transparency. PNG remains lossless: its Quality control changes compression behavior rather than introducing lossy image degradation. Higher user-facing Quality corresponds to lower PNG compression.
Because filetype and Quality belong to each crop operation, you can export one variant as PNG and the others as JPEG when the deliverables call for it. There is no need to make every crop use an identical format.
7. Make The Four Variants Easy To Identify
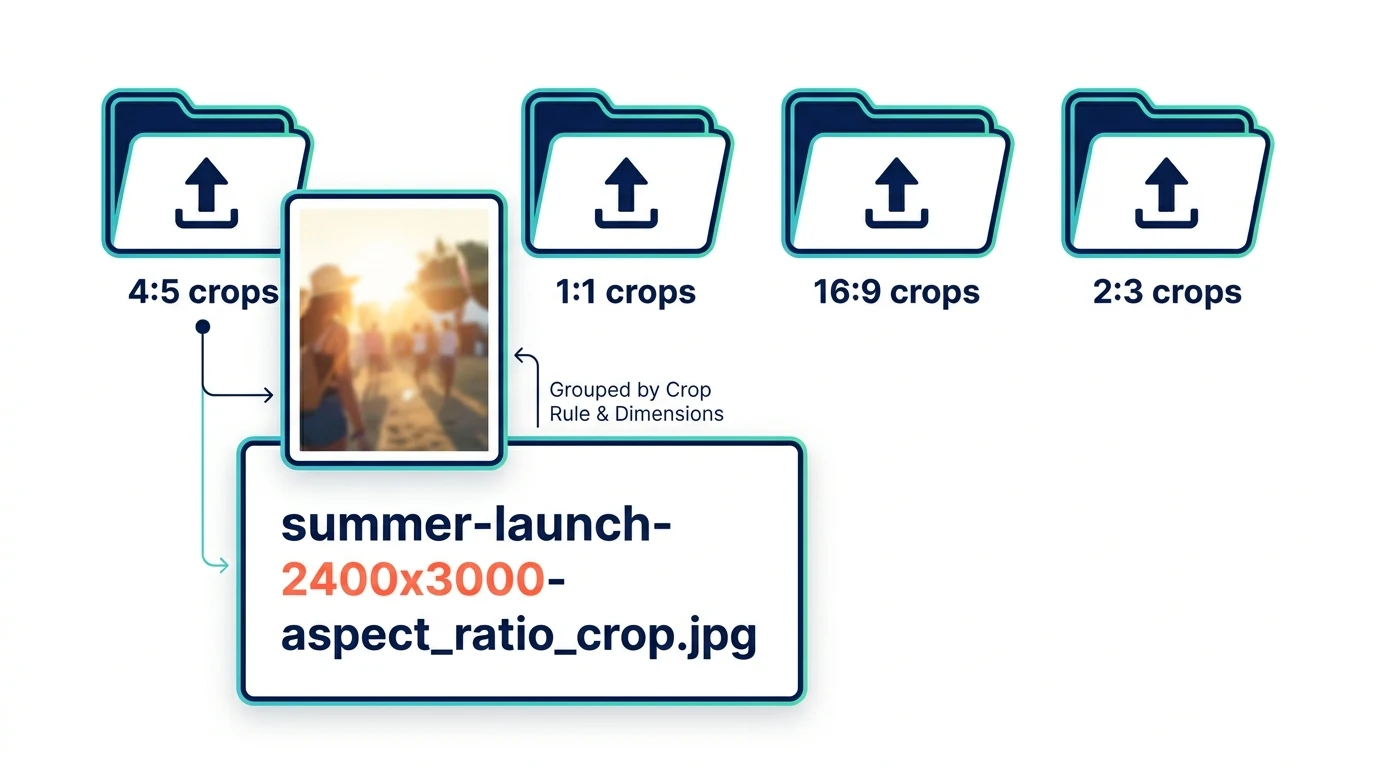
Click Export Folder To Use and select the parent directory for the generated files. For a campaign organized by output shape, choose Create A Subfolder For Each Crop Rule.
This groups all outputs from the 4:5 operation together, all square outputs together, and so on. Rule-specific folder names include configuration details, helping distinguish the sets without opening every file.
If your handoff is organized around individual photographs instead, Create A Subfolder For Each Image groups all variants of one source together. Save All Images To This Folder places everything directly in the selected export directory. This organization choice applies to the whole batch.
Use the filename builder to include the original filename and actual final dimensions. A useful component arrangement is:
{image-filename}-{width}x{height}-{crop-method}
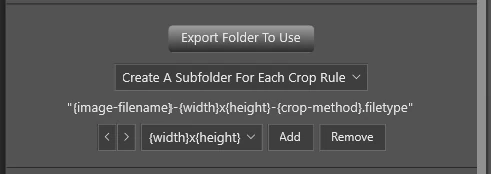
A generated filename could therefore look like:
summer-launch-2400x3000-aspect_ratio_crop.jpg
The dimensions come from the actual cropped result. They are not the ratio numbers you entered.
Including dimensions is particularly helpful here because all four operations use the same crop method. The {crop-method} component alone will say aspect_ratio_crop for every variant. The filename format is global across the batch, and existing output filenames receive numbered alternatives rather than being overwritten.
8. See What Four Crops Produce From One Photograph
Consider a 4000 × 3000 landscape photograph with a centrally positioned subject. With Center / Center alignment, the four operations produce these geometries:
- Instagram 4:5: 2400 × 3000, removing 800 pixels from each side.
- Facebook 1:1: 3000 × 3000, removing 500 pixels from each side.
- X 16:9: 4000 × 2250, removing 375 pixels from both the top and bottom.
- Pinterest 2:3: 2000 × 3000, removing 1000 pixels from each side.
This example shows why the variants need separate crops. The X version retains the entire source width, while the Pinterest version retains only half of it. Neither is simply a smaller copy of the other.
It also shows why a suitable source photograph matters. A centered product may work across all four shapes, but a group stretched across the full width of the photograph may not fit into the tall crop. Automation applies the geometry consistently; it does not make every composition equally suitable for every shape.
9. Catch Cut-Off Subjects And Missing Text Before The Full Run
Run the configured operations on your small test folder and inspect the exported files. Review each ratio, not just one attractive sample. A successful square crop does not tell you whether the narrower Pinterest crop works.
Look for these specific problems:
- Off-center faces or products being cut off. Adjust the relevant operation’s alignment. If subject positions vary widely across the collection, separate images into source folders that suit different anchors and run those groups separately.
- Text or logos disappearing at the edges. Text already embedded in the source can fall outside a new crop rectangle. Where practical, generate crops from the clean photograph and add placement-specific text afterward.
- Tall crops becoming too tight. A wide scene may not contain a useful 2:3 or 9:16 composition. Select a more suitable source rather than expecting a different anchor to preserve everything.
A rule uses its configured alignment across the batch. An anchor that suits a person on the right can be wrong for the next photograph if its subject is on the left.
After checking the exported files, also review them in the intended social placement before publishing. Cropping, exact-size preparation where required, and the final placement check are distinct parts of producing the finished asset.
10. Run The Full Collection As One Crop-And-Export Batch
Once the test outputs look right, select your full source folder and confirm the export destination. Keep the approved crop operations, export settings, folder organization, and filename format in place.
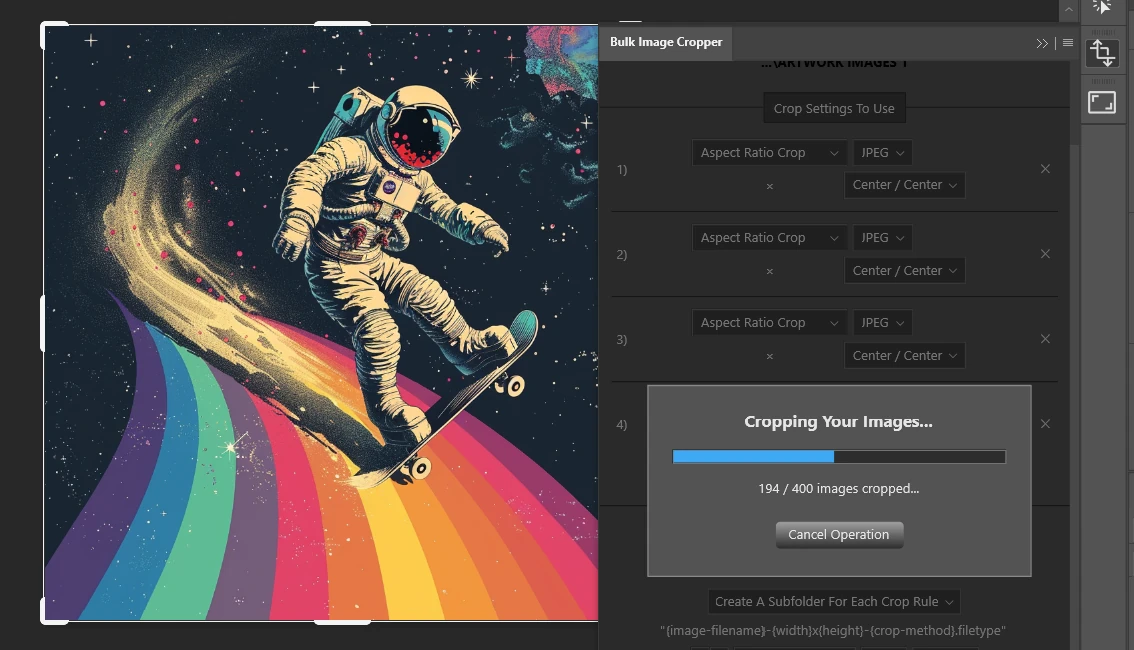
Click Crop My Images. The plugin validates the configuration and checks the current source-folder contents for supported images before processing.
For each source image, it applies a crop operation, exports the result, returns to the original source state for the next operation, and continues until that image’s variants are finished. It then closes the source document without saving changes and moves to the next file.
The progress total is the number of valid source images multiplied by the number of crop operations. With 100 images and the four-rule setup, the batch tracks 400 crop/export operations. Adding a fifth operation for Stories would make that 500.
The progress modal shows the operation’s status and provides Cancel Operation; Escape can also cancel while the modal is active. Your original source files remain unchanged because the cropped versions are exported separately.

11. Save The Approved Setup For The Next Campaign
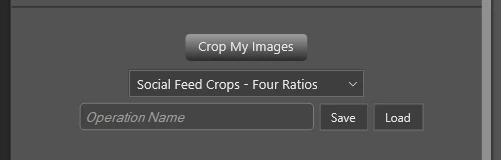
After reviewing the results, enter an Operation Name such as Social Feed Crops - Four Ratios and click Save. The configuration must pass validation before it can be saved.
A saved operation captures the crop rules, alignments, per-rule export settings, output organization, filename components, and selected source and export folders. This lets you reproduce an approved production setup later rather than reconstructing it from the last campaign’s exported files.
For the next job, choose the saved operation and click Load. Select the new source folder, confirm the export folder, and check a few representative images before committing the full collection. The approved ratios can remain the same even when the new photographs call for a different alignment.
To put the workflow into practice, install Bulk Image Cropper: Automated Batch Cropping through Adobe Exchange, build the four-ratio set, and test it on a small selection. Once the crops are approved, the plugin can handle the repeated cropping, exporting, naming, and organization across the folder—leaving you to choose and publish the strongest version for each placement.