How To Automatically Upscale An Entire Folder Of Images 4x Using AI
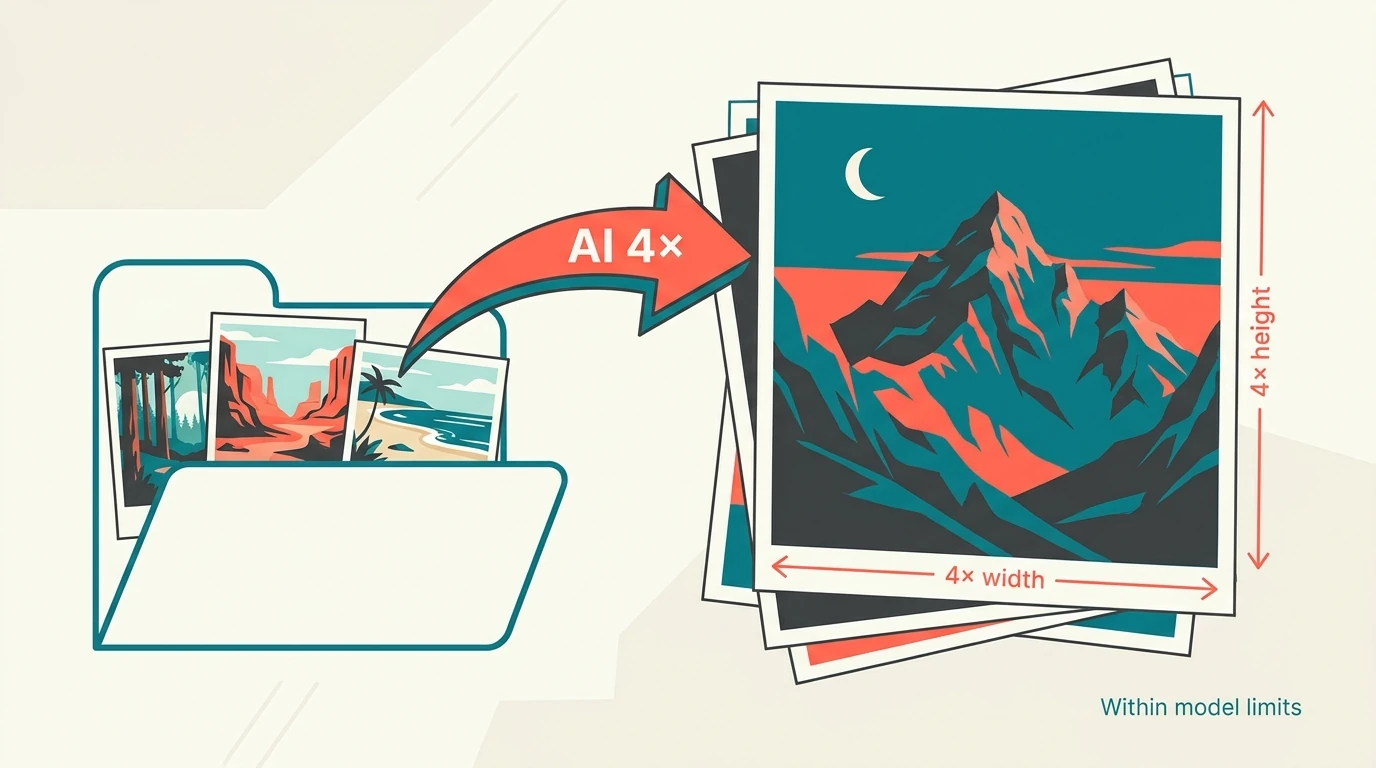

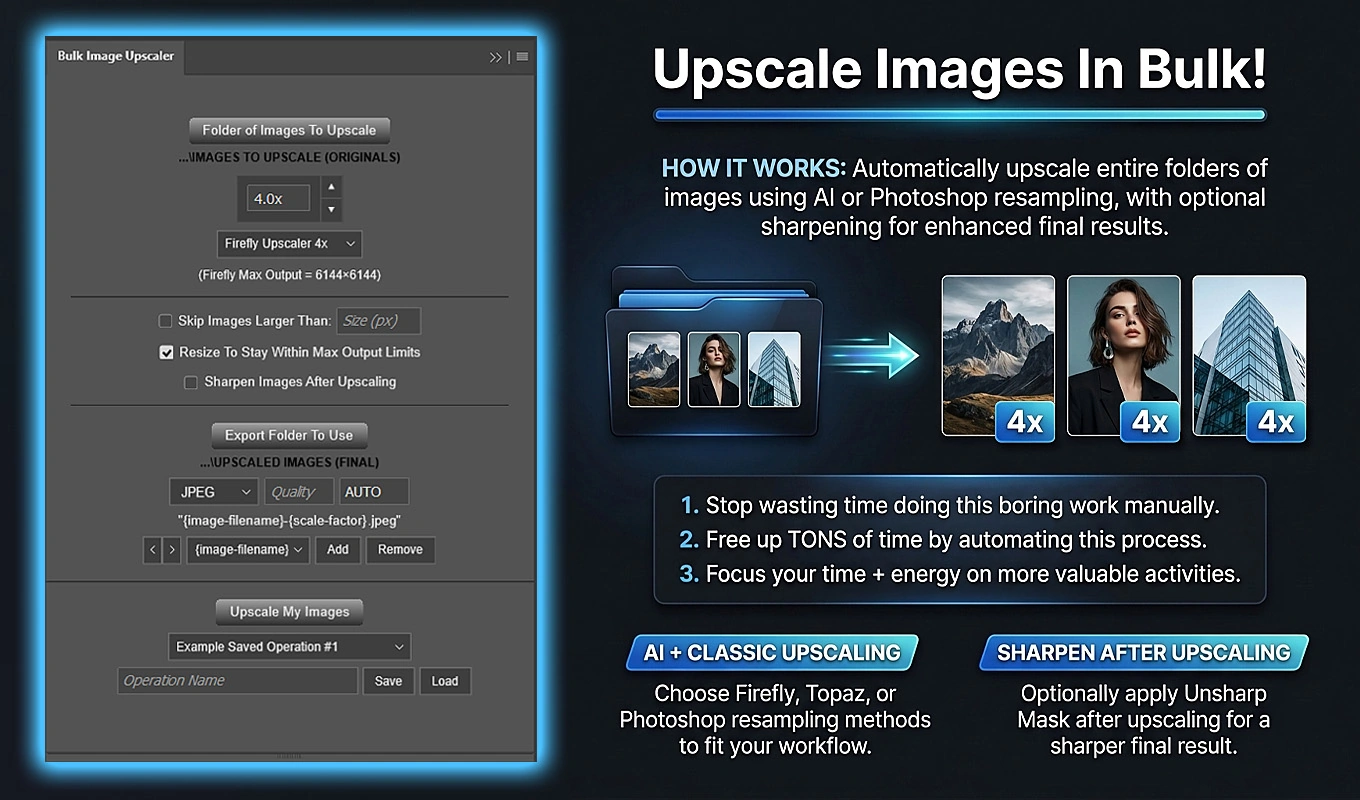
To automatically upscale a folder of images 4× using AI in Photoshop, use Bulk Image Upscaler: Batch-Enhance Resolution. Select your source folder, choose a 4× Firefly, Topaz Gigapixel, or Topaz Bloom method, configure the export, and start the batch. The plugin opens each supported image, runs the upscale, exports the result, and closes the source document without saving changes.
For images that fit the selected AI model’s output limits, 4× means four times the original width and four times the original height. A 600 × 450 image becomes 2400 × 1800 pixels. Larger sources need special attention: the plugin automatically handles model limits, but that can mean using 2× instead of 4×. The workflow below explains both how to automate the folder and how to tell whether every image can remain at your requested enlargement.
1. Prepare Photoshop and Put Your Source Images in One Folder
Install Bulk Image Upscaler through Adobe Exchange or Adobe’s Creative Cloud plugin marketplace, then open it from Photoshop’s Plugins menu. Your installed Photoshop version must support Generative Upscale for the AI methods to run; the plugin checks that capability before allowing an AI operation.
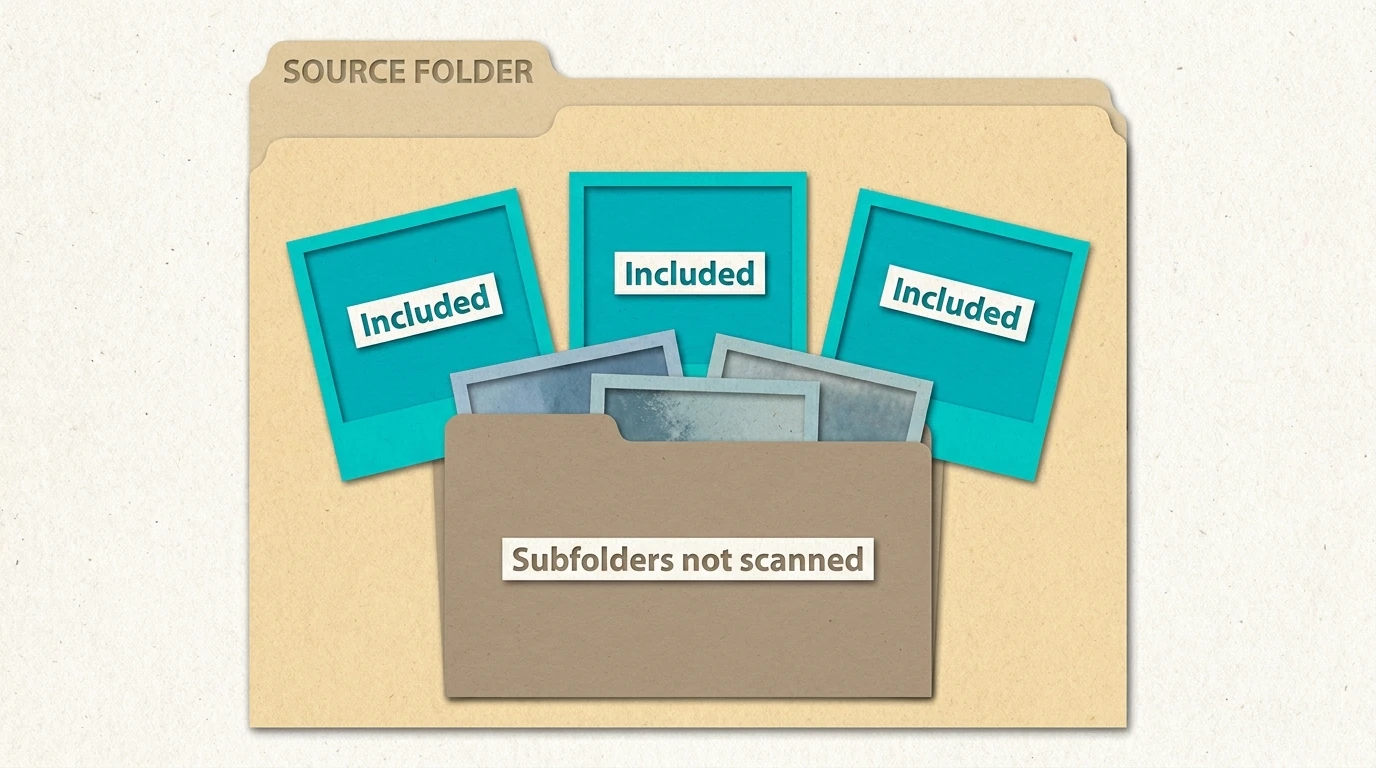
Put the images you want to enlarge directly inside one source folder. Bulk Image Upscaler supports common source formats including JPEG, PNG, TIFF, PSD, and WebP, among others. Unsupported file extensions are ignored.
The folder structure matters: the plugin processes supported files directly inside the selected folder, not images scattered through nested subfolders. If your intended batch spans several subfolders, gather the files you want processed into one input folder first.
In the plugin, click Folder of Images To Upscale and choose that folder. The interface displays a shortened path so you can confirm the selection. The plugin reads the folder’s current contents when the operation begins, so files added or removed after selection affect the batch that actually runs.
Also prepare a separate export folder. Keeping the enlarged derivatives apart from the inputs makes the results easier to review and keeps subsequent source-folder batches straightforward.
2. Choose a 4× AI Method and Focus on the Settings That Matter
The initial method is Firefly Upscaler 2x, so change it before starting a 4× batch. In the Upscaling Method dropdown, select one of these three options:
- Firefly Upscaler 4x
- Topaz Gigapixel 4x
- Topaz Bloom 4x
Selecting one automatically sets the scale-factor control to 4.0x. Check both the method name and the displayed factor rather than assuming the default configuration is already correct.
These choices use Photoshop’s Generative Upscale functionality. You are selecting the AI model through the plugin, not configuring a traditional Image Size interpolation method.
Adjust only the controls relevant to your chosen model
Firefly has no additional method-specific control in this plugin. Topaz Gigapixel exposes an optional Face Detail Recovery checkbox, which is relevant when processing portraits or other images containing people. Topaz Bloom exposes Creativity, an integer from 0 through 10.
Choose those settings deliberately, then keep the rest of the configuration focused on the job:
- Leave Resize To Stay Within Max Output Limits enabled. It is a required Smart Default for AI processing.
- Leave Skip Images Larger Than disabled if you want every supported image in the folder considered for processing. When enabled, it excludes sources whose width or height exceeds your threshold.
- Leave Sharpen Images After Upscaling off unless you specifically want an Unsharp Mask pass after enlargement. It is optional and off by default.
- Leave DPI at AUTO. AI methods fix this field automatically; it is not a custom DPI control for this workflow.
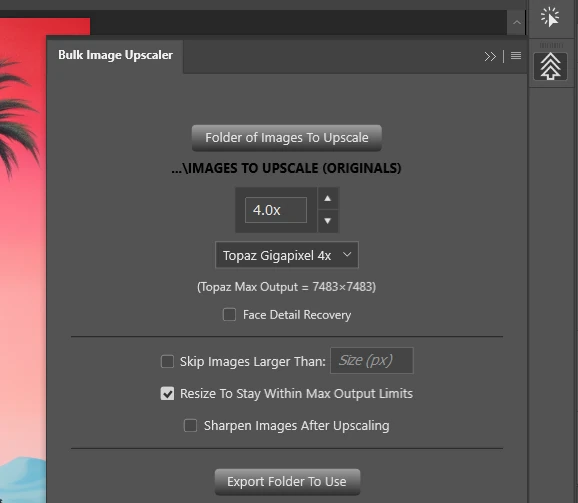
One batch uses one chosen AI family and primary scale configuration. Face Detail Recovery or Creativity, when applicable, is configured for that operation rather than separately for every file.
3. Check Whether Every Image Can Actually Stay at 4×
A 4× enlargement produces 16 times as many pixels because both dimensions are multiplied by four. That makes model output limits important even when the source image does not look especially large.
For an unchanged source to remain at a literal 4× enlargement, it must fit the selected model’s budget:
- Firefly: the final width and height must each be no more than 6144 pixels. At 4×, the source must therefore be no more than 1536 pixels on either side.
- Topaz Gigapixel: the final output must contain no more than 56,000,000 pixels. At 4×, that allows a source containing up to 3,500,000 pixels.
- Topaz Bloom: the final output must contain no more than 9,000,000 pixels. At 4×, that allows a source containing up to 562,500 pixels.
For the Topaz methods, the square dimensions displayed in the interface represent total-pixel budgets, not universal limits on each edge. A wide rectangular Gigapixel output can exceed 7483 pixels on one side while still fitting within 56 million total pixels.
Why the same source can produce different effective enlargements
Consider a 2000 × 1500 source. A literal 4× result would be 8000 × 6000 pixels, or 48 million pixels.
- With Firefly, the requested output exceeds the 6144-pixel dimension limit. The plugin can use Firefly 2× instead, producing 4000 × 3000 without reducing the source first.
- With Topaz Gigapixel, the 48-million-pixel output fits within the 56-million-pixel budget, so the requested 4× operation can proceed unchanged.
- With Topaz Bloom, even a 2× output would contain 12 million pixels. The plugin must proportionally reduce the source before performing the 2× operation within Bloom’s 9-million-pixel budget.
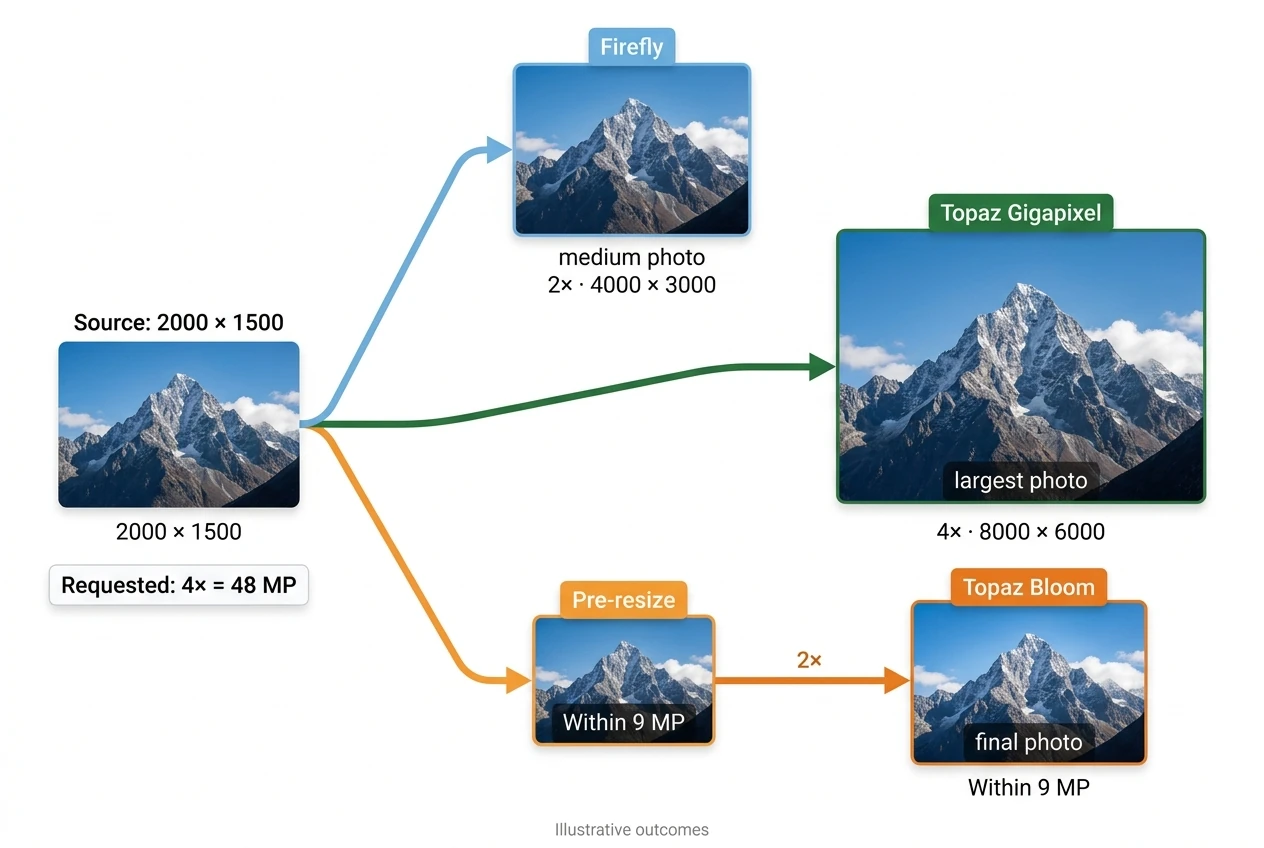
The automatic handling prioritizes retaining source information. It uses the requested scale when it fits, can move an oversized 4× request to the corresponding 2× model, and proportionally reduces the source only when necessary for 2× to fit. That source pre-resize uses Photoshop’s Bicubic interpolation.
If exact 4× dimensions are a delivery requirement for every image, choose a model whose limits accommodate every source in the folder. Automatic limit handling keeps oversized images processable, but it does not guarantee that every output will be four times the original dimensions.
4. Configure the Export and Start the Folder-Wide Batch
Once the source folder, AI method, and size requirements are settled, finish the operation in the export area:
- Click Export Folder To Use and select your destination folder.
- Choose the export filetype required for delivery, such as JPEG or PNG.
- Set Quality where applicable. JPEG, PNG, and WebP have a user-editable 0–100 control. PNG remains lossless; its setting controls compression rather than introducing lossy image quality.
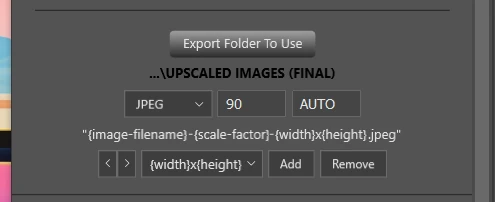
- Configure the filename format. Keeping the source filename and scale factor is a useful starting point; adding the final dimensions makes mixed-size batches easier to inspect.
- Confirm that the method ends in 4x and the scale-factor control reads 4.0x.
- Click Upscale My Images.
- In Confirm Before Proceeding, read the Generative Credits acknowledgement, select its checkbox, and click Confirm.
The Confirm button will not proceed until you actively select the acknowledgement checkbox. Cancel Operation exits without beginning the batch.
After validation, the plugin works through the supported images in the folder. For each image, it checks any enabled source-size threshold, resolves the AI output limits when necessary, performs the upscale, applies optional sharpening, exports the result, and closes the source document without saving.
This replaces the repetitive sequence of opening an image, invoking Generative Upscale, choosing settings, exporting, naming the result, closing the document, and repeating for the next file. You still choose the workflow, but you do not have to operate it image by image.
5. Understand What Happens to Originals, Credits, and Cancellation
Before trusting a large folder to an automated operation, it helps to know where the practical boundaries are.
Your original files are not saved with the enlarged result
Bulk Image Upscaler creates exported derivatives. After processing, it closes the source document with Do not save behavior, so the source file itself is not rewritten with the upscaled image—even when the operation temporarily resizes the open document to fit an AI limit.
Existing exported filenames are also protected against unintended replacement. If an output name already exists, the plugin adds a numbered suffix, such as image-4.0x (1).jpg.
Batch automation does not remove Generative Credits usage
All three AI families require the Generative Credits acknowledgement. Usage can depend on the model, operation settings, and number of images, so do not assume that a folder has one fixed credit cost regardless of its contents.
For a large job, reviewing a small representative folder first is a practical way to confirm your model choice and settings before applying them more broadly. That sample operation also uses Generative Credits.
You can cancel, but an active AI command may not stop immediately
The Upscaling Your Images... progress modal shows status, a progress bar, and a completed-image count. Cancel Operation and the Escape key can cancel the active operation.
Cancellation is checked between major processing stages. Photoshop can temporarily block normal plugin interaction while a generative command is executing, so cancellation should not be treated as an instantaneous interruption of an in-flight AI request.
6. Make the Exported Filenames Reveal the Actual Result
When model-limit handling can change the effective scale, filenames become more than an organizational detail. They can help you distinguish requested 4× outputs from images that needed adjustment.
In the filename builder, use these components:
- {image-filename} to retain the source name.
- {scale-factor} to record the actual AI scale used.
- {width}x{height} to record the final exported dimensions.
The components are joined with hyphens. For the earlier 2000 × 1500 example, a Gigapixel result could be named portrait-4.0x-8000x6000.jpg, while a Firefly result adjusted to 2× could be portrait-2.0x-4000x3000.jpg.
There is an important distinction when the source is reduced before upscaling: a 2.0x token identifies the AI multiplier applied to the adjusted source. It does not necessarily mean the exported dimensions are twice those of the original file. The width and height tokens tell you the delivered dimensions.
After the batch, inspect representative outputs as well as their names. Check images containing fine textures, faces, lettering, or other details important to your intended use. The filename confirms scale and dimensions; visual review confirms whether the result suits the job.
7. Save the Configuration for the Next 4× Folder
Once the configuration produces the results you need, enter an Operation Name and click Save. A saved operation retains the selected method and scale, applicable model controls, optional sharpening, filename components, export settings, and folder selections.
For the next job, select the saved operation and click Load. Review the restored source and export folders, choose different folders if needed, and check the new sources against the model’s limits. Loading a 4× configuration does not make a larger set of incoming images fit the same output budget.
For recurring work, this is the practical payoff: configure the AI enlargement and export workflow once, reuse it across new folders, and let Bulk Image Upscaler handle the repetitive opening, processing, naming, exporting, and closing. Keep model limits in view, include actual dimensions in your filenames, and you have a repeatable way to batch-upscale an entire folder at 4× wherever the selected AI model supports it.