How To Build a More Efficient Photo Editing Workflow for Wedding Photographers

A wedding gallery is not one editing problem. It is several different jobs: organizing files from multiple cameras, choosing the photographs that tell the story, balancing inconsistent lighting, retouching important images, preparing deliverables, and making sure the right people receive the right files.
Efficiency comes from separating those jobs—and stopping yourself from making the same decision repeatedly. A faster computer cannot fix an indecisive cull. A preset cannot fix poorly grouped lighting conditions. And automation only helps when the process being automated is already worth repeating.
The workflow below follows a wedding from memory cards to delivery. It uses Lightroom Classic for concrete examples, with complementary tools where they solve a specific bottleneck. The guiding principle is simple: make creative decisions deliberately, apply repeatable decisions in batches, and inspect the exceptions.
1. Build a Reliable Intake System Before You Start Editing
Start with a defined production sequence: ingest and verify, organize, cull, correct color and tone, retouch selected photographs, prepare output versions, inspect, deliver, and archive. Give each wedding a visible status so that “I’m working on it” becomes something more useful, such as “color complete; twelve retouches outstanding.”
This matters particularly during wedding season. When several galleries are open at once, remembering where you stopped becomes its own unpaid task.
Separate originals, working files, and deliverables
Use a repeatable folder structure. For example:
- 01_Originals: camera files, separated by photographer, camera, or card where necessary.
- 02_Working: job notes and any wedding-specific working catalog or supporting files.
- 03_Retouched: layered Photoshop documents and other edited masters.
- 04_Client_Clean: approved, unwatermarked client deliverables.
- 05_Previews_Watermarked: branded or proof versions, when needed.
- 06_Product_Previews: wall-art and other presentation mockups.
You do not need a separate Lightroom catalog for every wedding to use this structure. If you prefer a master catalog, organize each wedding through folders and collections while keeping the catalog in its established location.
Prevent filename collisions before combining multiple photographers’ work. Two cameras can both produce a file called DSC_1234. Preserve their identities through separate original-file folders or a consistent import naming convention. For delivered photographs, keep a stable identifier that lets you trace a client’s selection back to its source.

Make backup verification a gate, not a good intention
Before culling, confirm that every card has been copied and that a second independent copy exists. Compare file counts, open photographs from different points in the day, and use checksum verification where your copying process supports it. Do not clear cards simply because an import progress bar reached the end.
Build toward a working copy, a separate local backup, and an offsite backup. Two folders on the same physical drive are not independent protection against that drive failing. Periodically restore a small sample from your backups so you know recovery actually works.
Also distinguish photograph backups from editing-data backups. As Adobe’s Lightroom Classic catalog backup guidance explains, backing up the catalog does not back up your photographs or exported files. Include the associated .lrcat-data file in your backup plan as well; Adobe identifies it as important editing data in its catalog FAQ.
Fix camera chronology once
Synchronize camera clocks before the wedding, including your second photographer’s cameras. A shared reference photograph of a clock makes later correction easier if a camera is wrong.
If the files are already out of sequence, correct each affected camera’s offset before building the story. In Lightroom Classic, select that camera’s files in Grid view and use Metadata > Edit Capture Time. Adobe’s capture-time instructions explain how the adjustment to the active photograph shifts the other selected photographs by the same amount. Verify a recognizable moment afterward rather than assuming the correction was right.
The payoff is not merely a tidier timeline. It makes comparing overlapping coverage and spotting missing moments much easier.
2. Cull in Story-Driven Passes and Make Each Selection Once
The most expensive photograph to edit is often the one you should never have selected.
Do not alternate between choosing photographs and perfecting them. That encourages attachment to mediocre frames because you have already invested time in them. Complete a structured selection process first, then edit the selected set.
Give each culling pass one question
- Is this photograph usable or uniquely important? Remove obvious misfires, accidental frames, and redundant technical failures. Keep imperfect photographs when the moment cannot be replaced.
- Which frame best represents this moment? Compare bursts for expression, gesture, focus, and interaction. Choose meaningful variations, not several nearly identical photographs because deciding feels difficult.
- Does the selection tell the complete wedding story? Review coverage of preparations, ceremony, relationships, family groups, portraits, details, speeches, and reception—not just your favorite couple photographs.
For family formals, check every face before finalizing the selection. For documentary moments, do not automatically reject closed eyes: laughter, an embrace, or an emotional reaction may be stronger than a technically tidier alternative.
Use a small selection vocabulary. For example, one star can mean provisional keeper, two stars can mean delivery selection, and three stars can mean album or portfolio candidate. Track editing progress separately with labels or collections. Otherwise, “five stars” gradually becomes a confusing mixture of quality, completion, and client importance.
Choose a culling tool for the bottleneck you actually have
If your existing Lightroom selection process is responsive, keep it. Adding another application is not automatically an improvement.
If waiting for previews interrupts your decisions, Photo Mechanic is worth evaluating for ingestion and culling. Its setup guide covers single-key ratings, automatic advancement, and metadata preferences for working alongside Lightroom.
Test the handoff before using it on a complete wedding: rate a small group, import it into Lightroom, and confirm that ratings and labels arrive as intended. Camera Bits notes that color-label names must match between applications; the visible color alone is not enough.
There is also an important preview distinction. Photo Mechanic can display the JPEG embedded in a RAW file, as described in its RAW preview documentation. Treat that as a selection aid, not the final word on recoverable exposure or color. Send borderline but emotionally valuable frames to your RAW editor before rejecting them for their preview appearance.
Once the delivery selection is established, stop repeatedly browsing the rejects. Reopen them to answer a specific coverage question, not because you are avoiding the next production stage.
3. Batch by Lighting and Camera, Then Edit the Exceptions
A wedding changes lighting constantly. Window-lit preparations, an outdoor ceremony, shaded portraits, tungsten speeches, and a flash-lit dance floor should not be treated as one uniform batch.
The useful unit of editing is a group of photographs that can reasonably share a correction—not the entire wedding and not necessarily every photograph from the same room.

Build lighting groups around actual changes
Useful groups might include:
- Preparations beside one window, separated from photographs facing deeper into the room.
- Ceremony photographs in direct sun, separated from shaded viewpoints.
- Couple portraits during one consistent lighting setup.
- Reception photographs without flash, separated from flash photographs.
- Dance-floor sequences under similar DJ lighting, rather than every reception frame together.
Within each group, begin with a representative anchor photograph. Establish skin tone, highlight handling, contrast, and the overall look there. Then apply only the adjustments that make sense across that group.
Lightroom Classic lets you choose which edits to copy or synchronize; Adobe explains this in its Develop settings documentation. Use that selectivity instead of treating “Sync Everything” as the default.
A creative tone curve may transfer well across a set. Exposure compensation may not if your camera settings changed. White balance may need a separate adjustment when the light source changed. Crops, local corrections, and spot repairs should not be copied indiscriminately between different compositions.
Match cameras visually before synchronizing corrections
For a second photographer or a different camera model, make an anchor from each camera under comparable light. Compare the rendered skin tones and neutral areas, then establish a suitable baseline for each.
Do not assume identical temperature and tint numbers must produce identical-looking photographs. Your target is consistent appearance, not matching slider values.
Likewise, do not force every wedding scene into daylight neutrality. Candlelight can remain warm. DJ lighting can remain colorful. Correct unwanted casts while preserving the atmosphere that belongs to the moment.
Use an exception queue instead of interrupting the batch
After applying the baseline, scan the group for outliers. Flag the backlit portrait, the flash misfire, the strongly colored face, or the frame with an unusual highlight problem. Finish the ordinary photographs first, then handle the flagged exceptions together.
This avoids switching repeatedly between routine slider work and difficult problem-solving. It also makes the remaining workload visible.
If exposure and white balance are still your largest time sink, a complementary service such as Imagen’s Lite Personal AI Profile offers a specific approach: it uses your supplied preset while adapting exposure and white balance. The documented workflow supports RAW color photographs and requires a preset without masks.
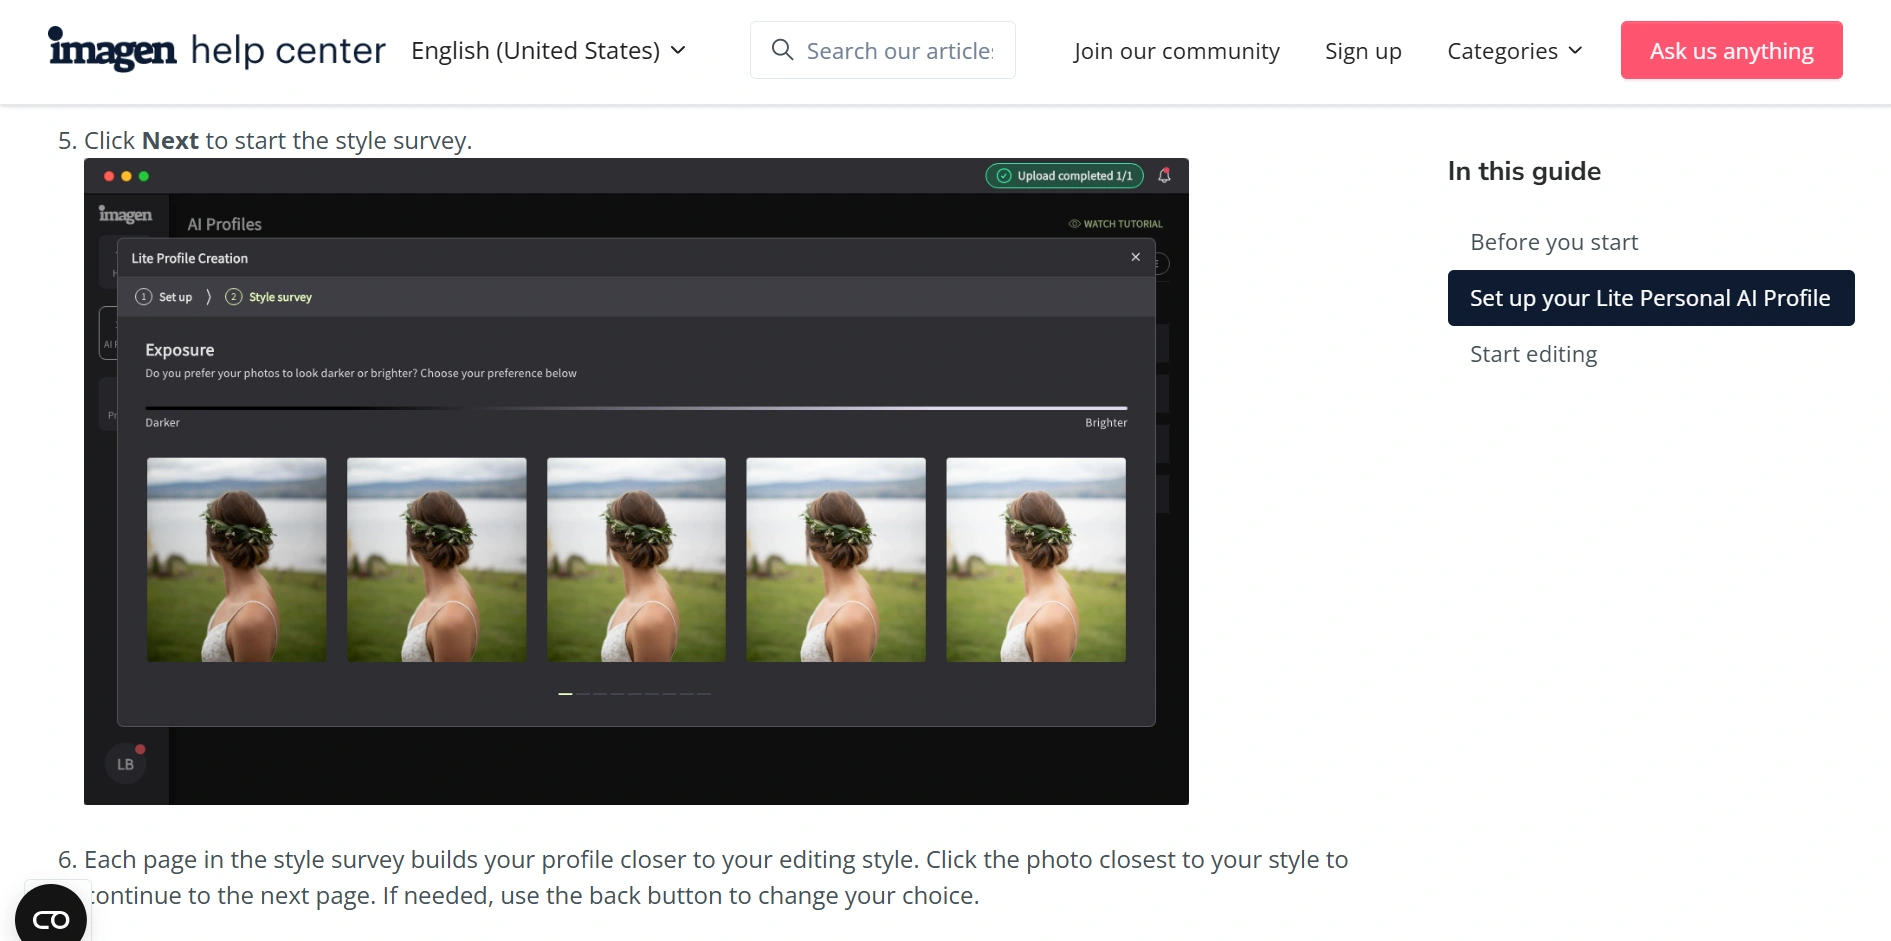
Evaluate it on a representative sample—not just easy portraits. Include preparations, bright ceremony highlights, mixed-light speeches, and difficult reception frames. Count the corrections you still need to make and include upload, processing, and review time when judging whether it helps. Keep only one owner of the working catalog during each handoff.
Remove waiting without compromising review
Use Lightroom Classic Smart Previews when you need a lighter editing setup or access to edits while the originals are disconnected. Reconnect the originals for full-resolution inspection and final delivery preparation; a lightweight editing proxy is not a replacement for your original files.
For performance problems, first address the workflow settings covered in Adobe’s performance guide: fast storage for the catalog and previews, adequate free space, intentional preview building, and an appropriately sized Camera Raw cache. Build detailed previews for the photographs you need to inspect closely rather than making every rejected frame consume the same preparation time.
Keep color judgment stable, too. A consistently lit workspace and a calibrated, profiled display help prevent unnecessary corrections based on misleading screen appearance. Adobe’s monitor calibration and profiling guidance is a useful starting point.
4. Reserve Photoshop for Photographs and Products That Need It
Not every delivered photograph needs individual Photoshop treatment. Decide what qualifies before opening the first file.
A practical distinction is between gallery-ready correction and detailed finishing. Most selected photographs need consistent color, tone, composition, and a sensible final inspection. Album heroes, large-print candidates, and specifically requested retouches may justify much more attention.
Create a retouch queue with a stated reason for each image. “Clean up distraction beside the couple” is actionable. “Make this better” invites an open-ended editing session.
Keep one authoritative retouched master
When a photograph receives detailed work, retain an editable master and make its relationship to the original obvious. Future album, print, and web versions should come from that approved master—not whichever JPEG happened to be easiest to find.
If you outsource retouching, send a short brief with an approved reference, the requested changes, and boundaries such as preserving natural skin texture or leaving permanent identifying features unchanged unless requested. Clear instructions are usually more useful than a large collection of vaguely similar examples.
Give your editor a defined return location and review checkpoint. Avoid having two people independently revise the same master without a handoff plan.
Automate recurring wall-art presentations, not creative album design
Wedding photographers who sell framed prints or canvases often perform another repetitive Photoshop task: placing approved portraits into the same presentation scenes. Manually replacing a photograph, fitting it, exporting the scene, and repeating the process for every candidate adds production work after the gallery is already finished.
Batch-Replace Smart Objects: Mockups In Bulk fits this specific stage. It takes a folder of artwork or image files and inserts each into one PSD/PSB mockup template, or into every valid PSD/PSB template directly inside a selected folder.
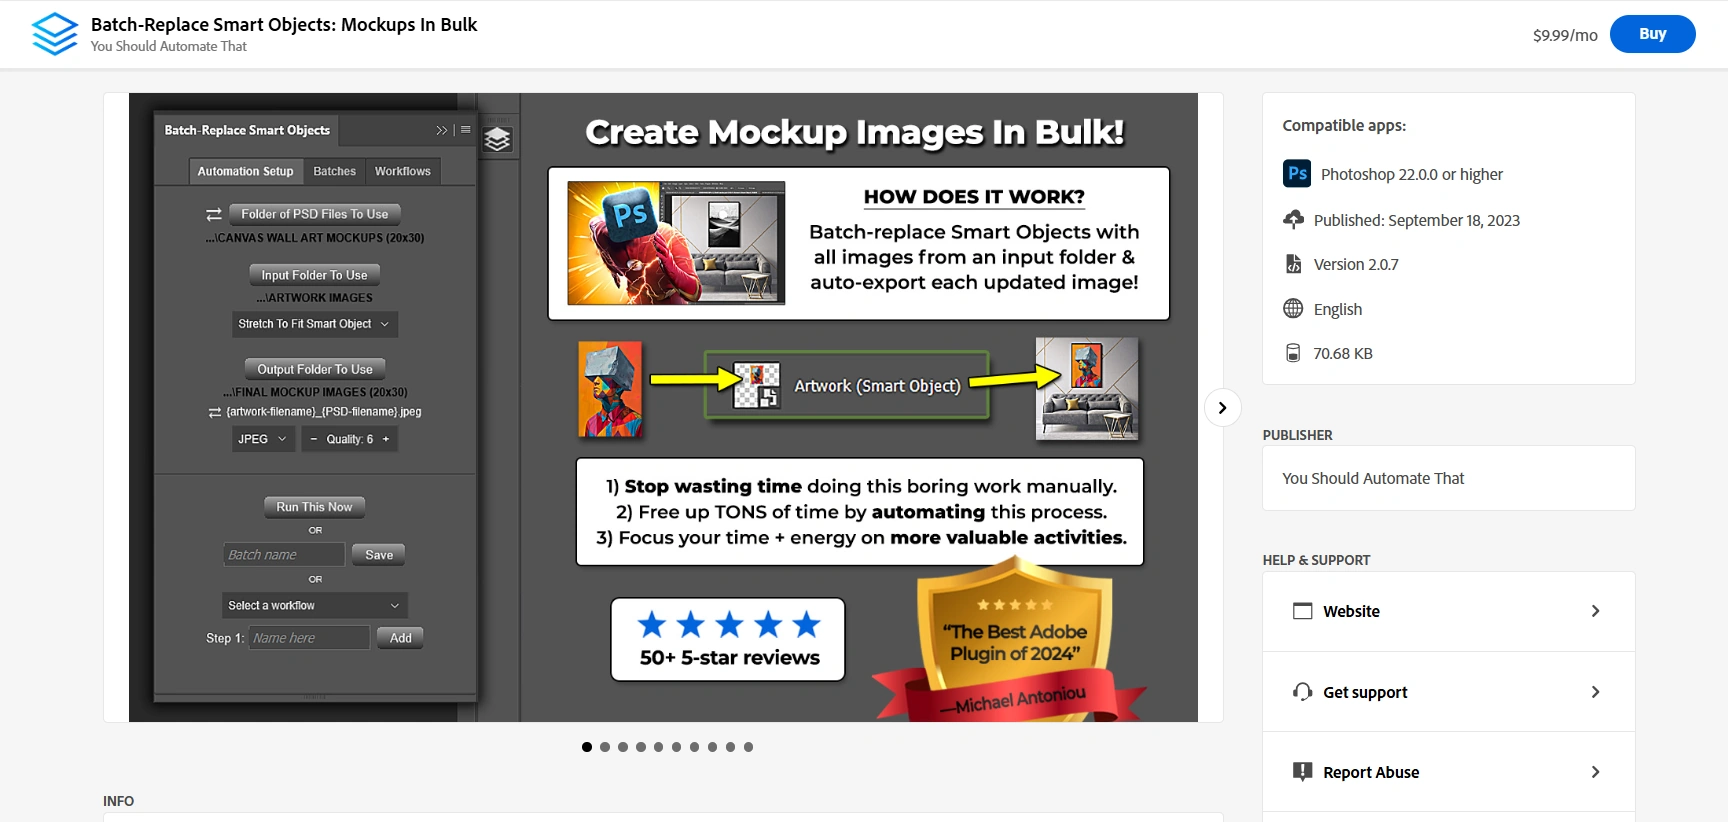
For example, ten approved portraits across two wall-art scenes can produce twenty presentation images in the normal case. The benefit is removing repeated replacement and export work—not replacing your judgment about which photographs deserve a print presentation.
For photographs of people, choose the placement behavior carefully:
- Contain Inside Smart Object preserves the full photograph and its aspect ratio, but may leave unused space.
- Fill Smart Object & Crop preserves aspect ratio and covers the target, but may crop part of the photograph.
- Stretch To Fit exactly matches the target dimensions and can distort proportions when the aspect ratios differ.
Contain and Fill offer nine placement positions. Use them to control where empty space falls or which part of the photograph survives cropping. Check heads, hands, and dress edges before generating the full set.
Prepare the template properly first. Its Smart Object’s internal dimensions and resolution provide the sizing reference. Convert the design layer to a Smart Object before applying the outer perspective or distortion intended to carry through to replacement photographs.
A template with one Smart Object is automatically targeted. With multiple Smart Objects, select the intended targets and save the template in that state for reuse. Every selected target receives the same current photograph; this is not a system for automatically assigning different photographs to different album-spread slots.
Save a Batch for a recurring setup, or use a Workflow when several presentation operations need different templates, placement settings, or export destinations. Keep these mockups separate from print-production files, and describe room scenes as illustrative unless their scale has actually been established.
If you do not sell these products, skip this stage. Optional presentations should not become a prerequisite for delivering the main wedding gallery.
5. Make Sharpening a Controlled Finishing Stage
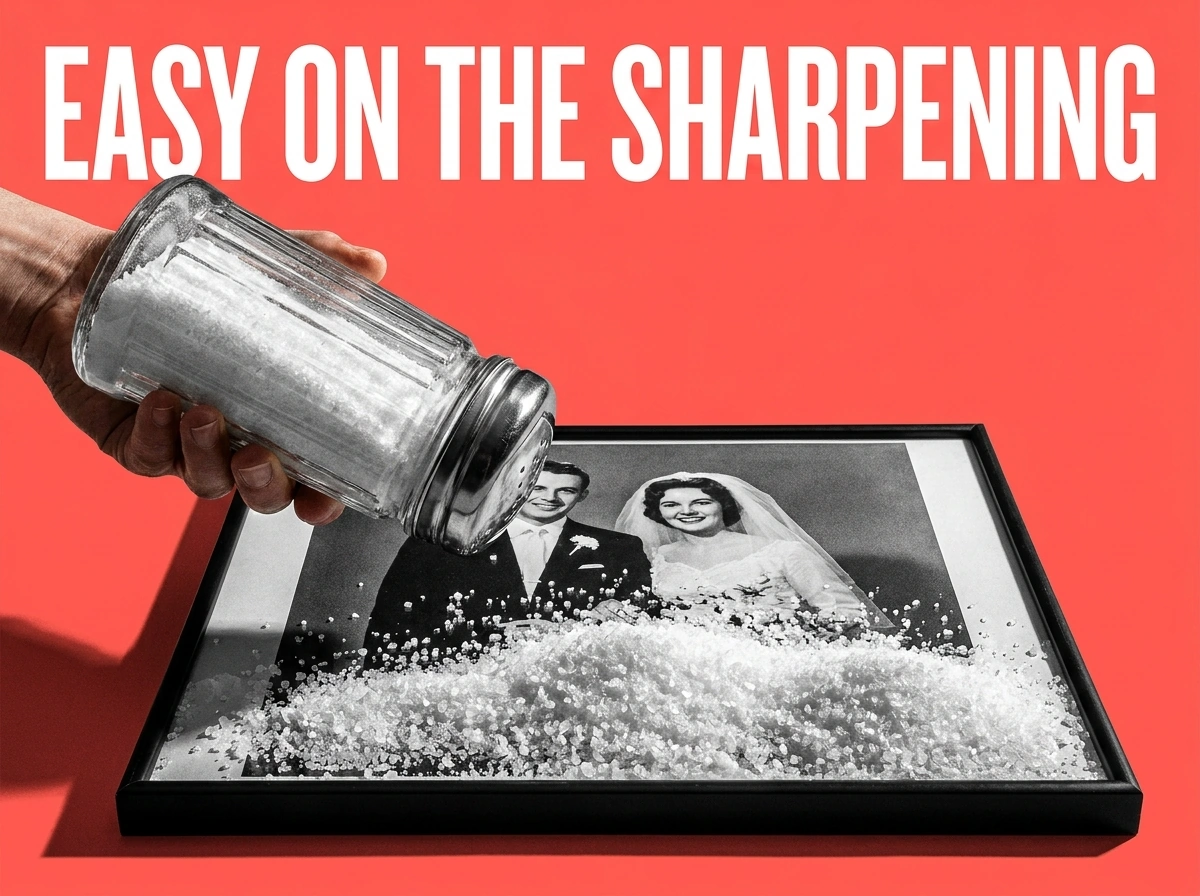
Sharpening should have a defined purpose and position in the workflow. Record what sharpening is already present in RAW development, then decide whether an additional finishing pass is needed for the intended output. Do not let a preset, a Photoshop pass, and a later export step all add sharpening without an intentional plan.
Complete composition and noise handling first. Prepare the required output dimensions before a destination-specific sharpening pass, and inspect the resulting files—not only the working image.
Test a wedding-specific sample before processing the folder
Your test set should include a close portrait, fine veil or lace detail, a group photograph, a high-ISO reception image, and a strongly backlit edge. Inspect eyes and fine detail, but also look for exaggerated skin texture, noisy shadows, and visible halos.
There is no universal wedding sharpening recipe. A clean daylight portrait and a dark dance-floor photograph may need different treatment even when their pixel dimensions match.
When the settings are established, repeatedly opening photographs, preparing the target, applying a filter, exporting, and closing them is unnecessary manual handling. Bulk Image Sharpener: Automated Sharpening automates that folder-based Photoshop sequence using either Unsharp Mask or Smart Sharpen.
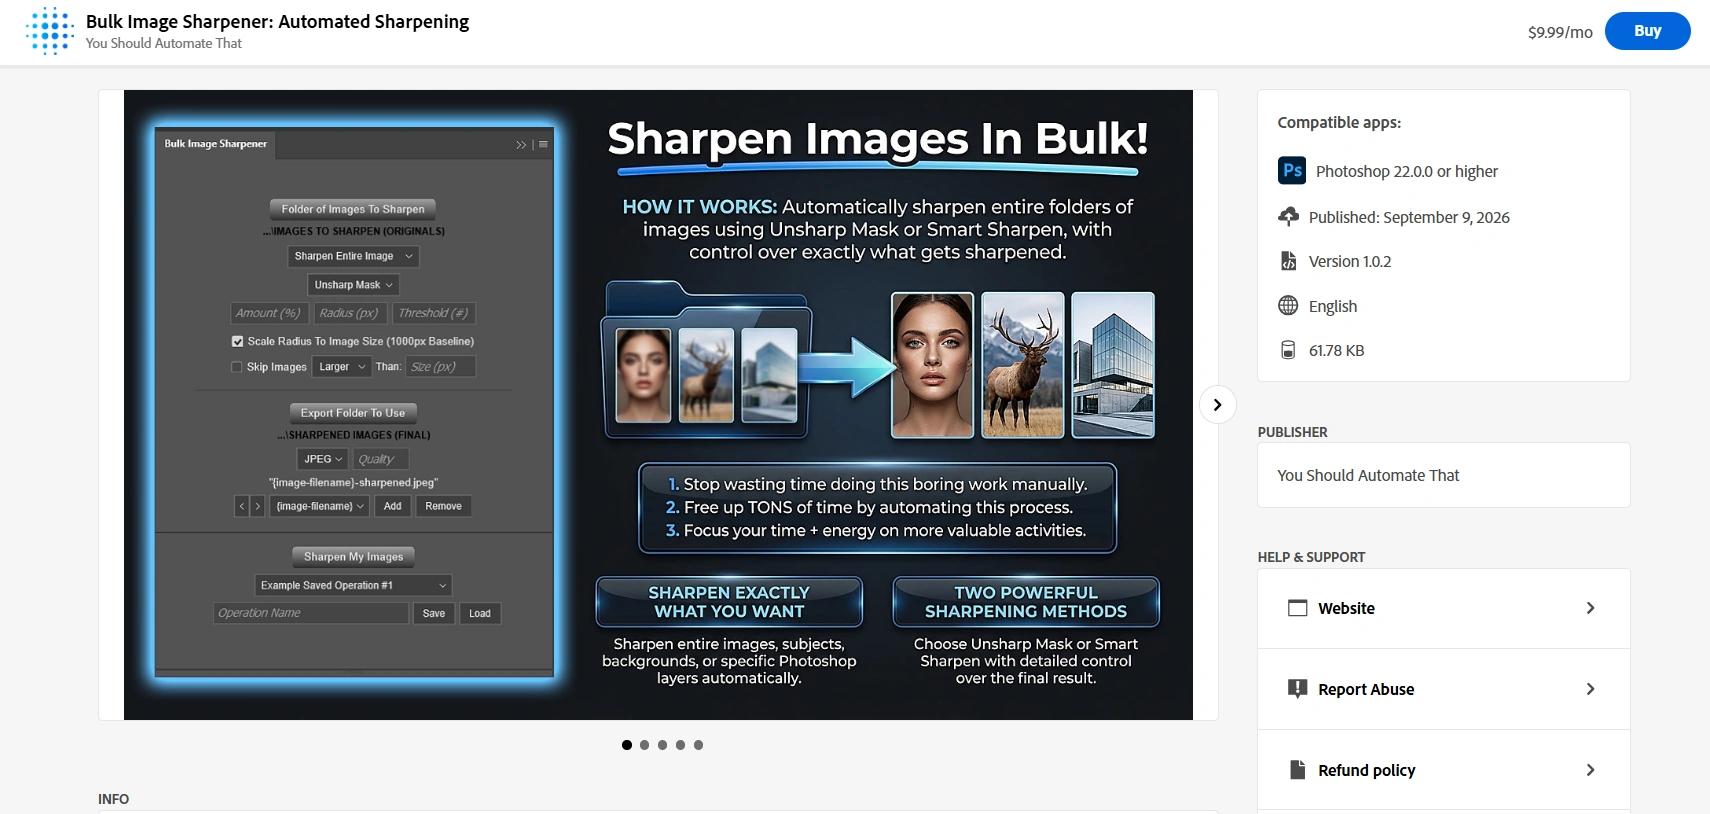
Use it after RAW development on supported rendered files, such as JPEG, TIFF, PSD, or PSB. It is a finishing tool, not a substitute for selecting photographs or developing camera RAW files.
Choose the target according to the actual photograph
Entire Image is the straightforward option for a general finishing batch. Subject Only can be useful for portrait sets when you want additional sharpening concentrated on Photoshop’s detected subject rather than the background.
The subject workflow uses Photoshop Select Subject, copies the selected pixels onto a new layer above the merged image, and sharpens that copied layer. If no usable subject selection is produced, the plugin falls back to sharpening the entire image. Review the outputs with that fallback in mind; “subject only” is not an unconditional guarantee for every source.
For consistently structured layered masters, a named-layer target can be useful. Matching is exact and case-sensitive, and a missing target also triggers whole-image fallback. A targeted ordinary layer is prepared through rasterization; a targeted group is merged.
Keep your editable retouch masters outside this output stage. Entire-image sharpening merges visible layers in the working document, so choosing PSD output does not mean the original visible layer structure remains intact. The source document is closed without saving, preserving the source file.
Use adaptive radius for mixed resolutions—not as automatic quality judgment
The plugin’s Scale Radius To Image Size option uses a 1000-pixel longest-edge baseline. It calculates the applied radius as the configured radius multiplied by the document’s longest edge divided by 1000.
As an illustration, a configured 1-pixel radius becomes 1 pixel on a 1000-pixel-long-edge image and 4 pixels on a 4000-pixel-long-edge image. Those numbers demonstrate the scaling behavior; they are not recommended settings for every wedding.
With Unsharp Mask, Radius scales while Amount and Threshold remain fixed. With Smart Sharpen, the main, shadow, and highlight radii scale. The reference is the full document size, not the subject’s bounding box.
This can reduce the need to calculate radii individually across mixed-resolution files. It does not account for every difference in noise, focus, texture, or output medium, so retain separate batches where those differences matter.
Save tested operations with clear names such as Portrait-Web or Reception-Web. Recheck their saved source and export folders before each wedding. If you enable size-based skipping, remember that skipped files are not exported; a completed operation does not necessarily mean every source produced a deliverable.
6. Branch Clean Client Files From Watermarked Previews
Watermarking is a distribution decision, not a mandatory stage for every photograph.
Keep approved client deliverables clean unless your agreement specifies otherwise. Create a separate branch for branded social previews, proof files, or other uses that genuinely need a visible mark. A watermark does not replace access controls or permission to publish a private wedding photograph.
Make the branches explicit before processing. A folder labeled Client_Clean should never become the input for an experiment that permanently replaces its files with branded versions.

Replace repeated logo placement with a saved operation
Applying a logo manually across a wedding set means repeating the same opening, placement, resizing, positioning, opacity, naming, and export steps. The creative decision is usually made once; the manual execution repeats hundreds of times.
Bulk Image Watermarker: Automated Batch Logos separates those two things. Configure a text or image watermark, choose its layout and conditions, and let the Photoshop plugin process the supported files directly inside the selected folder.
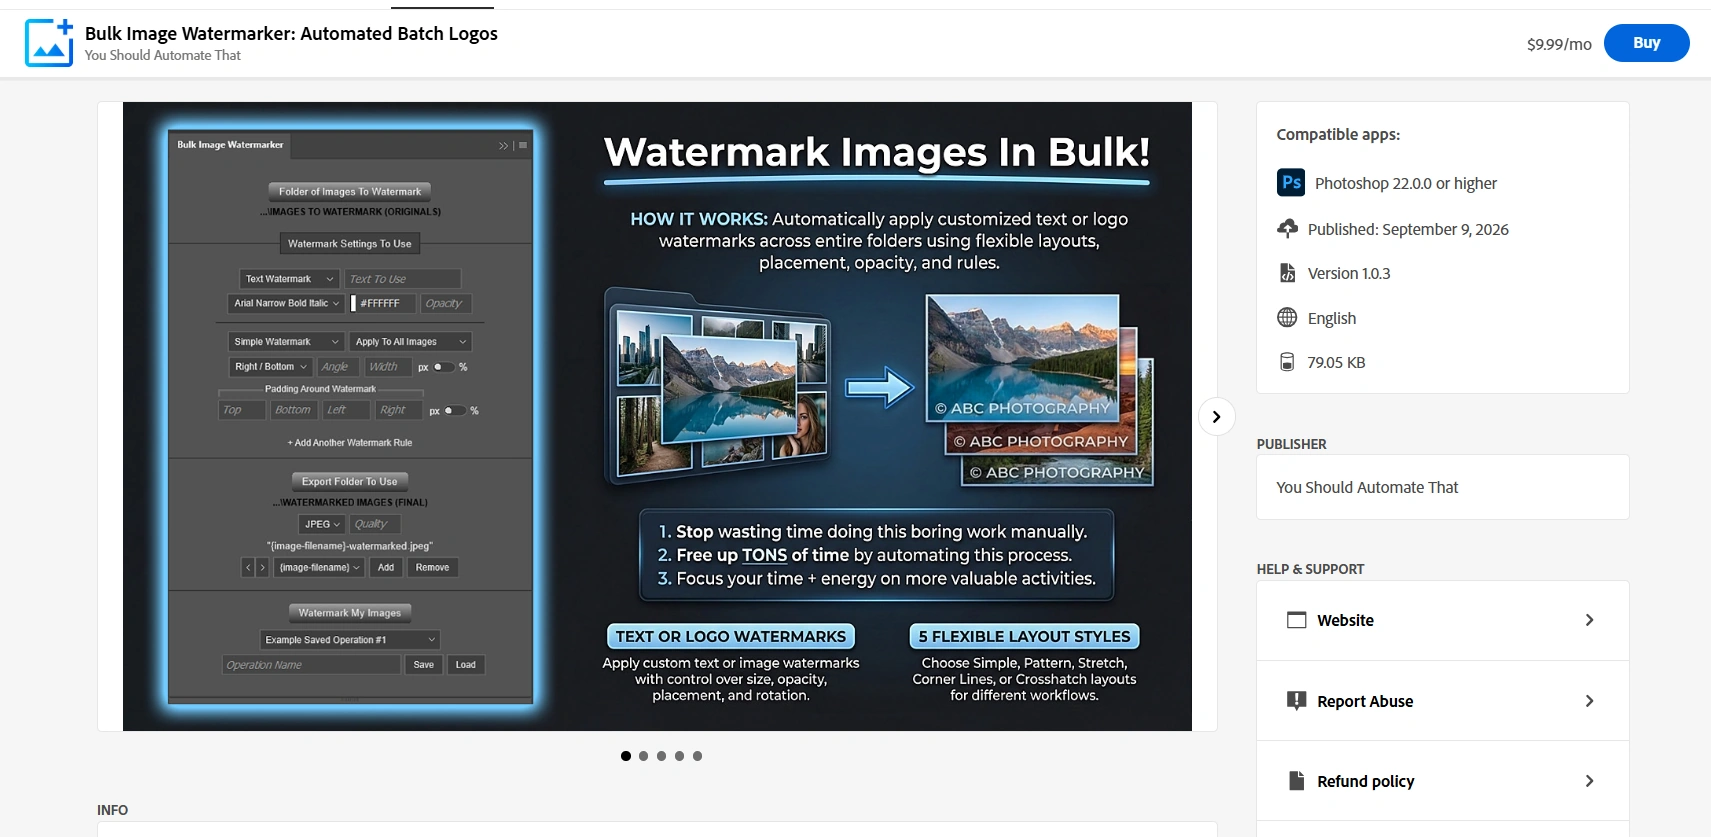
For understated wedding branding, a Simple Watermark is usually the relevant starting point. It supports nine alignments, opacity, rotation, configurable width, and independent edge padding. Percentage-based width adapts to image width, while percentage left/right padding uses image width and top/bottom padding uses image height.
That is useful when the preview set mixes portrait and landscape photographs or different resolutions. You can establish a proportional logo size and margins instead of manually correcting every placement.
Test the mark on both a bright dress and a dark reception background. Do not choose opacity from a single easy photograph and assume it remains readable everywhere.
Use conditions where they reduce genuine sorting work
Separate rules can target vertical, horizontal, or square images. Filename conditions can identify a deliberately named subset, such as files containing preview. Brightness conditions can support light/dark watermark treatments—for example, white text below a chosen brightness threshold and black text at or above it.
Brightness is calculated from the document-wide Photoshop histogram. It is not a measurement of the particular corner behind the logo, so a globally bright photograph can still have a dark logo placement area. Check those exceptions visually.
Rules run sequentially on the same working document. If several qualify, their watermarks accumulate and the combined result is exported once; they do not generate separate alternative outputs. When you combine conditions, filename and brightness categories use AND logic, while selected orientation types form an OR group.
There is one important completeness safeguard: if no rule applies to an image, the plugin does not export it. For a folder where every photograph needs a branded version, make sure the rules cover the entire set. Otherwise, use the conditional exclusions deliberately and reconcile the output count.
Save the tested workflow for future weddings. The time saving comes from eliminating repeated handling and setup, not from eliminating inspection. Keep a small test folder containing your difficult examples so that a logo update can be checked before another large batch.
Keep finishing stages separate and reproducible
Use separate source and destination folders for each batch. Both the Sharpener and Watermarker process supported files directly inside the selected folder rather than recursively searching arbitrary subfolders.
On a watermarked branch, finish the photograph’s sharpening before adding the logo. When further processing is planned, consider TIFF intermediates and reserve the delivery format for the final stage. Start reruns from the approved upstream files, not from already sharpened or watermarked outputs.
Duplicate-safe naming prevents existing outputs from being blindly overwritten, but it can also leave several versions in a destination. Use a fresh output folder for a release candidate, or clearly separate test runs from the approved delivery set.
7. Close the Job With a Release Checklist—and Measure the Bottleneck
A gallery is finished when it is correct, accessible, and backed up—not merely when the last slider has been adjusted.
Review consistency at gallery scale, then inspect important photographs closely. The first check catches visual jumps between cameras and lighting groups. The second catches retouching artifacts, focus problems, sharpening issues, and awkward crops that thumbnails can hide.
Use a release checklist that catches expensive mistakes
- Coverage: important moments and agreed family groups are represented, with no unexplained gaps.
- Consistency: skin tone and overall treatment remain coherent within scenes and across photographers.
- Versions: retouched masters, clean client files, watermarked previews, and presentation mockups are in the correct destinations.
- Completeness: expected source selections reconcile with exported files; conditional exclusions, skips, cancellations, and reruns are accounted for.
- Output: dimensions, format, color profile, and any print-lab requirements match the intended destination.
- Access: client and guest visibility, download permissions, and passwords have been checked from a visitor’s perspective.
- Recovery: original files, editing data, retouched masters, and the final delivery set have appropriate backups.
For gallery delivery, choose tools around the client experience rather than branding alone. For example, Pixieset’s Client Exclusive Access can separate client-only photo sets from guest-visible content and allow clients to mark photographs private. That is useful for preparations or personal moments that belong in the couple’s complete gallery but not necessarily in the version shared with every guest.
Test the actual visitor experience in a logged-out browser. Download a sample, confirm that it is the intended clean file, and verify that private content is not visible through the guest path.
Your delivery email should explain where to download photographs, which files to use for printing, how to make album selections, and what to do if something appears wrong. One clear message can prevent several rounds of avoidable support.
Improve the next wedding with evidence
Track hands-on time separately from machine time for ingestion, culling, baseline editing, exceptions, retouching, output preparation, and final review. Also record why photographs needed a second visit.
If culling dominates, improve selection rules before buying export automation. If color correction dominates, refine lighting groups and camera baselines. If output handling dominates, saved sharpening and watermarking operations are directly relevant. If print presentations consume repeated setup time, standardize the Smart Object templates.
Keep one main gallery in active finishing at a time where practical. A small sneak-peek set can be a separate, scheduled commitment, but reuse its approved edits in the full gallery instead of treating it as an unrelated production job.
For your next wedding, implement one dependable intake checklist, one selection vocabulary, one lighting-group method, and one tested output process. Then measure the result. The strongest workflow is not the one with the most software; it is the one that protects originals, reduces repeated decisions, automates predictable work, and leaves your attention available for the photographs that genuinely need it.