How To Build a Scalable Image Production Workflow for Large Product Catalogs

A large product catalog does not become manageable simply because individual images are edited faster. It becomes manageable when product identity, image standards, processing, quality control, and publishing work together as a repeatable system.
Otherwise, automation can make the wrong work happen faster: generating scenes for incompatible products, exporting thousands of inconsistent cutouts, or uploading images to the wrong variants.
The practical goal is to build a production line with clear inputs, reusable processing rules, visible exceptions, and approved outputs. Whether your catalog consists of photographed products, print-on-demand designs, or a mixture of both, the following workflow gives you a way to expand production without rebuilding the process for every product page.
1. Size the Workload in Image Sets, Not Just SKUs
“We have 2,000 products” is not yet a usable production estimate. You need to know how many distinct images those products require, which variants need their own photography, and how many delivery versions must be produced.
Separate three quantities:
- Source assets: photographs, supplied artwork, or other original files.
- Approved image compositions: hero images, alternate views, detail shots, and mockup scenes.
- Delivery versions: destination-specific files created from those approved compositions.
For example, 2,000 sellable variants requiring four unique views each represent 8,000 source-image requirements. If every approved image needs three different delivery versions, the potential delivery workload becomes 24,000 files. That does not mean you need to photograph or creatively edit 24,000 images.
An artwork-based catalog has a different calculation. Five hundred designs shown in six approved mockup scenes produce 3,000 design-and-scene combinations. Again, the production problem is not 3,000 unrelated creative tasks; it is a repeatable combination process.
Do not multiply indiscriminately. A packaging scene might apply only to one product family. Two channels might accept the same delivery file. Several size variants might legitimately share photography, while different colors require distinct images.
Build your estimate around valid combinations, then divide demand into initial catalog production, new-product launches, and revisions. Your system must handle the recurring workload, not just survive the first migration.
2. Write an Image Specification for Each Product Family and Destination
Before automating anything, define what an acceptable image looks like. “Consistent product photography” is too vague to serve as a production rule.
Create a short specification for each meaningful combination of product family, image role, and destination. Include:
- Required views and gallery order.
- Background treatment: transparent, solid background, or an approved contextual scene.
- Final canvas dimensions or aspect ratio.
- Subject positioning and acceptable visual size within the frame.
- Rules for shadows, reflections, props, packaging, and included accessories.
- Required file format, color profile, and delivery constraints.
- A reference image that demonstrates the intended result.
For an internal bottle-photography standard, you might choose a 2000 × 2000 canvas, a centered front view, and a consistent bottom baseline. Treat those dimensions as your production choice—not as a universal ecommerce requirement.
Keep channel compliance separate from brand preference. Google Merchant Center’s main-image requirements, for example, prohibit promotional overlays and require an image that clearly represents the item being sold. A graphic that works in a promotional banner should not automatically become the primary shopping-feed image.
Also distinguish a transparent production asset from a finished storefront image. A cutout may be an excellent reusable intermediate, while a particular destination needs that cutout composed onto an approved background.
Assign each specification a version. When a merchandising decision changes, you should be able to identify exactly which outputs need regeneration.

3. Create a Manifest That Keeps Product Identity Attached to Every Asset
The most damaging catalog-image mistake is often not a poor cutout. It is an excellent image attached to the wrong product.
Use a manifest: a structured inventory connecting product records, source files, required outputs, processing recipes, and approval status. A spreadsheet can support an initial pilot; a database or product-information system becomes more useful as relationships and concurrent editing grow.
A practical starting point is one record per intended output, with a reference to its reusable source asset. Include:
- Stable asset ID and source-file location.
- Product ID and variant SKU.
- Image role, such as front hero, rear view, or material detail.
- Source revision.
- Processing recipe and template version, where applicable.
- Destination and expected output filename.
- Production status, reviewer, and approval date.
- Published URL and approved alt text.
For example, an output record might connect asset IMG-004821 to variant BOT-014-OLIVE, identify its role as front hero, and specify source revision r01 and catalog-square recipe v03.
Keep the stable ID separate from the descriptive filename. Product names change, filenames get shortened, and delivery versions acquire different extensions. None of those events should break the underlying relationship.
Preserve SKUs as text when moving data between systems so identifiers with leading zeros are not accidentally changed. Avoid relying on row position to match files to products; join records using explicit identifiers.
The manifest should also reveal missing work. A product with three beautiful images is still incomplete if its required fourth view was never captured.
4. Batch by Shared Settings, but Keep Batches Small Enough to Recover
Completing one product page from photography through publishing before starting the next feels organized. At catalog scale, it repeatedly forces you to switch tools, settings, and decision modes.
Instead, batch similar operations: capture a product family, prepare its sources, process its cutouts, review them, generate the appropriate scenes, then prepare the publishing data.
The leverage becomes obvious when small actions are multiplied. A hypothetical 30-second handling task repeated across 4,000 images represents 33 hours and 20 minutes of work. That calculation is not a software performance claim; it illustrates why seemingly trivial steps deserve attention.
However, “batch everything” should not mean “put the entire catalog into one enormous run.” Group work by conditions that genuinely share a recipe:
- Product family and image role.
- Lighting and background conditions.
- Material and edge complexity.
- Required output treatment.
- Launch priority.
A fabric garment, a glass bottle, and a metal tool may all need transparent backgrounds, but they should not automatically receive the same edge-refinement settings.
Start with bounded batches—perhaps 50 images while validating a new recipe—and expand after measuring results. The right batch size is large enough to reduce repeated setup, but small enough that a failed run or incorrect setting does not create an unmanageable review problem.
Move completed batches forward rather than waiting for the entire catalog to finish each stage. You want fewer context switches without creating a giant queue of unfinished work.

5. Make Capture and Supplier Intake Predictable
Downstream automation becomes easier when upstream images arrive with predictable framing, lighting, resolution, and identification.
For in-house photography, prepare the shot list before the products reach the studio. Record which views are required, which packaging should appear, and which accessories belong in the frame. Capture product identification alongside the session so the photographer is not reconstructing SKU associations afterward.
Use an approved reference for each family. Match camera position, product orientation, and lighting to that reference, while allowing documented exceptions for unusually tall, wide, or reflective items.
For a tethered photography station, Capture One’s Next Capture Naming documentation is a useful resource. It explains how text and naming tokens can identify captures as they enter the software, including using a destination-folder name. That makes it worth evaluating when you want product identity established during capture rather than added in a later renaming session.
Test the workflow with your camera and studio setup before committing to it. The value here is capture organization and immediate inspection—not purchasing another editor simply because the catalog is large.
For supplier photography, create an intake checklist covering product identification, required views, usable source quality, permitted usage, and whether the supplied files already contain edits or transparency.
Reject or flag incomplete sets at intake. Discovering an absent rear view after the rest of a product’s images have been processed creates avoidable rework.
6. Separate Original Sources, Working Assets, and Published Files
Your originals, editable production files, and storefront images serve different purposes. Do not store them as an undifferentiated collection of similarly named files.
Maintain three logical asset layers:
- Original sources: preserved photography, artwork, and supplier files.
- Production assets: approved cutouts, editable compositions, masks, and mockup templates.
- Published derivatives: destination-ready files associated with specific product records.
For a smaller operation, controlled folders and a manifest may be sufficient. When multiple teams need search, permissions, approvals, and revision history, evaluate a digital asset management system.
ResourceSpace is a relevant option for asset governance: its documented workflow states control asset visibility and editing, and its version-control tools support reverting uploads or metadata changes. Assess those capabilities against your actual approval process rather than treating a DAM as a replacement for image production.
If the larger problem is fragmented product information—variants, attributes, localization, and completeness—Akeneo PIM addresses that complementary layer. A PIM governs product records; a DAM governs assets. Define how the two will reference each other before selecting systems.
Evaluate candidates using your own sample catalog. Can reviewers find the correct revision? Can a publisher distinguish approved assets from drafts? Can you export the relationships needed to reconstruct the catalog elsewhere?
Keep a separate backup of irreplaceable sources and templates. Source-preserving editing behavior is helpful, but it does not protect against an accidentally deleted folder or a damaged storage device.
7. Automate Product Cutouts as a Dedicated Production Stage
For photography-heavy catalogs, background removal is an especially strong automation opportunity. The repetitive work extends beyond the removal command: opening files, preparing layers, adjusting masks, exporting derivatives, and closing documents all consume handling time.
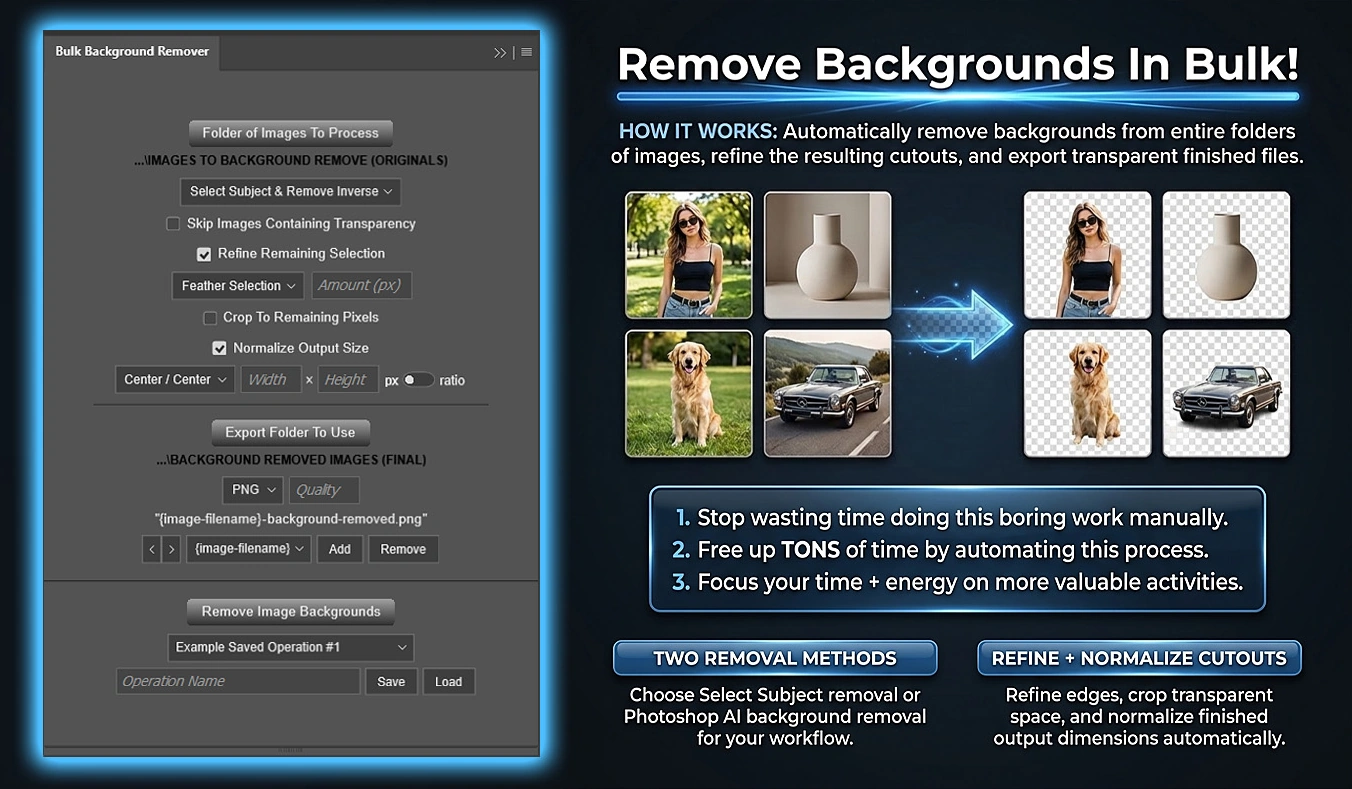
Bulk Background Remover: Automated Cutouts automates that folder-based workflow inside Photoshop. It uses Photoshop’s native Select Subject or Remove Background functionality rather than a proprietary segmentation model.
Choose the method around operational reliability
For a batch intended to run with minimal intervention, start by testing Select Subject & Remove Inverse. The plugin verifies that Photoshop produced a meaningful selection, then creates a Reveal Selection layer mask to hide the background.
The alternative, Remove Background Using AI, invokes Photoshop’s native Remove Background command. Photoshop can display a blocking popup when it cannot identify a background, so the plugin warns before that type of batch begins. It cannot reliably suppress that Photoshop-controlled dialog.
Neither method guarantees an accurate result on every image, and the plugin does not automatically fall back to the other method after failure. Keep an exception path for images that require individual treatment.
Build a recipe for a specific photography family
A useful pilot recipe could consist of Select Subject, a carefully tested Contract refinement, and PNG export. Contract can help remove unwanted edge pixels; Feather softens the transition, while Expand reveals more boundary content. Test the pixel amount on representative images before applying it broadly.
Use Crop To Remaining Pixels when the next stage needs tightly bounded cutouts. Use Normalize Output Size when it needs standardized canvases. These settings are mutually exclusive in the interface because normalization includes its own preliminary transparency trim.
The transparency-skip option requires particular care. If enabled, an image containing transparency is skipped completely: no removal, refinement, normalization, or new export occurs. A transparent margin does not necessarily mean an image is already production-ready.
If you need existing cutouts included in a complete delivery set, route them through a separate, documented preparation path rather than assuming the skip option will copy them into the export folder.
Preserve editability without misunderstanding the layer structure
The plugin merges visible source layers during preparation, and the originals are closed without saving. PSD or PSB exports preserve the processed working result, not the source document’s original multilayer composition.
Save validated settings as an operation so recurring batches do not require rebuilding the same configuration. Stage supported files directly inside the selected input folder; processing is not recursive.
For thousands of product photographs, the practical gain is replacing repeated file-by-file handling with a reusable production stage—while reserving human attention for difficult edges and genuinely exceptional images.
8. Standardize Canvas Size Without Confusing It With Product Scale
Identical canvas dimensions do not guarantee that products look equally sized in a catalog grid. Canvas size, subject size, and subject position are separate controls.
Bulk Background Remover’s pixel normalization trims surrounding transparency, proportionally reduces an oversized cutout if necessary, and creates the requested final canvas. It does not enlarge a smaller cutout.
For example, a trimmed 3000 × 1500 cutout normalized to a 2000 × 2000 canvas becomes approximately 2000 × 1000 before positioning. An 800 × 600 cutout placed on that same target canvas stays 800 × 600.
Both outputs have matching canvas dimensions. Their apparent product scale is very different.
That scale-down-only behavior is useful for avoiding unnecessary enlargement, but it means consistent visual occupancy still depends on capture standards and source preparation. A normalization setting is not a substitute for adequate source resolution or controlled framing.
The plugin provides nine alignment positions. Center / Bottom can establish a common baseline, while Center / Center suits families intended to float centrally. Remember that boundary alignment places the subject against the canvas boundary; it is not a custom-padding control.
Ratio normalization solves a different problem. It preserves the trimmed cutout’s size and expands transparent canvas to reach the requested ratio without cropping visible subject pixels. A 4:5 batch can therefore share a shape without sharing identical pixel dimensions.
Finally, review the cutout on its actual delivery background. Transparent assets and white-background product images are different deliverables. Background removal does not itself add a white background, and this plugin does not export JPEG; background-specific composition belongs in a separate stage.
9. Generate Mockup Families From Approved Templates
For print-on-demand products, wall art, branded merchandise, and other artwork-based catalogs, the repeated task is often placing each design into the same approved set of scenes.
Batch-Replace Smart Objects: Mockups In Bulk handles this production stage inside Photoshop. It combines an artwork folder with one PSD/PSB mockup template or a folder of PSD/PSB templates, replaces the intended Smart Objects, and exports the resulting combinations.
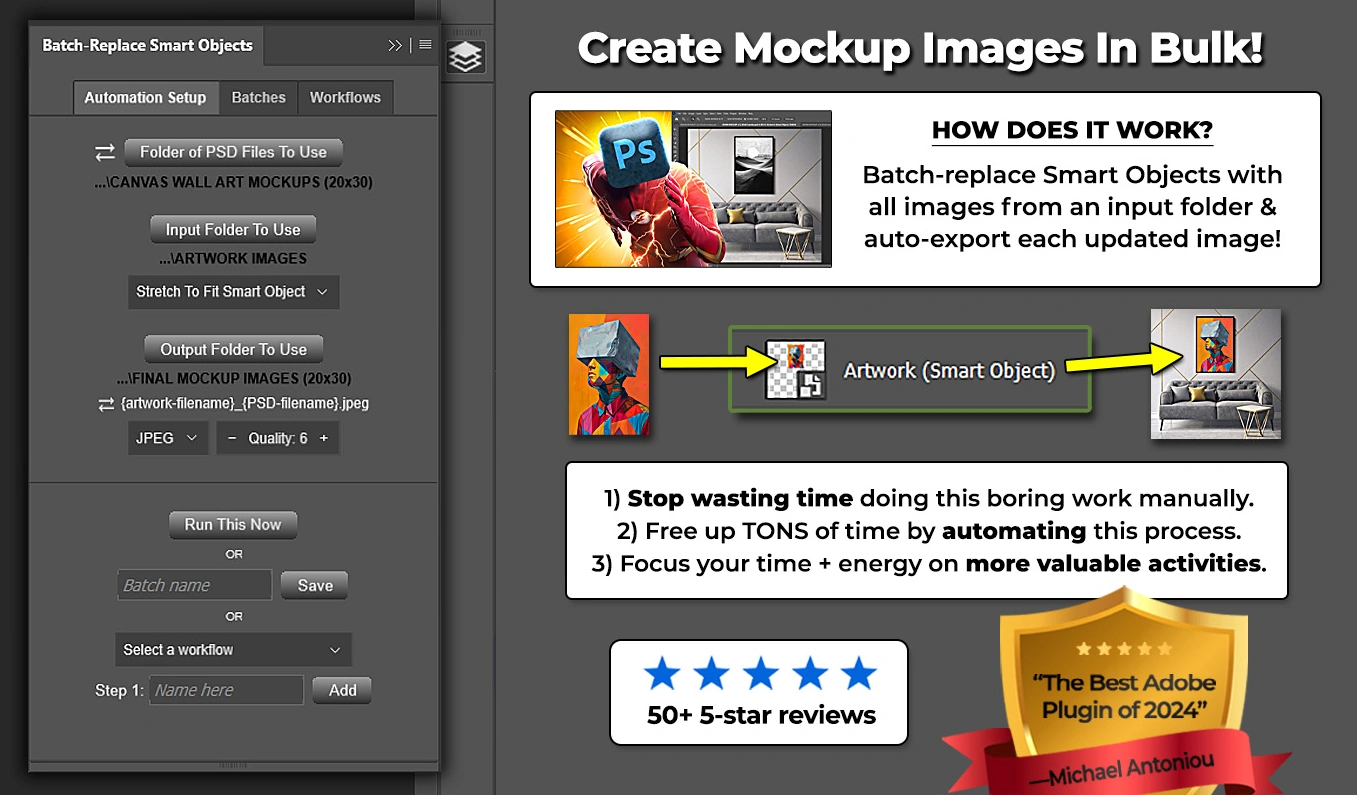
If 500 approved designs belong in six compatible scenes, folder-of-templates mode can produce 3,000 finished mockups using one shared operation configuration. Keep unrelated or incompatible templates out of that processing folder.
Decide whether the scenes need one recipe or several
Use a folder of templates when the same placement and export settings are appropriate across the collection.
Use a Workflow when different scene groups need different configurations. Each Workflow step stores a complete operation, so one step might use a group of framed-art templates, another a mug template, and another a separate output format. Steps run sequentially, and a step can itself process a folder of templates.
A Saved Batch represents one reusable operation; a Workflow chains multiple operations. That distinction lets you standardize recurring scene production without forcing every scene to use identical settings.
Choose placement deliberately rather than accepting the default
- Contain Inside Smart Object preserves the whole design and its proportions, but can leave unused space.
- Fill Smart Object & Crop preserves proportions and covers the target area, but can crop important content.
- Stretch To Fit Smart Object fills the internal area exactly and can distort the artwork’s aspect ratio.
- Place Original Image avoids intermediate resizing and is appropriate when source dimensions and resolution are already prepared.
Contain and Fill support nine alignment positions. For designs with important content near an edge, the anchor choice can determine whether the composition succeeds.
Validate the template before multiplying it across the catalog
The Smart Object’s internal dimensions and resolution define the placement reference—not merely its visible size in the outer scene. Unnecessary transparent canvas inside the object can change the apparent scale of replacement artwork.
For perspective and distortion to carry across replacements reliably, convert the design layer to a Smart Object before applying those outer transformations. The plugin does not repair incorrectly constructed mockups.
A template with one Smart Object is targeted automatically. With multiple Smart Objects, select the intended targets and save the template in that state for later reuse.
Every selected target receives the same current artwork before one output is exported. Selecting three objects does not generate three independent outputs or assign three different designs within the same iteration.
Name templates meaningfully because finished filenames combine artwork and template names. A name such as des-0042_room-frame.jpg is much easier to reconcile than a scene with an unexplained working filename.
Approve the product representation as carefully as the design placement. A repeatable mockup is useful only when its materials, proportions, printable area, and included items accurately represent what customers receive.

10. Make Every Handoff Restartable and Every Rerun Traceable
A scalable production line should recover from interruption without requiring the whole catalog to start again.
Define an output identity using the asset ID, source revision, recipe version, destination, and template version where relevant. Your coordination system can then distinguish an already-approved output from one that genuinely needs regeneration.
This tracking belongs in your manifest or production system. Do not assume that a desktop plugin automatically understands the catalog’s product relationships.
Use a straightforward handoff procedure:
- Select eligible records from the manifest.
- Stage only their required source files in a dedicated processing folder.
- Run the validated operation into a fresh output folder.
- Reconcile actual files against expected outputs.
- Send exceptions for correction and approved results to the next stage.
Both promoted plugins read their selected input folders when execution begins and process supported files directly within those folders. Finish staging before starting a run, and avoid changing the batch contents while work is in progress.
Saved operations, Saved Batches, and mockup Workflows reduce repeated setup. They should not be mistaken for a cross-application scheduler that automatically performs cutout review, mockup production, metadata generation, and publishing.
Duplicate-safe filenames protect earlier outputs from blind overwriting, but numbered duplicates are not an approval system. An output ending in “(2)” is not necessarily the newest approved version. Record that decision explicitly.
For cutout batches, reconcile inputs into exported, skipped, and exception categories. A progress counter reaching the end does not mean every input produced an export—especially when transparency skipping is enabled.
Keep operational paths short and stable, and record the actual settings used. Quality values are not interchangeable across tools: Bulk Background Remover uses 0–100, while Batch-Replace Smart Objects uses 0–12.
11. Put Quality Control Where Mistakes Become Expensive
Quality control should detect errors before those errors multiply. Reviewing a faulty Smart Object template after generating thousands of scenes is much less useful than reviewing it before the batch.
Establish gates at source intake, cutout approval, template approval, and publication. Give each gate a named owner and an explicit acceptance rule.
Check every output mechanically
Your validation process should compare expected and actual files, confirm that files open, check dimensions and formats, and verify product associations. Missing outputs, duplicate identities, and unmatched variants should become exceptions rather than disappear into a completed batch.
Use visual inspection according to risk
For a new recipe, inspect every pilot output. During an initial catalog launch, review every primary product image before publishing. Reduce repetitive visual inspection only after you have evidence that a particular family and recipe behave consistently.
Keep difficult materials and structures in a higher-risk lane: transparent glass, fine wires, mesh, reflective surfaces, holes, and products photographed against similar-colored backgrounds.
Review cutouts on white, dark, and neutral backgrounds to expose different edge problems. Inspect both the full composition and important boundaries at a useful zoom level. For normalized sets, scan a thumbnail grid for inconsistent product scale and baseline placement.
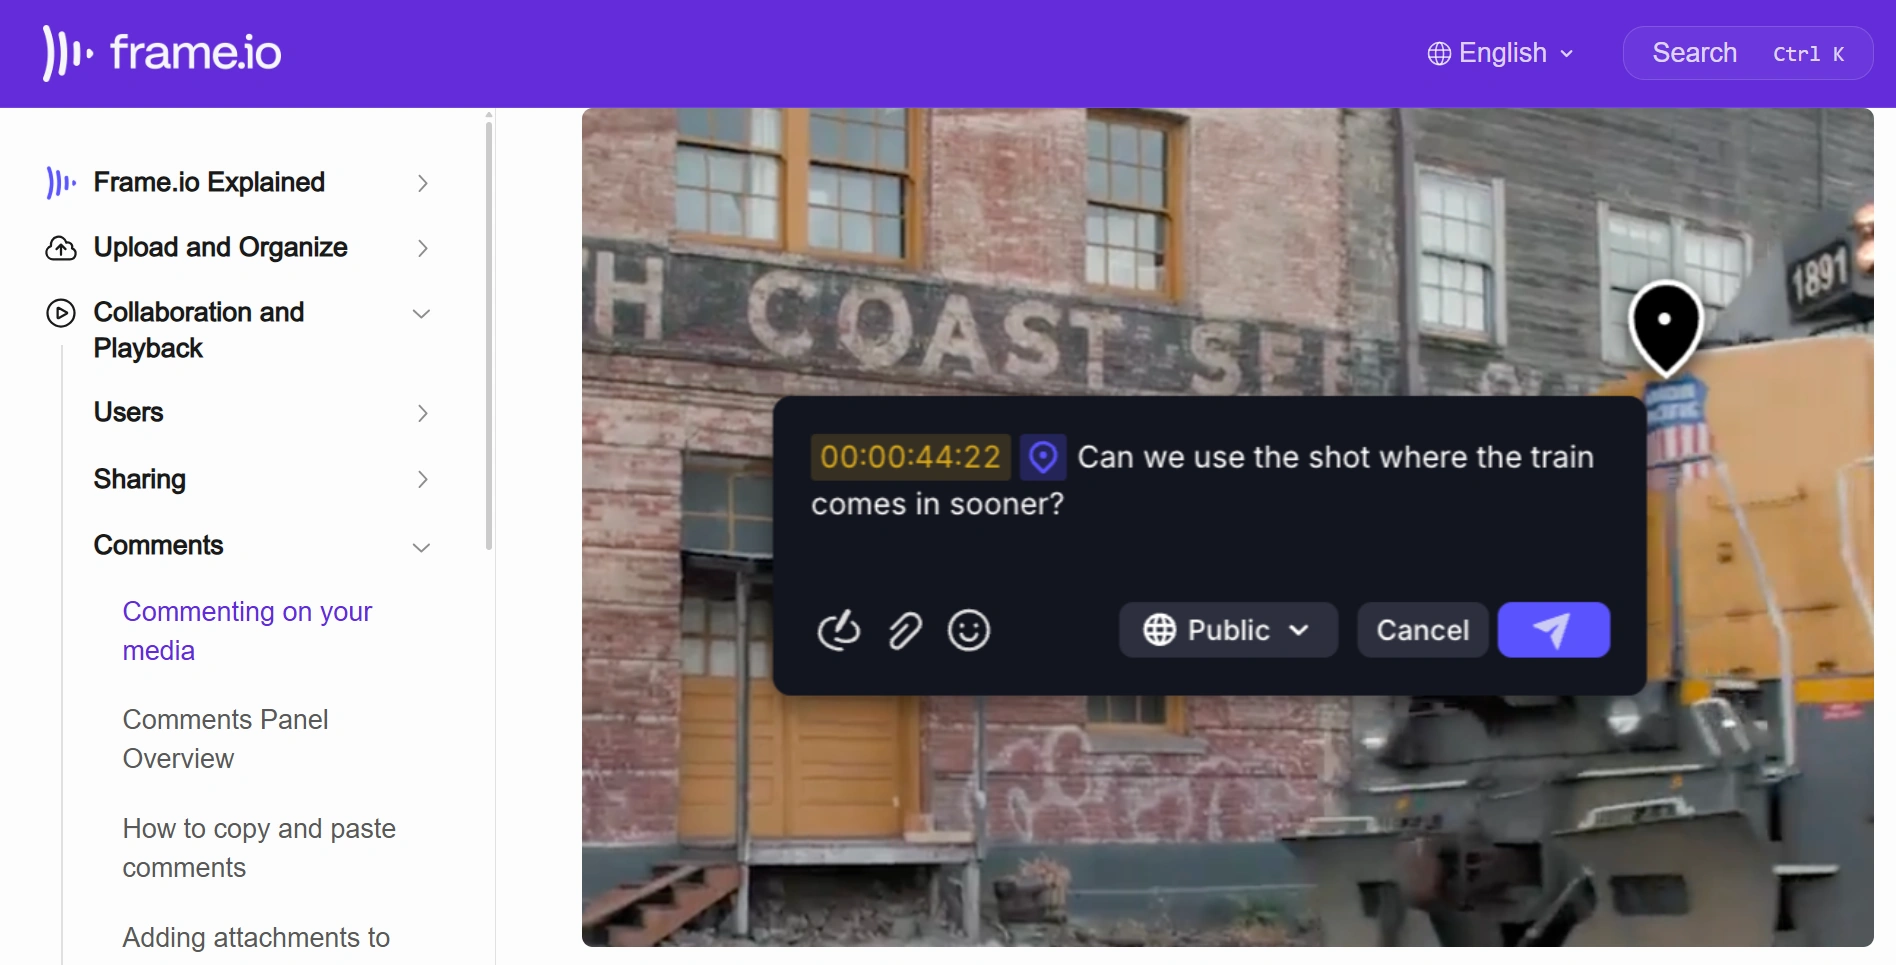
When multiple reviewers are involved, Frame.io’s image commenting and annotation tools can make feedback more specific than a message saying “this edge looks wrong.” Its Comparison Viewer supports side-by-side review with linked zoom controls, which is useful when checking a revision against the approved reference.
Classify defects so they lead to the right correction: source problem, mask problem, template problem, identity mismatch, or publishing problem. Otherwise, teams repeatedly edit symptoms without fixing the recipe that caused them.
12. Use AI for Descriptive Filenames and Alt Text, With Product Data as the Ground Truth
Image metadata is another repetitive catalog task, but it deserves more discipline than “ask AI to optimize everything for SEO.”
Google’s image SEO guidance says, “When possible, use filenames that are short, but descriptive.” It describes filenames as providing relatively light clues about an image’s subject, and warns against keyword stuffing in alt text.
Use AI to reduce drafting work and identify meaningful differences between views—not to manufacture ranking promises or fill every description with sales language.
Combine the approved image with authoritative product information
ChatGPT’s image-input capabilities and Gemini’s file and photo analysis are useful for testing a metadata style on small, representative sets.
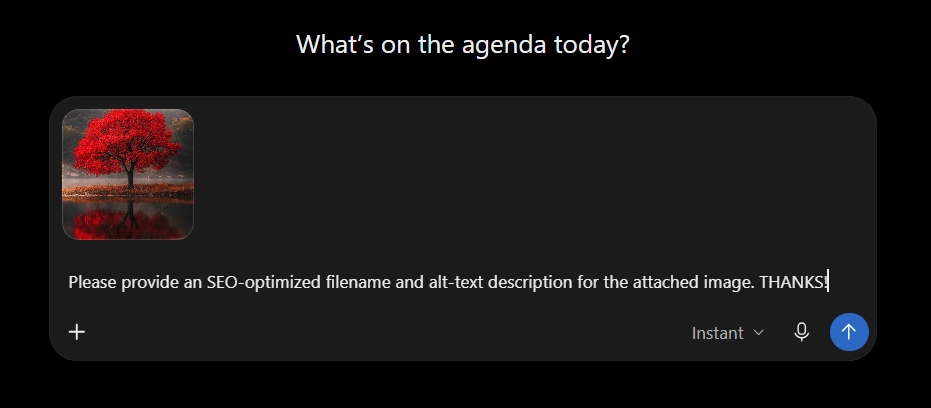
Supply the asset ID, SKU, approved product name, known variant attributes, image role, and final file extension alongside each image. Do not expect the model to reconstruct catalog identity from appearance. OpenAI’s image-input documentation specifically notes that original filenames and metadata are not processed, so provide those identifiers explicitly as text.
A practical prompt is:
“For this approved product image, return the supplied asset ID unchanged, one descriptive filename, and one concise alt-text draft. Use the product record for identity and specifications, and the image for visible details and viewpoint. Preserve the supplied SKU and actual file extension in the filename. Do not invent materials, capacities, certifications, included accessories, or unreadable label text. Avoid promotional adjectives and keyword repetition. Flag ambiguity for review.”
For an olive-green bottle shown from the front, an appropriate filename might be bot-014-olive-bottle-front.webp. An alt-text draft might be “Olive-green bottle shown from the front with a screw-top lid.” Neither needs a string of phrases such as “best bottle,” “cheap bottle,” and “buy bottle online.”
For predictable filenames, use a deterministic naming template built from trusted product fields. AI can draft the descriptive component and distinguish the viewpoint; it should not freely reinvent your identifier scheme.
Use a dedicated metadata service when volume outgrows chat
AltText.ai is a relevant specialized resource for bulk alt-text generation. Its documentation covers CSV imports containing image URLs, ecommerce product-name and brand inputs, and an Asset ID field that can connect exported results to your internal records.
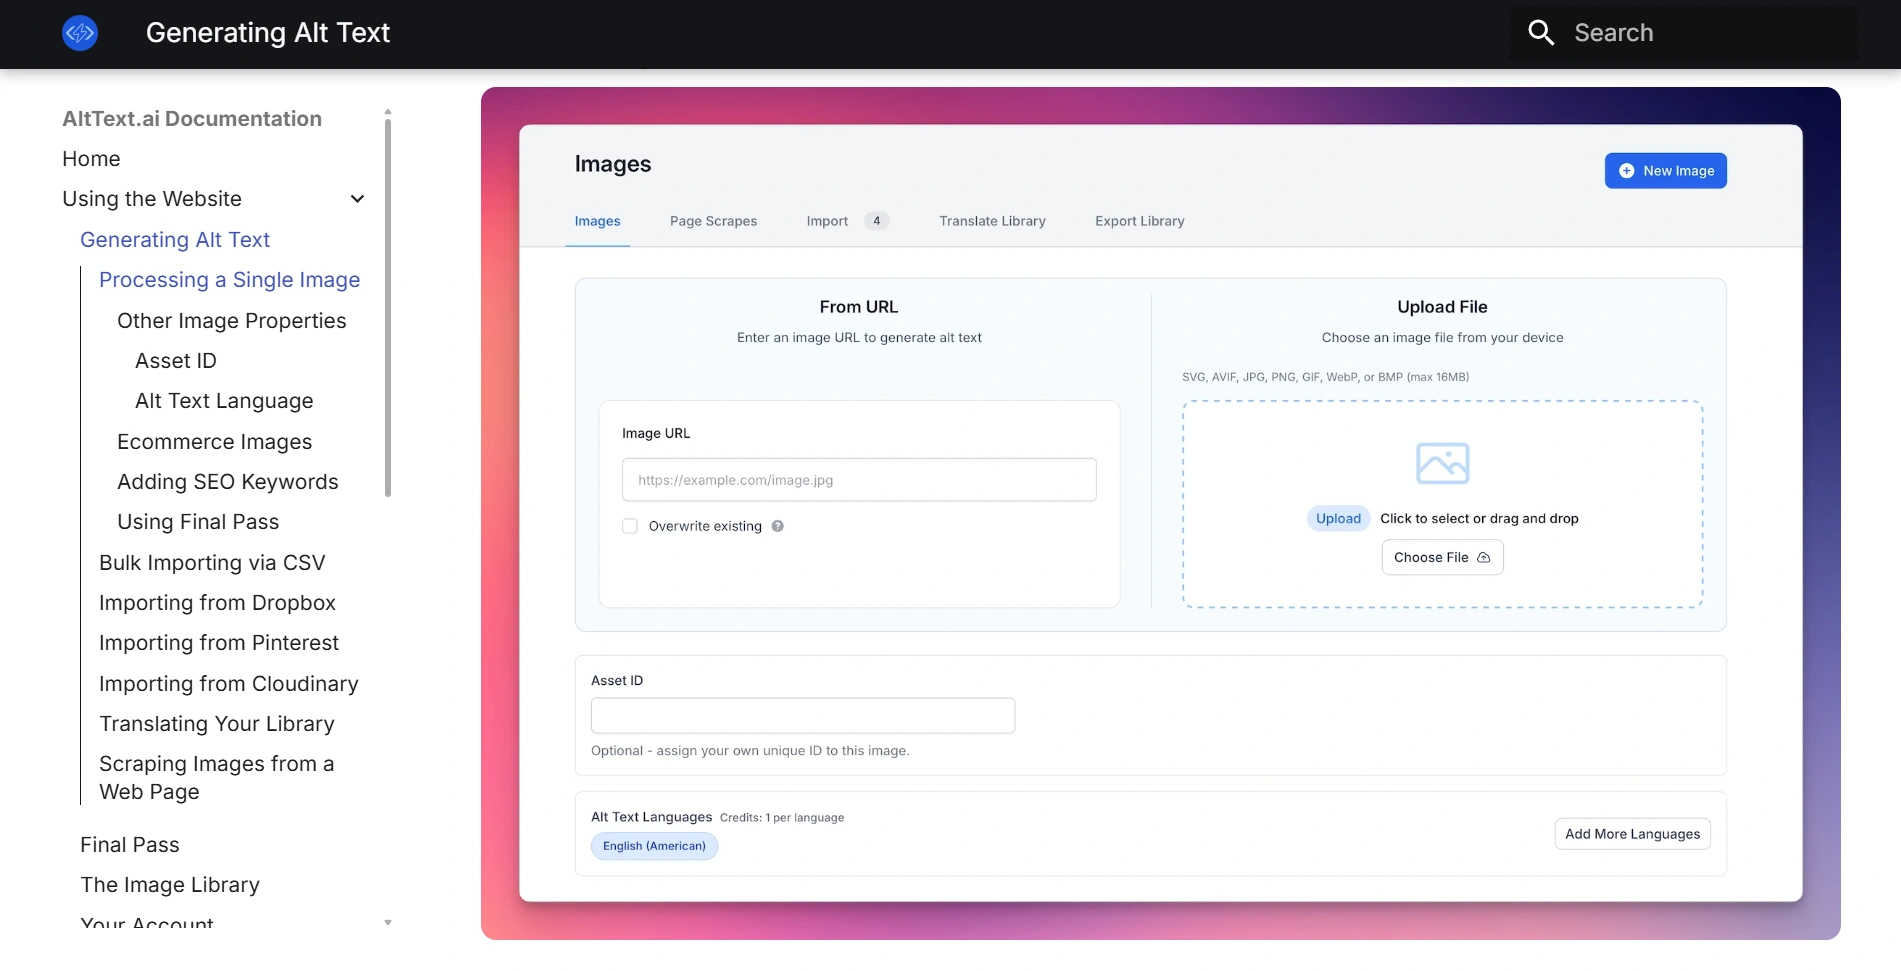
Those identifier-based handoffs matter more than generating attractive prose in an isolated chat. Test the service on your own products, review the drafts, and confirm how results will return to your manifest or commerce platform before running the full catalog.
This is an alt-text production resource, not a substitute for your filename-governance or image-approval process. Also confirm your organization’s policy before uploading unreleased product images to an external AI service.
Write for the image’s purpose, not just its pixels
The W3C alt-text decision tree recommends, “Use a brief description of the image in a way that conveys that meaning in the alt attribute.” Context matters: informative product imagery, decorative imagery, and functional images need different treatment.
Distinguish front, rear, interior, and detail views instead of repeating the same product title across an entire gallery. Generate metadata from the approved final image, then validate it before publication. Better filenames and alt text support clarity and discoverability; they do not guarantee higher rankings.
13. Publish Through Controlled Imports, Then Check the Live Product Experience
An image-production workflow is not finished when files exist in an export folder. It is finished when the correct approved assets appear on the correct products and variants.
Prepare a publishing package containing product identifiers, final asset locations, gallery order, variant associations, and approved alt text. Compare that package with the manifest before importing it.
For Shopify catalogs, the product CSV field documentation explains image URLs, image position, alt text, and variant image URLs. Use the current platform schema rather than improvising an import format from an old spreadsheet.
Read the CSV import and overwrite guidance carefully. Shopify warns that blank included fields can overwrite existing values and that sorting product CSV data incorrectly can break image associations. Export a backup and test a small subset before making a catalog-wide change.
After publication, check:
- The correct hero image appears for each tested product.
- Selecting a variant displays the intended variant image.
- Gallery order matches the image specification.
- Mobile presentation does not introduce unexpected cropping or background problems.
- Alt text is present and appropriate to the displayed image.
- Image URLs remain accessible and the expected revision is visible.
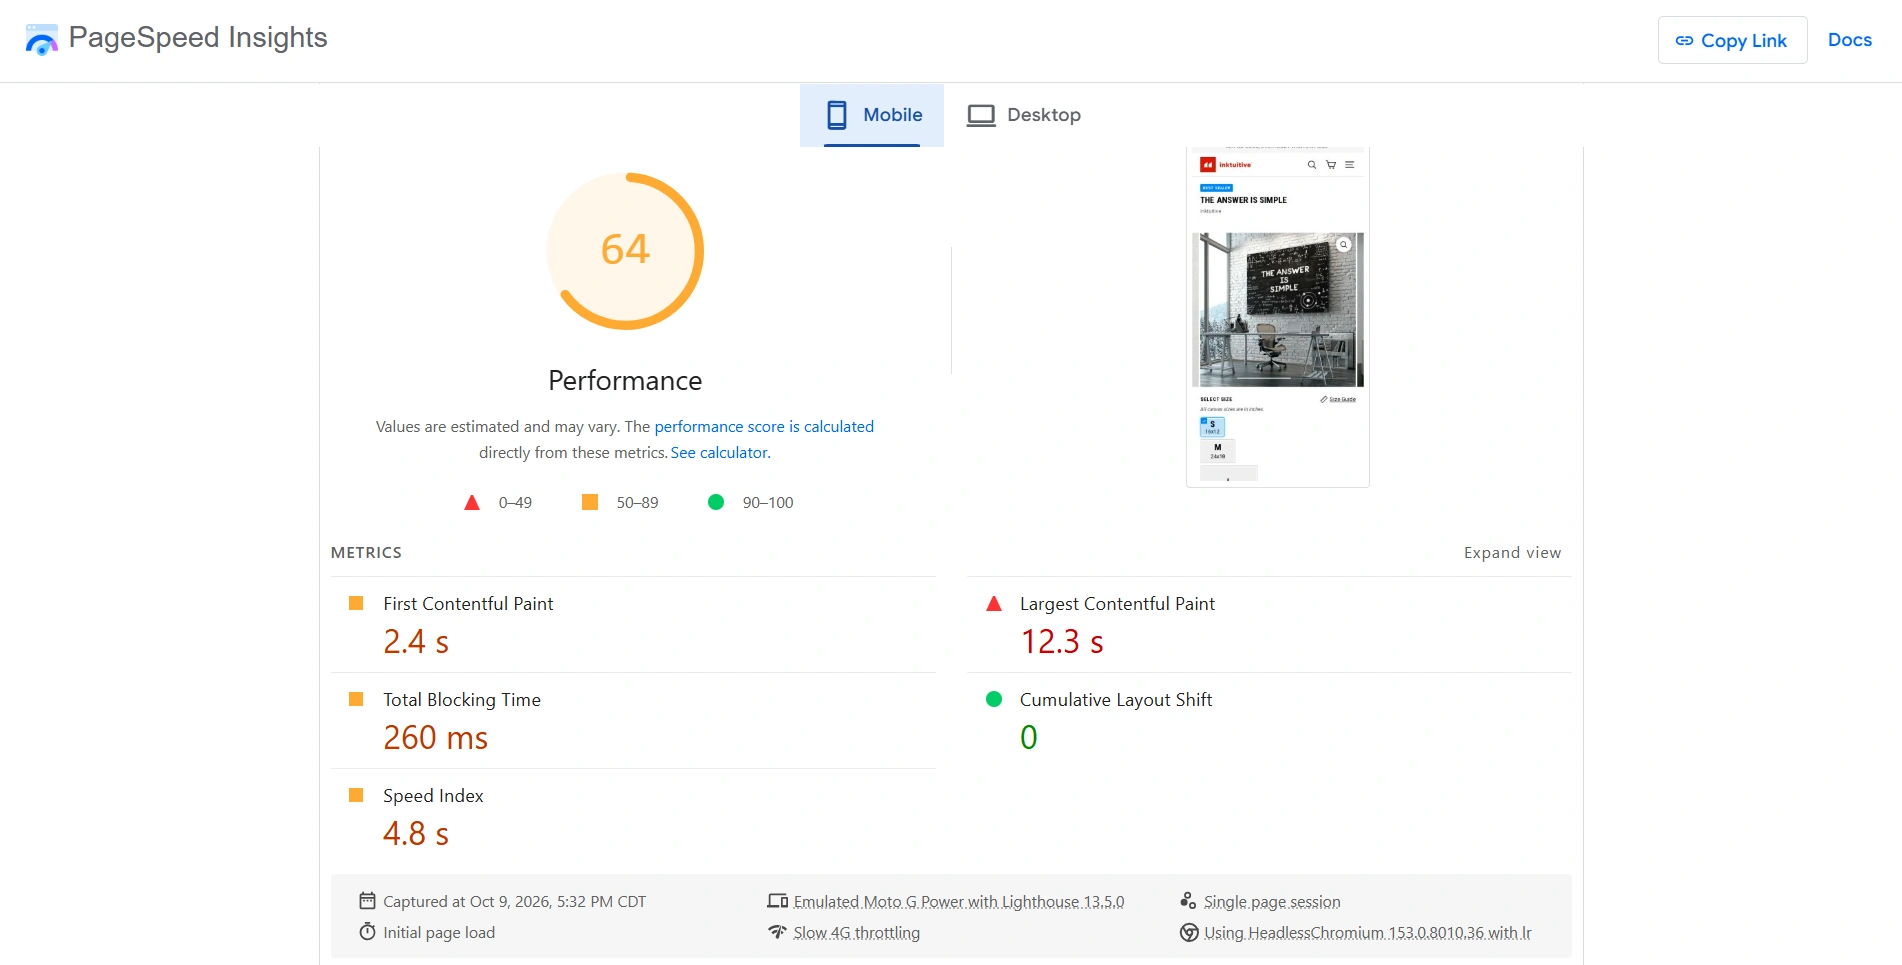
Include discovery and page performance in the release check. Google’s image guidance covers crawlable image elements and image sitemaps; PageSpeed Insights can help assess the actual product page rather than judging performance from file size alone.
Keep the previous approved mapping available for rollback. Avoid renaming already-published assets merely because a new AI draft suggests a slightly different phrase; descriptive naming should be established before publication, not become a recurring source of URL churn.
14. Scale the Bottleneck, Not Just the Automation
Once the workflow runs end to end, measure where approved work slows down. The fastest processing stage is not necessarily the stage that determines catalog throughput.
Track a compact set of operational metrics:
- Approved outputs per working hour.
- Elapsed time from source intake to publication.
- First-pass acceptance rate.
- Exception rate by product family and recipe.
- Review backlog and waiting time.
- Missing required image roles.
- Total production cost per approved output, including review and rework.
For a hypothetical production line generating 600 outputs per hour while reviewers approve 200 per hour, the review queue grows by 400 outputs per hour. Improving generation speed alone makes that imbalance worse.
The appropriate response might be clearer acceptance criteria, better capture standards, splitting a troublesome product family into a different recipe, or adding review capacity. It is not automatically another editing tool.
Roll out in stages. First, define one product family’s image contract and manifest. Next, run a deliberately varied pilot containing ordinary products and difficult cases. Then process a bounded production batch through publishing and reconcile every outcome. Expand only when another operator can repeat the workflow using the documented settings and references.
Assign ownership as you grow: someone must maintain specifications, someone must own production recipes and templates, someone must approve image quality, and someone must verify publishing. These responsibilities can belong to one person initially, but they should remain explicit.
A scalable catalog-image workflow is not simply a collection of batch tools. It is a system that preserves identity, applies approved treatments consistently, exposes exceptions, and can reproduce the right output from the right source. Automate the repeatable work, keep decisions visible, and make every stage accountable for delivering something the next stage can trust.