How To Create Mockups With One Click Using A Saved Photoshop Batch
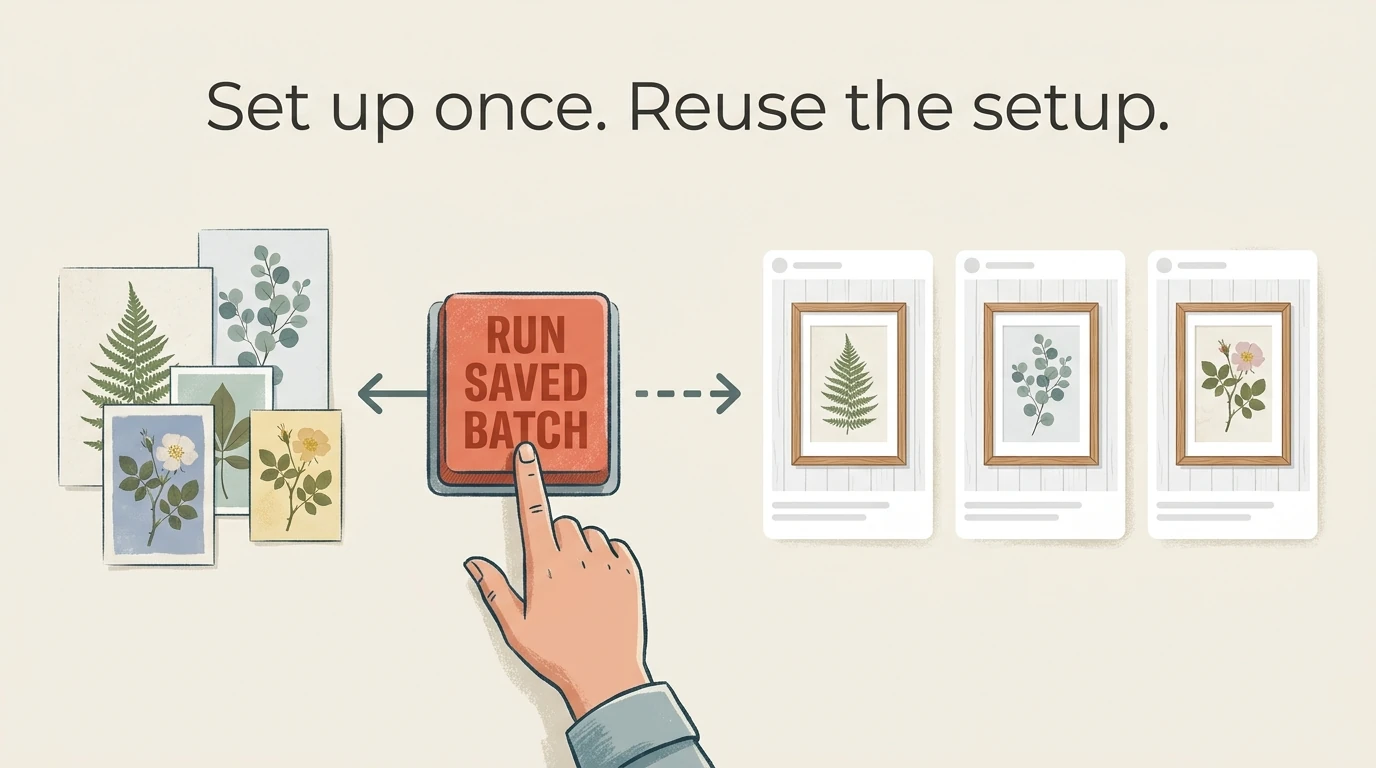

To create mockups with one click, configure your template, artwork folder, placement, and export settings in Batch-Replace Smart Objects: Mockups In Bulk, then save that configuration as a Batch. On later runs, open the plugin’s Batches tab and click Run Batch. The plugin restores the saved settings, processes the artwork folder, and exports the finished mockups.
The useful distinction is between setting up a production job and repeating it. You make the template and output decisions once; you do not need to reconstruct those decisions every time you have new designs.
1. What “One Click” Means After the First Setup
A saved batch does not eliminate the initial preparation. You still need a Photoshop mockup containing a suitable Smart Object, a folder of artwork, and a destination for the results. “One click” describes launching that already-configured operation.
In this workflow, a Saved Batch means an operation stored inside the Batch-Replace Smart Objects plugin. It retains the template reference, input and output locations, placement behavior, filename order, export format, and Quality setting.
Once that setup exists, clicking Run Batch starts the repetitive work: inserting each artwork into the intended Smart Object targets and exporting each completed mockup. One click can therefore launch many outputs, rather than create just one image.
2. Prepare a Reusable PSD or PSB Mockup
Start with the Photoshop scene you want to reuse, such as a framed print, shirt, mug, or package. The template must be a PSD or PSB file containing at least one Smart Object layer. A flattened image alone is not a replaceable mockup template.
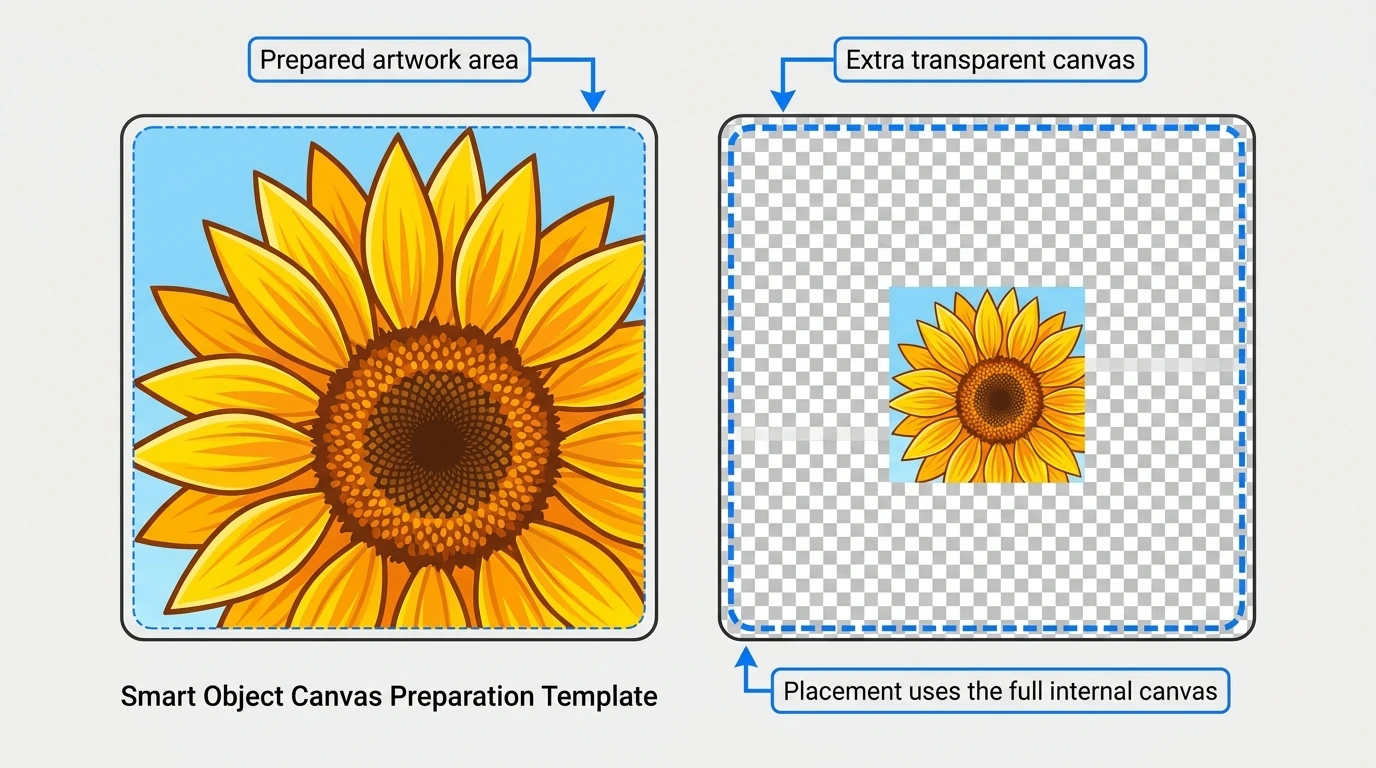
Inspect the Smart Object’s contents before building the saved operation. Its internal dimensions and resolution provide the reference for the plugin’s resize-based placement modes. The apparent size of the object in the outer mockup scene is not that reference.
For example, unnecessary transparent canvas around the artwork inside a Smart Object can produce unexpected placement sizes. Prepare that internal canvas to represent the intended artwork area.
Perspective and distortion also depend on correct template construction. Convert the design layer into a Smart Object before applying the outer mockup transformations. That allows replacement artwork to inherit those transformations. The plugin automates replacement; it does not rebuild an incorrectly constructed template.
3. Save the Smart Object Targets With the Template
Targeting depends on how many Smart Objects your template contains:
- If there is exactly one Smart Object, the plugin targets it automatically. You do not need to select it manually.
- If there are several Smart Objects, select the intended target layer or layers in Photoshop’s layer stack.
- If there are several Smart Objects but none are selected, the plugin asks you to select the replacement targets.
For a repeatable saved batch, save the PSD or PSB with the intended Smart Object layers already selected. This prepares the template to reopen with those targets defined.
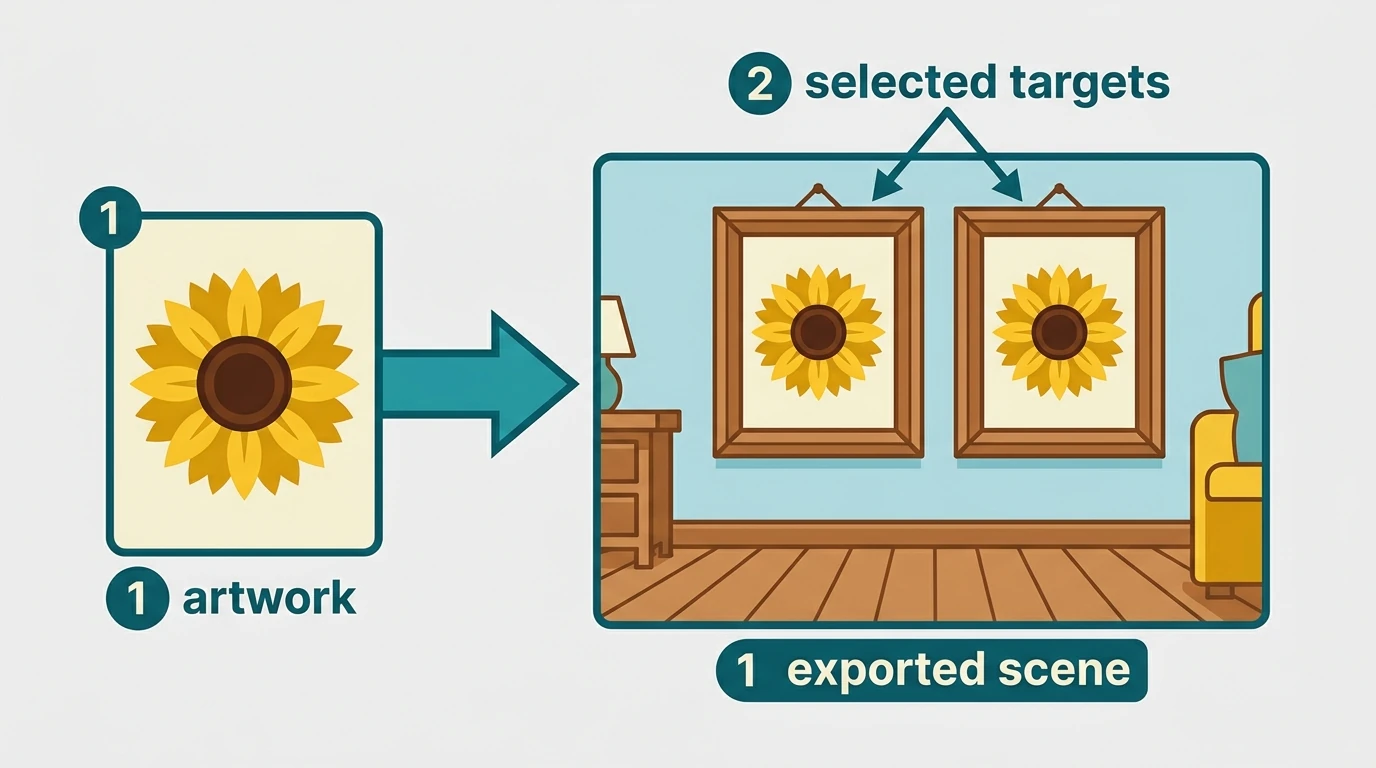
Selecting several targets does not create a separate output for each one. If a room scene contains two selected picture-frame Smart Objects, the same current artwork goes into both frames, and the completed scene is exported once. The next artwork then replaces both selected targets for the next output.
4. Connect Your Template and Folders in Automation Setup
If the plugin is not installed yet, acquire Batch-Replace Smart Objects: Mockups In Bulk through Adobe Exchange or Adobe’s Creative Cloud plugin marketplace. After Creative Cloud installs it, open or restart Photoshop as needed and launch it through Photoshop’s Plugins menu.
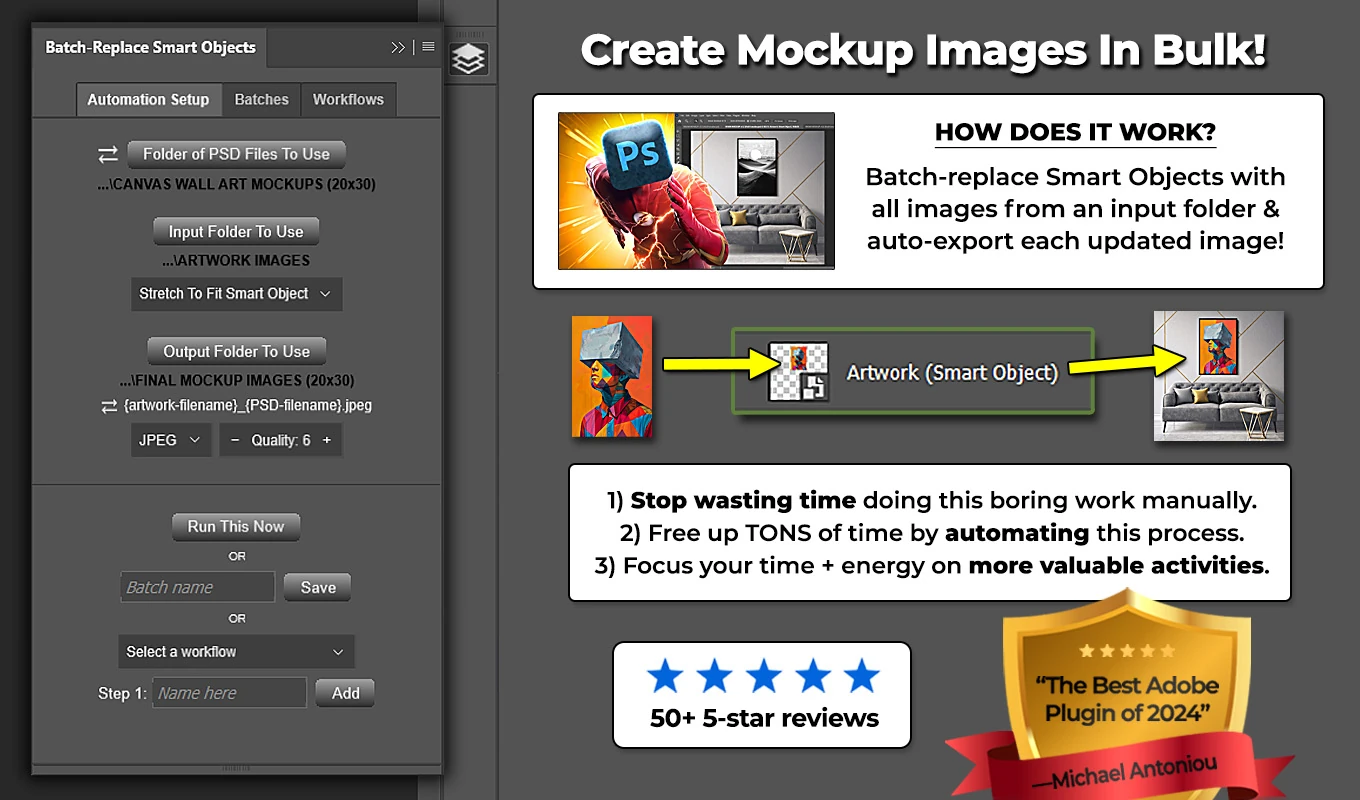
In the Automation Setup tab, connect the three required resources:
- Under Photoshop Document To Use, choose your prepared PSD or PSB mockup.
- Under Input Folder To Use, choose the folder containing the artwork you want to insert.
- Under Output Folder To Use, choose where the finished mockups should be saved.
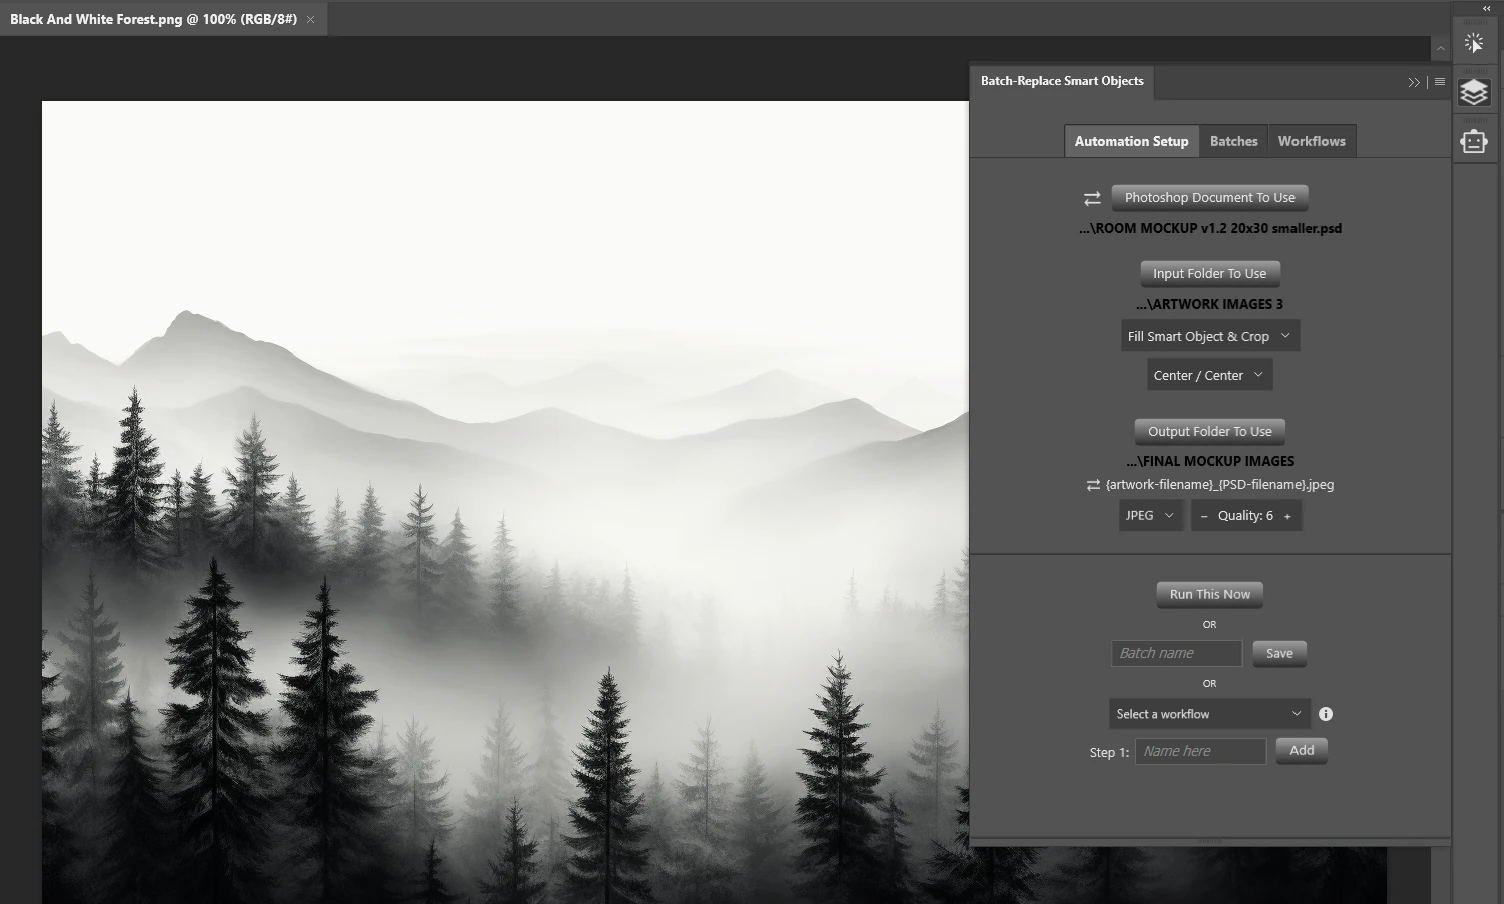
For example, your template might be room-frame.psd, your artwork folder New Print Designs, and your destination Finished Room Mockups.
Use a stable input-folder location if you want to keep rerunning the same saved batch. You can change the artwork inside that folder without choosing a new folder each time. The plugin reads its contents when the operation runs, not just when you first select it.
5. Match Placement to the Artwork You Will Keep Adding
The best placement setting is the one that suits the artwork you expect this saved batch to process repeatedly. A logo collection and a folder of edge-to-edge photographs may need different rules.
- Contain Inside Smart Object suits artwork that must remain completely visible, such as illustrations with important details near the edges. It preserves aspect ratio without cropping, but can leave unused space.
- Fill Smart Object & Crop suits artwork that must cover the entire target area, such as photographs used in full-bleed scenes. It preserves aspect ratio and crops the overflow.
- Stretch To Fit Smart Object, the default, exactly matches the Smart Object’s internal width, height, and resolution. It fills the area with the complete image, but can distort artwork whose proportions differ.
- Place Original Image suits files already prepared at the required dimensions and resolution. It uses them without intermediate resizing, so differently sized source files can occupy different amounts of space.
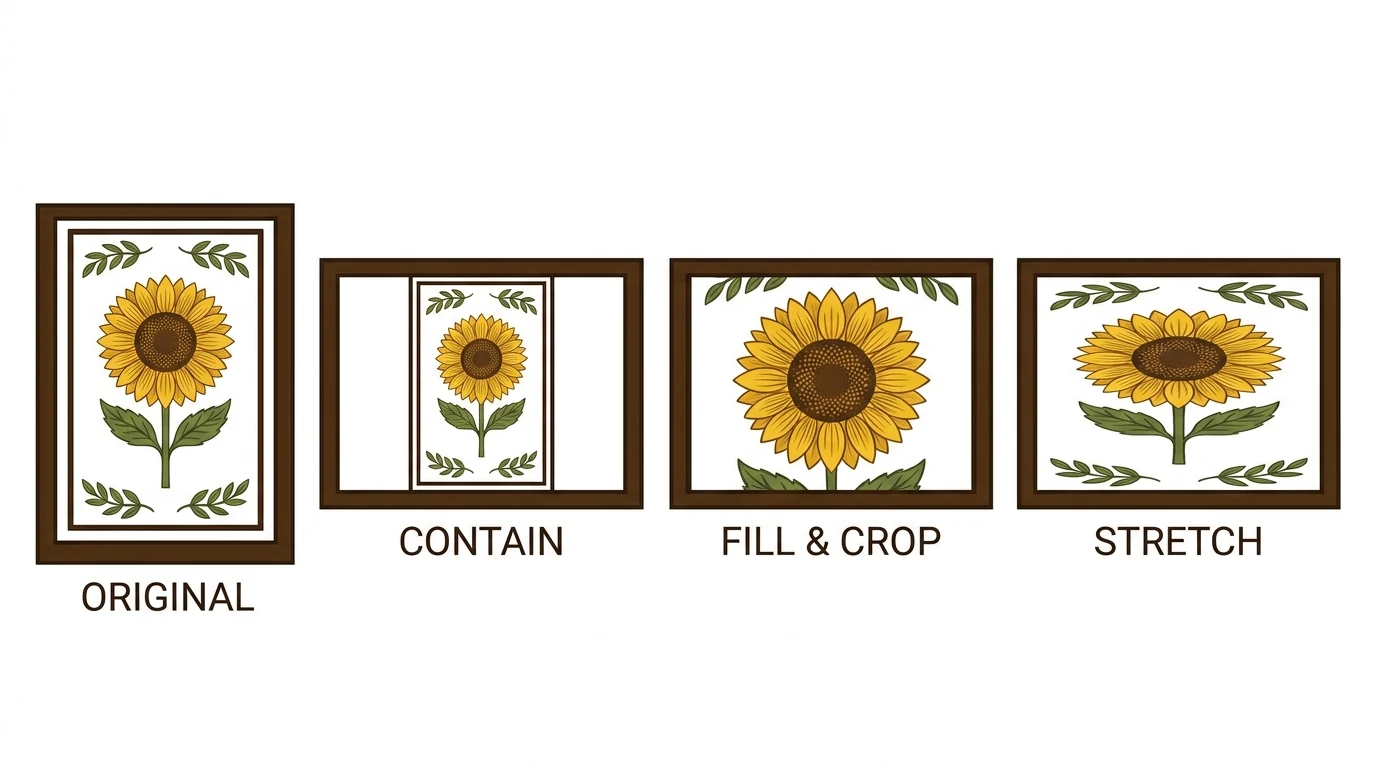
Contain and Fill also offer nine placement positions, with Center / Center as the default. For Contain, the position determines where unused space falls. For Fill, it determines which portion remains visible after cropping. Top / Center, for example, can retain the upper part of an image when vertical cropping is necessary.
A saved batch applies its configured placement rule throughout the operation. If two groups of artwork need substantially different treatment, give them separate saved batches rather than expecting one crop position to suit every composition.
6. Choose the Export Format and Filename Order
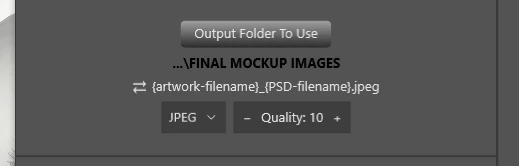
Set the delivery format before saving the batch. JPEG is a practical choice for finished preview images; PNG provides lossless output. The plugin also supports GIF, PDF, TIFF, PSD, PSB, and WEBP when the job requires those formats.
The interface uses a Quality scale from 0 to 12. Quality is adjustable for JPEG, PNG, and WEBP. For PNG, it controls lossless compression rather than introducing JPEG-style image degradation. Choose the setting you want to reuse instead of leaving that decision for every run.
Output filenames automatically combine the artwork and mockup names. With sunflower-design.png and room-frame.psd, the default JPEG filename is sunflower-design_room-frame.jpg.
The filename-order toggle reverses that to room-frame_sunflower-design.jpg. Artwork-first naming helps group results by design; template-first naming helps group them by scene. This becomes especially useful when several saved batches deliver images into the same output folder.
7. Test the Operation Before You Save It
Run a small test using Run This Now before committing to the recurring setup. If the production folder contains many files, use a separate test folder containing a few representative designs.
Choose examples that expose placement problems: perhaps a wide design, a tall design, and artwork with important content close to an edge. Check the exported files for the following:
- The intended Smart Objects received the artwork.
- The artwork inherited the mockup’s perspective or distortion correctly.
- The selected placement mode produced acceptable proportions, spacing, or cropping.
- The format, image quality, filename, and destination are correct.
Three artwork files processed through one template should normally produce three finished mockups, even if several Smart Object targets are selected.
If you tested with a temporary input folder, switch Input Folder To Use back to the production folder before saving the Batch. Otherwise, you will save a reusable operation that points to the test files.
The source mockup is not automatically overwritten with every replacement; completed mockups are exported separately.
8. Save a Named Batch You Can Recognize Later
With the production settings in Automation Setup, enter a Batch name and click Save. The saved operation then appears in the Batches tab.
Choose a name that identifies the job, not just its creation date. Wall Art - Room Frame - Contain - JPEG is easier to recognize later than Batch 1. Include the distinctions that matter in your own production routine.
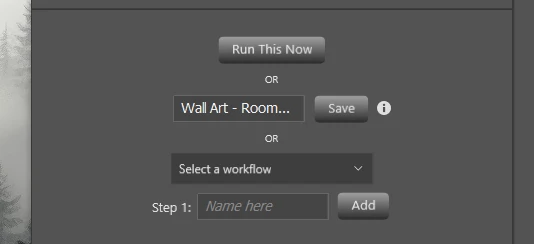
The Batch retains the selected template or template-folder mode, template resource, artwork folder, output folder, placement option and position, filename order, export type, and Quality.
In the Batches tab, expand its details to check that the production folders and intended settings were saved. This is particularly worthwhile after a test run, when it is easy to overlook a temporary folder or a trial export setting.
9. Generate the Next Round With Run Batch
Once the operation is saved, the next production run is much shorter:
- Place the artwork you want to process directly inside the saved Input Folder.
- Open the plugin’s Batches tab.
- Find the operation, using Filter by name if necessary.
- Click Run Batch.
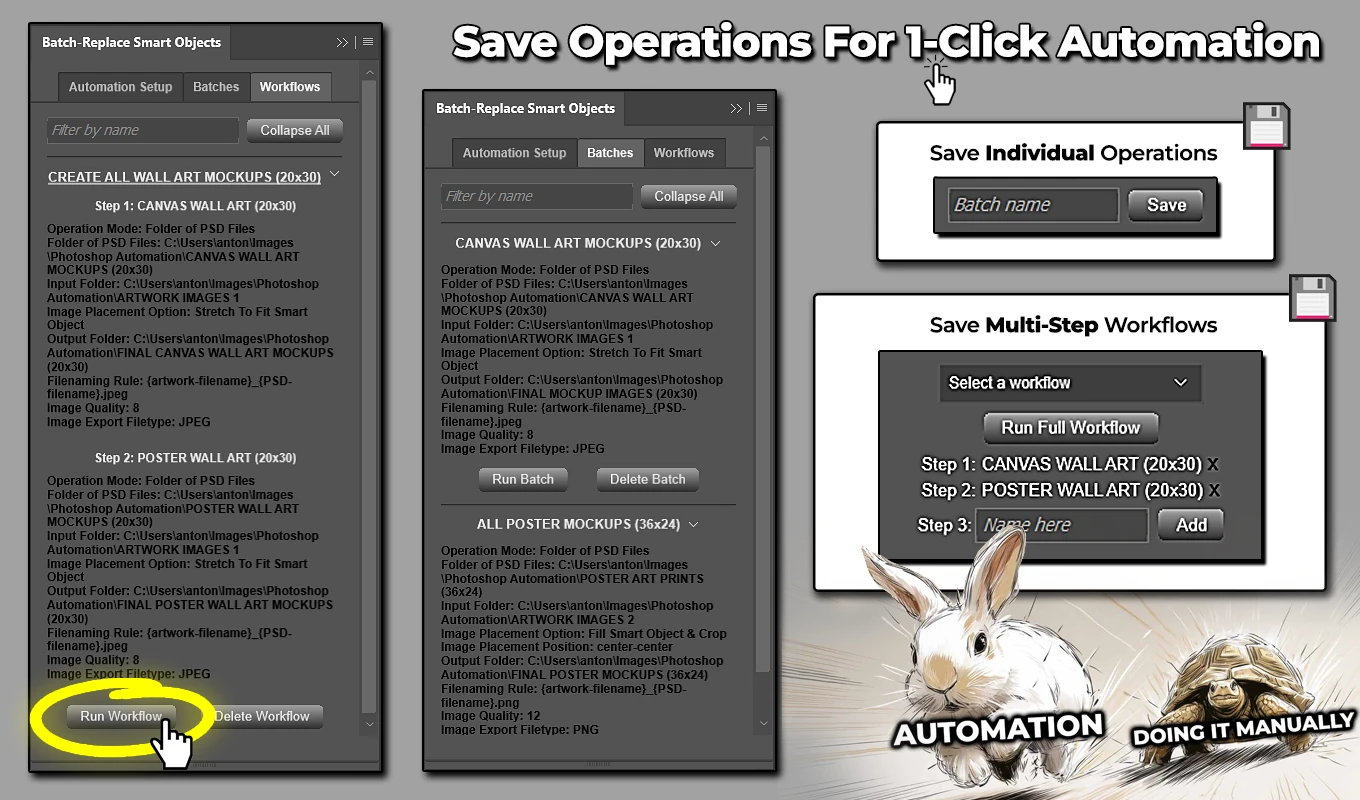
That final click restores and runs the saved configuration. You do not need to reselect the template, rebuild the placement settings, or choose the export destination again.
The input folder can contain supported artwork formats such as JPEG, PNG, TIFF, PDF, PSD, AI, SVG, and WEBP. Unsupported files are ignored. Artwork must be directly inside the selected folder; the operation does not recursively collect files from nested subfolders.
If you need to stop an operation, the plugin’s guidance is to press Escape several times in succession. The interruption point depends on what Photoshop is doing at that moment.
10. Rerun Without Clearing Out Previous Mockups
A recurring batch should not require you to empty the output folder before every run. Batch-Replace Smart Objects handles existing output names by generating numbered alternatives rather than blindly overwriting them.
If sunflower-design_room-frame.jpg already exists, a subsequent output can become sunflower-design_room-frame (1).jpg, followed by sunflower-design_room-frame (2).jpg on another repeat.
This removes a cleanup step, but it is important to distinguish output protection from artwork selection. A saved batch processes the supported artwork currently in its input folder. It is not a “new designs only” filter.
If the folder still contains 40 older designs and you add 10 new ones, the run processes all 50. To produce only the new designs, keep only those intended files in the saved input folder and move the older sources to a separate archive location. The folder reference can stay unchanged while its working contents change.
11. Keep the Saved File and Folder References Valid
Saved Batches retain references to your template and folders. They do not package those resources into a self-contained project. The referenced PSD or PSB and the input and output folders still need to exist and remain accessible.
For dependable repeat runs, keep the working locations stable. Avoid renaming or moving the template after saving the Batch, and reconnect an external drive before launching an operation that depends on it.
The plugin checks input and output folder accessibility before execution. If a previously working job stops, first check whether a folder was moved, renamed, deleted, or disconnected. If there are no valid artwork files, the operation will not proceed.
When your production locations genuinely need to change, select the new resources in Automation Setup and save a replacement Batch. Verify its stored details before removing the obsolete operation with Delete Batch. There is no need to keep launching a saved job that still points to an old project location.
12. Do You Need a Saved Batch or a Multi-Step Workflow?
One saved batch is enough when you want to repeat one operation configuration. That can mean one template, but it can also mean several templates using the same placement and export settings.
For the latter, select Folder of PSD Files To Use instead of an individual Photoshop document, then save that configuration as a Batch. The plugin processes the valid PSD and PSB templates directly inside the selected folder against the artwork folder. Nine templates and 100 designs can therefore produce 900 finished mockups from one saved operation.
A Workflow is useful when the recurring job contains different operation configurations. For example, a framed-print step might use Contain and JPEG, while a second scene needs Fill and PNG, with a different output folder. Each Workflow step stores its own complete setup, and the Workflow runs the steps sequentially.
Start with the simplest repeatable job: one prepared mockup, one stable artwork folder, and one tested Saved Batch. Save it in Batch-Replace Smart Objects, then use Run Batch for the next production round. The point of the one-click workflow is not to skip the important decisions—it is to stop making the same decisions for every new set of mockups.