How To Prepare Images for Multiple Social Media Platforms Without Wasting Hours

The slow part of preparing social images usually isn’t a single crop or export. It’s repeating the same decisions: finding the right file, checking dimensions, repositioning a logo, rewriting a caption, and uploading everything again somewhere else.
The way out is to separate creative decisions from repeatable production. Decide which versions you actually need, approve their framing, automate the predictable transformations, and prepare the publishing information alongside the files.
You don’t need a different production process for every social network. You need a small collection of reusable image formats, a clear exception-handling process, and a publishing workflow that doesn’t make you start over at every destination.
1. Make a placement list—not a separate job for every platform
“An Instagram image” is not a sufficiently specific production brief. A feed photo, a Story, and an image used within a video cover layout have different jobs. The same distinction applies to an uploaded LinkedIn photo versus the preview image accompanying a website link.
Before editing, list the placements you intend to publish. Then group placements that can share the same image.
A practical starting collection is:
- Square, 1:1: a 1080 × 1080 working export for campaigns that need a square version.
- Portrait feed, 4:5: a 1080 × 1350 working export that can be useful across several feed placements.
- Full-height vertical, 9:16: a 1080 × 1920 working canvas for Stories and other vertical layouts, with placement-specific checks for interface overlays.
- Pinterest vertical, 2:3: a 1000 × 1500 version when Pinterest is part of the distribution plan.
- Landscape: a separate wide composition only when the placement or creative genuinely calls for it.
These are useful production recipes, not universal requirements for every platform. Don’t generate all five automatically if your campaign only uses two.
Also, don’t build your workflow around an outdated “one correct Instagram size” chart. Buffer’s Instagram aspect-ratio documentation includes feed images from 3:4 through 1.91:1. A 1080 × 1440, 3:4 version may therefore belong in your plan; 4:5 is a convenient shared format, not the only portrait option.
Pinterest gives a particularly clear starting point. Its standard image specifications state: “We recommend using a 2:3 aspect ratio, or 1000 x 1500 pixels.”
Likewise, don’t assume X always needs a separate landscape export. X’s photo-posting guide says standard single-image ratios between 2:1 and 3:4 display in full. Your existing 4:5 image falls inside that range.
Keep a compact specification record for each placement: aspect ratio, chosen export dimensions, upload method, file-size limit, branding position, and any required manual publishing step. Verify the actual uploader or scheduler you will use—not just the native platform—before approving the recipe.

2. Choose cropping, proportional resizing, or a new layout before you batch
These three approaches solve different problems. Confusing them creates more rework than almost any export setting.
- Cropping changes the frame by removing image area. Choose it when the subject still works inside the new shape.
- Proportional resizing changes pixel dimensions without changing the image’s shape. Choose it when the existing aspect ratio is acceptable and you want to retain the full composition.
- Rebuilding the layout places the complete image inside a different-shaped canvas. Choose it when you need a new ratio but cannot sacrifice content or distort the artwork.
A 4000 × 3000 photograph is 4:3. Resizing it proportionally to 1080 pixels wide produces 1080 × 810—not a square and not a 4:5 portrait. Making it exactly 1080 × 1350 by resizing alone would change its proportions.
If the entire photograph must remain visible in a portrait post, create a portrait layout with intentional surrounding space: a background color, a headline area, or a designed frame. Don’t expect an ordinary proportional resize to create that extra canvas.
Sort your source images before processing. Useful groups include centered subjects, left-positioned subjects, right-positioned subjects, text-heavy artwork, and images requiring individual attention. This is more productive than applying one center crop to everything and repairing the failures afterward.
Keep an untouched master and a separate approved working source. Make color corrections, retouching decisions, and content approvals on the working source before generating the social variants.
3. Generate all your crop variants in one Photoshop batch
When your images can tolerate cropping, the biggest saving is generating several aspect ratios from the same source folder without running a separate image-by-image workflow for each one.
Bulk Image Cropper: Automated Batch Cropping is a Photoshop plugin that lets you stack multiple independent crop operations in one batch.
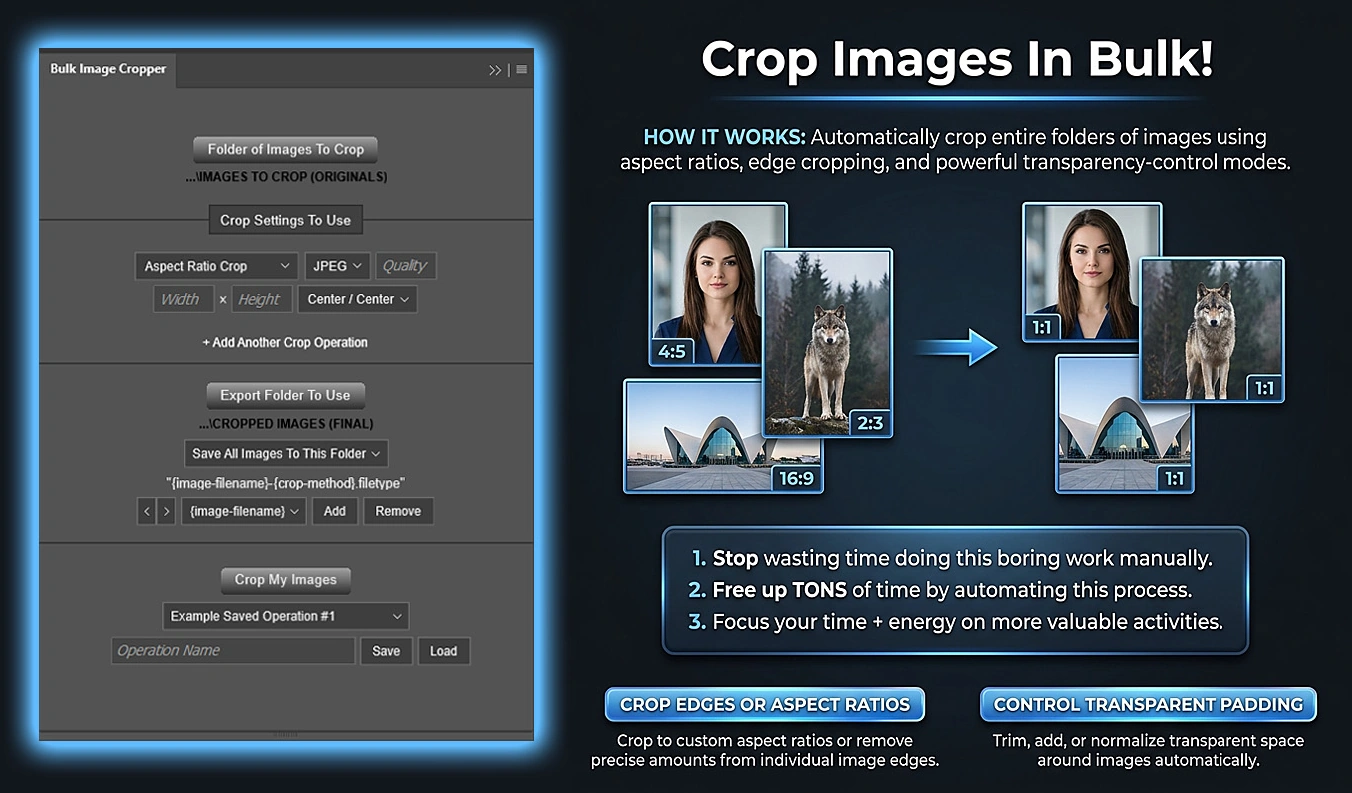
For a campaign needing square feed images, portrait feed images, Stories, and Pinterest images, you could configure:
- Rule 1: Aspect Ratio Crop, 1 × 1.
- Rule 2: Aspect Ratio Crop, 4 × 5.
- Rule 3: Aspect Ratio Crop, 9 × 16.
- Rule 4: Aspect Ratio Crop, 2 × 3.
Every supported source image receives every configured rule. Twenty images and four rules produce 80 crop/export operations in one batch run.
Crucially, those crops are independent. The portrait version is not cropped from the square version, and the Story version is not cropped from the portrait version. Each rule starts from the original source-document state.
The Width and Height fields in Aspect Ratio Crop specify proportions, not final pixel dimensions. Entering 4 × 5 does not produce a 1080 × 1350 file automatically. A 4000 × 3000 source cropped to 4:5 retains a 2400 × 3000 area; resizing to the delivery dimensions is a separate step.
Use the nine alignment positions deliberately. A left-aligned crop can preserve a subject positioned on the left; a top-aligned crop can preserve important content near the top. Treat these as fixed framing choices, not automatic subject detection.
For repeatable production, save separate operations for different composition groups. A “centered products” setup and a “left-positioned portraits” setup are more useful than one supposedly universal crop preset.
The plugin can group exports by crop rule, which is helpful when the next stage needs different dimensions for each ratio. Original source files remain unchanged.
4. Stack resize rules without stretching the artwork
If your images already have acceptable proportions—or you have prepared correctly shaped layouts—batch resizing handles the repetitive dimension and export work without removing content.
Bulk Image Resizer: Automated Batch Resizing lets you stack multiple resize rules, with each rule using its own dimensions, export format, quality, DPI, and Photoshop resampling method.
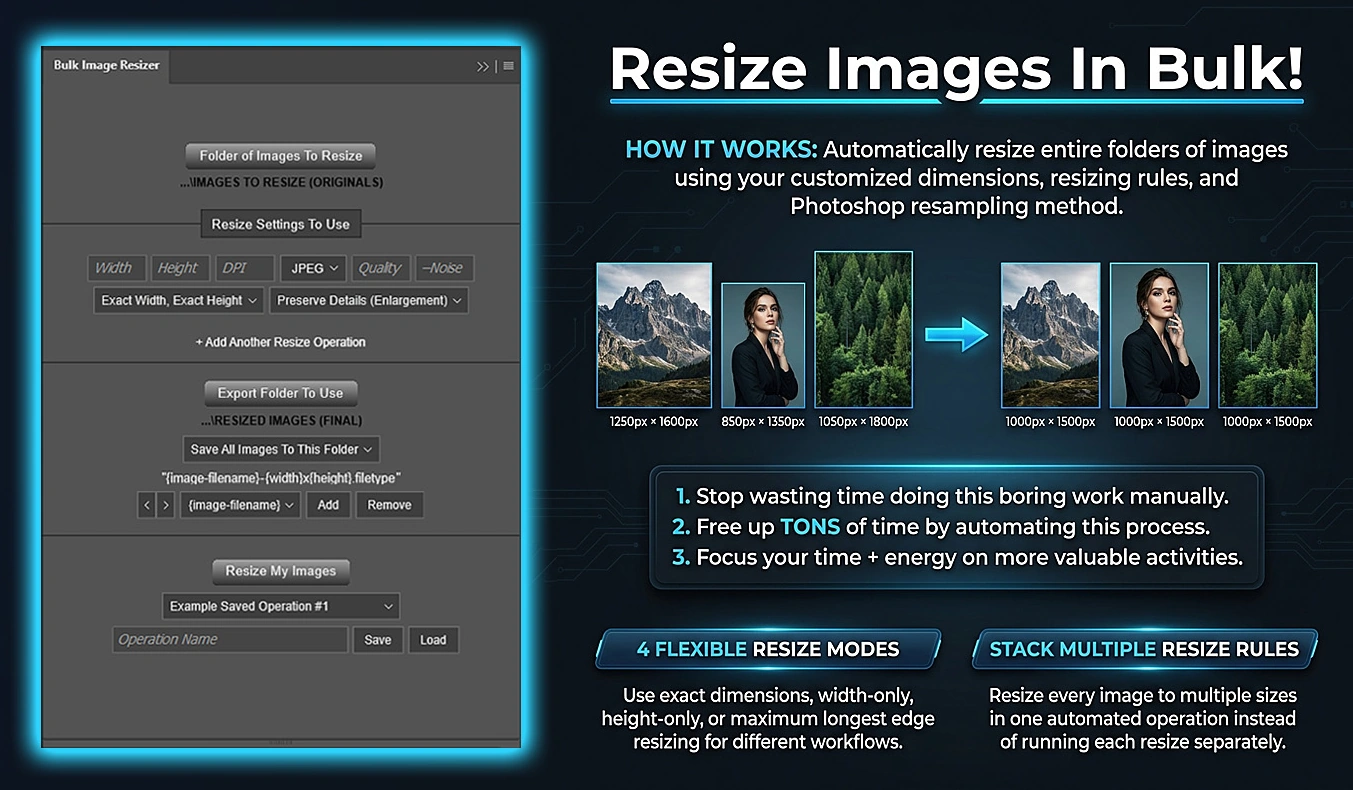
For example, an approved folder of 4:5 artwork could use:
- Rule 1: Exact Width, Auto Height, width 1080, producing 1080 × 1350.
- Rule 2: Exact Width, Auto Height, width 1200, producing 1200 × 1500.
Both versions are generated for every source image in one operation. Add other genuinely required widths to the same batch instead of reopening and exporting the folder repeatedly.
Each standard resize rule independently uses the original source state. The smaller output is not generated by repeatedly shrinking another exported version.
Choose the sizing mode according to the requirement:
- Exact Width, Auto Height preserves proportions while standardizing width.
- Auto Width, Exact Height preserves proportions while standardizing height.
- Maximum Longest Edge preserves proportions across portrait, landscape, and square sources.
- Exact Width, Exact Height produces the specified dimensions, but can distort an image if its original ratio differs.
The important boundary is that stacking resize rules does not create new aspect ratios while preserving proportions. To make square, portrait, and Story versions of the same photograph without stretching it, establish those shapes through cropping or layout design first.
Also, every source receives every resize rule; the plugin does not automatically route particular image shapes to particular destinations. Group your inputs accordingly.
Maximum Longest Edge is useful for flexible-size deliveries, but it sets the longest edge to the target value. It is not a “never enlarge” cap. Separate undersized sources if enlargement would be undesirable.
For a crop-first workflow, several ratios can share one resizing pass: square, 4:5, and 9:16 crops can all use Exact Width, Auto Height at 1080 pixels. That produces 1080 × 1080, 1080 × 1350, and 1080 × 1920 respectively.
5. Set export defaults that prevent avoidable rework
Export decisions should be settled once per workflow, not reconsidered for every image.
Start with color. For a conventional web-delivery workflow, prepare an sRGB working copy and inspect the conversion before batching. Adobe’s online-color guidance explains how to use Edit > Convert to Profile and select sRGB IEC61966-2.1. Do this explicitly; don’t assume a batch plugin performs an undocumented color conversion.
Then choose formats by stage:
- Use PNG or PSD intermediates when files will pass through cropping, resizing, and watermarking before final delivery.
- Consider JPEG for final photographic uploads where the destination supports it.
- Consider PNG for graphics, screenshots, or layouts where you want to test preservation of text and sharp edges.
- Keep an editable master separately from the upload-ready file.
Avoid a chain of JPEG exports between production stages. If you crop to JPEG, resize that JPEG to another JPEG, and watermark it into a third JPEG, you introduce repeated lossy encoding. Use lossless intermediates and make the final delivery export at the end.
For JPEG quality, test representative images at two settings—such as 80 and 90 in the promoted plugins—and compare the result and file size. Treat those as starting points, not universal optimum values. Inspect fine text, gradients, hair, foliage, and other detail-heavy areas.
The plugins’ PNG Quality control changes lossless compression rather than introducing JPEG-style visual loss. Don’t lower it expecting the same image-quality trade-off.
Finally, stop spending time debating 72 versus 300 DPI for a fixed-pixel social export. Adobe’s explanation of dimensions and resolution distinguishes pixel data from physical output size. At fixed pixel dimensions, changing the resolution value does not add screen detail. Use a consistent valid DPI setting where required, and focus your checks on pixels, format, appearance, and upload limits.
6. Add attribution after framing, not before
A watermark placed on the original image can be cropped away in a portrait version, end up too close to a Story interface, or become disproportionately small after resizing. Add branding after the delivery composition and dimensions are established.
Bulk Image Watermarker: Automated Batch Logos automates text and image watermarks across a Photoshop source folder. For ordinary social publishing, its Simple Watermark layout is a useful starting point: choose a logo or text, one of nine alignments, opacity, width, and independent edge padding.
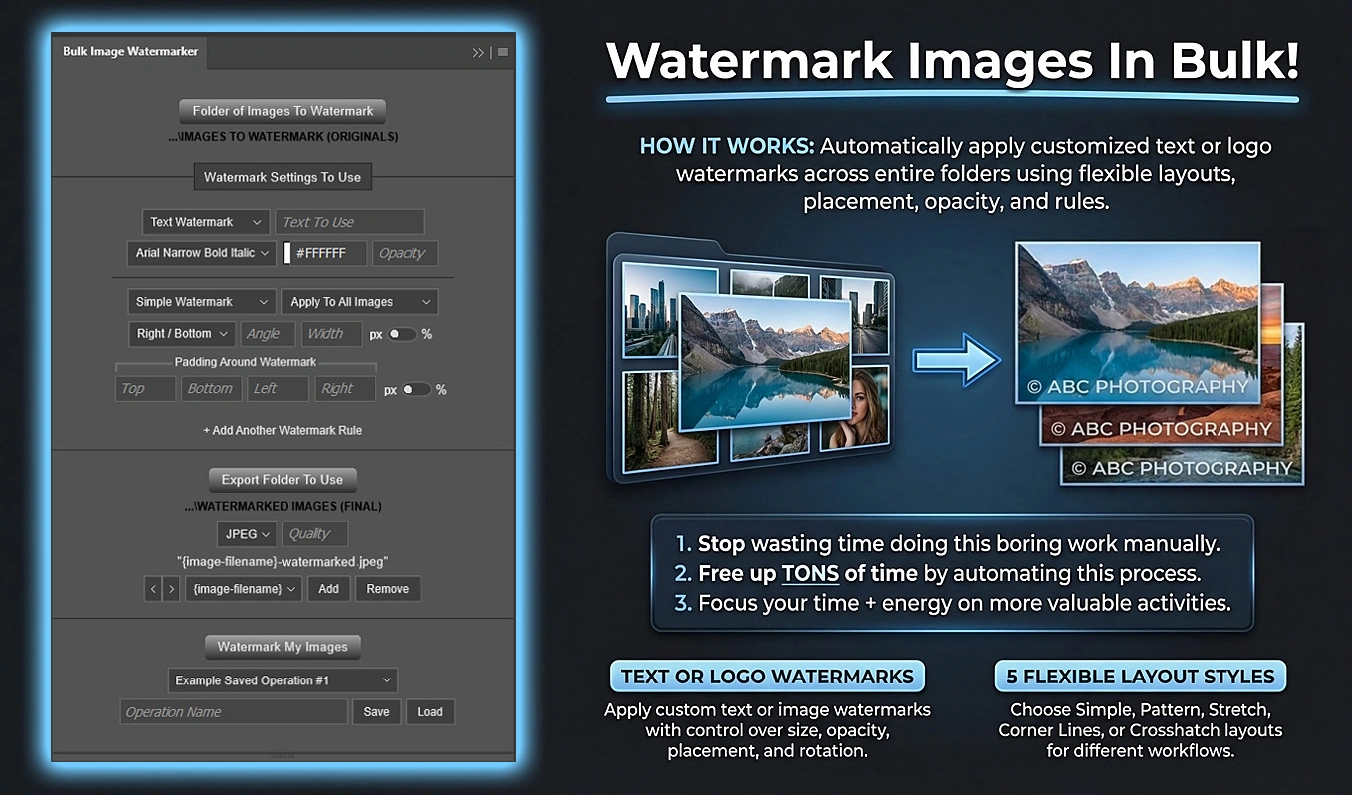
Percentage-based width helps maintain proportional branding across different image sizes. Percentage padding can likewise adapt to the canvas, with top and bottom measured against height and left and right against width.
You can also use output filenames to apply placement-specific branding. If your filename builder includes final dimensions, configure separate watermark rules such as:
- Filename contains “1080x1080”: apply the approved square-layout mark.
- Filename contains “1080x1350”: apply the approved portrait-feed mark.
- Filename contains “1080x1920”: apply the Story mark with padding chosen for its interface preview.
This lets one folder receive different treatments without manually opening every file. Ensure every intended output matches a rule: the Watermarker does not export an image when no rule applies.
Unlike crop and resize rules, watermark rules are cumulative. If two rules qualify, both effects appear on one final exported image. Don’t combine an unrestricted logo rule with a placement-specific logo rule unless you actually want two marks.
Brightness conditions can help choose light or dark marks automatically. However, average document brightness is not the same as brightness beneath a corner logo, so inspect placement contrast on a sample.
For public portfolio posts, a readable name, handle, or short domain may be more appropriate than a dense proof overlay. A watermark can identify the creator and discourage casual reuse, but it cannot guarantee protection against copying or removal.
A website address embedded in image pixels is not a clickable link. Pair attribution with an actual destination link or an appropriate profile-link call to action. If traffic is the goal, Google’s campaign-URL guidance explains how consistent campaign parameters help identify referring campaigns in Analytics.
7. Make the folder structure do the remembering
A fast export process is not useful if nobody can tell which files are approved, which are intermediate, and which belong to a specific post.
Use stage-based folders inside each campaign:
- 01-masters: untouched originals and editable source files.
- 02-working: approved sources ready for production.
- 03-intermediate: crop and resize outputs that are not publishing-ready.
- 04-review: final candidates awaiting approval.
- 05-publish: only the approved upload-ready files.
- 06-exceptions: files requiring individual treatment.
Within the publishing folder, split by placement when that makes uploading easier. Shared square files can serve several networks without being duplicated into multiple platform folders.
Use meaningful source names before batching. The promoted plugins’ dynamic filename builders can carry the original filename and actual output dimensions into the export. A name such as “autumn-mug-07-1080x1350.jpg” is more useful than “final-final-2.jpg.”
Keep the publishing record separate from the filename. A simple spreadsheet can hold the asset ID, approved file, placement, caption, alt text, destination link, scheduled time, approval status, and published-post URL.
There is one important handoff detail: these plugins process supported files directly inside the selected input folder, not recursively through nested folders. If crops are grouped into rule-specific subfolders, select the relevant subfolder for the next stage. Alternatively, collect variants sharing a resizing recipe into one flat staging folder.
Use separate input and output locations. Duplicate-safe filenames help protect existing exports, but numbered duplicates are not version control. Keep only the approved revision in the publishing folder.
8. Test the awkward images before processing the whole folder
Don’t begin with the easiest centered photograph. Build a small test set designed to expose the ways your recipe might fail.
- A subject close to the left or right edge.
- A portrait with little space above the head.
- A wide scene that may lose essential context in a vertical crop.
- A graphic with small text.
- A very bright and a very dark image.
- A lower-resolution source.
Run these through the complete workflow, including the scheduler or native uploader. A crop that looks attractive in Photoshop can still lose a headline in a preview or place branding behind interface controls.
Check the expanded post, feed preview, and relevant grid or thumbnail view separately. For Stories, inspect the actual interface with the additions you intend to use. Don’t treat a downloaded safe-zone overlay as permanently correct for every placement and publishing configuration.
For multi-image posts, check the first image and the resulting layout before approving the sequence. LinkedIn’s photo-posting guidance explains that multi-photo layout depends on the first image’s height and orientation. A set of individually good images can still produce an awkward combined presentation.
Also distinguish uploaded images from website link previews. Re-exporting a local JPEG will not fix a preview that is pulling an old image from a webpage. LinkedIn’s Post Inspector instructions explain how to refresh cached URL preview information for new posts.
After the sample passes, process the full batch and review a thumbnail overview for obvious framing mistakes. Open the exceptions individually rather than inspecting every routine file at full size.

9. Draft platform-specific captions from the actual images
Preparing the files and preparing the post should be one coordinated workflow. Otherwise, you finish exporting and immediately begin another round of repetitive work.
An image-capable language model can help produce first drafts. ChatGPT’s image-input documentation explains how to upload images for interpretation and also warns that descriptions or captions can be incorrect.
Give the model the image plus confirmed context: what the product is, who created the work, the intended audience, the campaign objective, the destination, and any approved claims. Type the asset ID explicitly; don’t depend on the model extracting filenames or metadata.
A useful prompt is:
“Analyze this image for a social post. Asset ID: autumn-mug-07. Confirmed facts: this is a handmade stoneware mug from our autumn collection; do not invent materials, dimensions, pricing, or availability. Draft an Instagram caption emphasizing the visual details, a LinkedIn caption explaining the production process, and a Pinterest title and description focused on relevant search language. Use a warm, specific tone. Suggest up to three relevant hashtag candidates where appropriate. Flag any information you need me to confirm.”
Use one approved factual brief, then adapt the presentation. A visual caption, a professional explanation, and a searchable Pin description do not need to be identical to share the same underlying message.
Review every claim, proper name, date, product detail, and call to action. Treat hashtag suggestions as candidates to check, not evidence of current popularity or guaranteed reach.
For cropped variants, provide the final image when the wording depends on visible content. Don’t describe a detail that exists in the master but has disappeared from the published crop.
Only upload images and confidential campaign information to an external AI service when you have permission and its data-handling arrangements are acceptable for the work.
10. Prepare alt text alongside each final image
Alt text should travel with the approved asset, not become a task someone remembers just before publishing.
The useful principle is purpose, not exhaustive visual inventory. The W3C Images Tutorial puts it clearly: “Images must have text alternatives that describe the information or function represented by them.”
For a product photograph, describe the product and the visually meaningful details. For a promotional graphic, include the essential message. For a chart, make sure the important information is available in text rather than merely describing its colors.
For example, “Speckled cream stoneware mug with a curved handle on a dark wooden table” is more informative than “Beautiful new product! Shop now.” The latter is marketing copy, not a description of the image.
If you want image analysis inside the publishing workflow, Metricool’s AI alt-text feature analyzes an attached image and generates a draft description. Its documented workflow lets you review and edit the result before accepting it; access depends on the plan or available AI credits.
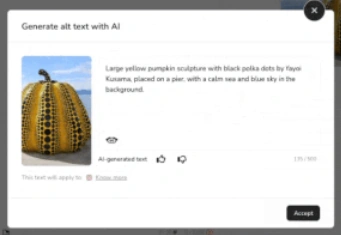
Generate or review alt text for the final crop. A square detail image may need a different description from a wide photograph of the same scene. For carousels, handle each image individually rather than attaching one generic description to the whole sequence.
Check whether your scheduler supports alt text for the exact network and post type. Metricool’s documentation, for example, notes that alt text is not supported in Stories. Don’t assume a description stored in your spreadsheet will automatically transfer everywhere.
11. Schedule from one dashboard, but customize by network
The publishing equivalent of batch exporting is composing once, adapting where necessary, and scheduling multiple destinations from one place.
Two useful options are Buffer and Metricool. Their value here is publishing coordination—not replacing your approved image-production workflow.
Buffer for a shared post with network-specific versions
Buffer’s scheduling workflow lets you select multiple channels, begin with a base post, and use “Customize for each network” to create network-specific versions. That is useful when one campaign needs different wording, media choices, or mentions at each destination.
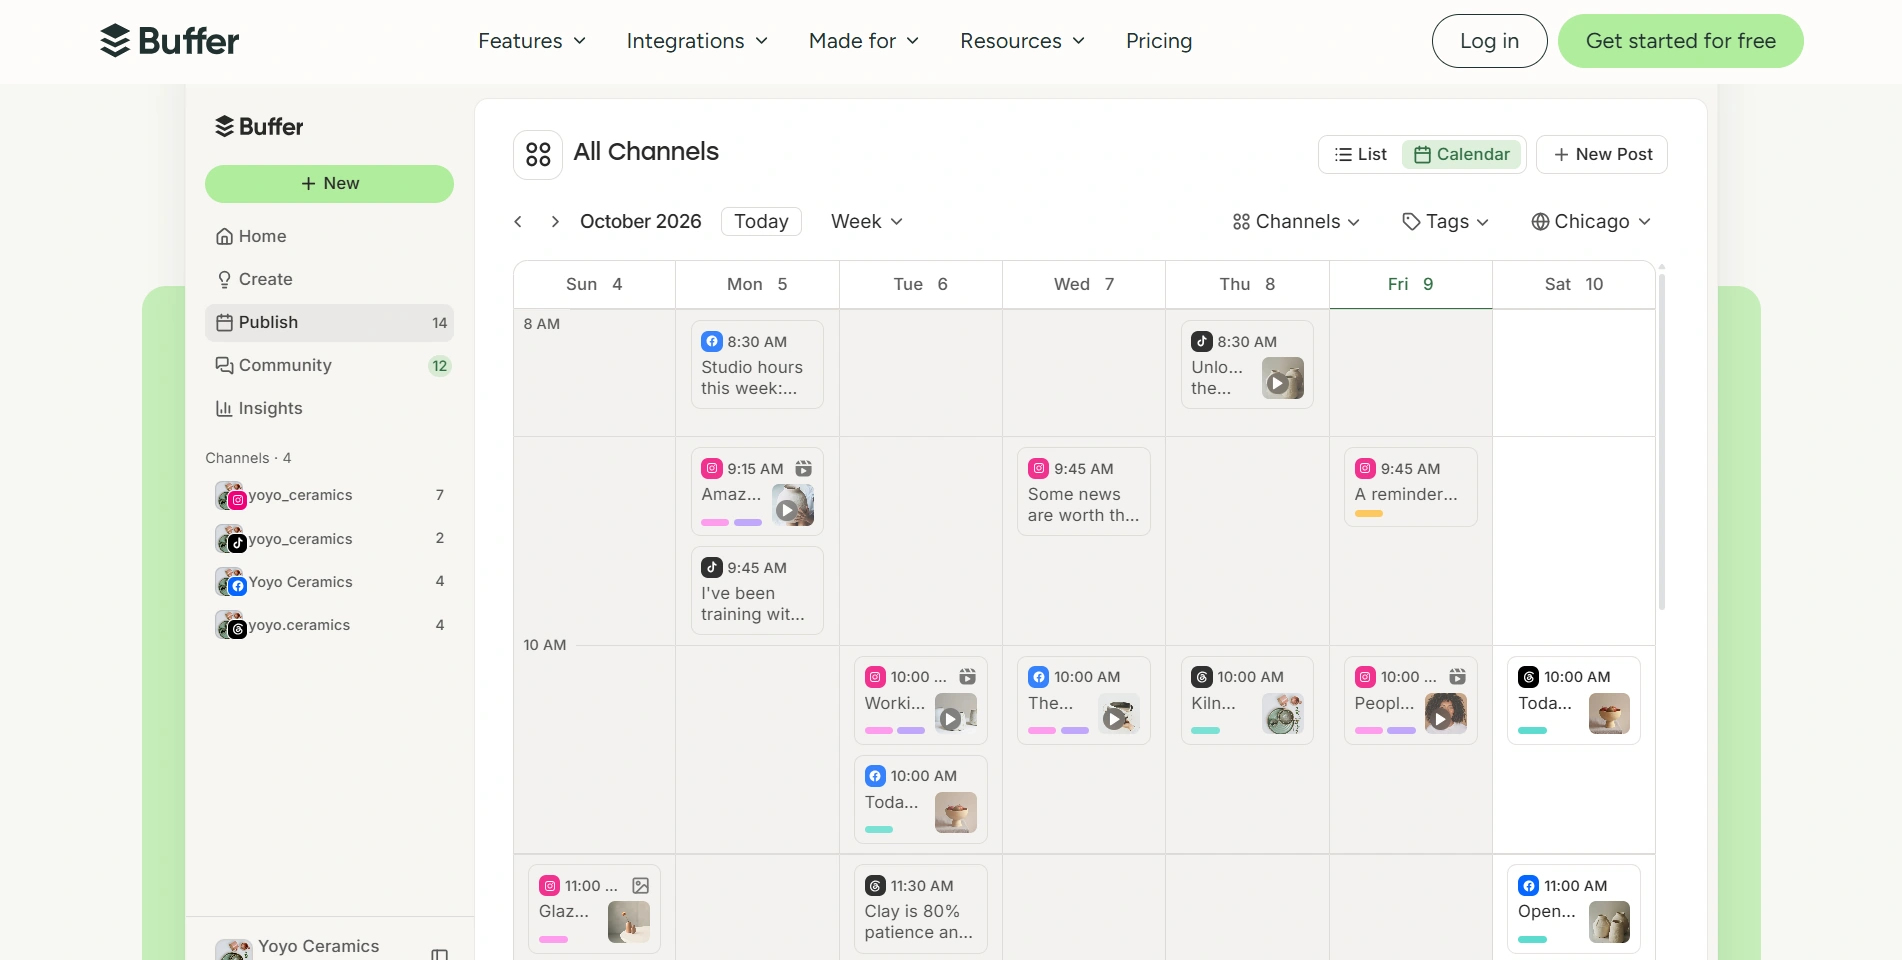
Prepare the image variants first, then attach the appropriate one to each network’s version. Don’t make the publishing composer the place where you repeatedly improvise unapproved crops.
Metricool for template-based multiposting and review
Metricool’s multiposting workflow starts with a shared template and lets you edit content by network, including text, images, links, and alt text. Its documented process also includes sending the publication for review when another team member or client needs to check it.
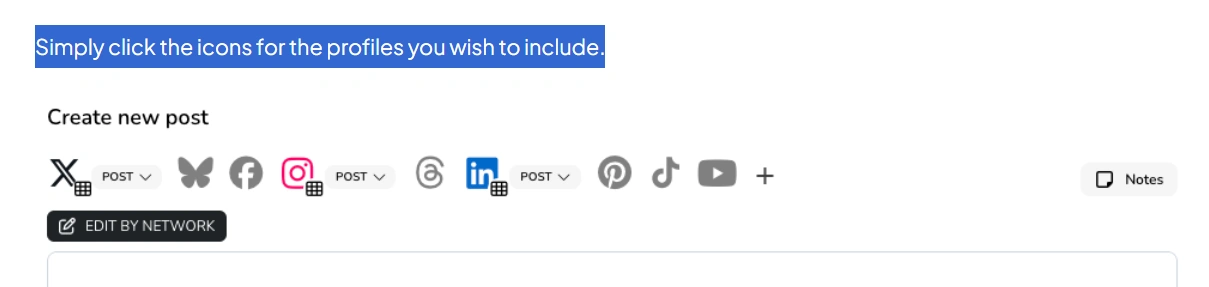
Choose between tools by testing your actual requirements: account types, supported destinations, carousel handling, approval needs, alt text, and the distinction between automatic and notification publishing. A long list of network logos is less useful than reliable support for your specific post types.
Before scheduling, check:
- The correct account and placement are selected.
- The image version matches the intended composition.
- Mentions resolve to the right accounts on that network.
- Links lead to the intended destination.
- Carousel order is correct.
- The time zone and publishing time are correct.
- Any required manual completion step has an owner.
Some native additions still require a handoff. Buffer’s Instagram publishing guide, for example, documents notification publishing for features such as Story links and feed-post music. Scheduling something is not always the same as making it completely hands-free.
12. Turn the next campaign into a repeatable production run
Here is how the pieces fit together for a campaign with 20 approved photographs and three required versions: square feed, 4:5 portrait feed, and 9:16 Story.
- Define the placements. Confirm that the three formats cover the actual publishing plan; don’t create unused variants.
- Prepare working sources. Complete approvals and color preparation, then move difficult compositions into the exceptions group.
- Test the recipe. Process representative awkward images and inspect their publishing previews.
- Generate the crops. Stack 1:1, 4:5, and 9:16 rules in Bulk Image Cropper. Twenty sources produce 60 crop outputs. Use PNG intermediates and include actual dimensions in filenames.
- Standardize dimensions. Run the crop outputs through Bulk Image Resizer with Exact Width, Auto Height at 1080 pixels. The three shapes become 1080 × 1080, 1080 × 1350, and 1080 × 1920. Stack additional width rules only if those extra deliveries are genuinely needed.
- Apply reviewed branding. Use Bulk Image Watermarker rules targeted to the dimension-bearing filenames, with appropriate padding for each placement. Export the final delivery format after watermarking.
- Prepare the post information. Draft captions, verify claims, write or review alt text, and record the destination links alongside the approved files.
- Approve and schedule. Move approved files into the publishing folder, attach the right variants in the scheduler, and customize each network’s post.
- Check the published result. Confirm the first live examples and record any changes needed before repeating the workflow.
Save the crop, resize, and watermark operations separately. These are distinct production stages, not an undocumented one-click connection between the three plugins. When loading a saved operation for a new campaign, verify its remembered input and output folders before running it.
Keep a short exception log: which subjects need a different alignment, which graphics need a redesigned canvas, which placement needs more branding clearance, and which posts require manual completion. That log is how the next batch becomes easier.
The goal is not to automate every creative judgment. It is to make each important decision once, preserve it in a reusable recipe, and stop repeating the mechanical work for every image and every platform.