How To Remove Product Photo Backgrounds And Align Subjects Consistently

Removing a product photo’s background is only half the job. For a clean catalog, the resulting cutouts also need a consistent canvas and a deliberate alignment rule. Otherwise, one product sits high, another drifts sideways, and a third looks unusually small because its original photo contained more empty space.
The reliable workflow is to remove the background, trim the transparent margins, create the required canvas, and position the remaining product against the same alignment anchor. Bulk Background Remover: Automated Cutouts is a Photoshop plugin that automates those steps across a folder. Here is how to configure that workflow—and how to distinguish consistent positioning from consistent product size.
1. Define the Canvas and Baseline for Your Catalog
Before processing the photos, decide what “consistently aligned” should mean for the finished collection. Three separate decisions determine the result:
- Canvas dimensions: Should every exported image be exactly 2000 × 2000 pixels, or is a shared aspect ratio sufficient?
- Product position: Should products sit on a common bottom baseline, remain centered, or align toward one side?
- Product size: Should each product retain its available resolution, or must every product occupy a particular height or proportion of the frame?
For many product catalogs, an exact square canvas with Center / Bottom alignment is a useful starting point. Every file has the same dimensions, each product is horizontally centered, and its bottommost visible content sits at the same canvas boundary.
Center / Center is a different treatment: it balances the empty space around each cutout instead of giving products a shared bottom baseline. Neither is universally better. Choose the rule that suits the catalog layout, then apply it throughout the collection.
Keep the product-size decision separate. Equal canvas dimensions and equal alignment do not automatically make differently sized cutouts occupy the same amount of space.
2. Create the Cutout with Photoshop’s Native Subject Detection
Bulk Background Remover provides two background-removal methods, both using native Photoshop functionality. For a batch where unattended processing is important, choose Select Subject & Remove Inverse, which is the plugin’s default method.
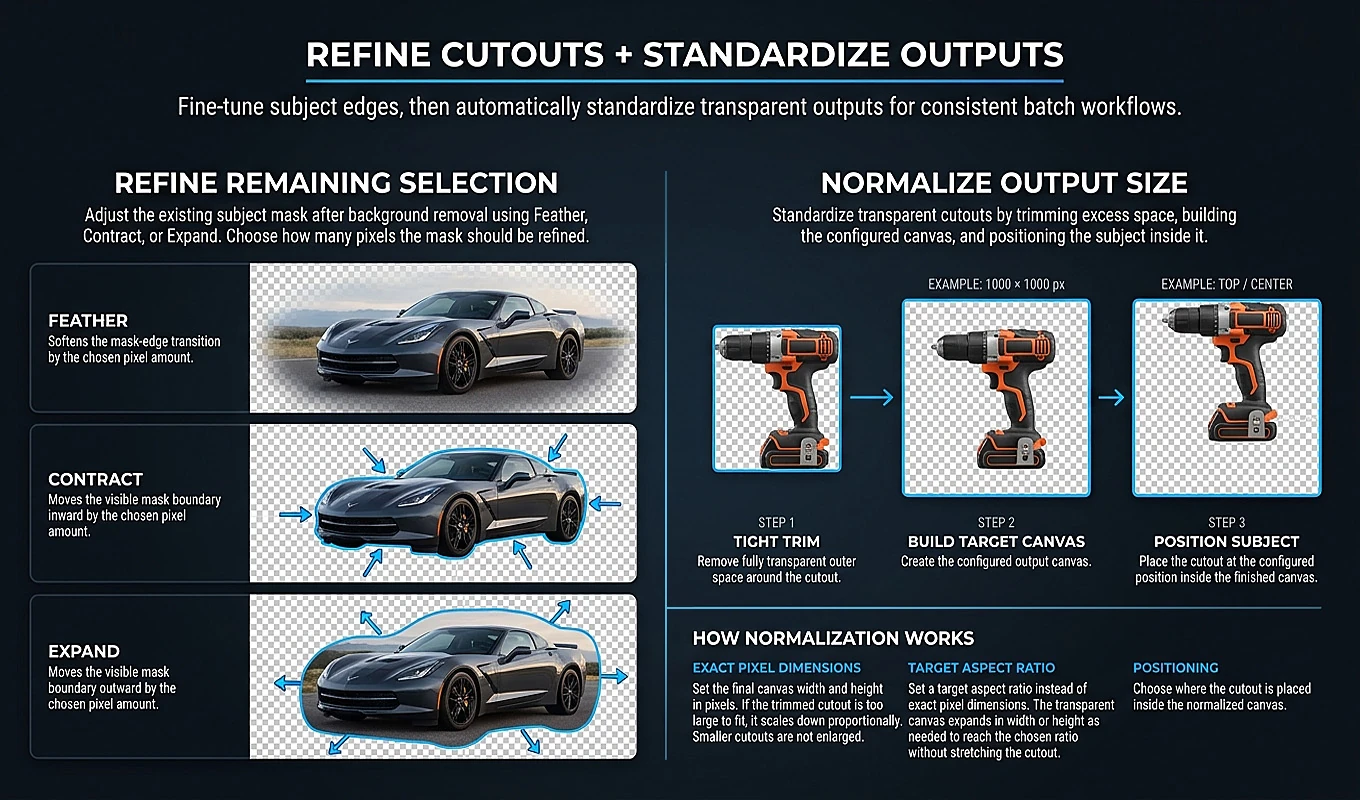
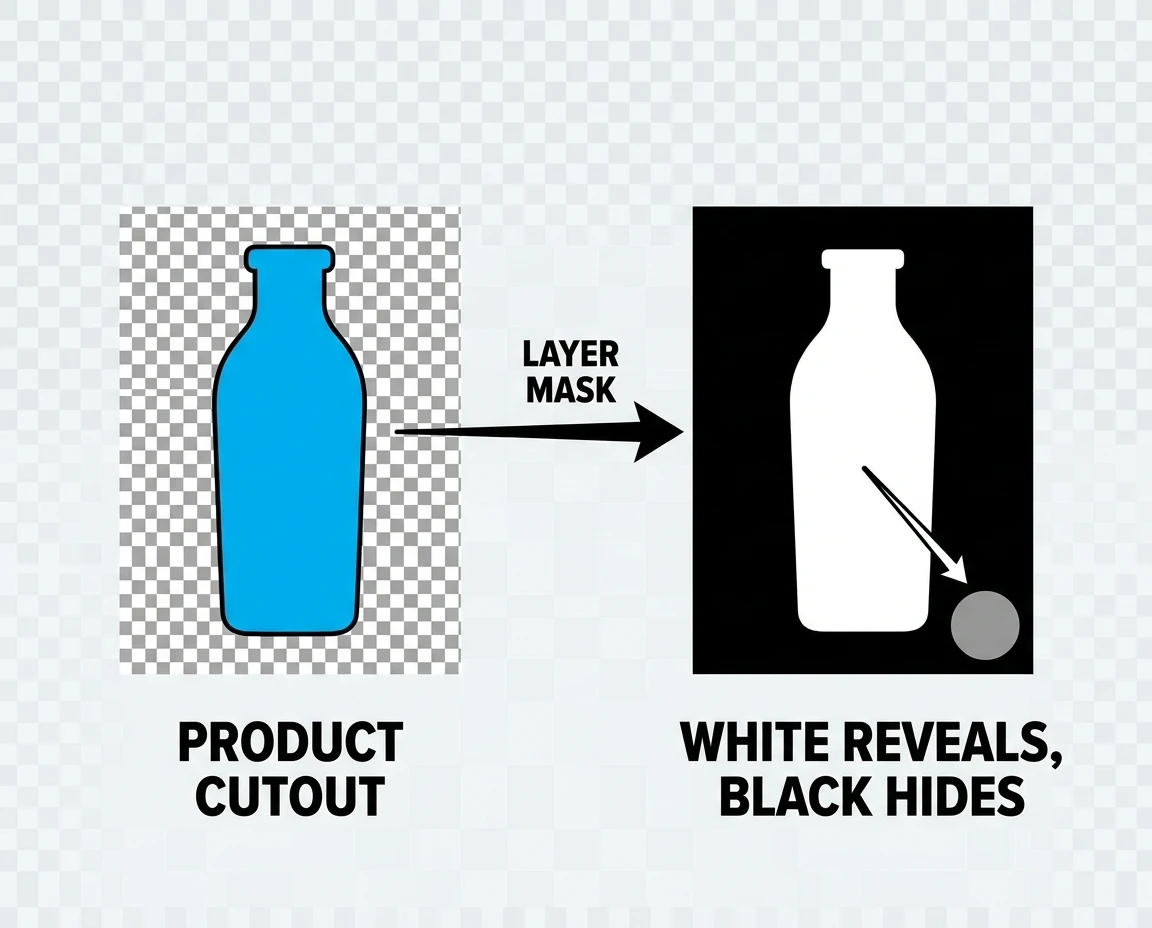
This method runs Photoshop’s Select Subject operation and checks that Photoshop created a meaningful selection. It then creates a Reveal Selection layer mask: the selected product remains visible, while the surrounding background becomes hidden and transparent. Despite the method’s name, the implementation uses a mask rather than simply deleting all inverse pixels.
The mask also supports optional edge refinement. Contract Selection can pull the boundary inward to reduce unwanted background edging. Expand Selection can reveal more edge content when the initial selection is too aggressive. Feather Selection softens the transition between the product and transparency.
Use refinement to solve an observed edge problem, not as an automatic requirement. A small contraction may help one product but remove important detail from another, particularly around thin handles, wires, or delicate edges. Test the setting on representative photos before applying it throughout the folder.
The second method, Remove Background Using AI, invokes Photoshop’s native Remove Background command. Photoshop can display an operation-pausing popup when it cannot identify a background, and the plugin cannot reliably suppress that dialog. The plugin warns before this method runs; Select Subject & Remove Inverse is the more suitable choice when minimizing manual interruptions matters.
3. Trim Transparent Margins Before You Align the Product
The original photo frame is usually a poor reference for positioning the finished product. One photograph might have substantial headroom, while another places the product close to an edge. After background removal, those differences remain as transparent space.
Trimming that space establishes the actual cutout bounds. Positioning can then be based on the product rather than on the photographer’s original framing.
Bulk Background Remover’s Crop To Remaining Pixels option removes fully transparent outer canvas from all four sides. It does not resize the product, add padding, or crop through visible subject pixels to force a particular shape.
For consistently aligned catalog images, however, use Normalize Output Size rather than Crop To Remaining Pixels alone. Normalization performs its own preliminary transparency trim, then creates the requested canvas and positions the cutout within it.
The two checkboxes are mutually exclusive in the interface. You do not need to enable cropping first: turning on Normalize Output Size already includes that step. Cropping alone produces tightly bounded assets, but their final canvas sizes can differ from product to product.
4. Understand What Exact-Size Normalization Does to Product Scale
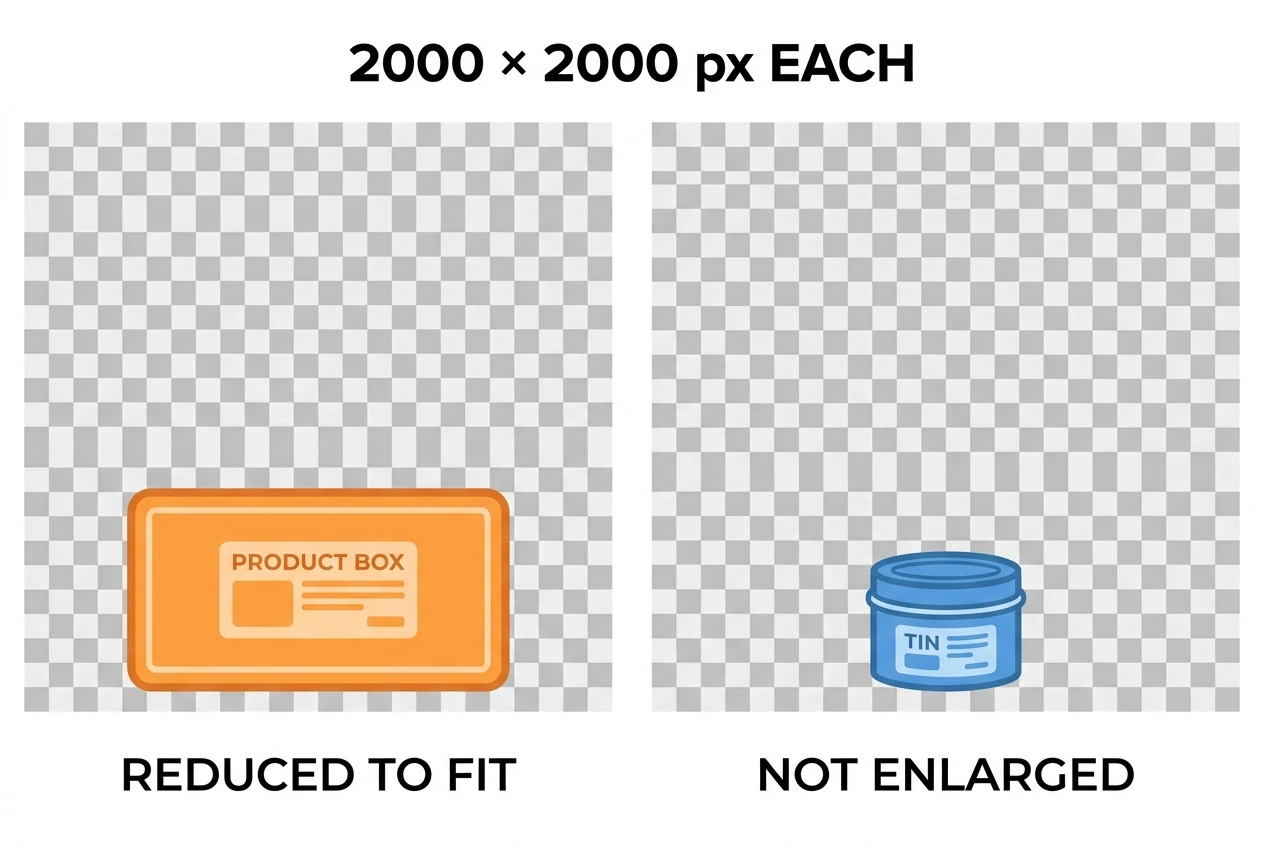
In pixel mode, Normalize Output Size creates an exact final Width × Height canvas. If the trimmed cutout is too large to fit, it is reduced proportionally. If it already fits, it is not enlarged.
For a 2000 × 2000-pixel target, consider two examples:
- A trimmed 3000 × 1500-pixel cutout is reduced to approximately 2000 × 1000 pixels, then placed within the 2000 × 2000 canvas.
- A trimmed 800 × 600-pixel cutout remains 800 × 600 pixels. Transparent canvas is added around it to reach 2000 × 2000.
The fitting scale is the smallest of 1, target width divided by cropped width, and target height divided by cropped height. Capping that scale at 1 prevents automatic upscaling, while proportional resizing prevents horizontal or vertical stretching.
This distinction matters when judging a catalog. Both example outputs have identical canvas dimensions and can share the same bottom alignment, but the products occupy very different amounts of the frame.
If your brief requires every product to reach a specific visible height or fill percentage, that needs additional size preparation or manual adjustment. The plugin’s pixel normalization is a scale-down-if-needed workflow, not an equal-product-height or scale-up-to-fill feature. Starting with adequately sized, similarly framed source photography helps reduce those differences.
5. Choose the Alignment That Matches the Product Layout
Normalization offers nine predefined positions, combining Left, Center, or Right horizontally with Top, Center, or Bottom vertically. The default is Center / Center.
For product photography, the most useful choice is often determined by how the images will sit beside one another:
- Center / Bottom: Useful for bottles, boxes, footwear, and other products that should appear to stand on a shared baseline.
- Center / Center: Useful when balanced surrounding space matters more than a common lower edge.
- Left / Center: Useful when the composition needs open space on the right.
- Center / Top: Useful when the top edge is the intended reference point.
The plugin positions the remaining subject bounds within the normalized canvas. With Center / Bottom, the cutout is centered horizontally and its lower bound is placed against the bottom canvas boundary. With Right / Center, its right bound reaches the right boundary and it is centered vertically.
Top, bottom, left, and right alignment are boundary positions, not automatic inset margins. If the layout requires a specific transparent gap below the product, do not assume bottom alignment will create it; plan an additional layout adjustment.
Also consider what remains in the cutout. A retained cast shadow may become the bottommost visible content, so aligning that bound is not necessarily the same as aligning the physical base of the product. Consistent decisions about shadows help produce a more convincing shared baseline.
6. Run a 2000 × 2000, Bottom-Aligned Product Batch
The following configuration produces transparent square outputs with each successfully processed product centered horizontally and aligned to the bottom. It is a practical starting point for a repeatable catalog workflow.
Install Bulk Background Remover: Automated Cutouts through Adobe Exchange or Adobe’s Creative Cloud plugin marketplace, then open it from Photoshop’s Plugins menu.
- Prepare a source folder. Begin with a small, representative selection of product photos so you can verify the treatment before running the full collection. The plugin processes supported files directly inside the chosen folder; it does not recursively process nested subfolders.
- Click Folder of Images To Process and select that folder.
- Set Background Removal Method to Select Subject & Remove Inverse.
- Decide whether to enable Skip Images Containing Transparency. Use it only when already-transparent images should be excluded from this operation entirely.
- Enable Refine Remaining Selection only if the sample cutouts need edge adjustment. For residual background edging, a small Contract Selection amount, such as 1 or 2 pixels, can be a starting point to test—not a universal setting.
- Enable Normalize Output Size. Select px, enter Width 2000 and Height 2000, and choose Center / Bottom alignment. Leave Crop To Remaining Pixels off; normalization already trims transparent margins.
- Click Export Folder To Use and choose a destination folder, preferably separate from the sources so the derivatives are easy to review.
- Choose PNG for transparent catalog assets. Configure the filename components, then click Remove Image Backgrounds.
The transparency-skip decision deserves particular care here. When enabled, any image detected as already containing transparency is skipped completely: it receives no background removal, refinement, cropping, normalization, or export. It is not a way to bypass removal while still aligning that file. Leave the setting off if those images must also enter the configured workflow, understanding that the selected background-removal method will still be attempted.
For filenames, combine the original image name, the background-removed label, and the final dimensions if you want the output size to be visible in the name. An output could be mug-background-removed-2000x2000.png. Dimension components use the actual final document size after processing.
PNG remains lossless. Its Quality control changes compression behavior rather than introducing JPEG-style loss of image detail.
During the batch, the plugin opens each source, prepares its working layers, performs the configured removal, applies the relevant refinement and normalization, and exports the result. The source document is closed without saving, so the normal workflow does not write those edits back over the original file.
7. Use Ratio Mode When Matching Shape Is Enough
Not every product-image workflow requires identical pixel dimensions. If the destination needs a consistent shape but can accept different resolutions, Normalize Output Size also provides ratio mode.
For portrait-oriented product cards, enter Width 4, Height 5, and select ratio. These values describe a 4:5 aspect ratio, not a 4 × 5-pixel canvas.
After trimming the cutout, the plugin expands whichever canvas dimension is necessary to reach the requested ratio. It preserves the existing cutout size, does not distort the product, and does not crop visible product pixels to force the shape.
For example, an 800 × 600-pixel cutout needs an 800 × 1000-pixel canvas to reach 4:5. The product remains 800 × 600, and the added area is transparent. The selected alignment then determines where the product sits within that expanded canvas.
Ratio mode standardizes shape, not resolution. Different source cutouts can produce different final pixel dimensions even when every output is 4:5. Use pixel mode when the requirement is “every file must be 2000 × 2500”; use ratio mode when it is “every file must have a 4:5 canvas.”
8. Evaluate the Exports as a Product Collection
A cutout can look good on its own and still look inconsistent beside the rest of the catalog. Review the test outputs together in the intended product-grid layout, or arrange them side by side at a consistent display size.
Look for differences that individual-image inspection can hide:
- Canvas consistency: In pixel mode, confirm that the files share the requested dimensions. In ratio mode, check the common shape without expecting identical resolution.
- Baseline consistency: Check whether products appear to sit on the same lower edge. Retained shadows or stray mask content can affect that impression.
- Apparent size: Identify products that look disproportionately small or large. Shared canvas dimensions do not resolve every source-scale difference.
- Edge consistency: Compare hard edges, soft edges, halos, and fine detail across the group, rather than judging the refinement on only one easy image.
- Surrounding space: Make sure the chosen alignment supports the layout. A mathematically centered narrow object can look quite different beside a broad one.
Include challenging examples in the test set: a tall bottle, a wide package, a small item, a reflective object, and a product with fine edge detail if those appear in your catalog. Photoshop’s detection results depend on the source content, so a successful test on one simple box does not establish that every product will receive an equally suitable cutout.
If the collection reveals a shared edge issue, revise the refinement and rerun the test. If only a few items need a different treatment, handle those exceptions separately rather than changing the entire batch around them. If the problem is apparent size, address the sizing requirement instead of repeatedly switching alignment positions.
9. Save the Approved Catalog Workflow for the Next Shoot
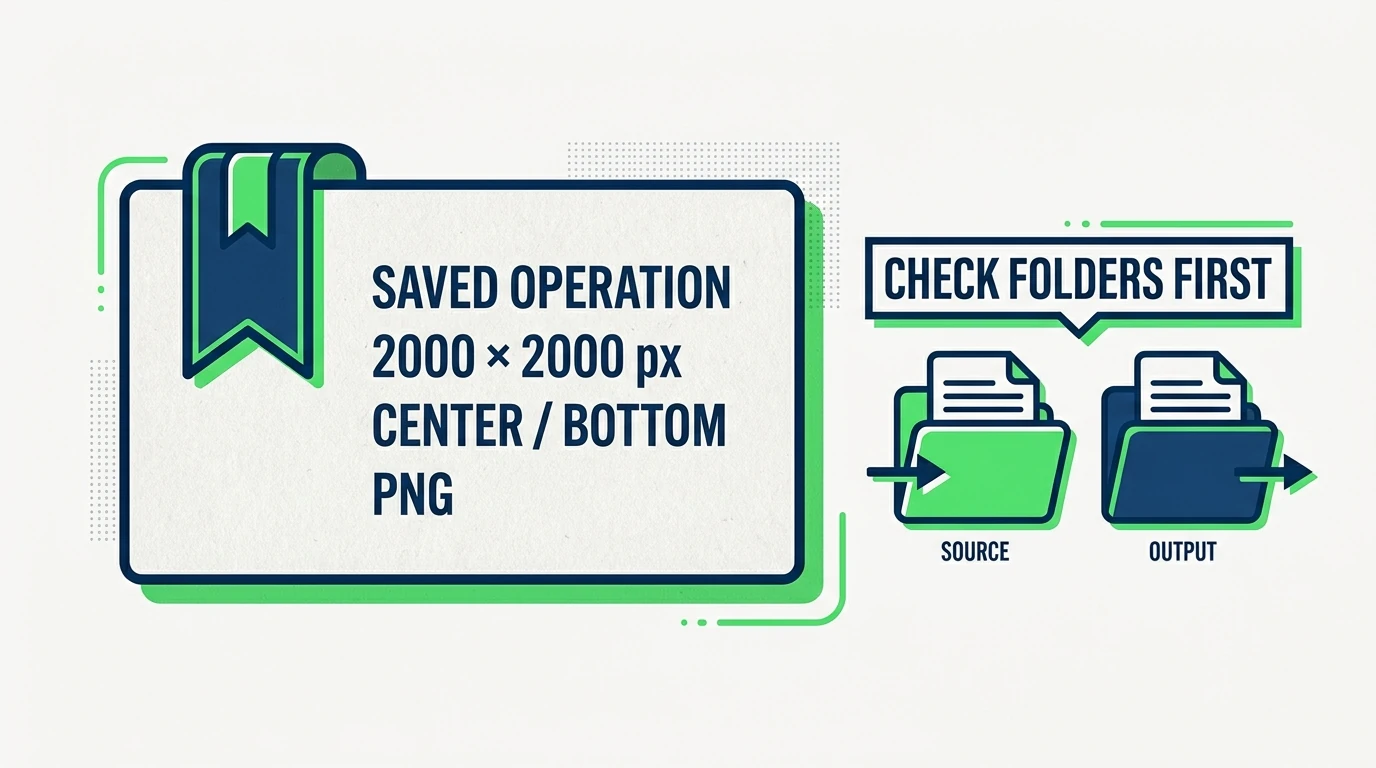
Once the test outputs meet the catalog’s requirements, save the configuration as a named operation. A descriptive name such as Catalog 2000 Square Center Bottom PNG makes the intended output easy to recognize later.
Saved operations retain the removal method, transparency-skip choice, refinement settings, normalization dimensions and mode, alignment, export format, Quality, filename components, and source and output folder references. You can load the approved treatment instead of rebuilding it for each new product shoot.
Check the restored folders before running the next collection and select the new source or destination when necessary. Loading a saved operation restores its configuration; it does not automatically choose the folder for a new shoot.
The essential recipe is straightforward: create a reliable cutout, remove empty outer space, standardize the canvas, and align the visible product to a deliberate anchor. Bulk Background Remover makes that sequence repeatable across a folder. Start with a representative test batch, review the products together, and save the configuration once the collection—not just one image—looks right.