How To Replace Every Occurrence Of Text Across Multiple PSD Files

To replace every matching occurrence of text across multiple PSD files, use Bulk Text Replacer: Batch-Update Text Layers with Search All Text Layers and Layer Text Contains. Enter the text to find, enter its replacement, choose the source folder, and export the updated documents as PSDs. The plugin replaces all qualifying occurrences within each eligible text layer—not just the first match in each file.
The important part is defining what should count as a match. Capitalization, word boundaries, and search scope determine which occurrences change. Layout settings then help keep the replacement text usable when its length differs from the original.
1. Understand What “Every Occurrence” Means in a PSD Batch
There are three levels to this task: every occurrence within a text layer, every eligible text layer within a document, and every PSD in the selected source folder. A successful folder-wide replacement needs to cover all three.
Bulk Text Replacer searches editable Photoshop text layers, including text layers inside groups and nested groups. If the same phrase appears twice in a headline layer and once in a footer layer, contains matching can replace all three occurrences during the same file operation.
However, visible lettering is not necessarily editable text. Words baked into a photograph, flattened artwork, or rasterized layer are pixels rather than Photoshop text content. The plugin does not replace that lettering simply because the document has a PSD extension.
“Every occurrence” also means every occurrence that satisfies your chosen matching settings. Whole Words Only deliberately excludes a search string embedded inside a larger word. Any Text Match includes those substring matches. Neither setting is universally correct; the right choice depends on what you intend to change.

2. Prepare One Source Folder and Open the Plugin
Put the PSD files you want to update directly inside one source folder. Bulk Text Replacer processes supported files in the selected directory; it does not recursively traverse filesystem subfolders.
This is different from its layer search. Nested Photoshop layer groups are searched recursively, but nested folders on your computer are not. If your PSDs are divided among several directories, bring the intended files into one working folder or run the folders separately.
Install Bulk Text Replacer: Batch-Update Text Layers through Adobe Exchange or the Creative Cloud plugin marketplace. After installation, open or restart Photoshop as needed and launch the plugin from the Plugins menu.
Click Folder of Files To Process and choose your source folder. Use a separate destination folder for the revised files so the original templates and updated documents remain easy to distinguish.
3. Enter the Text to Find and Its Replacement
Create your first replacement pair using the Original Text and Replacement Text fields. For example, a folder-wide brand update could use:
Original Text: Northline
Replacement Text: Evergreen Collective
Original Text is the content the plugin searches for. Replacement Text is what it inserts when the rule matches. Both fields must contain text; this workflow does not support deleting a match by leaving Replacement Text empty.
The search is literal, not a user-facing regular-expression search. If you enter a price such as $19.99 or a phrase containing parentheses, those characters are treated as actual text rather than pattern instructions.
Matching also normalizes certain stored structural characters. Linebreak and paragraph separators are treated as spaces, tabs become spaces, and certain zero-width markers are removed. This helps a visible phrase match even when Photoshop stores some of its spacing as structural formatting.
4. Set Search All Text Layers and Layer Text Contains
For a genuinely document-wide replacement, select these two settings:
- Search All Text Layers: evaluate text layers throughout the document, including those inside nested groups.
- Layer Text Contains: find the requested text anywhere within an eligible layer’s contents.
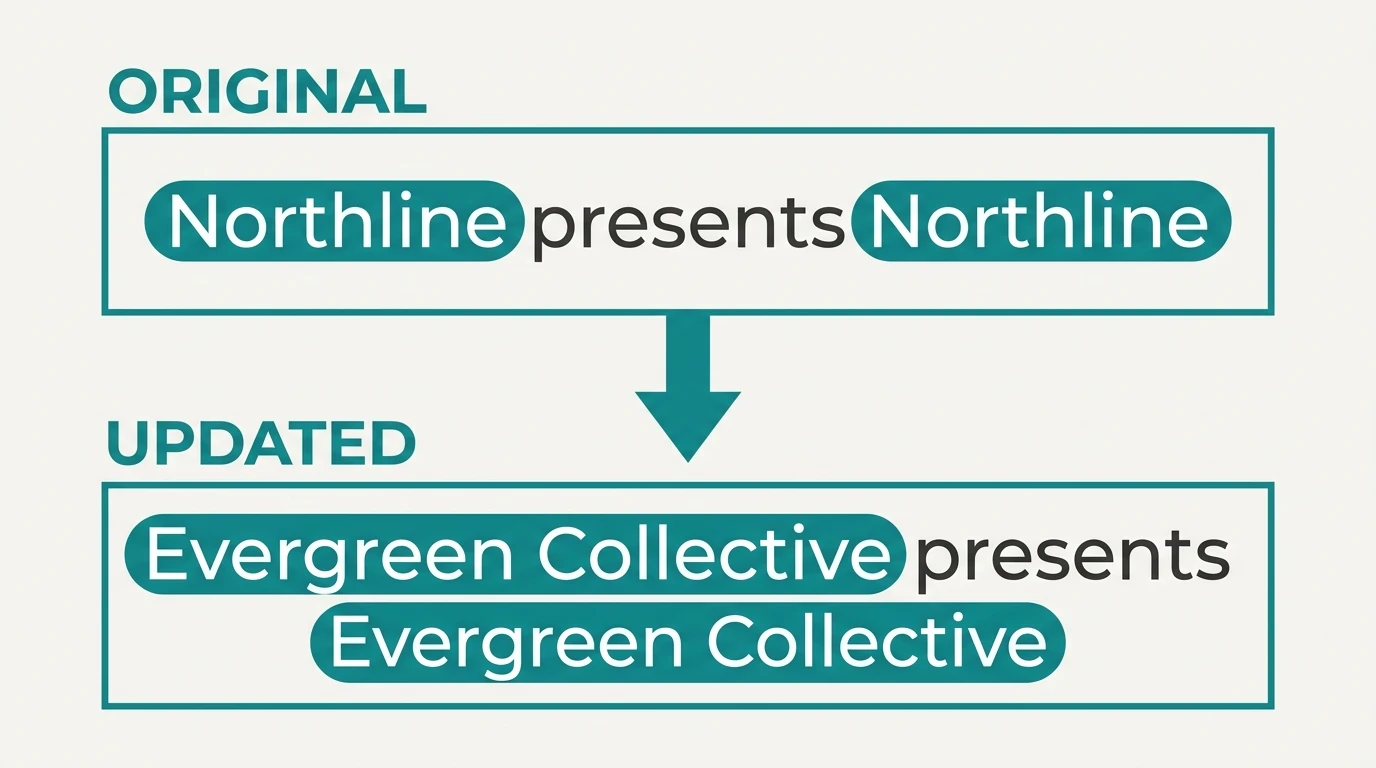
Layer Text Contains is the key setting for replacing repeated text within a layer. It replaces all matching occurrences, subject to your case and word-boundary settings.
For example, a layer containing “Northline presents the Northline summer collection” becomes “Evergreen Collective presents the Evergreen Collective summer collection.” Both instances change, while the surrounding wording remains part of the replacement result.
Do not confuse this with Entire Layer Match. That option requires the complete normalized layer contents to equal Original Text. A layer containing only “Northline” could match, but a layer containing “Shop Northline today” would not. When Entire Layer Match succeeds, the complete layer contents become Replacement Text.
Likewise, Search By Layer Name intentionally limits the search to an exact, case-sensitive layer name. That is useful for targeted changes, but use Search All Text Layers when matching text anywhere in the document should be eligible.
5. Decide How Capitalization and Partial Words Should Behave
Search scope determines where the plugin looks. Case sensitivity and word matching determine which text it recognizes once it gets there.
Use Case Insensitive when capitalization should not exclude a match
Case Insensitive is the default. With Original Text set to “Northline,” it can match “Northline,” “NORTHLINE,” and “northline.” This is useful when the same brand appears in uppercase headlines and mixed-case body copy.
Choose Case Sensitive if only the exact capitalization should change. For example, replacing “US” should not necessarily replace the ordinary word “us.”
Choose between complete words and literal substrings
Whole Words Only is also the default. It matches “Northline” as a standalone word or phrase but does not match that sequence inside “NorthlineGear.” Punctuation and other non-word characters can act as valid boundaries.
Any Text Match performs literal substring matching. It can therefore match “Northline” inside “NorthlineGear” as well as in ordinary standalone uses.
If your objective is every occurrence of the exact character sequence, including inside longer terms, choose Any Text Match. If your objective is every occurrence of a particular word or phrase without altering larger words, keep Whole Words Only.
These distinctions matter with short search terms. Replacing “art” everywhere is very different from replacing it inside “cart,” “artist,” and “partial.” Decide whether those embedded matches are wanted before processing the folder.
6. Keep Replacement Text Within the Existing Design
Finding every occurrence solves the content problem. It does not, by itself, solve the layout problem. Replacing “Northline” with “Evergreen Collective” introduces substantially more text into every affected headline, caption, and label.
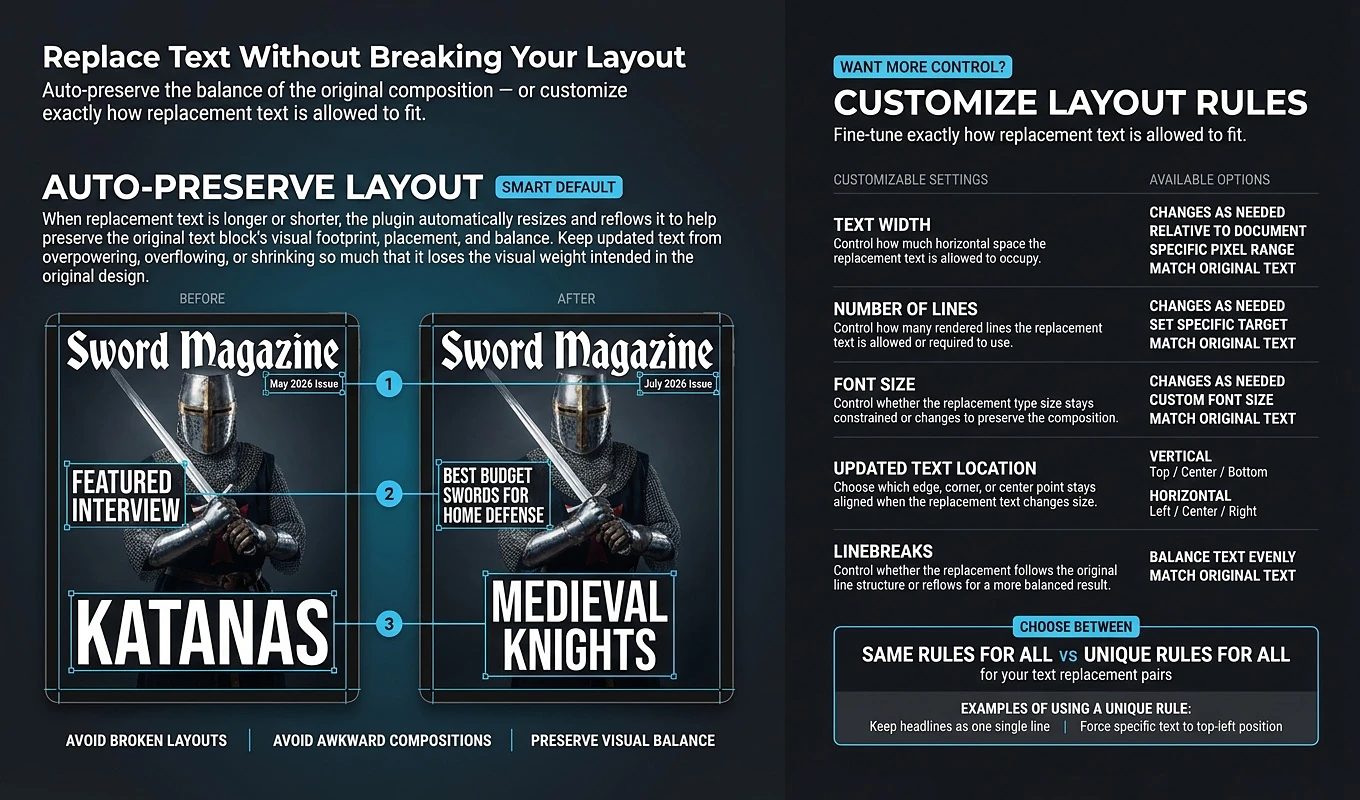
Leave Auto-Preserve Layout selected for a general-purpose starting point. This mode uses the original visible rendered text width as its horizontal constraint, lets Photoshop re-wrap the replacement, and adjusts font size so the new visible height approaches the original height.
The plugin converts point text to paragraph text when controlled wrapping requires it, resizes the paragraph box to contain the composed text, and restores the original Center / Center position.
Auto-Preserve Layout does not lock the original font size or line count. Both can change to accommodate the replacement. Its goal is to approximate the original visual composition, not guarantee a pixel-identical result for every possible wording.
If a headline must stay on one line, switch to Customize Layout Rules and use:
- Text Width: Fixed, with Match Original Text as the width reference.
- Number of Lines: Fixed, with Set Specific Target set to 1.
- Font Size: Adjustable.
That configuration gives the font size room to change while retaining the one-line requirement. It is more appropriate than Auto-Preserve Layout when the design has a strict line-count requirement.
7. How One Rule Is Applied Across the Entire PSD Folder
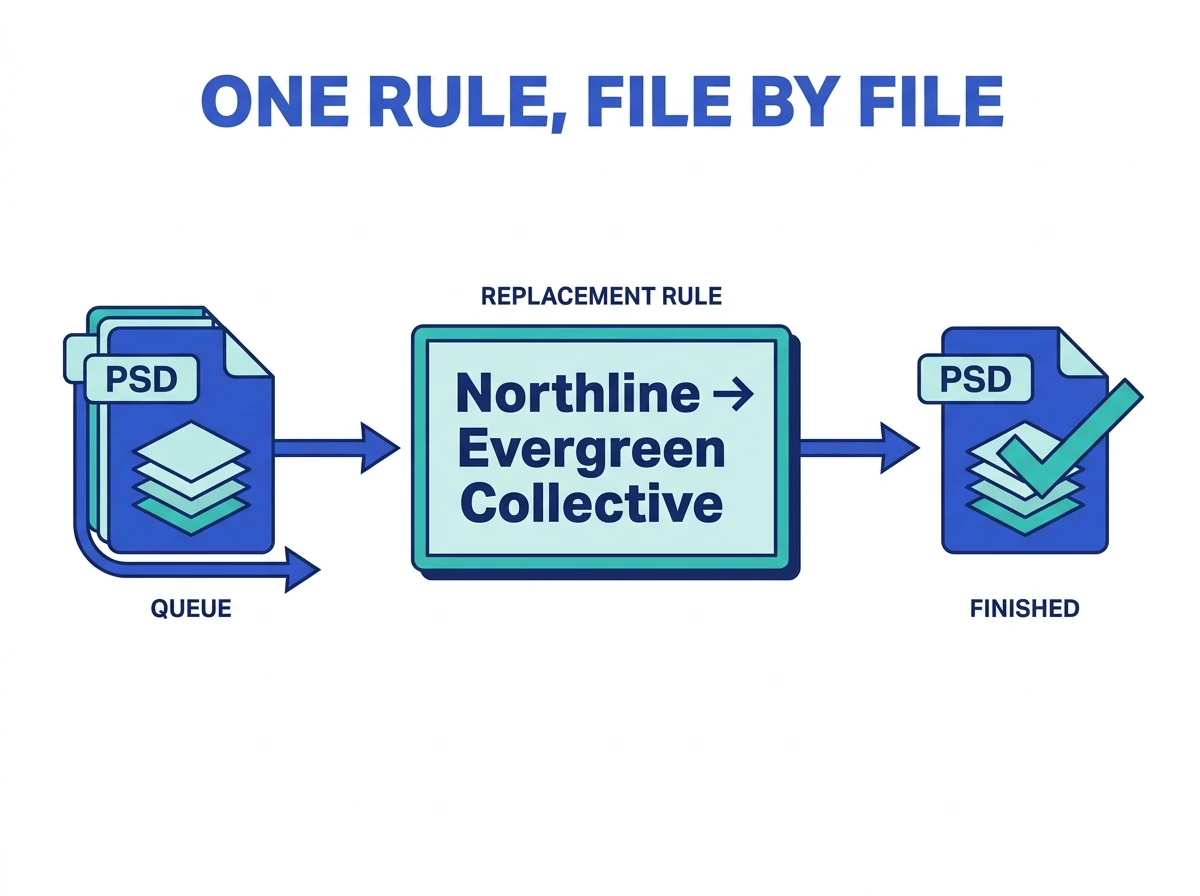
Once configured, the rule becomes a repeated operation rather than a task you perform manually in every document. When the batch starts, the plugin follows the same basic sequence for each source file:
- Open the document in Photoshop.
- Discover its text layers recursively and capture their original text and layout information.
- Evaluate eligible text layers using the selected search and matching settings.
- Replace all qualifying occurrences within each matching layer.
- Apply the selected layout behavior to the changed text.
- Export the completed derivative, close the source without saving, and continue to the next file.
You do not need a separate rule for the second or third occurrence of the same text. Nor does each match create a separate export. The replacements are applied within the document, and the export stage produces its final derivative.
This removes the repetitive sequence of opening each PSD, inspecting grouped layers, editing repeated wording, correcting the layout, exporting, and closing the original.
8. Add Other Text Changes Without Assuming a Replacement Cascade
If the update involves more than one source string, click + Add Replacement Rule. You can add separate pairs for a brand name, year, price, or promotional phrase.
Same Rules For All applies one shared search, matching, and layout configuration to the replacement pairs. Unique Rules For All gives each pair independent settings. For example, a brand rule could target a layer named Brand while a year rule targets a layer named Year.
For a larger mapping, + Import Text via CSV can populate the replacement pairs. The CSV must contain exactly two columns, with the first-row headings ORIGINAL TEXT and REPLACEMENT TEXT. Each data row must provide a non-empty value in both columns. Search and layout settings are configured in the plugin rather than imported with those pairs.
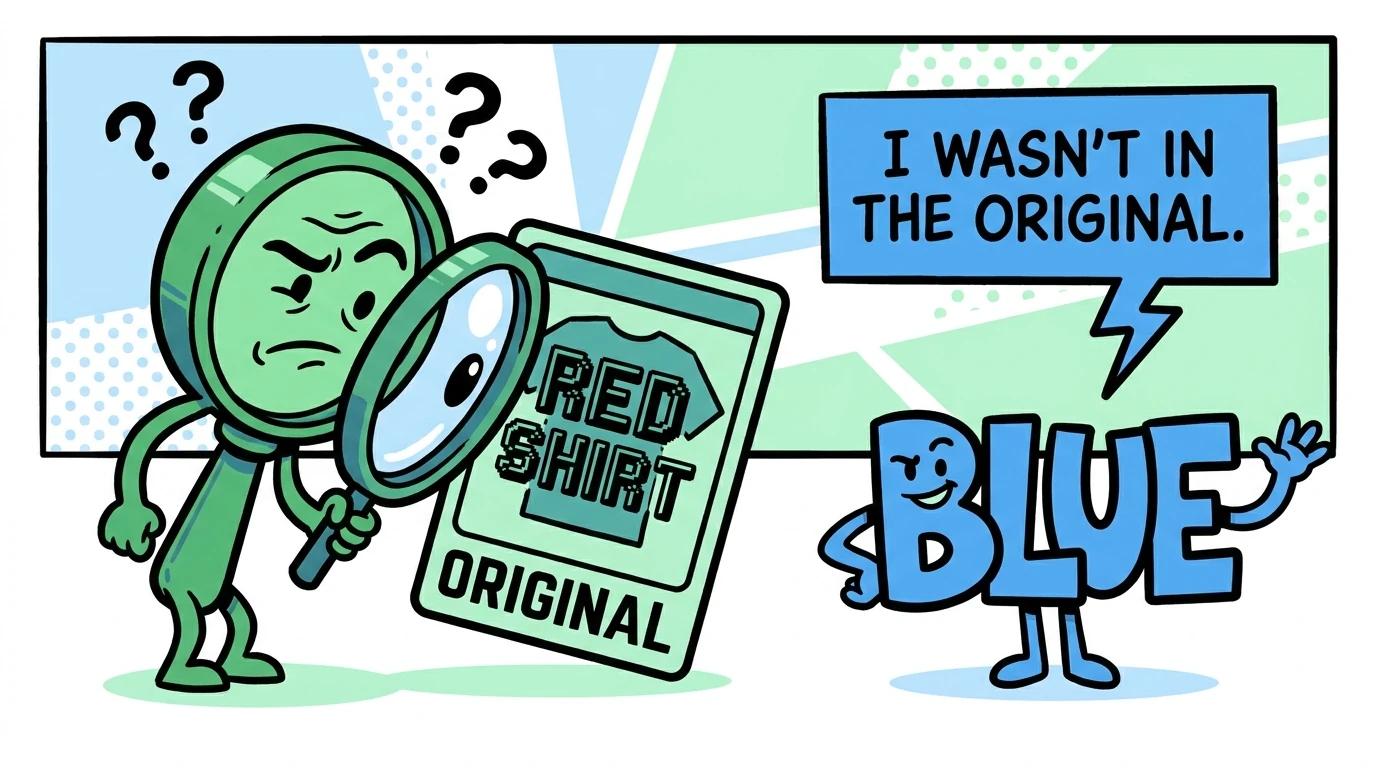
There is an important distinction between multiple rules and sequential find-and-replace. Each rule evaluates the text-layer state captured when the document was first inspected. Later rules do not search text created by earlier rules.
For example, if a layer originally says “RED SHIRT,” a RED → BLUE rule can change it to “BLUE SHIRT.” A second BLUE → GREEN rule does not then discover the newly inserted “BLUE.” Its search is evaluated against the original “RED SHIRT.”
Also, separate rules that match the same original layer are not guaranteed to combine cumulatively. A later matching rule can rewrite that layer using its own transformation of the original content. For predictable multi-rule updates, design rules around distinct intended layers rather than relying on several successive edits to one layer.
9. Export Editable PSDs as Separate Files
Click Export Folder To Use and select the destination for your updated documents. Choose PSD as the export filetype; it is also the default.
PSD output is appropriate when the goal is another working Photoshop document rather than a flattened delivery image. It retains layers, allowing the updated text to remain editable for subsequent production work.
The default filename pattern is {original-filename}-text-replaced.psd. A source named summer-banner.psd would therefore produce summer-banner-text-replaced.psd.
If that output name already exists, the plugin appends a numbered suffix, such as summer-banner-text-replaced (1).psd. This helps keep repeated runs from colliding with existing generated filenames.
The original source documents are closed without saving. The workflow therefore creates revised derivatives instead of overwriting your source templates. Keeping the export folder separate makes that distinction especially clear when reviewing a large batch.
10. Check a Small Sample Before Running the Full Batch
Before applying the configuration to the entire folder, run it on a small test folder containing representative PSDs. Include a document with repeated occurrences in one layer, one with text inside a nested group, and a layout where the longer replacement is likely to be challenging.
Open the exported test PSDs in Photoshop and inspect both the wording and the composition. Confirm that all intended occurrences changed, that larger words were included or excluded correctly, and that the layout remains suitable.
Three practical questions are worth settling before the full run:
- Does every source contain editable text layers? A file with no Photoshop text layers is skipped and produces no output file.
- What happens when a PSD has text layers but no matching wording? It still goes through the normal export stage, so an exported derivative is not proof that a replacement occurred.
- Has the source folder changed since selection? The plugin retrieves its actual current contents when the operation begins. Check that it still contains the files you intend to process.
After reviewing the sample, select the full source folder, confirm the export destination, and click Replace Text In Files. The same tested matching and layout settings will then be applied across the batch.

11. Save the Setup for the Next Folder-Wide Update
If this is a recurring task, enter an Operation Name and click Save. A saved operation stores the replacement pairs, search and matching settings, layout configuration, source and export folder references, output format, and filename structure.
For the next update, select the saved operation and click Load. Adjust the text pairs as needed instead of rebuilding the entire workflow. If a stored folder has moved or can no longer be retrieved, select a valid location again.
Bulk Text Replacer provides a practical way to replace every qualifying occurrence across a PSD folder while handling the layout work that different wording creates. Start with Search All Text Layers and Layer Text Contains, choose the case and word-matching behavior deliberately, test representative files, and save the configuration once the results meet your requirements.