How To Resize Images By Their Longest Dimension While Preserving Aspect Ratio
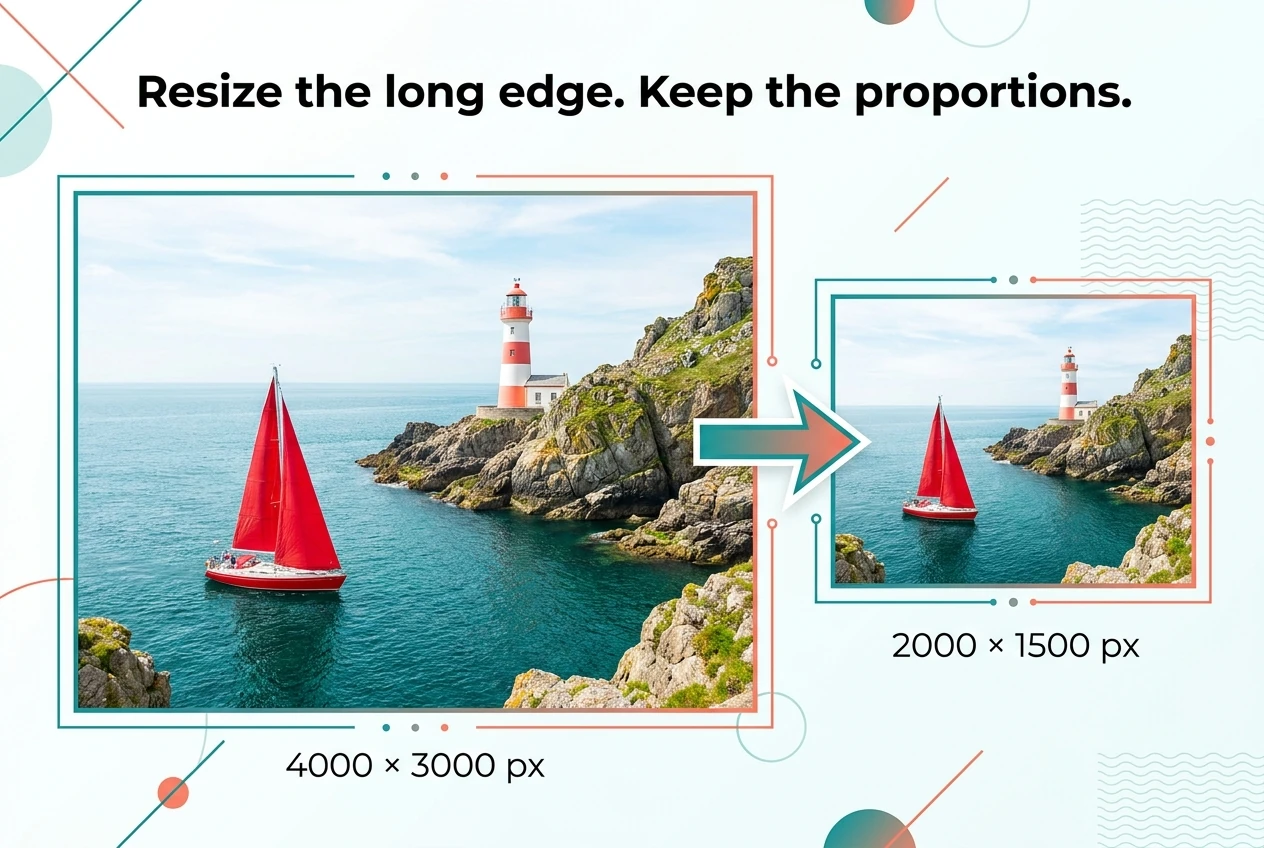

To resize an image by its longest dimension, set whichever side is larger—width or height—to your target pixel value, then scale the other side proportionally. A landscape image becomes a specified width, a portrait image becomes a specified height, and neither needs to be stretched or cropped.
For a folder of mixed-orientation images, Bulk Image Resizer: Automated Batch Resizing provides a Photoshop workflow built around this task. Select its Maximum Longest Edge sizing mode, enter your target, and the plugin determines which dimension to use for each image.
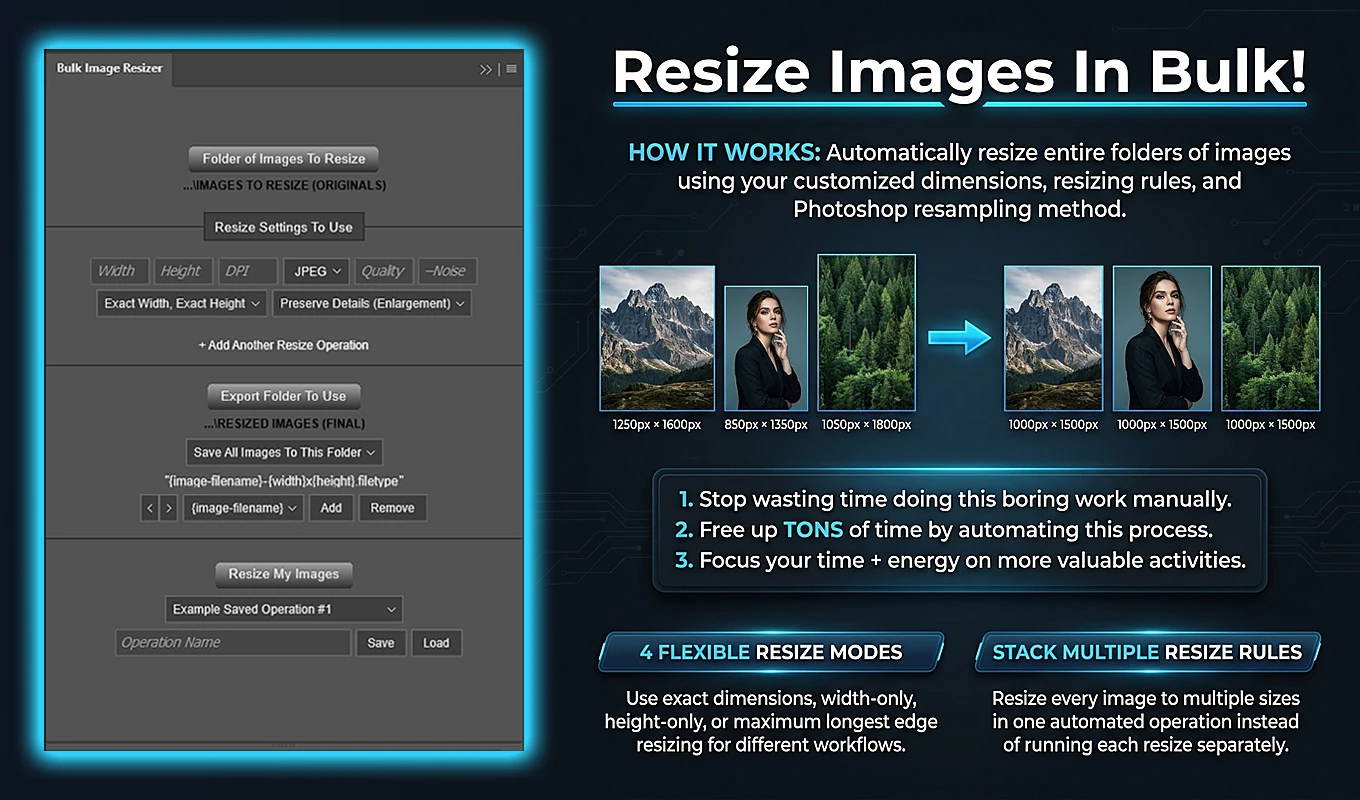
One important detail: this mode sets the longest edge to the target. It can enlarge smaller originals as well as reduce larger ones.
1. What “longest dimension” means for image proportions
The longest dimension is simply the larger of an image’s pixel width and pixel height. For a 4000 × 3000 image, it is the 4000-pixel width. For a 3000 × 4000 image, it is the 4000-pixel height. A square has equal dimensions, so either side represents its longest edge.
Preserving aspect ratio means applying the same scale factor to both dimensions:
- Scale factor = target longest edge ÷ original longest edge
- Output width = original width × scale factor
- Output height = original height × scale factor
For example, reducing a 4000 × 3000 image to a 2000-pixel longest edge uses a scale factor of 0.5. Both dimensions are halved, producing 2000 × 1500 pixels.
This preserves the image’s proportions and framing. It does not remove part of the picture, add borders, or make every image the same shape. Calculated dimensions are rounded to whole pixels, so some results include a small rounding difference from the mathematical ratio.
2. Resize a folder by longest edge in Photoshop
Bulk Image Resizer is a third-party Photoshop plugin available through Adobe Exchange and Adobe’s Creative Cloud plugin marketplace. Install it through Adobe’s normal plugin installation flow, then open it from Photoshop’s Plugins menu.
The following setup creates JPEG copies with a longest edge of 2000 pixels:
- Click Folder of Images To Resize and select your source folder. Place the images directly inside that folder; the plugin does not recursively search nested subfolders.
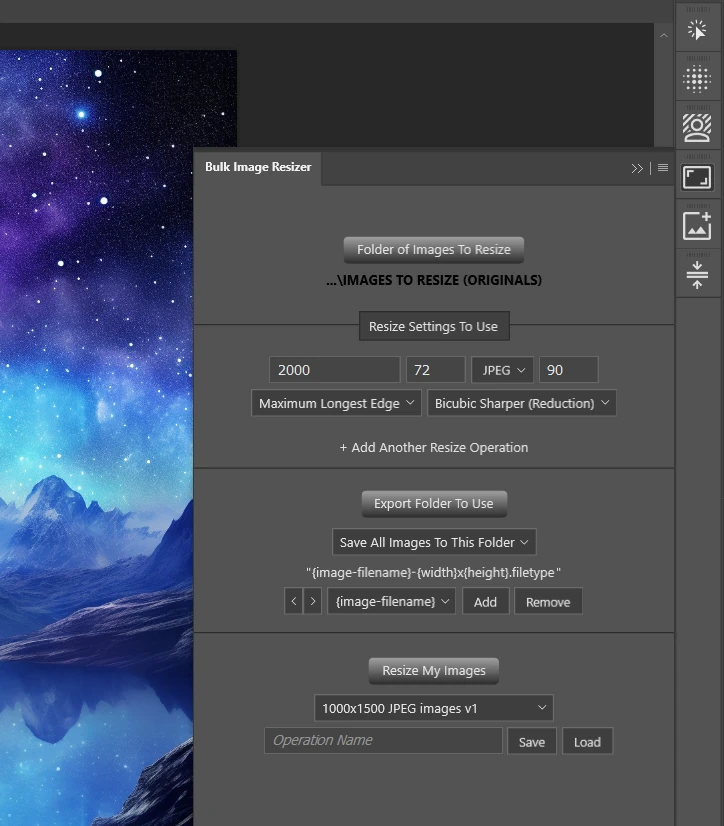
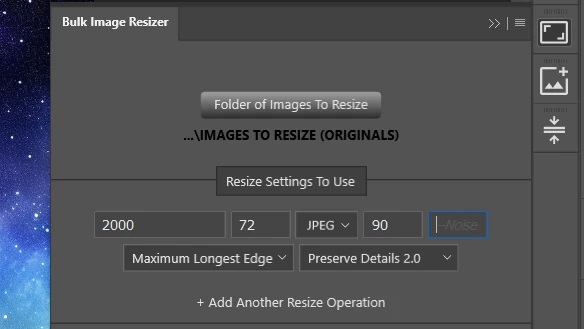
- In Resize Settings To Use, select Maximum Longest Edge from the sizing-mode dropdown.
- Enter 2000 in Max Longest Edge. The normal Width and Height fields are hidden because the plugin calculates those dimensions separately for each source image.
- Enter the DPI required by your delivery specification and choose a Photoshop resampling method. For a photo batch that needs reduction, Bicubic Sharper (Reduction) is a relevant starting option. If you choose either Preserve Details method instead, also enter its required Reduce Noise value from 0 through 100.
- Select JPEG and enter a Quality value, such as 90. This is an example export setting, not a requirement for preserving aspect ratio.
- Click Export Folder To Use and choose the output location. For a simple single-size batch, choose Save All Images To This Folder.
- Keep or configure a filename pattern that includes the source filename and final dimensions, such as {image-filename} followed by {width}x{height}.
- Click Resize My Images. The plugin validates the configuration, reads the current source-folder contents, and processes the supported images.
The longest-edge value is measured in pixels. DPI is a separate setting; it is not the value to use when a delivery brief asks for a “2000-pixel long side.”
The plugin exports resized copies and closes the source documents without saving changes back to the originals. Your source files remain unchanged.
3. What a 2000-pixel target produces across different orientations
A longest-edge rule standardizes the larger dimension without forcing every image into an identical width-and-height box. With a 2000-pixel target, these sources produce:
- Landscape, 4000 × 3000: 2000 × 1500 pixels.
- Portrait, 3000 × 4000: 1500 × 2000 pixels.
- Square, 3000 × 3000: 2000 × 2000 pixels.
- Wide panorama, 6000 × 2000: approximately 2000 × 667 pixels after rounding.
Each output has a longest dimension of 2000 pixels, but the shorter dimensions differ because the originals have different proportions.
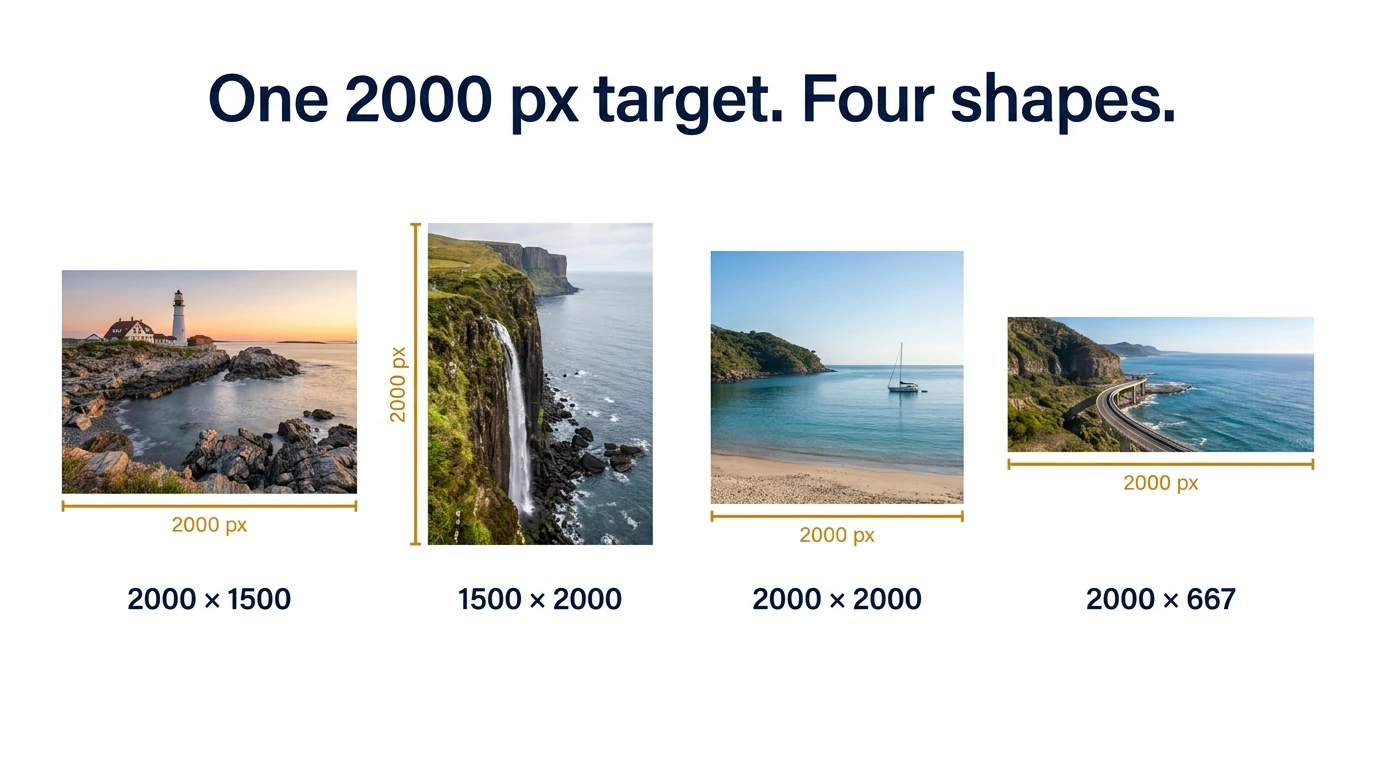
This is especially useful when a website or client specification defines one common long-side dimension for a collection containing portraits, landscapes, and wide images. You do not need separate orientation-specific rules merely to decide whether width or height should control the resize.
When checking the results, ask whether the larger dimension equals the target—not whether every image has the same width.
4. Why “Maximum Longest Edge” can enlarge a small image
It is easy to read “maximum” as “reduce anything larger than this, but leave smaller images alone.” That is not how Bulk Image Resizer’s current Maximum Longest Edge mode works.
The mode resizes the longest edge to the configured value in either direction. A 4000 × 3000 image becomes 2000 × 1500 at a 2000-pixel target. A smaller 1200 × 800 image becomes approximately 2000 × 1333.
This distinction matters because two common delivery requirements are different:
- “Every image must have a 2000-pixel longest edge” allows enlargement when necessary.
- “No image may exceed 2000 pixels, and smaller images must not be enlarged” calls for downscale-only handling.
If your requirement prohibits enlargement, review the source dimensions first and place only the images needing reduction in the processing folder. Keep smaller images out of that batch rather than assuming the mode will skip or preserve them at their existing size.
If enlargement is acceptable, include a smaller original in your test set so you can judge whether its enlarged appearance meets the delivery requirement.
5. Why fixed-width and exact-square settings are not equivalent
Bulk Image Resizer offers four sizing modes, but Maximum Longest Edge is the one that directly matches a mixed-orientation long-side requirement.
Exact Width, Auto Height preserves proportions, but always makes width the controlling dimension. A 3000 × 4000 portrait resized to a width of 2000 pixels becomes approximately 2000 × 2667. Its longest side therefore exceeds a 2000-pixel long-edge requirement.
Auto Width, Exact Height has the corresponding issue for landscape images: it standardizes height, not necessarily the longest side.
Exact Width, Exact Height sets both dimensions explicitly. Entering 2000 × 2000 for a rectangular source does not preserve its proportions. The image is resized into that square shape, which can stretch or compress its contents. It is not cropped to fit.
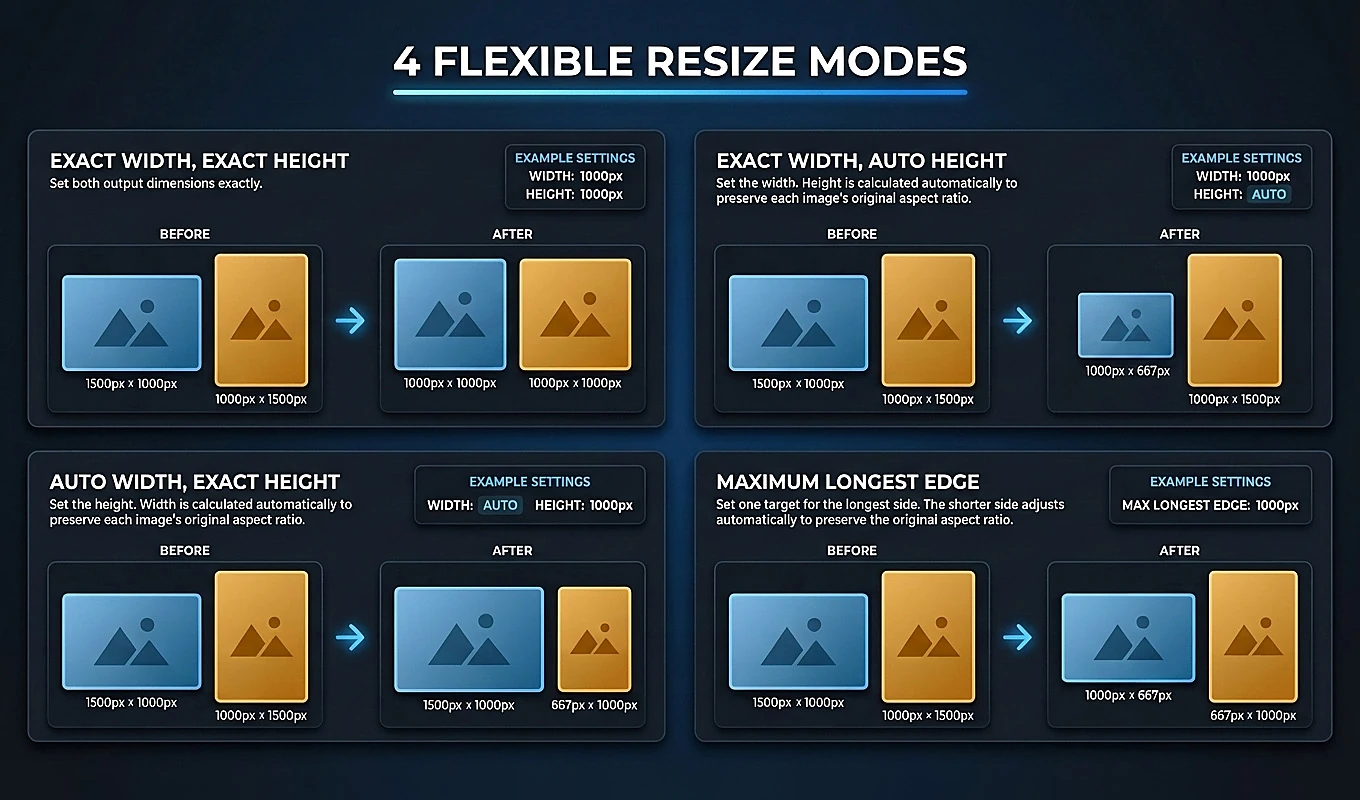
Use Maximum Longest Edge when the requirement is “make the larger side this many pixels while keeping the original proportions.” If the requirement instead calls for identical square canvases, longest-edge resizing alone does not provide that result for rectangular originals.
6. Match resampling to reduction or enlargement
Aspect ratio determines the relationship between width and height. Resampling determines how Photoshop calculates the pixels in the resized result. Preserving proportions prevents geometric distortion, but the selected interpolation method still affects the image’s appearance.
Bulk Image Resizer passes your selected method to Photoshop’s Image Size functionality. Relevant choices include:
- Bicubic Sharper (Reduction), which is oriented toward reducing image dimensions.
- Bicubic Smoother (Enlargement), which is oriented toward enlargement.
- Preserve Details (Enlargement) and Preserve Details 2.0, which expose the plugin’s Reduce Noise control.
- Nearest Neighbor (Hard Edges), which is relevant to hard-edged artwork rather than treating every source as a photograph.
- Automatic, which lets Photoshop use its automatic interpolation behavior.
One resize rule uses its selected resampling method across the images it processes. If your folder contains originals both larger and smaller than the target, that rule may perform reductions and enlargements during the same run. Automatic is an available option for that situation, but reviewing representative outputs is still worthwhile.
For either Preserve Details method, Reduce Noise accepts an integer from 0 through 100. That control does not apply to the other methods.
The underlying tradeoff remains important: reduction removes pixel information, while enlargement creates additional pixels through interpolation. A larger pixel count should not be treated as proof that a small source has gained genuinely captured detail. Inspect textures, fine edges, and important subject details before committing the full collection.
7. Generate several longest-edge sizes from each original
If you need more than one delivery size, you can stack multiple longest-edge rules rather than run the same folder separately for each target.
Click + Add Another Resize Operation and configure each additional block with Maximum Longest Edge. For example, a 4000 × 3000 original could produce:
- A 2000-pixel longest-edge version at 2000 × 1500.
- A 1200-pixel longest-edge version at 1200 × 900.
- A 600-pixel longest-edge version at 600 × 450.
Each rule can have its own export format, DPI, quality, and resampling settings. You can keep those settings consistent when only the size needs to change, or configure them separately when the deliverables differ.
Importantly, the second version is not generated by resizing the first exported version. For these Photoshop resizing methods, the plugin returns to the original document state before applying the next rule. Each output is derived independently from the source rather than from an already-resized variant.
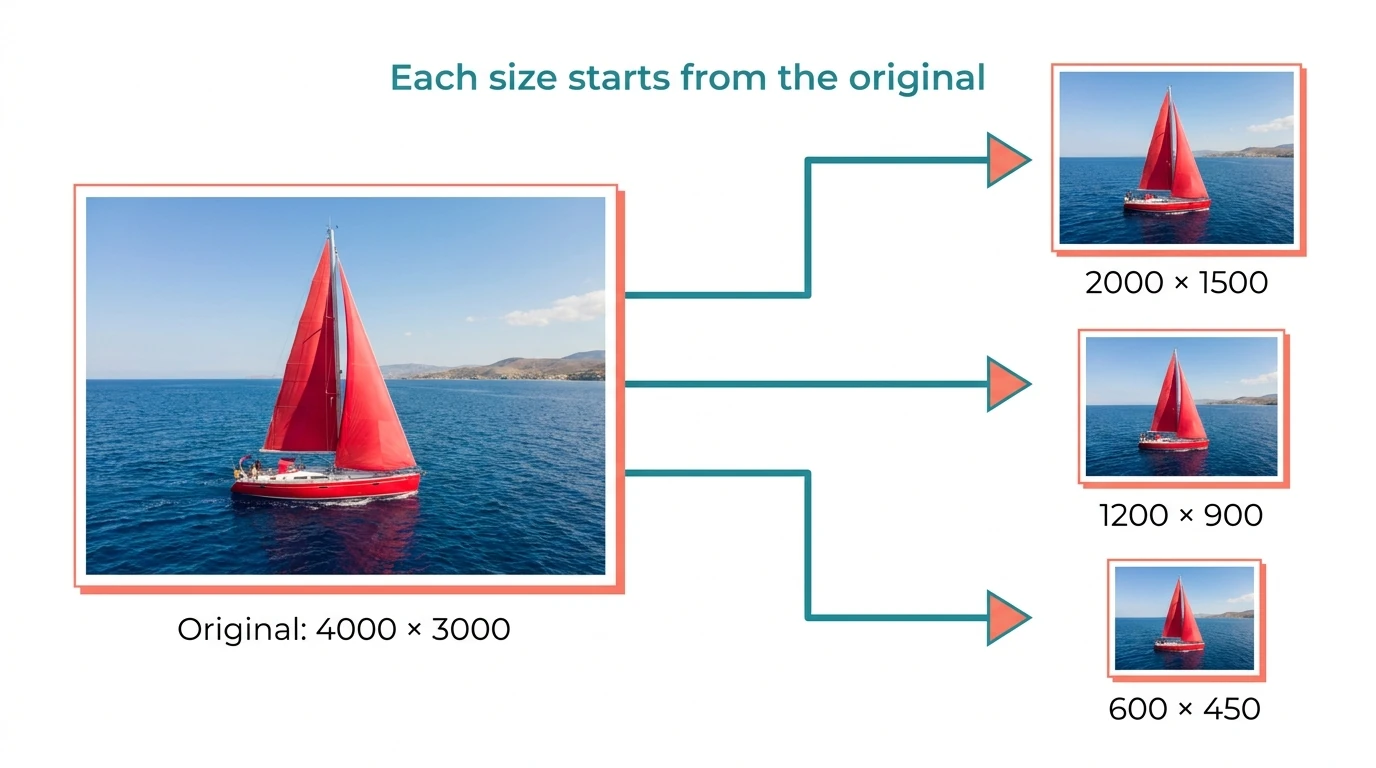
This keeps a multi-size workflow straightforward: define the required long-side targets once, then let every source image receive each rule.
8. Put actual output dimensions in the filenames
When portrait and landscape outputs have different widths and heights, dimension-based filenames make the results easier to identify without opening each file.
In the filename-format builder, use {image-filename} followed by {width}x{height}. Components are joined with hyphens, and the appropriate export extension is added automatically.
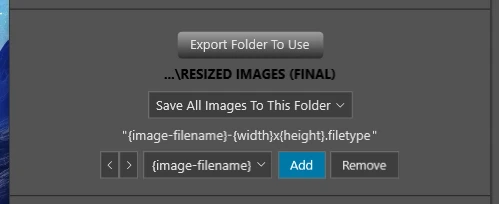
The dimension component uses the actual final output dimensions. With a 2000-pixel target, exported names might look like:
- landscape-photo-2000x1500.jpg
- portrait-photo-1500x2000.jpg
- square-photo-2000x2000.jpg
For a single target size, a flat output folder may be sufficient. For several longest-edge targets, Create A Subfolder For Each Resize Rule groups the outputs by rule. That separates the size variants while the filenames identify each file’s final width and height.
The plugin also numbers filename collisions rather than blindly overwriting an existing output. That is useful when you rerun a batch, though checking the export location before starting still helps keep delivery folders clear.
9. Save the long-edge specification for recurring batches
If every new collection needs the same longest-edge sizes, the repeated work should be selecting and checking the new images—not rebuilding the same settings.
After configuring and validating the operation, enter an Operation Name and click Save. A descriptive name such as “Web images — 2000 and 1200 long edge” makes the intended deliverables easy to recognize later.
A saved operation includes the selected source and export folders, resize rules, output settings, folder organization, and filename-format components.
For the next batch, choose the saved operation and click Load. Confirm the restored folders or select different ones, then check that the targets and export settings still match the current brief. If a saved folder has moved or can no longer be restored, the plugin asks you to select it again.
The source-file list is read immediately before processing, not frozen when the folder was originally selected. New supported images placed directly in that folder can therefore be included in the next run without rebuilding the resizing rules.
10. Check a representative sample before the full run
A small test folder can confirm both the dimension logic and the visual result before you process the entire collection. Include a landscape image, a portrait image, and any square or unusually wide image that represents the actual job. Include a source smaller than the target if enlargement is part of the batch.
Check the exported samples for these specific outcomes:
- The larger pixel dimension equals the configured longest-edge target.
- The shorter dimension follows the original proportions, allowing for whole-pixel rounding.
- The framing is unchanged, with no stretching introduced by an incorrect sizing mode.
- Fine details and edges look appropriate after the chosen reduction or enlargement.
- The filename dimensions agree with the exported file’s dimensions.
- Multiple size variants appear in the intended output folders.
Once those checks pass, use the same configuration for the full source folder. The key setup is simple: Maximum Longest Edge controls the larger dimension, proportional calculation determines the other side, and Photoshop’s selected resampling method creates the resized pixels.
For mixed-orientation batches, Bulk Image Resizer turns that setup into a reusable production workflow: select the folder, define the long-edge target or targets, verify a sample, and generate consistently sized copies without manually deciding which dimension to enter for every image.