How To Speed Up Your Graphic Design Workflow (Tips, Tricks, and Tools)

A faster graphic design workflow is not just about learning to move your mouse faster. It is about spending less time reconstructing settings, hunting for assets, repeating production steps, and fixing decisions that should have been settled earlier.
The useful distinction is between work that needs your judgment and work that merely needs to happen. Choosing the right visual direction deserves attention. Opening 100 images, applying the same treatment, exporting them, and naming every file usually does not deserve 100 separate rounds of your attention.
You can improve both sides: make creative decisions with fewer distractions, then turn predictable production work into reusable systems and automated batches. Start with the bottleneck you actually have—not the longest list of productivity tools you can install.
1. Measure Hands-On Time Before You Optimize Anything
For your next three representative projects, record where your time goes. A spreadsheet or a few notes are enough. Separate the work into three categories:
- Decision work: interpreting the brief, choosing concepts, establishing hierarchy, and resolving visual problems.
- Production work: preparing assets, applying repeated treatments, creating variants, exporting, and naming files.
- Recovery work: finding missing assets, reconciling feedback, rebuilding settings, correcting specifications, and redoing rejected outputs.
Those categories suggest different solutions. Slow decision work may need clearer constraints or a better reference process. Repetitive production work may need automation. Recovery work usually points to a broken handoff, approval process, or file-management habit.
Also distinguish hands-on time from elapsed time. A batch that takes Photoshop a while to finish can still be valuable if it replaces constant supervision. Conversely, a quick export is not particularly efficient if you have to configure it manually for every file.
Use a simple calculation when deciding whether to automate: manual handling avoided, minus setup, checking, and exception handling.
For example, suppose a repetitive routine takes 40 seconds of hands-on work per file. Across 120 files, that is 80 minutes of handling. If configuring and checking a batch takes 35 minutes, the hypothetical saving is 45 minutes—not the entire 80. Measure your own routine rather than borrowing somebody else’s performance claim.
Your most useful success metric is approved, usable output per hour of your attention. Producing more files is not an improvement if it also creates a larger pile of corrections.
2. Define the Deliverable Before You Build the Design
“Make some campaign graphics” is not a production specification. Before opening the first layout, establish what the finished deliverables must actually satisfy.
- Geometry: an aspect ratio, exact pixel dimensions, or a physical print size?
- Content: which copy, logos, photographs, and mandatory elements are approved?
- Output: which formats, transparency requirements, and filesize limits apply?
- Layout constraints: required margins, subject placement, and areas that must remain clear?
- Handoff: editable source files, delivery files, or both?
- Approval: who makes the final decision, and when must feedback arrive?
Several of these distinctions have major workflow consequences. Cropping an image to 4:5 does not establish exact output dimensions. Standardizing transparent margins does not create identical canvas sizes. A small filesize and a fixed resolution can also become competing requirements.
Write those distinctions down before production, not after a folder of exports fails an upload check.
Then establish an approval gate. Finish one representative layout—or a small set covering genuinely different cases—and get the direction approved before multiplying it. Include the awkward case: the longest headline, widest product, least cooperative photograph, or densest information block.
A template that works beautifully with a three-word headline but breaks with the actual campaign copy has not passed its production test.
When the brief is uncertain, use low-cost proofs. Resolve composition and hierarchy before spending time on detailed retouching, fine texture, or dozens of final-format variants.
3. Single-Handle a Production Stage Instead of Half-Finishing Everything
Single-handling does not mean completing an entire project without ever stopping. A client may need to approve a direction before you can proceed. It means taking a ready piece of work to a useful stopping point instead of repeatedly reopening it without finishing the current stage.
For a collection of promotional graphics, a practical sequence might be:
- Gather and verify all required assets.
- Prepare the images that need preparation.
- Build and approve the representative layout.
- Complete the remaining layouts using that direction.
- Check typography and content across the set.
- Create delivery variants and exports.
This is usually a more manageable working pattern than designing one graphic, answering a message, preparing another photograph, exporting an unrelated file, and returning to the first headline.
Try reserving a focused session for one type of work: asset preparation, layout production, or revisions. Define the session by a finish line—“prepare all approved product photographs”—rather than only by a duration.
Batch work that shares the same treatment. Do not force delicate hair cutouts, hard-edged packaging, and reflective glass into one supposedly universal preparation recipe. Separate them when they need different handling.
Keep an exception queue, too. If one image needs special attention, identify it and return to it deliberately rather than allowing it to derail the whole routine. The queue can be a folder or a short list; it does not require another management platform.
Before an unavoidable interruption, leave a specific restart note: “Open campaign-master-v03; check the alternate headline in the portrait layout; export only after approval.” That is more useful than “finish campaign.”

4. Explore Visual Directions in Controlled Batches
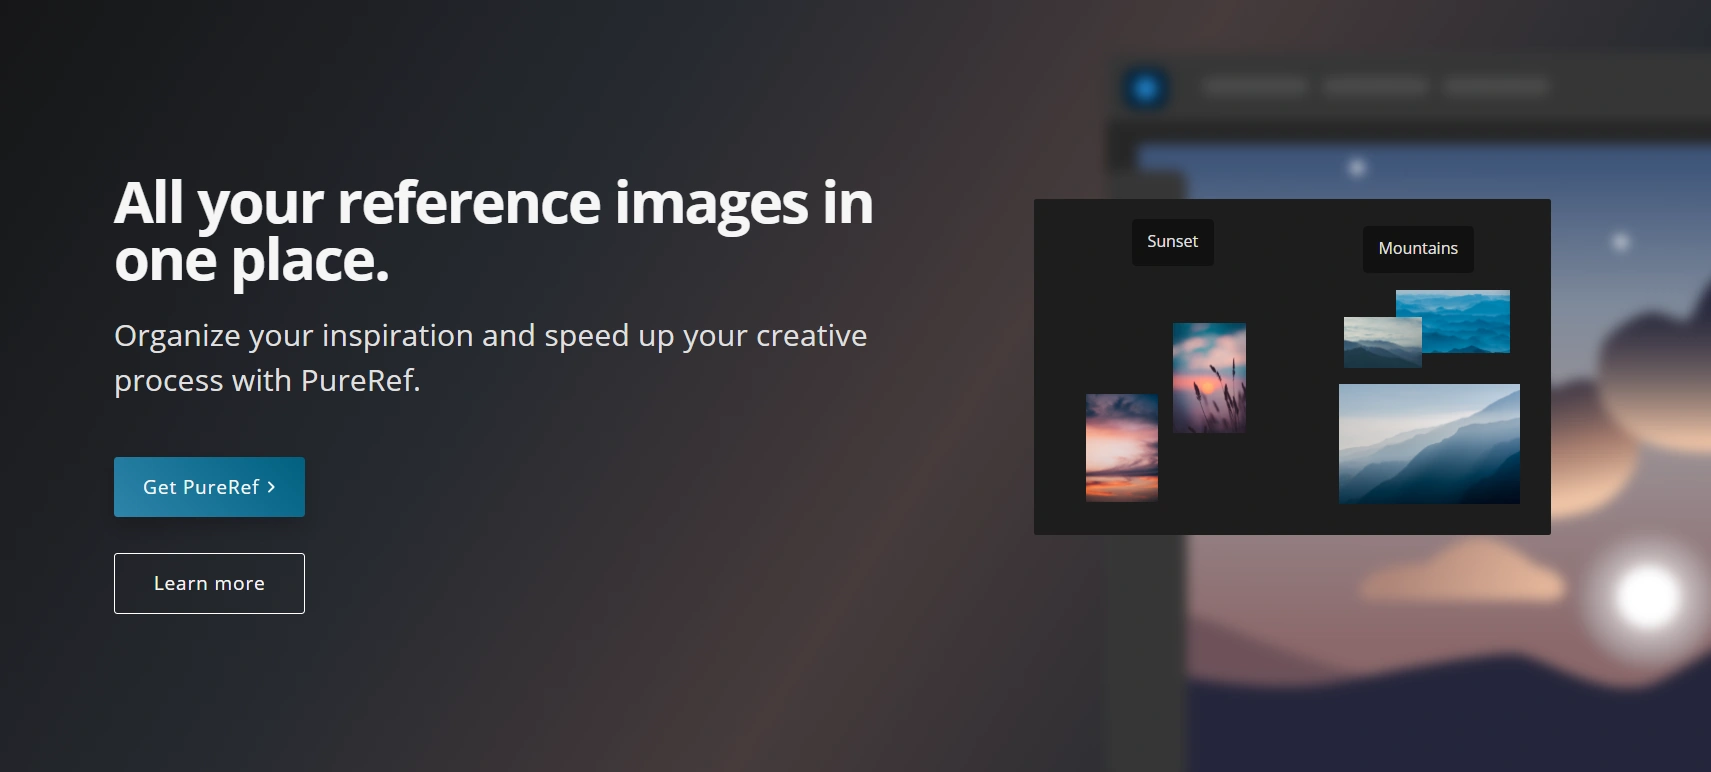
Reference gathering becomes inefficient when you keep reopening the same websites without deciding what you are looking for. Build a compact reference board organized around questions: lighting, composition, typography, color, or material treatment.
PureRef is useful for this kind of visual working surface. It lets you gather and arrange reference images and keep the board above your workspace. Instead of maintaining a row of browser tabs, place the relevant references together and add notes about what each one contributes.
Set a stopping rule for exploration. For example: choose three plausible directions, compare them against the brief, and advance one. More references are only useful if they help resolve a decision.
Use a prompt matrix when generated imagery fits the brief
If a project calls for AI-generated concept imagery, avoid improvising an endless sequence of unrelated prompts. Make a controlled matrix instead. Four environments, two lighting treatments, and two compositions give you 16 deliberate combinations to investigate.
Bulk AI Image Creator: Batch Generative Fill can turn that prompt list into a Photoshop generation batch. Its CSV structure is intentionally simple: put TEXT PROMPTS in cell A1, then place one prompt per row beneath it in Column A. Leave other columns empty, and export the sheet as a properly formatted CSV.
You choose one model, image width, image height, DPI, and export configuration for the entire operation. The plugin then processes the valid prompts sequentially through Photoshop’s Generative Fill functionality instead of requiring you to enter, generate, export, and rename each request manually.
For a reference-compatible model, such as Gemini 3 (Nano Banana Pro), you can attach one or two reference images and reuse that same visual guidance across the batch. That is operation-wide guidance, not a guarantee that every result will preserve an identical subject or style.
Enable Export All Generated Image Variations when reviewing alternatives is part of the job. Disable it when you only want the first variation exported for each prompt. Photoshop determines how many variations are generated; the export setting does not guarantee that only one variation was created internally.
Run a small pilot CSV before committing a long list. Check whether the compositions leave enough room for your actual layout, and keep critical headlines and brand copy as editable design elements rather than depending on generated lettering.
The plugin automates Photoshop; it does not supply an independent generation service or unlimited credits. Review Adobe’s Generative Credits guidance for your plan and selected model. Credit consumption and Adobe service restrictions still matter, and the plugin requires explicit credit-use acknowledgement before generation begins.
5. Build a Small Reusable Design Kit, Not a Giant Template Museum
The best reusable kit removes repeated decisions without making every design look identical. Start with the elements you reconstruct most often:
- A small set of named type styles, such as headline, body, caption, and legal copy.
- Approved colors and logo assets.
- Spacing and alignment conventions.
- Frequently used information blocks, labels, and calls to action.
- A clean starting document with the appropriate guides and layer organization.
Creative Cloud Libraries in Photoshop can hold graphics, colors, text styles, and layer styles so you do not have to rebuild or locate them for each project. Name assets by their role and approval state, not just their appearance: “Primary logo—approved” is more informative than “blue logo 2.”
For editorial and multipage work, InDesign’s paragraph and character styles deserve particular attention. Define the formatting once, apply the appropriate styles, and edit the style definition instead of manually correcting individual text blocks.
Design reusable structures around real variability. Test short and long copy, portrait and landscape imagery, and the smallest intended delivery format. Make alternate arrangements for genuinely different content instead of endlessly patching one overloaded template.
Be deliberate about linked assets. Photoshop’s library-linked graphics can update when the library original changes. That is useful for maintaining a shared asset, but historical approved artwork may need a fixed archival copy rather than a live dependency.
After completing a recurring job, spend a few minutes cleaning its reusable starting file. Remove obsolete alternatives, name the important layers, and record the unusual setup decisions. The next project should begin with the distilled system, not the previous project’s debris.

6. Make Asset Preparation a Separate, Repeatable Operation
Asset preparation is easy to underestimate because it happens in fragments: find a photograph, remove a background, trim it, export it, then repeat later. Gather the ready assets first and process them as a production stage.
For files scattered across projects, Adobe Bridge collections can group assets from different folders for browsing. Smart collections can be based on saved searches. Use them to assemble and inspect a working set rather than repeatedly searching through your entire archive.
Keep that browsing organization separate from the actual batch input. A collection is not the same thing as a physical input folder. For folder-based processing, place the selected files directly in a dedicated source directory and write derivatives somewhere else.
A straightforward project structure is often enough: source assets, prepared cutouts, working masters, and delivery files. Avoid mixing finished exports back into the folder you intend to process next.
Batch the cutouts and their surrounding preparation
Bulk Background Remover: Automated Cutouts automates more than the initial background-removal command. It can also refine the resulting mask, trim transparent outer canvas, and normalize the output canvas.
For unattended processing, its Select Subject & Remove Inverse method is the more suitable starting point. It uses Photoshop’s native Select Subject and creates a subject-revealing layer mask. The alternative Remove Background Using AI method invokes Photoshop’s native Remove Background command, which can produce a blocking popup on unsuccessful attempts and require manual acknowledgement.
For a product-cutout library, a practical test configuration could be:
- Select a folder of similar product photographs.
- Use Select Subject & Remove Inverse.
- Test a small Contract Selection amount if the sample cutouts show unwanted edge contamination.
- Normalize to a 2000 × 2000 pixel canvas with Center / Bottom alignment.
- Export PNG cutouts into a separate preparation folder.
Pixel normalization proportionally reduces an oversized cutout to fit, but it does not enlarge a smaller one. This creates consistent canvas dimensions and alignment—not automatically identical apparent product sizes. If matching visual scale matters, inspect that separately.
The transparency-skip option also deserves care. Skip Images Containing Transparency is a true skip: qualifying images are not processed or exported. Do not enable it expecting a consolidated output folder containing copies of every already-transparent asset.
Finally, retain the originals. The plugin merges visible source layers during preparation, so a processed PSD should not be treated as a preserved copy of the original multilayer composition. Check difficult edges on representative outputs and handle exceptions separately instead of assuming that a successful batch means every mask is production-ready.
7. Make Keyboard Shortcuts Follow Your Actual Working Habits
Do not try to memorize an entire shortcut chart. Identify the commands you repeatedly reach for during your normal work, then make those commands easier to invoke.
In Photoshop, open Edit > Keyboard Shortcuts. Choose the appropriate command category, assign a shortcut, resolve any conflict, and save a custom set. Adobe’s keyboard-shortcut customization guide covers application menus, panel menus, tools, and supported taskspaces.
Start with three high-frequency operations. Use them consistently before adding more. A small shortcut set you remember is more useful than a sophisticated one you have to look up.
Extend shortcuts beyond the design application
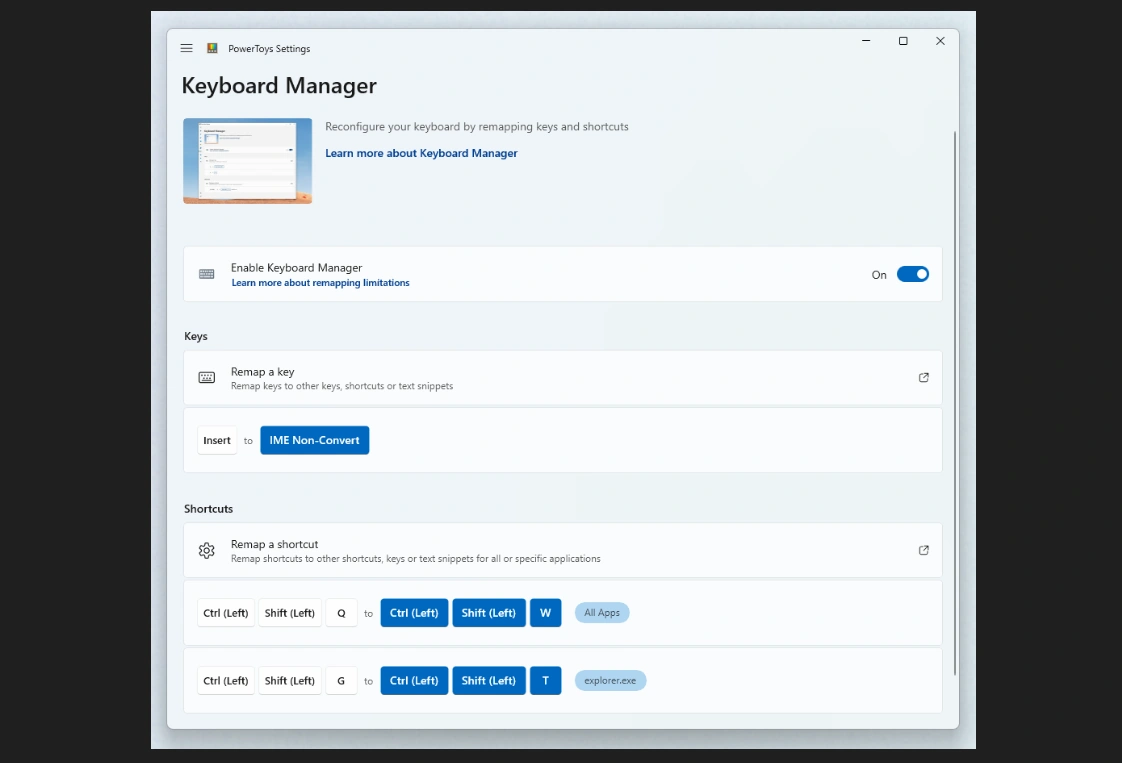
On Windows, PowerToys Keyboard Manager can remap shortcuts globally or for a specific application. It can also assign a shortcut to launch an application or insert a text sequence. For an application-launch shortcut, its “If running” behavior can show the existing window rather than opening another instance.
On macOS, Keyboard Maestro can connect hotkeys to macros that launch applications, open documents, arrange windows, and insert reusable text. A sensible first macro is a project-start command that opens your working template and arranges the applications you need.
Use these utilities for dependable navigation and setup—not elaborate sequences of blind clicks through dialogs whose state may change.
Keep global shortcuts distinct from ordinary typing. Where appropriate, use application-specific mappings so a design shortcut does not interfere with writing an email or editing a headline. Test shortcuts in the situations where you actually work, including text-entry mode.
The objective is to remove tiny interruptions from frequent actions, not to turn every possible action into a new key combination.
8. Create Image Variants From the Same Master, Not From Each Other
When one collection needs square, portrait, and landscape variants, the repeated cropping and exporting can become a substantial production job. Define the variants together instead of finishing one format and then reconstructing the setup for the next.
Bulk Image Cropper: Automated Batch Cropping supports multiple independent crop operations in a single batch. You could configure 1:1, 4:5, and 16:9 Aspect Ratio Crop rules for the same source folder.
With 60 source images and three rules, that is 180 crop/export operations. Each rule starts from the original source state; the portrait result is not cropped from the previously generated square result.
That independence matters. Successive crops can discard image area you needed for another format. Generating each variant from the same master avoids that cumulative loss.
Each rule can have its own export format and applicable Quality setting. You can also group outputs into subfolders by crop rule, which makes a multi-format delivery easier to inspect. Include actual final dimensions in the filename when they will help you distinguish outputs.
Match the crop method to the actual requirement
Aspect Ratio Crop is a crop, not a resize. Entering 4 × 5 specifies a proportion, not an exact pixel size. Its nine alignment positions determine which region is retained; they should not be mistaken for automatic subject-aware composition.
For transparent assets, choose the correct boundary treatment. Trim Excess Transparency caps margins at a maximum. Add Transparent Padding ensures a minimum. Normalize Transparency tightly trims the asset and then establishes the requested padding around its visible content.
Uniform padding is not the same as uniform canvas dimensions. For exact-size cutout canvases, use the appropriate normalization workflow rather than assuming a margin rule will produce identical document sizes.
Also separate photographic variants from finished layout variants. Cropping a composed advertisement can cut off headlines, logos, or mandatory copy. Build ratio-specific layouts when the design needs reflow; use automated image cropping where the content can safely tolerate it.

9. Make Feedback Specific, Consolidated, and Version-Aware
Fast production does not help much if revisions arrive as conflicting emails, vague messages, and screenshots of different versions. Give reviewers one place to respond and one clear decision to make.
Use three distinct review questions at the appropriate stages:
- Direction review: does this concept satisfy the brief?
- Master review: are the hierarchy, imagery, and approved copy correct?
- Delivery review: do the finished variants meet the agreed specifications?
Do not ask for final-detail feedback on a concept whose direction is still undecided. Equally, do not reopen the entire creative direction when the current request is to verify final delivery.
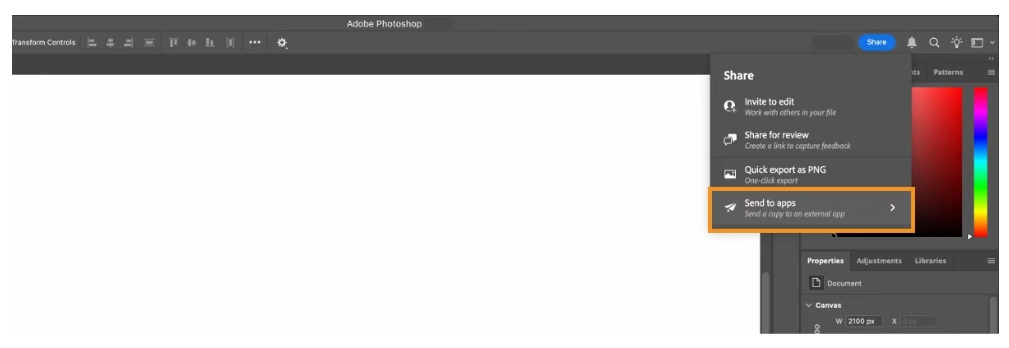
For Photoshop work, Share for Review provides a browser-based review link with general and pinned comments. Pinned comments identify the relevant canvas area, and you can respond through Photoshop’s Comments panel. Refresh the review link when you want it to reflect the latest document version.
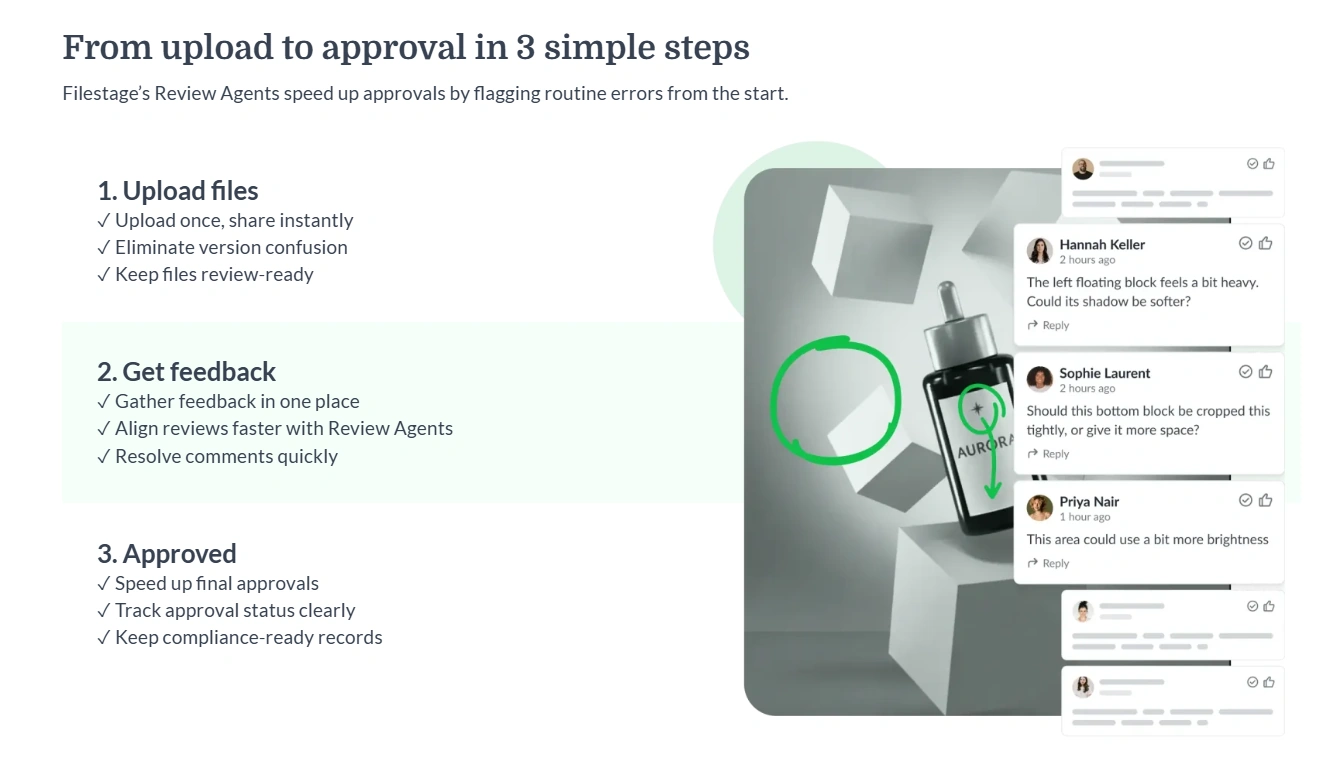
For teams managing many review files and stakeholders, Filestage offers contextual annotations, review decisions, and approval tracking. Its version-comparison workflow includes side-by-side and overlay views on supported plans. Those are useful when someone needs to verify whether requested changes were actually made.
A tool does not resolve contradictory feedback by itself. Establish one person who consolidates comments and decides which instruction wins when reviewers disagree.
Ask for actionable feedback: the affected area, the requested change, and the reason it matters. “Move the headline above the product so it remains visible in the portrait layout” is more useful than “make it pop.”
Then implement a consolidated revision pass. Check it against the agreed comments, not against your memory of a conversation spread across three channels.
10. Diagnose Computer Slowdowns Without Sacrificing the Master File
If Photoshop hesitates every time you move a layer, a better project-management system will not fix the immediate problem. Investigate application performance separately from workflow organization.
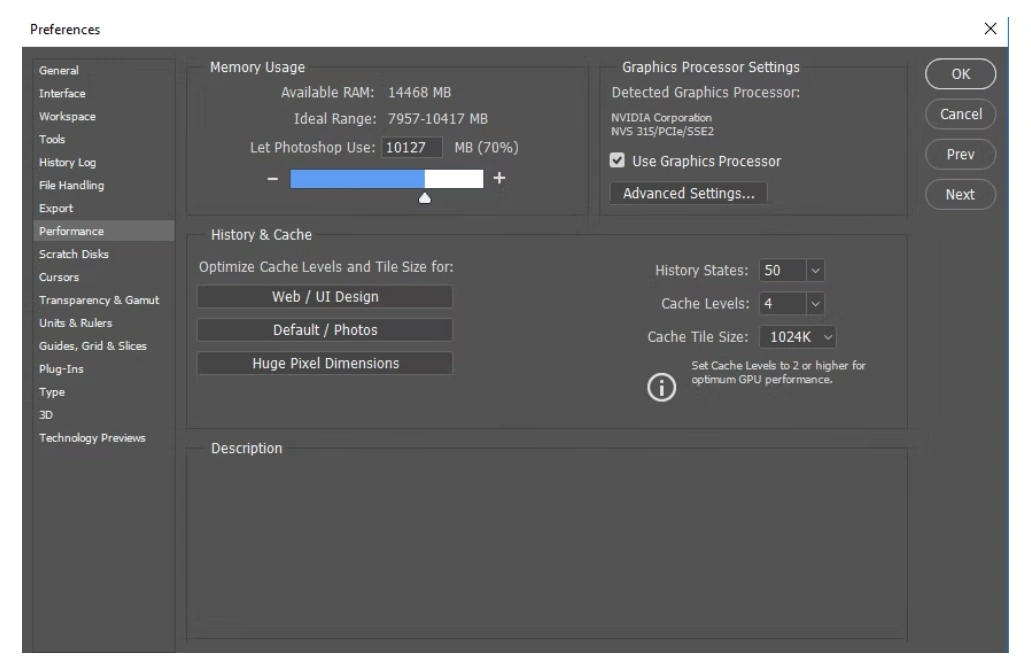
Start with a typical problem document and follow Adobe’s Photoshop performance guidance. In the document-window status menu, choose Efficiency. A value below 100% indicates that Photoshop has exhausted its allocated RAM and is using the scratch disk.
That gives you a diagnostic signal rather than a reason to change every preference at once. Close unnecessary documents, review your memory allocation, and retest the same operation. Do not allocate all system memory to Photoshop; your operating system and other applications need resources too.
Check scratch-disk configuration as well. Photoshop uses those drives for temporary storage, and Adobe recommends putting faster drives first in the priority order. Insufficient scratch space can cause performance problems and failures.
For layer-heavy documents, smaller Layers-panel thumbnails are another targeted adjustment: Photoshop updates visible thumbnails as the document changes, which can affect responsiveness.
Test one change at a time and record whether it improves your actual document. A setting that helps one type of work is not automatically the best setting for every project.
Most importantly, do not flatten your only editable master or discard valuable image data merely to make the application feel faster. Use a separate working or delivery copy when a simplification is appropriate. Speed that creates an expensive reconstruction later is not a genuine saving.
11. Treat Compression as a Delivery Stage, Not an Endless Export Experiment
Repeatedly exporting an image, checking its size, changing quality, and exporting again is exactly the kind of production loop that should not demand your attention for every file.
First decide what you are optimizing. A uniform quality setting, a shared filesize goal, and a consistent percentage reduction are different requirements.
Bulk Image Compressor: Batch-Reduce Filesizes provides three corresponding modes:
- Standard Compression applies your chosen Quality across the batch when predictable export settings matter more than a size target.
- Target Filesize searches independently for settings near a chosen KB or MB size.
- Target Reduction % calculates each file’s target from its own original filesize.
The target modes test actual encoded outputs and measure their saved sizes. That replaces manual save-and-check experimentation with per-image calibration rather than assuming one quality setting will make every image equally small.
Protect the requirements that must not change
Use Never Compress Below This Quality when you need an encoder-quality floor. The target workflow prioritizes quality adjustment before considering changes to pixel dimensions.
If dimensions are flexible, Downscale Images If Necessary can allow a bounded second-stage search. A 0.5x maximum allowance does not force every image to half size; it sets the furthest permitted reduction, used only when quality alone cannot adequately reach the target.
If the specification requires an exact 2000 × 2000 output, leave adaptive downscaling off. A filesize target does not justify silently breaking the dimension requirement. If both constraints cannot be met acceptably, resolve the tradeoff rather than hiding it.
Target compression is best-effort, with a successful range of ±10%. For a strict 500 KB upload ceiling, a 450 KB target provides some headroom when the limit and target use the same byte convention. The plugin uses 1024 bytes per KB. Still verify the saved files: a closest permitted result can remain outside the target range when guardrails prevent a match.
The skip-small-files option also affects delivery consistency. Skipped files are copied unchanged, retaining their original format and name. Disable it when every output must be converted to the same format and naming pattern.
Compressed derivatives are JPEG or WebP. Choose WebP when transparency must be retained, and keep high-quality masters separate. Complete composition and cropping first, then compress the delivery files rather than repeatedly recompressing intermediate versions.

12. Finish With a Preflight—and Improve One Bottleneck Each Week
Automation makes a repeated setting easier to apply at scale. It also makes a mistaken setting easier to apply at scale. Build a short preflight into every recurring operation.
Before processing a large folder, test a representative subset: a typical asset, a difficult one, and an unusual shape or size. Inspect the exported files, not just the open Photoshop documents.
- Check final dimensions and aspect ratios against the actual brief.
- Inspect important text, logos, cutout edges, and crop boundaries.
- Verify transparency in a suitable viewer and confirm the intended filetype.
- Check actual filesizes when a delivery ceiling applies.
- Confirm naming, output locations, expected variants, and the treatment of skipped files.
Remember that the tools described here are separate operations, not an automatically connected end-to-end pipeline. Prepare inputs deliberately, run the appropriate pass, check its results, and hand approved outputs to the next stage. Save recurring configurations once they have passed that test.
A practical one-week implementation plan
- Day one: measure a normal project and identify the largest avoidable block of hands-on work.
- Day two: write the deliverable specification and establish a representative approval gate.
- Day three: create one reusable starting file, asset kit, or shortcut set that removes repeated setup.
- Day four: pilot one batch operation on a small, representative set and document the exceptions.
- Day five: run a real job with the improved process, including setup and quality checking, then compare the handling time with your baseline.
Keep the change if it improves usable throughput. Adjust it if exceptions consume the saving. Remove it if it adds more maintenance than value. You do not need a complicated software stack to make that decision.
The fastest sustainable graphic design workflow leaves you with fewer repeated decisions, fewer manual production loops, and fewer preventable revisions. Choose one task you are tired of repeating, define what a correct result looks like, and build a reliable way to complete that task in batches. Then use the attention you recover for the design work that actually needs you.