How To Use Different Unsharp Mask Radius Values For Different-Sized Images Automatically
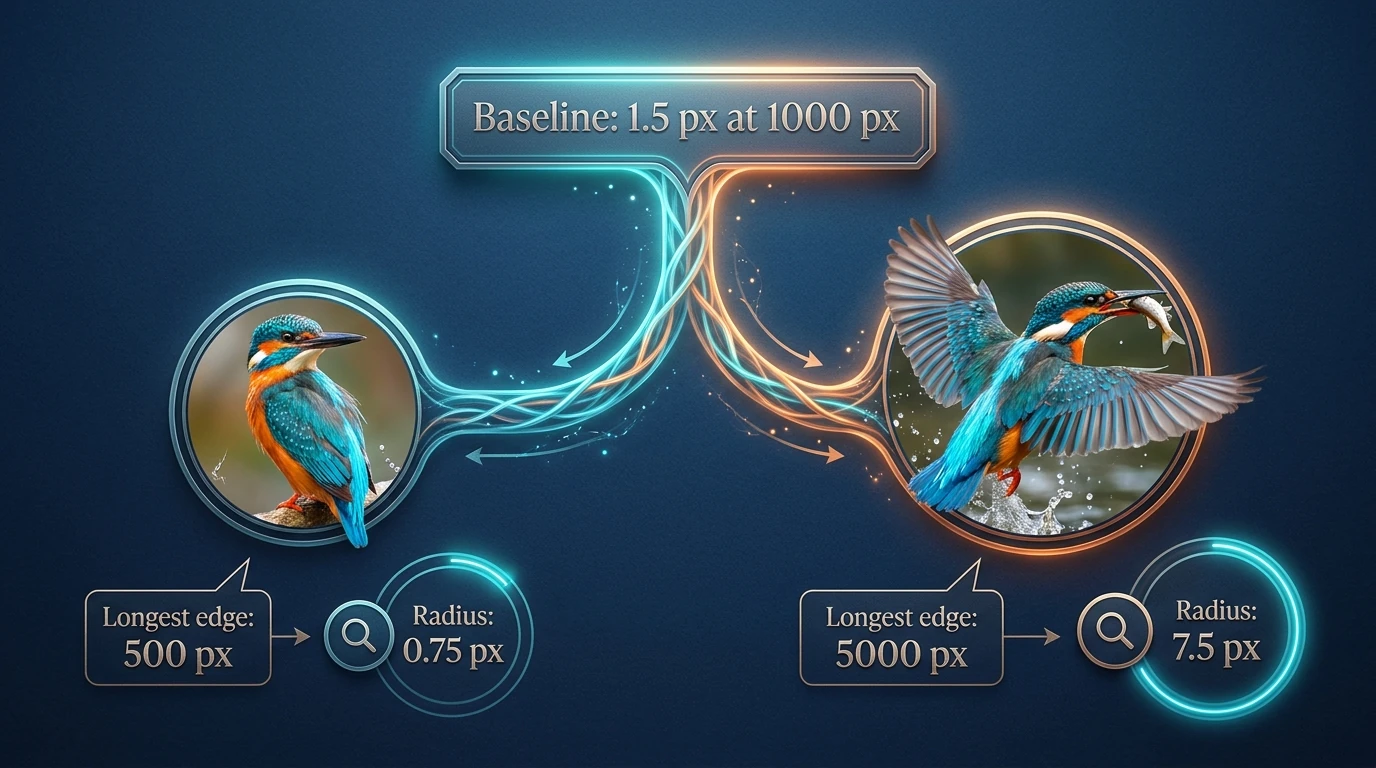

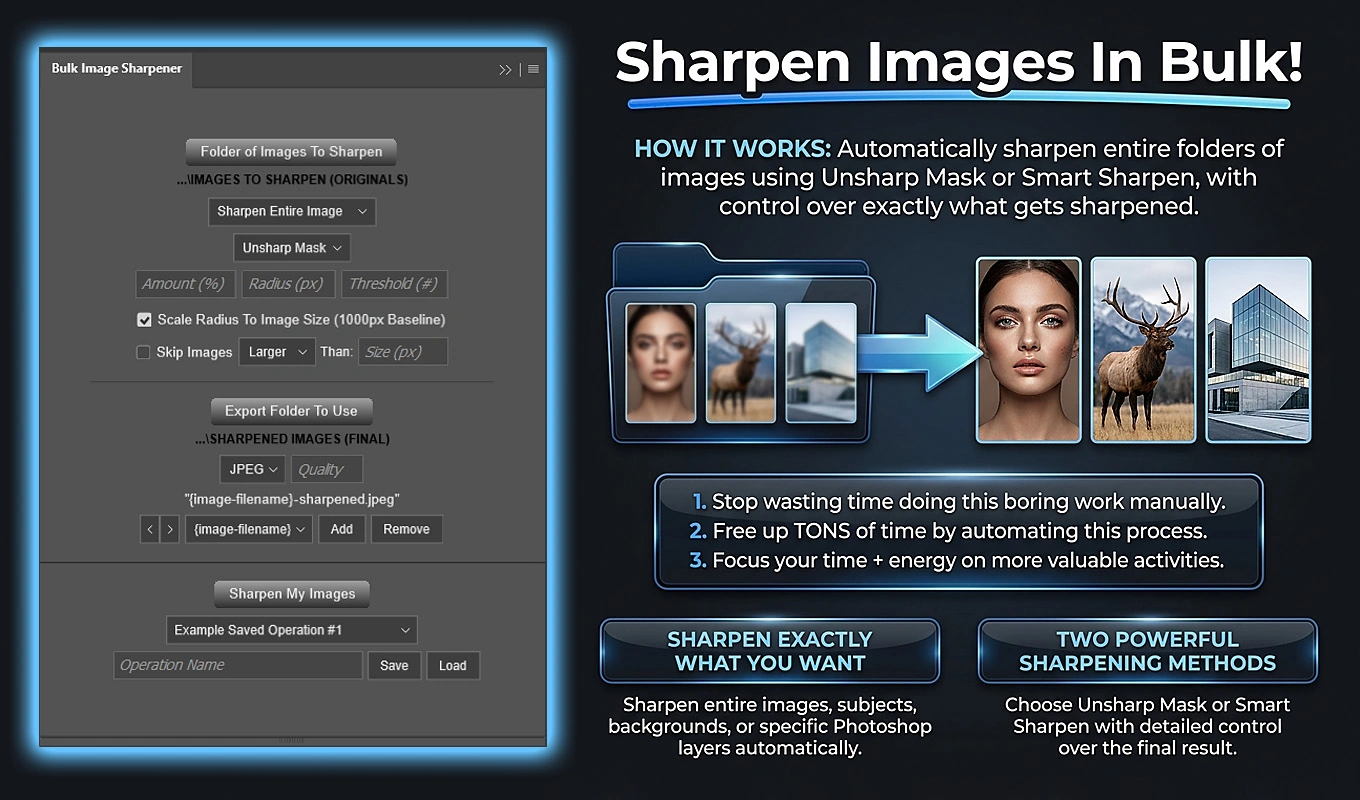
To apply a different Unsharp Mask Radius to each image automatically, use Bulk Image Sharpener: Automated Sharpening in Photoshop and enable Scale Radius To Image Size (1000px Baseline). You enter one reference Radius, and the plugin scales it for each source image using that document’s longest edge.
For example, a 1.5 px baseline produces a 0.75 px Radius on a 500-pixel image, a 3 px Radius on a 2000-pixel image, and a 7.5 px Radius on a 5000-pixel image. You do not have to calculate and enter those values separately.
The key is choosing a sensible baseline, understanding what scales, and testing the result before processing your full folder. Here is how to set up that workflow.
1. Understand Why a Fixed Pixel Radius Behaves Differently Across Resolutions
Unsharp Mask Radius is measured in pixels. A 2 px Radius covers a relatively larger portion of a 500-pixel image than it does of a 5000-pixel image.
That matters when a folder contains the same kinds of images at substantially different resolutions. Applying one fixed Radius to everything can produce a relatively broad sharpening effect on small files and a comparatively fine effect on large files.
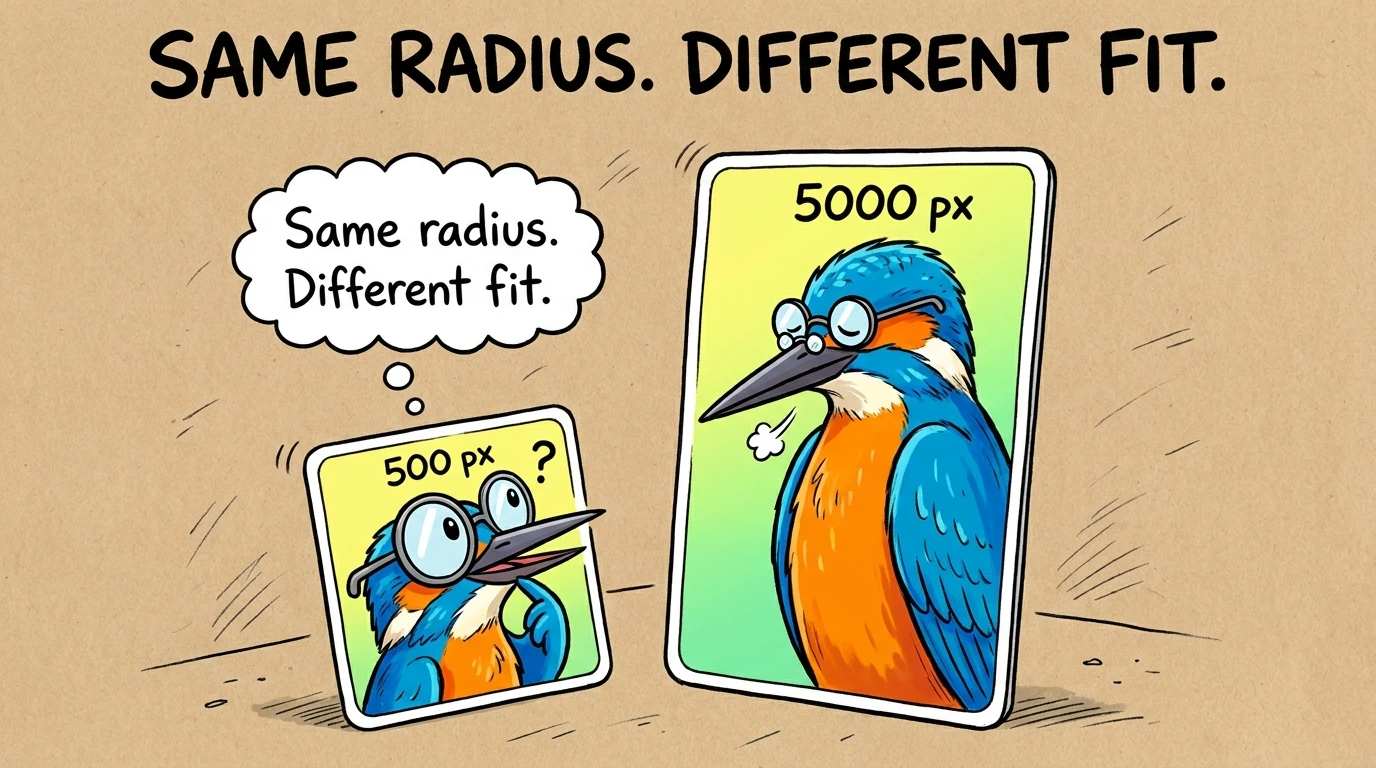
Adaptive radius scaling addresses that mismatch. Instead of keeping the pixel radius identical, it keeps the radius proportional to the document’s longest edge.
This is a consistent sizing rule, not a guarantee that every photograph will need identical sharpening treatment. Image content, noise, existing sharpness, and intended use still matter.
2. Use the Longest-Edge Formula to Calculate Each Radius
Bulk Image Sharpener uses this calculation when adaptive scaling is enabled:
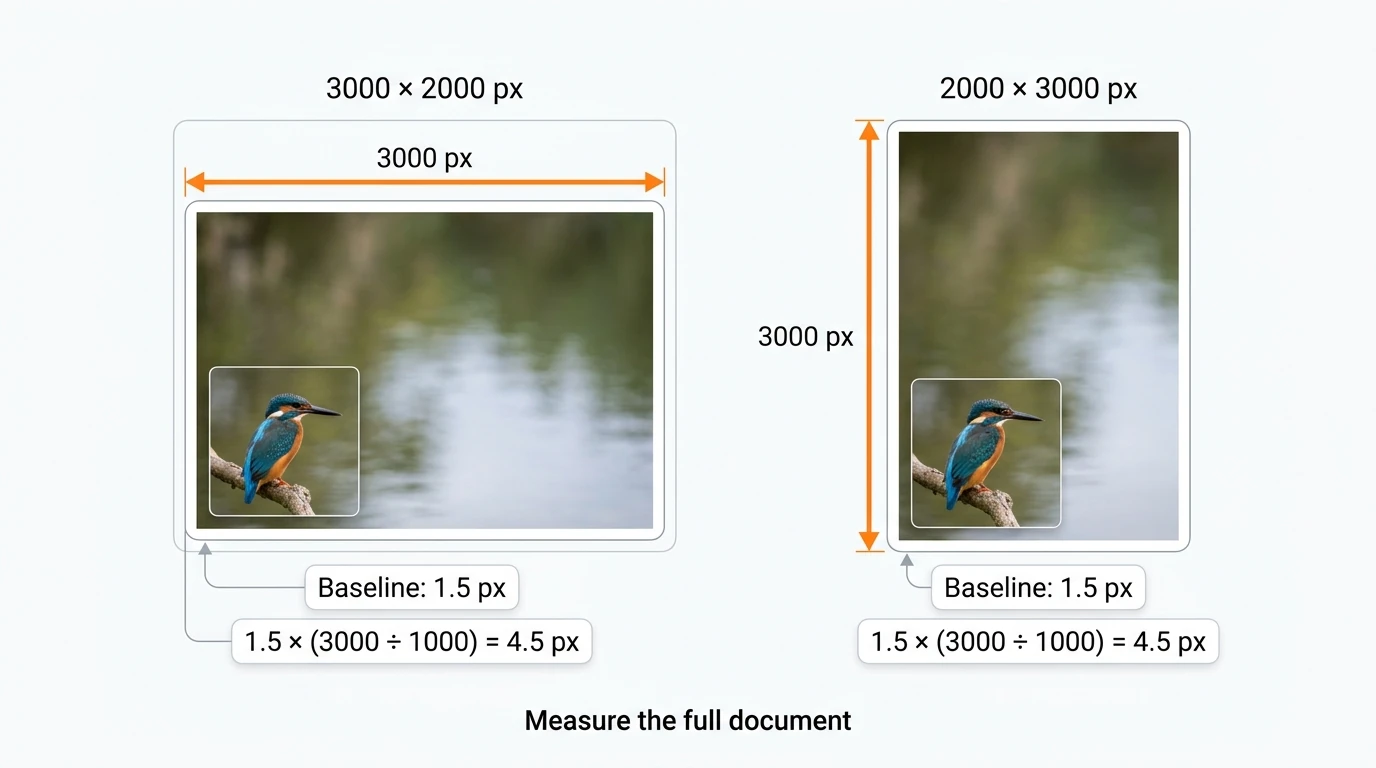
Applied Radius = configured Radius × (document’s longest edge ÷ 1000)
The longest edge is whichever is greater: document width or document height. A 3000 × 2000 landscape image and a 2000 × 3000 portrait image therefore receive the same Radius when processed with the same baseline.
The 1000-pixel baseline gives the Radius field a specific meaning: it is the radius you want for an image whose longest edge is 1000 pixels.
- At 1000 pixels, the configured Radius is used unchanged.
- At 2000 pixels, the Radius doubles.
- At 500 pixels, the Radius halves.
The calculation uses pixel dimensions, not megapixels, file size, or PPI metadata. It also uses the complete Photoshop document, not the bounds of a selected subject or targeted layer.
3. Keep Radius Separate From Amount and Threshold
Automatically changing Radius does not mean automatically changing every Unsharp Mask setting. The three controls serve different purposes:
- Radius controls the spatial reach of the sharpening effect. The configured input accepts 0.1–1000 px.
- Amount controls sharpening strength. The accepted range is 1–500%.
- Threshold influences how different neighboring tonal values must be before Photoshop treats them as an edge to sharpen. It accepts whole numbers from 0–255.
With adaptive scaling enabled, only Radius changes from image to image. Amount and Threshold stay at the values you configured.
For example, if you choose Amount 90% and Threshold 2, those settings remain 90% and 2 throughout the batch. The Radius can still vary according to each document’s dimensions. Those numbers are simply an illustration, not a universal sharpening preset.
This distinction helps when evaluating results: a size-based Radius adjustment does not automatically compensate for a noisier image or a file that already has strong sharpening.
4. Convert an Existing Approved Radius Into a 1000-Pixel Baseline
You do not have to choose the baseline from scratch. If you already have a Radius that looks right on a representative image, convert it into the equivalent 1000-pixel value.
Baseline Radius = approved Radius × (1000 ÷ reference image’s longest edge)
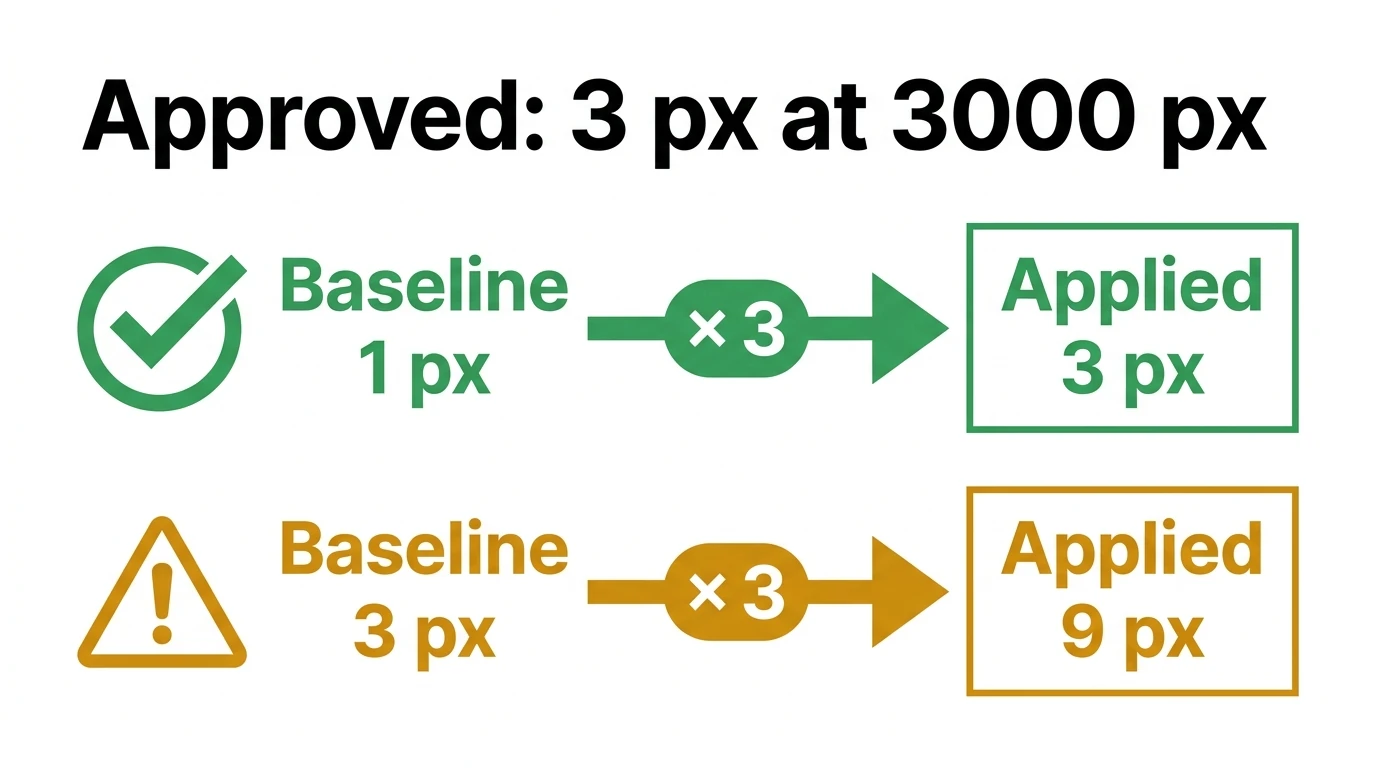
Suppose you like a 3 px Radius on an image whose longest edge is 3000 pixels:
3 × (1000 ÷ 3000) = 1 px baseline
Enter 1 px in Bulk Image Sharpener and enable scaling. The plugin will apply 3 px to that 3000-pixel image, 1.5 px to a 1500-pixel image, and 6 px to a 6000-pixel image.
Avoid entering the approved 3 px directly as the baseline in this example. With scaling enabled, that would produce 9 px on the original 3000-pixel reference image.
5. Prepare Your Images at the Dimensions You Intend to Sharpen
Before configuring the batch, decide which image dimensions the sharpening should be based on. If this is final sharpening for delivery, finish any planned resizing first so the plugin calculates Radius from those delivery-sized documents.
Adaptive radius scaling does not resize an image or generate additional resolution. It changes the sharpening radius applied to the document at its current size.
Place your supported source files directly inside the folder you will select. Bulk Image Sharpener processes supported files in that directory; it does not recursively process arbitrary nested source folders. Common supported inputs include JPEG, PNG, TIFF, PSD, and PSB.
Also choose a separate destination for your sharpened outputs. Keeping test results and final exports organized makes it easier to compare settings without confusing source images with processed derivatives.
6. Enable Adaptive Unsharp Mask in Bulk Image Sharpener
Bulk Image Sharpener is available through Adobe Exchange and Adobe’s Creative Cloud plugin marketplace. After installation, access it through Photoshop’s Plugins menu.
Configure the operation as follows:
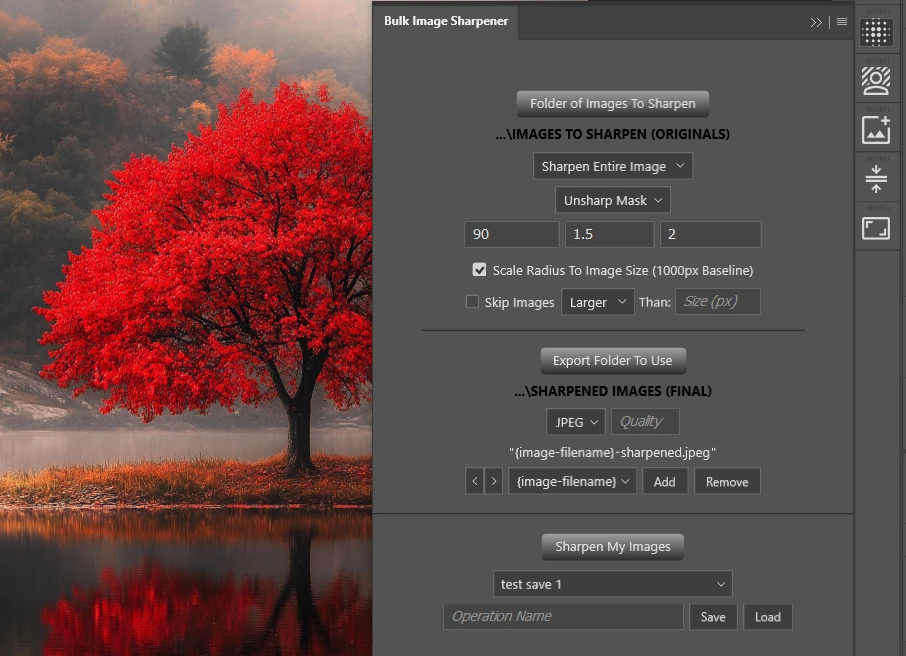
- Select Folder of Images To Sharpen and choose your source directory.
- Choose Sharpen Entire Image for a standard whole-image sharpening batch.
- Set Sharpening Method to Unsharp Mask.
- Enter your chosen Amount and Threshold.
- Enter the Radius you want to use at the 1000-pixel longest-edge baseline.
- Enable Scale Radius To Image Size (1000px Baseline).
- Select Export Folder To Use, choose an output format such as JPEG or PNG, and configure the available Quality setting.
- Keep the default source-name-plus-sharpened filename format, or customize it before running.
The scaling checkbox is off by default. Selecting Unsharp Mask alone does not activate adaptive sizing; the checkbox must be enabled.
Radius scaling also works with the plugin’s other sharpening targets. Regardless of the target, the scale factor still comes from the full document’s dimensions. For this straightforward workflow, Sharpen Entire Image keeps the setup focused on resolution-based sharpening across complete images.
7. See What One Baseline Does Across a Mixed-Resolution Folder
Consider a batch configured with a 1.5 px Radius and Scale Radius To Image Size enabled. The resulting radii would be:
- 500 × 500 image: longest edge 500; applied Radius 0.75 px.
- 1000 × 800 image: longest edge 1000; applied Radius 1.5 px.
- 1200 × 2000 image: longest edge 2000; applied Radius 3 px.
- 3000 × 2000 image: longest edge 3000; applied Radius 4.5 px.
- 5000 × 3500 image: longest edge 5000; applied Radius 7.5 px.
All five files can remain in the same source folder. The plugin calculates the appropriate scaled Radius for each document rather than requiring a separate Radius entry for every size.
Two documents with the same longest edge receive the same Radius even if their aspect ratios differ. The rule does not use image area, so a square image does not receive a larger Radius merely because it contains more total pixels.
8. Test Representative Sizes Before Processing Everything
The fastest useful test is not necessarily the smallest possible test. Choose a few files that expose how the baseline behaves across the actual range of your batch.
Create a small test folder containing copies of a small image, a medium image, and a large image. If your collection includes both smooth subjects and detailed textures, include examples of each. Run the configured operation on that folder and inspect the exported results.
Check the outputs at 100% view and at the size at which people will actually use or view them. Look for:
- Bright or dark halos around high-contrast edges.
- Noise or grain becoming more conspicuous.
- Fine details looking brittle or unnaturally outlined.
- Large images receiving an effect that is broader than intended.
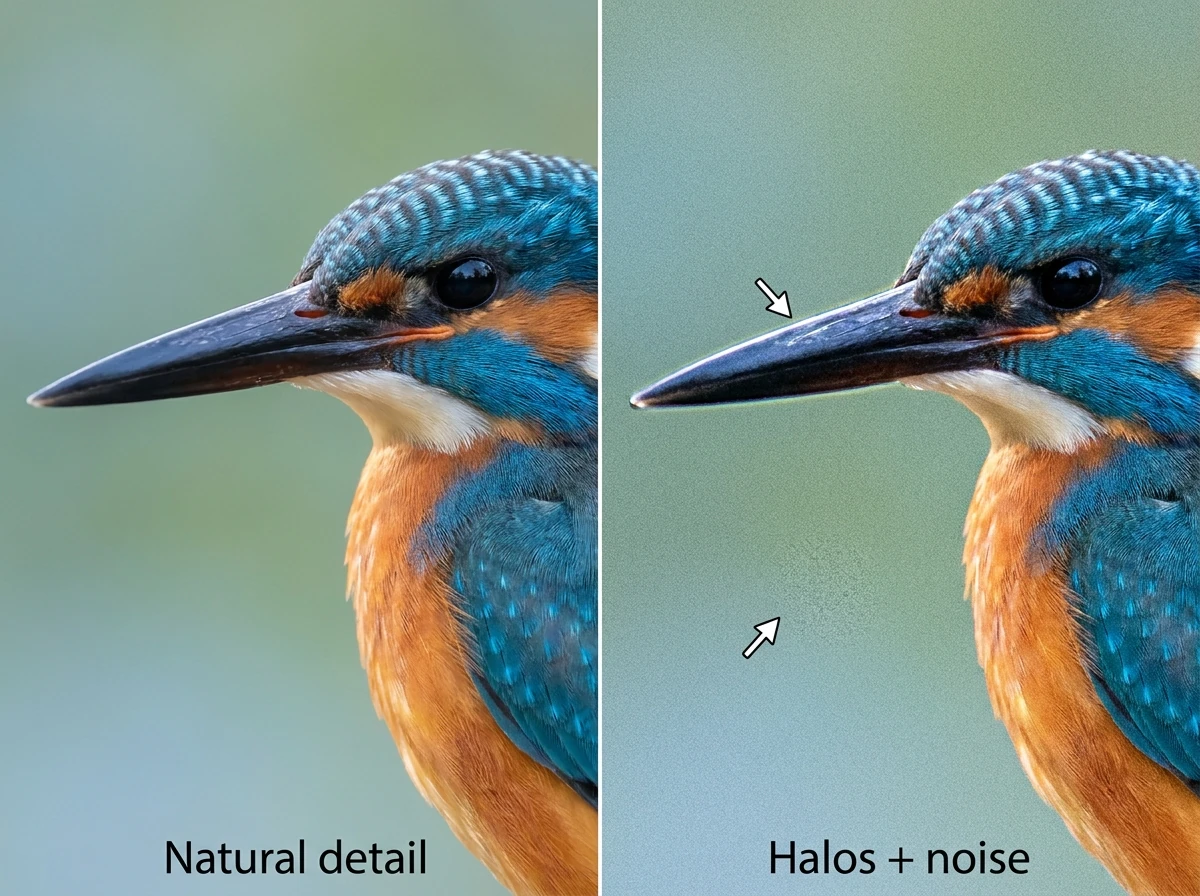
If the effect is too broad across the test set, reduce the baseline Radius and test again. If sharpening is too aggressive or noisy, review Amount and Threshold as well rather than expecting Radius scaling to solve every issue.
This small approval pass avoids spending a full production run discovering that the baseline was unsuitable.
9. Exclude Image Sizes That Should Not Receive This Treatment
Sometimes one baseline works well for most of a folder, but certain image sizes should not be processed at all. Bulk Image Sharpener’s optional Skip Images setting can exclude them using a longest-edge cutoff.
Choose either Larger or Smaller for the operation, then enter a whole-number pixel threshold.
- Skip Images Smaller than 1000 px excludes images whose longest edge is below 1000 pixels.
- Skip Images Larger than 6000 px excludes images whose longest edge is above 6000 pixels.
Equality does not trigger a skip. With Larger set to 6000 px, a document whose longest edge is exactly 6000 pixels is still processed.

This is an exclusion rule, not another way to set Radius. Skipped images are not sharpened or exported unchanged; they receive no output from that operation. The setting is useful when very small assets or unusually large source files do not belong in the current sharpening run.
10. Record the Actual Radius in Your Output Filenames
A mixed-resolution batch is easier to review when the exported files identify the Radius that was actually applied.
In the filename-format builder, add the {sharpen-radius} component. It records the actual main sharpening Radius, including adaptive scaling, rather than simply repeating the configured baseline.
A useful filename arrangement combines these components:
- {image-filename}
- sharpened
- {sharpen-radius}
- {width}x{height}
The components are joined with hyphens, and the Radius component includes the text radius- before its value.
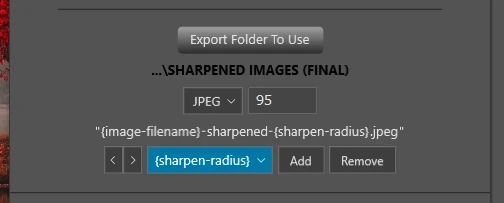
With a 1.5 px baseline, a 4000-pixel-long image can therefore record an applied Radius of 6 px in its filename. Including dimensions alongside Radius makes it easier to check that the scaling rule behaved as expected when reviewing exported files outside Photoshop.
11. Split the Folder Into Separate Batches When Size Is Not the Only Difference
Adaptive Radius is most useful when resolution is the main reason similar images need different pixel radii. It cannot determine whether every image should receive the same Amount, Threshold, or relative sharpening width.
Separate operations are preferable when your source collection contains meaningfully different sharpening requirements, such as:
- Clean product images mixed with visibly noisy photographs.
- Previously sharpened files mixed with relatively soft originals.
- Images intended for small screen display mixed with images prepared for a different delivery purpose.
- Fine textures mixed with subjects that need a gentler treatment.
Each group can still use adaptive Radius. The difference is that you approve an appropriate baseline, Amount, and Threshold for that group instead of expecting one configuration to fit unrelated material.
If every image already has the same delivery dimensions, scaling provides no size-based variation: identical longest edges produce identical radii. Leave scaling off when your intention is specifically to apply one fixed pixel Radius regardless of document size.
12. Run the Folder Without Repeatedly Adjusting Radius by Hand
After approving your test results, select the full source folder, confirm the export destination and filename format, and click Sharpen My Images.
The plugin reads the source folder’s current contents when the operation begins. For each supported source, it opens the document and checks any enabled size-exclusion rule. For each image that proceeds, it prepares the sharpening target, calculates the scaled Radius, applies Photoshop’s Unsharp Mask, exports the result, and closes the source document without saving.
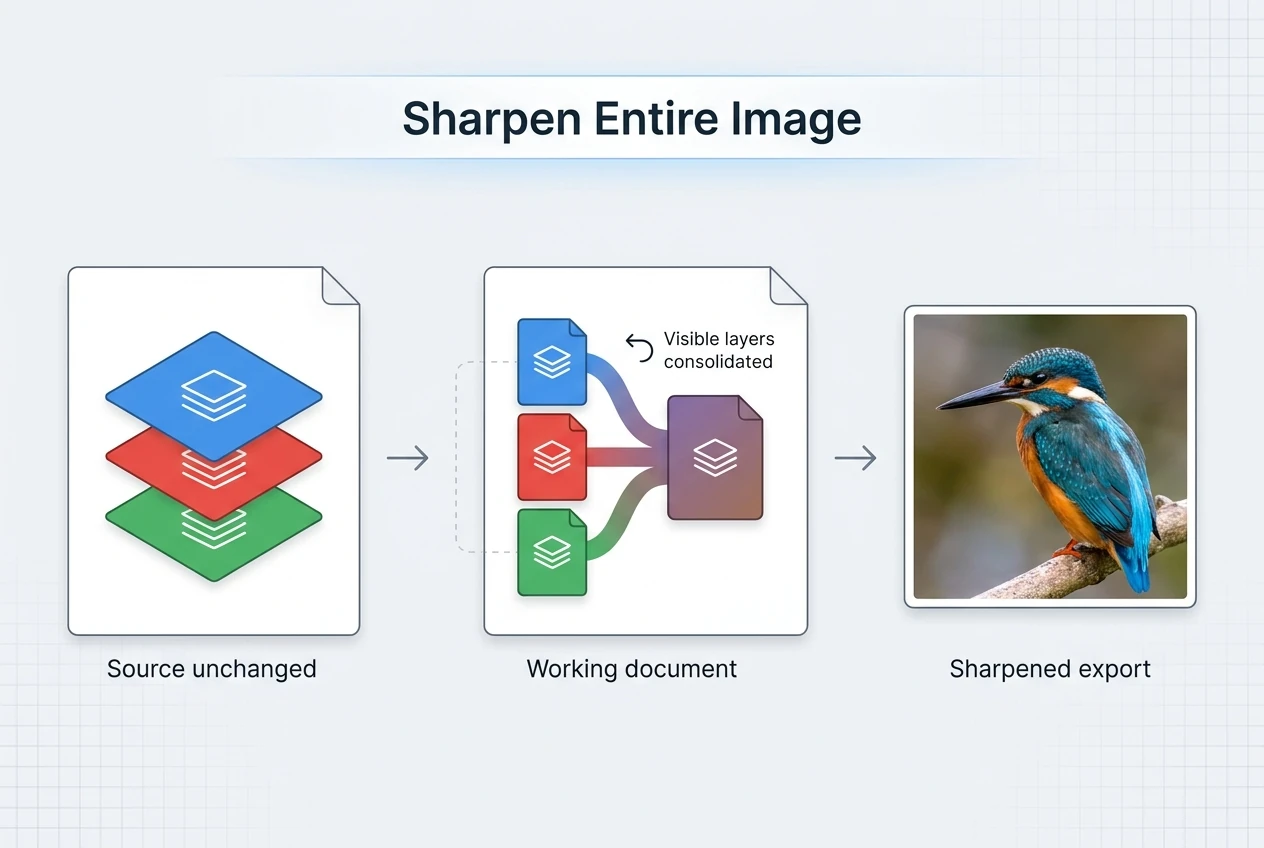
With Sharpen Entire Image, visible layers are consolidated in the working document before sharpening. This means a layered output should not be assumed to retain the source’s original visible layer stack, even though the original source file itself remains unchanged.
The progress dialog shows the batch progressing, and Cancel Operation lets you stop it if needed. The repetitive opening, radius calculation, filter application, exporting, and closing are handled by the plugin rather than repeated manually for each file.
13. Save the Approved Baseline for Your Next Mixed-Size Batch
Once the results are approved, enter an Operation Name and click Save. A saved operation preserves the sharpening method, Unsharp Mask settings, adaptive-radius checkbox, selected target, optional size-exclusion settings, filename components, export settings, and folder references.
Give the operation a name that describes its purpose and baseline, such as “Product Images — USM 1 px at 1000 — PNG.” Treat that as a naming example, not a recommended preset.
For the next job, load the operation and confirm that its source folder, destination, and sharpening requirements still match the new files. If a saved folder can no longer be accessed, select it again.
The essential setup is simple: choose a Radius for a 1000-pixel image, enable Scale Radius To Image Size, and approve representative outputs. Bulk Image Sharpener then turns that one baseline into different Unsharp Mask Radius values automatically across your folder, without making you recalculate and re-enter the setting for every image.