How To Use Nine-Point Watermark Alignment When Processing Images In Bulk


To use nine-point watermark alignment in a batch, choose a horizontal and vertical position for your watermark, set its size and edge padding, and apply that configuration across your source folder. The important part is making the placement work consistently on images with different dimensions—not simply repeating the same pixel coordinates.
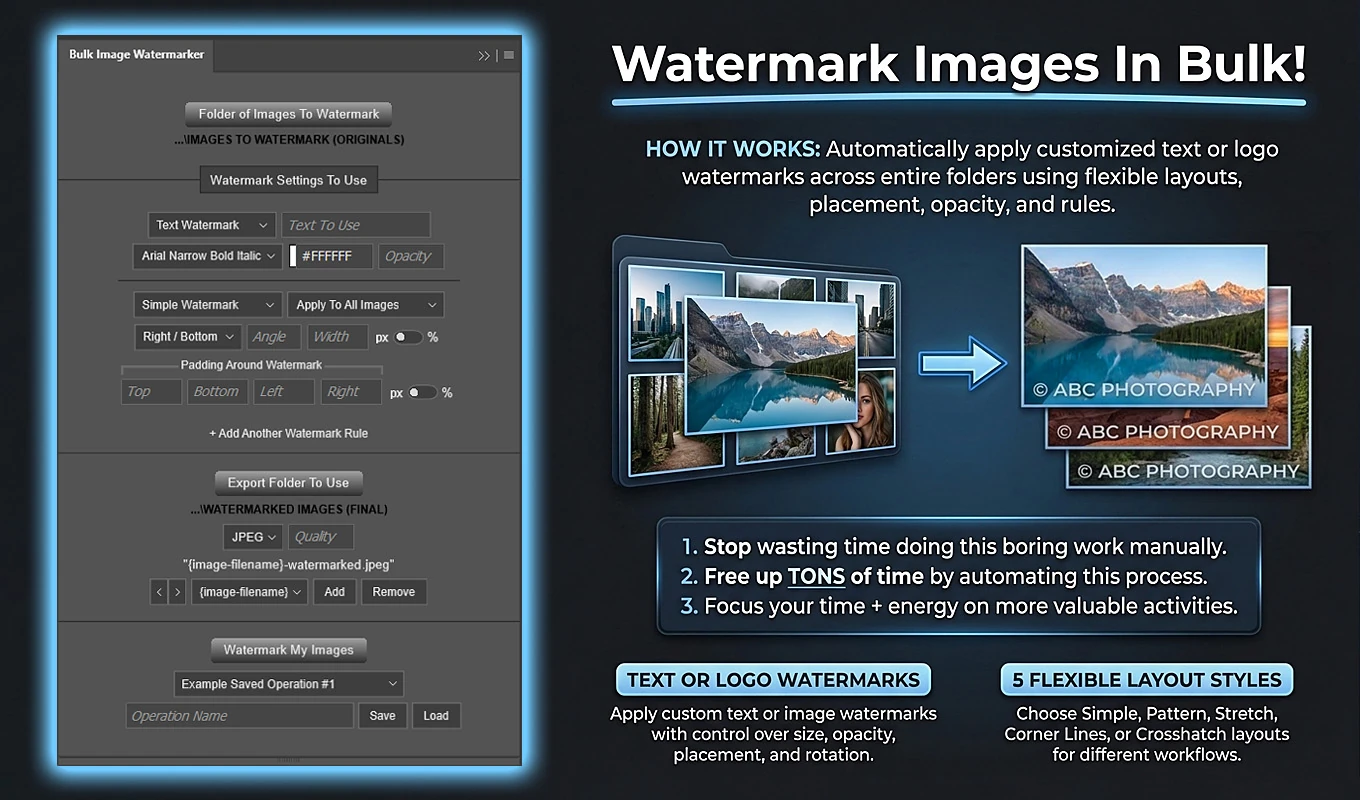
Bulk Image Watermarker: Automated Batch Logos is a Photoshop plugin that automates this workflow for both text and image watermarks. Its Simple Watermark layout provides nine alignment positions, along with percentage-based sizing, rotation, and independent padding on all four sides. Here is how to combine those controls into a reliable bulk-watermarking setup.
1. Understand What Each of the Nine Positions Means
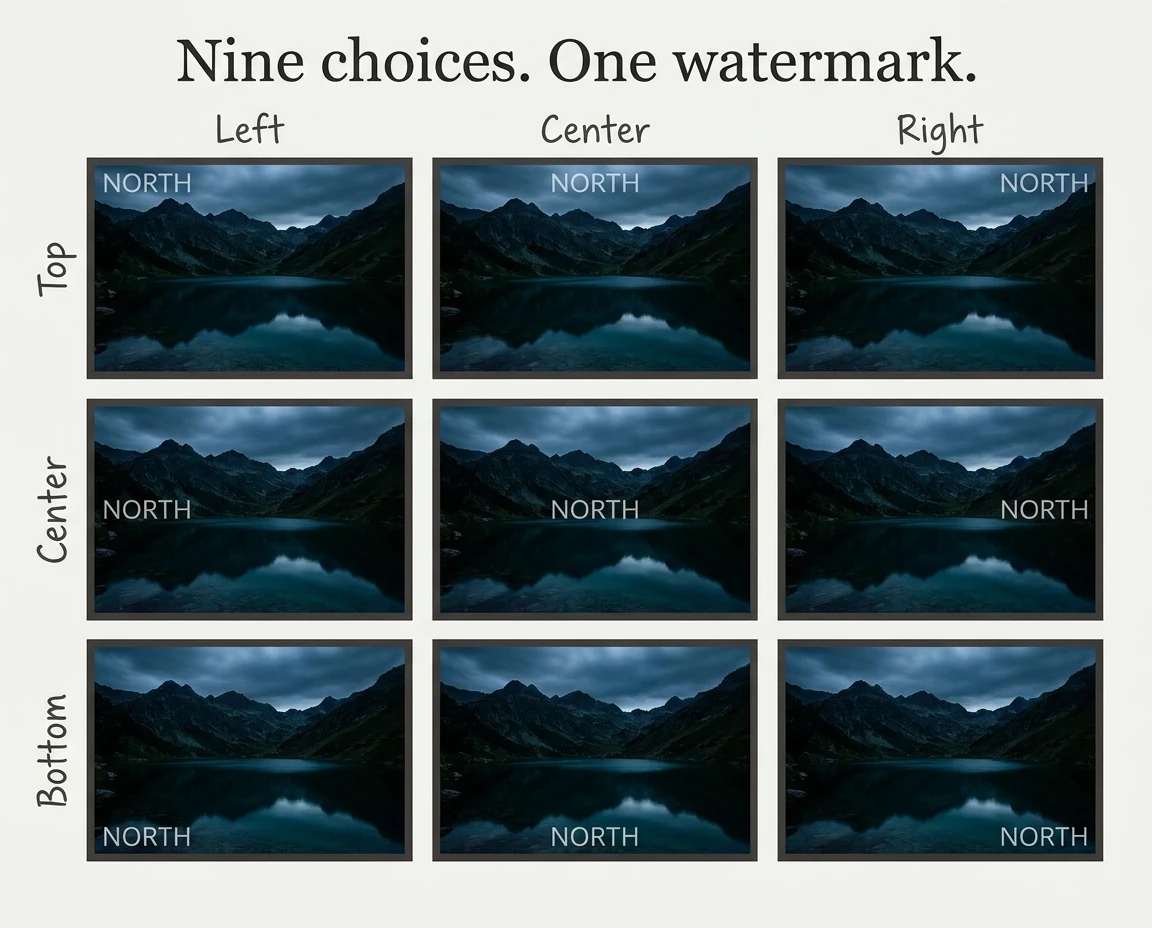
Nine-point alignment combines three horizontal choices—Left, Center, and Right—with three vertical choices—Top, Center, and Bottom. In the plugin’s alignment labels, the horizontal choice comes first.
- Left / Top: positions the watermark in the upper-left area.
- Center / Top: centers it horizontally near the top.
- Right / Top: positions it in the upper-right area.
- Left / Center: places it along the left side, vertically centered.
- Center / Center: centers it horizontally and vertically.
- Right / Center: places it along the right side, vertically centered.
- Left / Bottom: positions it in the lower-left area.
- Center / Bottom: centers it horizontally near the bottom.
- Right / Bottom: positions it in the lower-right area.
These are nine possible placements for one watermark, not a command to create nine copies. To use this control in Bulk Image Watermarker, select Simple Watermark as the Watermark Layout.
The alignment establishes the preferred placement. Width, rotation, and padding then determine the watermark’s final size and how it fits within the image.
2. Choose the Position Around the Image Content
Start by examining several images from the folder, especially those with different compositions. A consistent alignment is useful only if the chosen area remains suitable across the batch.
Right / Bottom is a practical starting point for a small brand logo when that corner generally contains background rather than important detail. Left / Bottom may be more suitable if products, signatures, or other essential elements regularly occupy the opposite corner.
Center / Bottom works well when you want a balanced placement beneath a centrally composed subject. Center / Center is more appropriate when the watermark is intended to cross the image visibly, as with a prominent proof mark. The side-center positions can be useful when there is recurring open space along one edge.
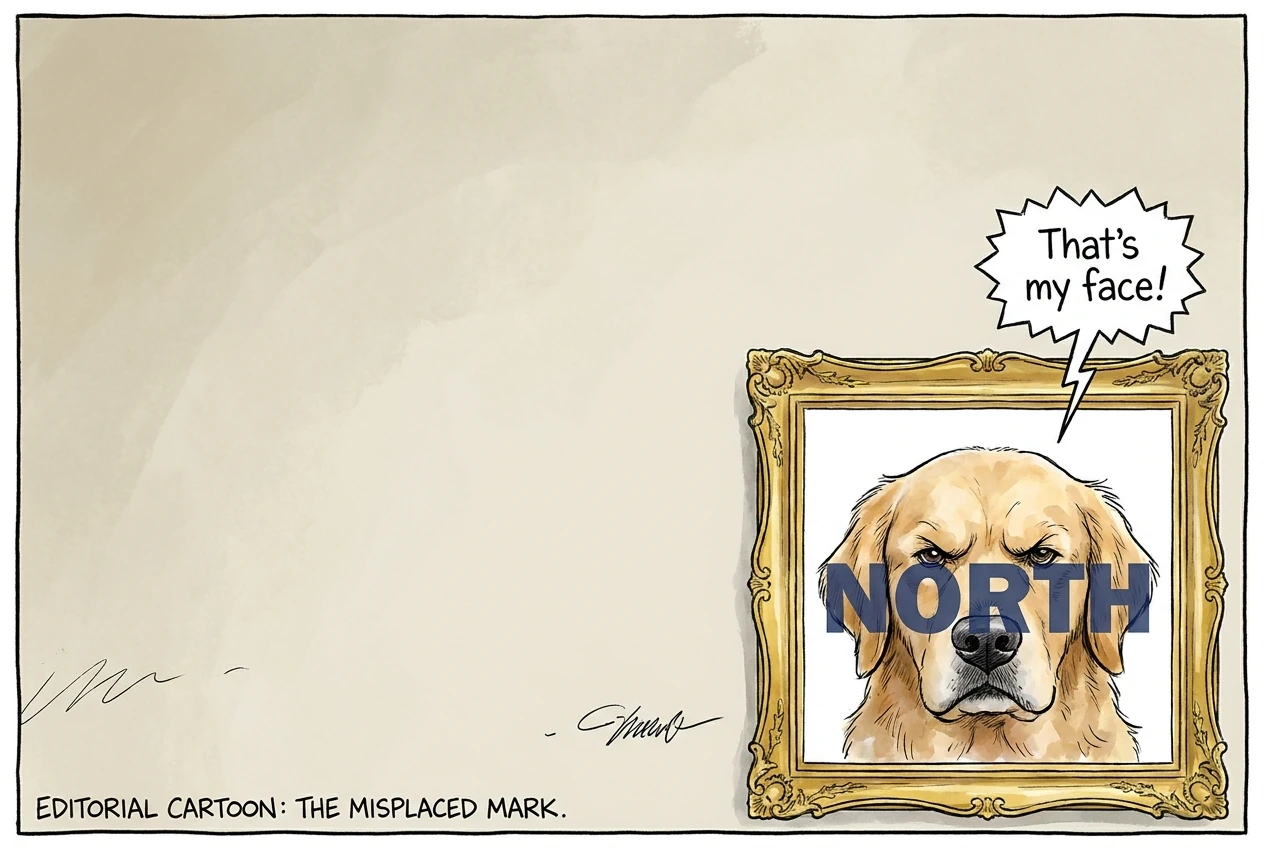
Do not choose a corner solely because it looks good on the first image. Check whether it covers faces, product details, existing text, or other important content elsewhere in the set. Nine-point alignment controls placement geometry; the compositional decision still comes from your choice of position.
3. Set Up Your First Nine-Point Batch in Photoshop
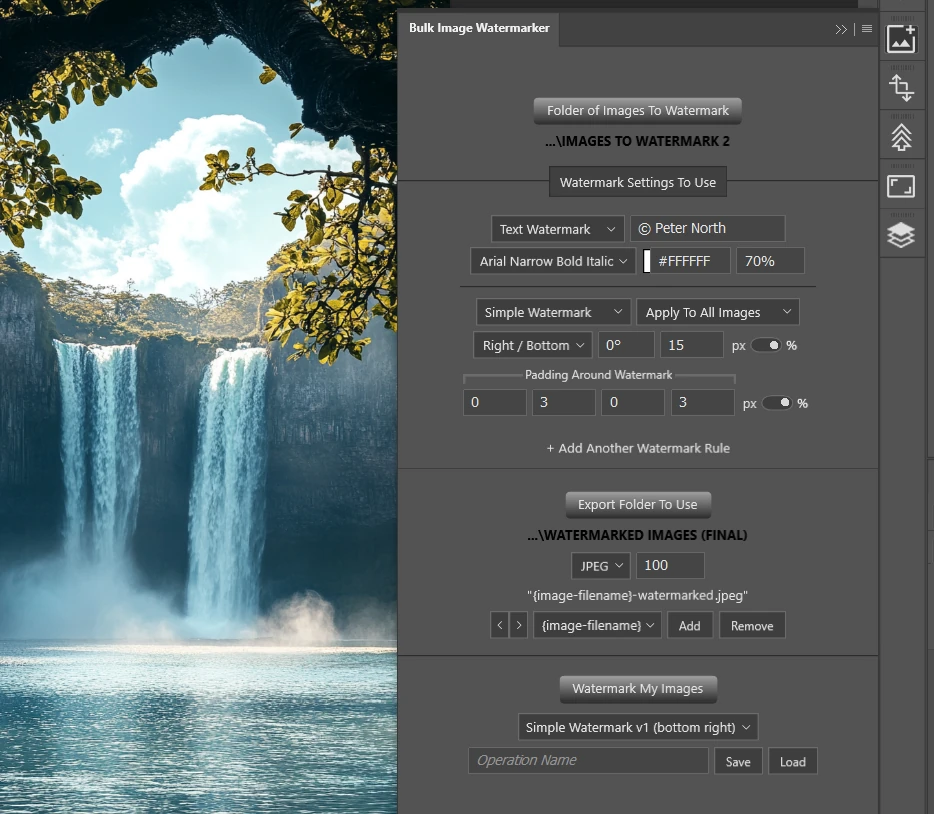
Install Bulk Image Watermarker through Adobe Exchange or Adobe’s Creative Cloud plugin marketplace, then access it from Photoshop’s Plugins menu. For a straightforward first batch, configure one watermark rule that applies to every image.
- Click Folder of Images To Watermark and select your source folder.
- Under Watermark Settings To Use, choose Text Watermark or Image Watermark. For text, enter Text To Use and choose a font and color. For a logo, click Image To Use and select a file Photoshop can place.
- Set Watermark Layout to Simple Watermark.
- Choose an Alignment, such as Right / Bottom.
- Set Width and its unit. A 15% width is a useful starting example for a compact logo, though the right value depends on the asset and the images.
- Start with Angle at 0°. Set an appropriate Opacity, such as 70%, and configure your padding. For a bottom-right placement, you could begin with Right and Bottom at 3%, with Top and Left at 0%.
- Leave the application setting at Apply To All Images for this initial workflow.
- Select Export Folder To Use, choose your export filetype, and adjust Quality where available. Keep or modify the filename format; the default combines the source filename with “watermarked.”
- Click Watermark My Images to validate the settings and process the folder.
The plugin opens each source image, applies the qualifying watermark rule, exports the result, and closes the source document without saving. Your original files remain unchanged.
For the first run, use a small representative batch. The following sections explain how to refine the settings before applying them to the full folder.
4. Match Watermark Width to the Size of Each Image
Alignment answers “where?” Width answers “how large?” Both need to be configured together.
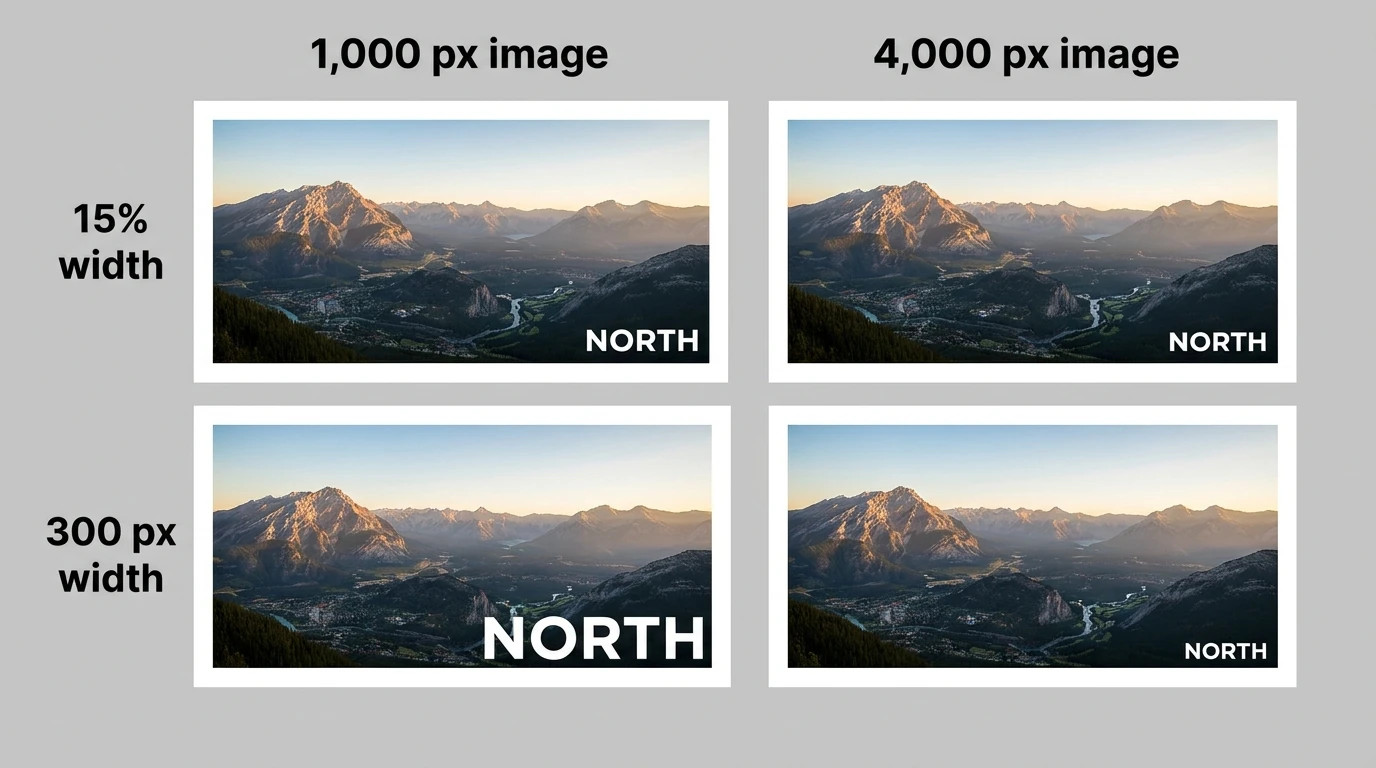
In Simple Watermark, width can use pixels or a percentage of the current image width. Percentage sizing is particularly useful when the folder contains images at different resolutions.
For example, a watermark width of 15% produces these target widths before any fitting adjustment:
- A 1,000-pixel-wide image gets a 150-pixel-wide watermark.
- A 2,000-pixel-wide image gets a 300-pixel-wide watermark.
- A 4,000-pixel-wide image gets a 600-pixel-wide watermark.
The watermark’s height scales proportionally, preserving its own aspect ratio. This applies to both text and image watermarks.
Use pixel width when the watermark needs a fixed absolute size—for example, when every source image already has identical dimensions. Be more cautious with fixed pixel sizes in a mixed-resolution folder: a 300-pixel logo occupies a much larger share of a 1,000-pixel-wide image than a 4,000-pixel-wide image.
Also consider the shape of the watermark itself. A tall logo and a short wordmark can have the same width but occupy very different amounts of vertical space. Judge the complete mark, not just its width value.
5. Use Padding to Keep the Watermark Away From the Edges
A bottom-right watermark usually needs some breathing room rather than sitting directly against the canvas boundary. Simple Watermark provides separate Top, Bottom, Left, and Right padding values for this purpose.
Pixel padding creates fixed margins. Percentage padding adapts the margins to each image:
- Left and Right padding use a percentage of image width.
- Top and Bottom padding use a percentage of image height.
On a 2,000 × 1,000 image, 3% Right padding represents 60 pixels, while 3% Bottom padding represents 30 pixels. On a 4,000 × 2,000 image, those margins become 120 and 60 pixels respectively.
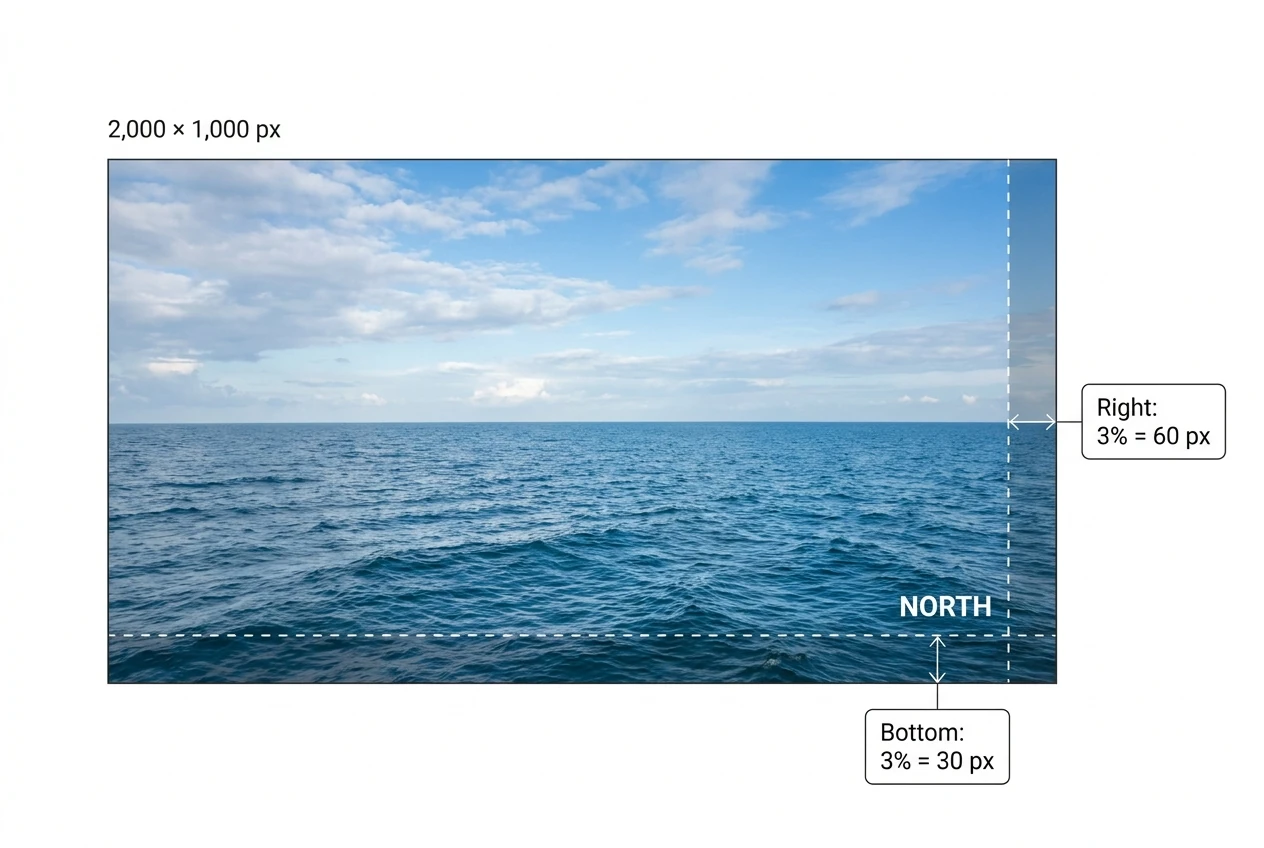
This makes percentage width and percentage padding a useful combination: the mark and its edge clearance both adapt as the image dimensions change.
Padding also acts as a fitting constraint. After resizing, rotation, and alignment, the plugin checks whether the watermark fits within the padded area. If necessary, it can scale the watermark down proportionally. The requested width is therefore a target that may be reduced to respect the available space.
When Width and Padding both use percentages, the watermark width plus Left and Right padding must not exceed 100%. Padding must also leave a usable image area; extreme settings can trigger a warning and be ignored for the affected image.
6. Give Portrait, Landscape, and Square Images Different Alignments
One alignment may not suit every aspect ratio. A logo that fits comfortably in a landscape corner may feel crowded on a narrow portrait image, even when percentage sizing keeps its width proportional.
Instead of separating the images into different folders, create orientation-specific Watermark Rules. Each rule can use Simple Watermark with its own alignment, width, and padding.
For example, you could configure:
- Landscape rule: enable Apply To Horizontal Images, choose Right / Bottom, and use a 15% watermark width.
- Portrait rule: enable Apply To Vertical Images, choose Center / Bottom, and use a 25% watermark width.
- Square rule: enable Apply To Square Images, choose Right / Top, and use an 18% watermark width.
These percentages are starting examples, not universal recommendations. The useful distinction is that each image shape gets a deliberately chosen placement rather than inheriting a compromise intended for another composition.
Click + Add Another Watermark Rule to create each additional configuration. New rules start from the normal defaults, so configure the watermark source and required settings for each one.
Orientation is determined from the document dimensions: vertical means width is less than height, horizontal means width is greater than height, and square means the two are equal. With one rule for each orientation and no additional restrictions, each image matches its corresponding rule.
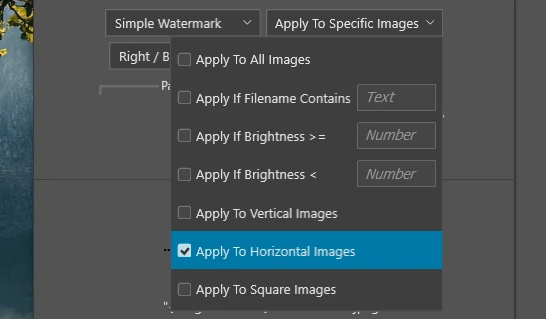
Cover every orientation you want exported. If you configure only portrait and landscape rules, a square image that matches no other rule will not produce an output.
7. Account for Rotation When Checking the Final Position
A rotated watermark occupies different bounds from an unrotated one. A long text watermark may be relatively shallow at 0°, but extend much farther vertically after rotation.
In Simple Watermark, the plugin resizes the watermark, rotates it, and then calculates its aligned placement. This means Right / Bottom is applied to the rotated watermark rather than positioning it first and rotating it out of place afterward.
Padding is still relevant after rotation. A mark that fits comfortably when horizontal may need to shrink to fit the same padded area at an angle.
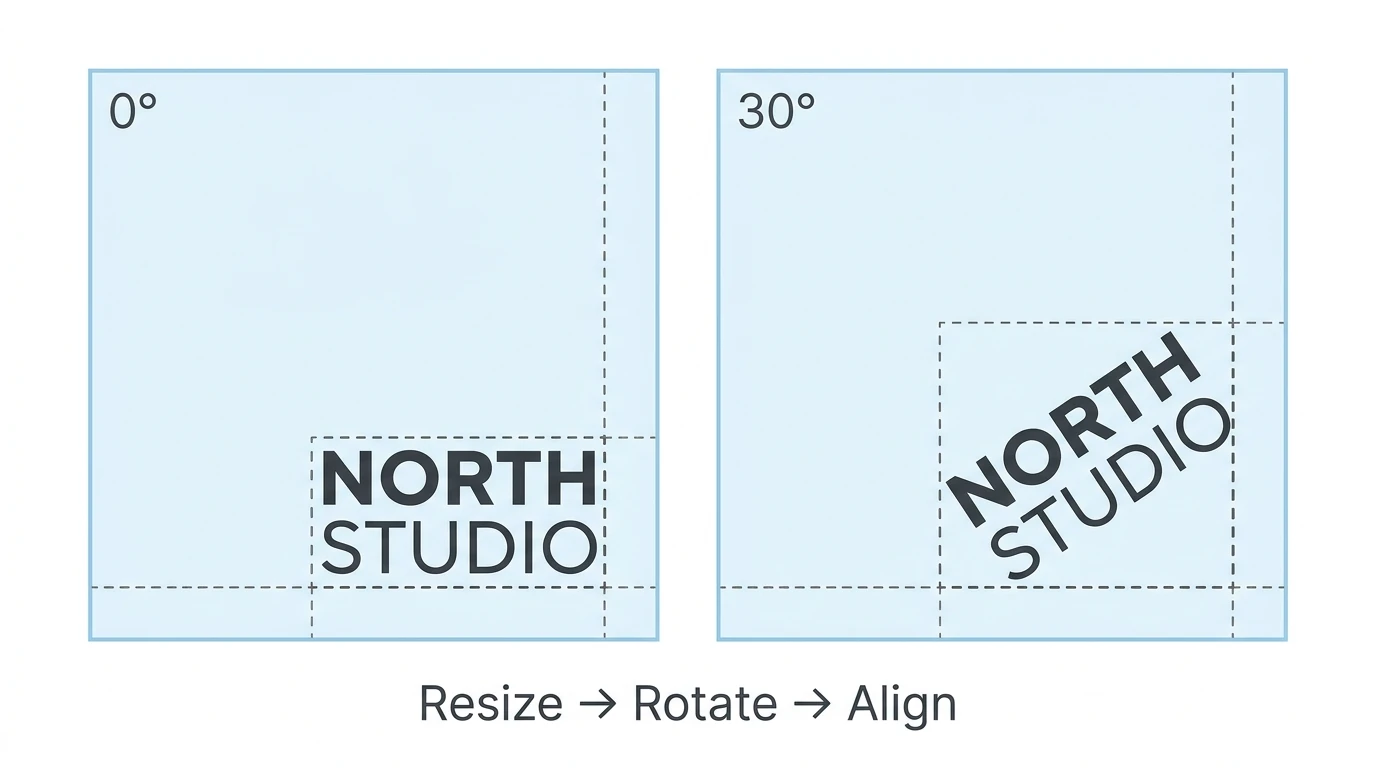
For an ordinary corner logo, begin at 0°. If you want an angled text watermark, change Angle and inspect the exported result on both wide and narrow images. Check that the rotated mark remains readable, leaves appropriate edge clearance, and does not become unexpectedly small because of the fitting constraints.
8. Put a Logo and Copyright Text at Different Alignment Points
Nine-point alignment is not limited to choosing one location for the entire operation. Each Simple Watermark rule has its own alignment, so you can place different watermark elements in different regions.
A practical two-rule arrangement is:
- Rule #1: an Image Watermark containing your logo, aligned Right / Bottom, with percentage width and right/bottom padding.
- Rule #2: a Text Watermark containing your copyright notice or website address, aligned Left / Bottom, with its own width, color, opacity, and left/bottom padding.
Set both rules to Apply To All Images if both elements should appear throughout the batch.
The rules are sequential and cumulative. The plugin adds the logo, adds the text to the same working image, and exports one combined result. It does not create a separate output for each rule.
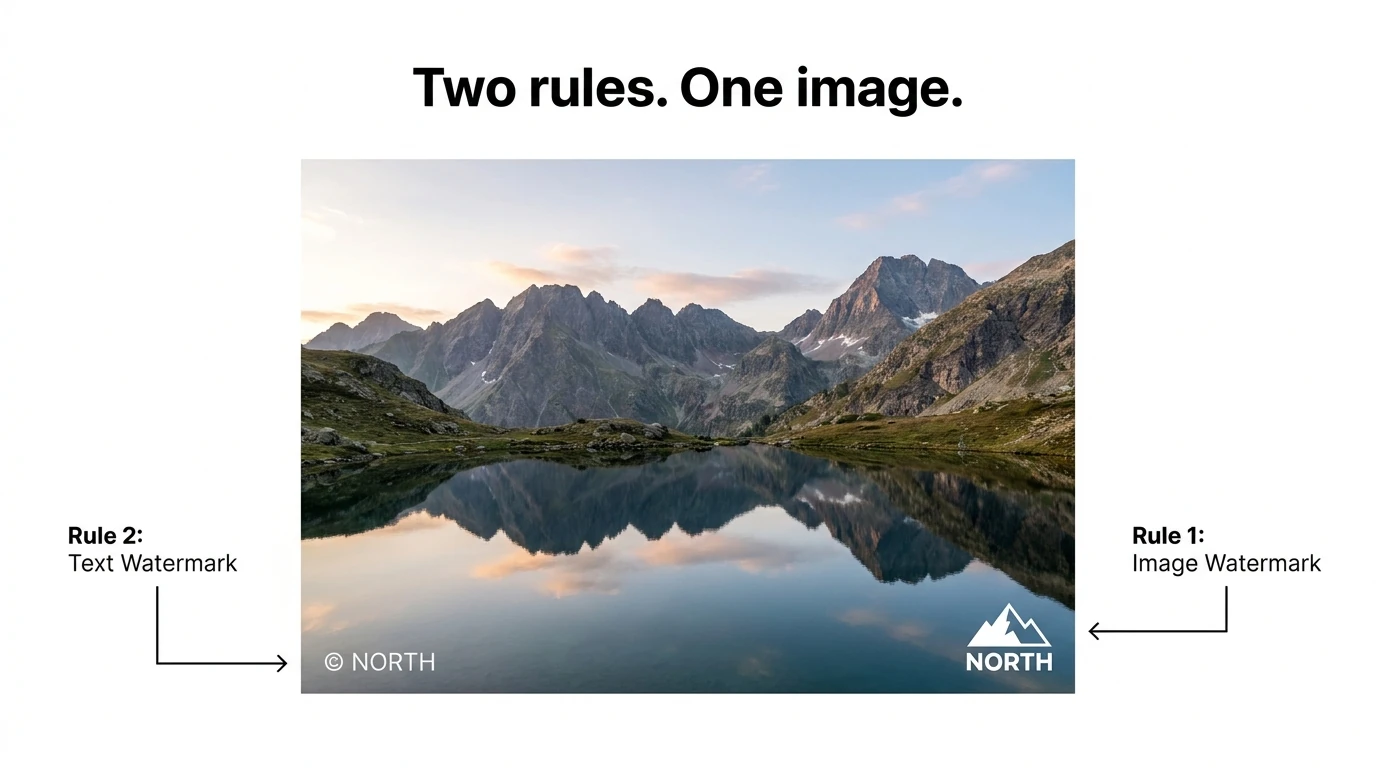
Give the two elements enough space to remain distinct, especially on smaller images. Alignment does not itself establish separation between different rules: if two qualifying rules use the same position, their watermarks can occupy the same region. Inspect the combined output rather than checking each rule only in isolation.
9. Check the Exported Placement Before Running the Full Folder
A useful test batch includes the images most likely to expose a placement problem—not just the easiest examples.
Include a small and a large image, each orientation present in the production folder, and images with important detail near the chosen watermark position. Place the test files directly inside the selected source folder; the plugin does not recursively process arbitrary nested subfolders.
Export the test batch to a separate destination and inspect the actual output files. Check:
- Position: does each watermark occupy the intended alignment region?
- Scale: is the watermark appropriately sized on both small and large images?
- Clearance: are the edge margins comfortable, including after rotation?
- Content: does the placement obscure important image details?
- Combined rules: do multiple watermarks remain distinct and readable?
- Coverage: did every image you intended to export match at least one rule?
If a mark looks too large, adjust Width before changing alignment. If it is in the correct region but too close to an edge, adjust the relevant padding. If it repeatedly covers important content, choose another alignment or introduce an orientation-specific rule.
Once the test results are satisfactory, select the production source folder and the intended export folder, then run the same configuration across the full batch.
10. Save the Alignment Setup for the Next Batch
After testing, give the configuration a descriptive Operation Name and click Save. A name such as “Bottom-right logo, 15% width, 3% margins” makes the placement strategy easy to recognize later.
Saved Operations preserve the watermark rules, sources, alignments, widths, padding, angles, opacity, application conditions, export settings, and filename components. For a recurring job, select the saved operation and click Load instead of rebuilding the placement settings.
The source and export folder references are saved too, so review those locations when moving to a new batch. If a saved watermark-image file has been moved, renamed, deleted, or otherwise becomes inaccessible, select the asset again for the affected rule.
The repeatable formula is straightforward: choose the alignment, size the mark for the images, establish edge clearance, and verify the exported result. Bulk Image Watermarker turns that tested placement into a reusable folder-wide workflow, so consistent watermarking no longer requires manually positioning the same logo or text on every image.