What Are The Different Types Of Image Compression?

The two main types of image compression are lossless and lossy. Lossless compression preserves the image data so it can be reconstructed exactly. Lossy compression discards some information to make the file smaller, accepting a tradeoff between filesize and fidelity.
The confusion starts when those terms appear alongside JPEG, PNG, quality sliders, target filesizes, and resizing. These describe different things: the preservation guarantee, the file format, the encoding technique, or the practical strategy used to reduce a file. An image can be a downscaled, lossy WebP exported toward a target filesize—all at once.
Understanding those distinctions makes it much easier to choose the right approach instead of simply turning every compression setting to maximum.
1. Lossless Compression: Preserve the Image Data Exactly
Lossless compression changes how image data is represented, not the information that must be recovered. The decoder can reconstruct the same image sample values supplied to the lossless encoder.
Think of a graphic containing a large area of identical blue pixels. Rather than treating every repeated value as unrelated information, an encoder can represent patterns more efficiently. The actual methods are more sophisticated, but the essential promise is straightforward: the compression itself does not discard image data.
Common examples include:
- PNG, which uses lossless compression and supports transparency. The W3C PNG specification defines support for indexed-color, grayscale, and full-color images.
- Lossless WebP, when the exporter is explicitly using its lossless mode.
- TIFF with a lossless compression option such as LZW or ZIP. TIFF is not automatically lossless under every possible export configuration.
- GIF’s LZW compression, which preserves its indexed image data. Converting an original image to GIF’s limited palette can still discard colors before that compression occurs.
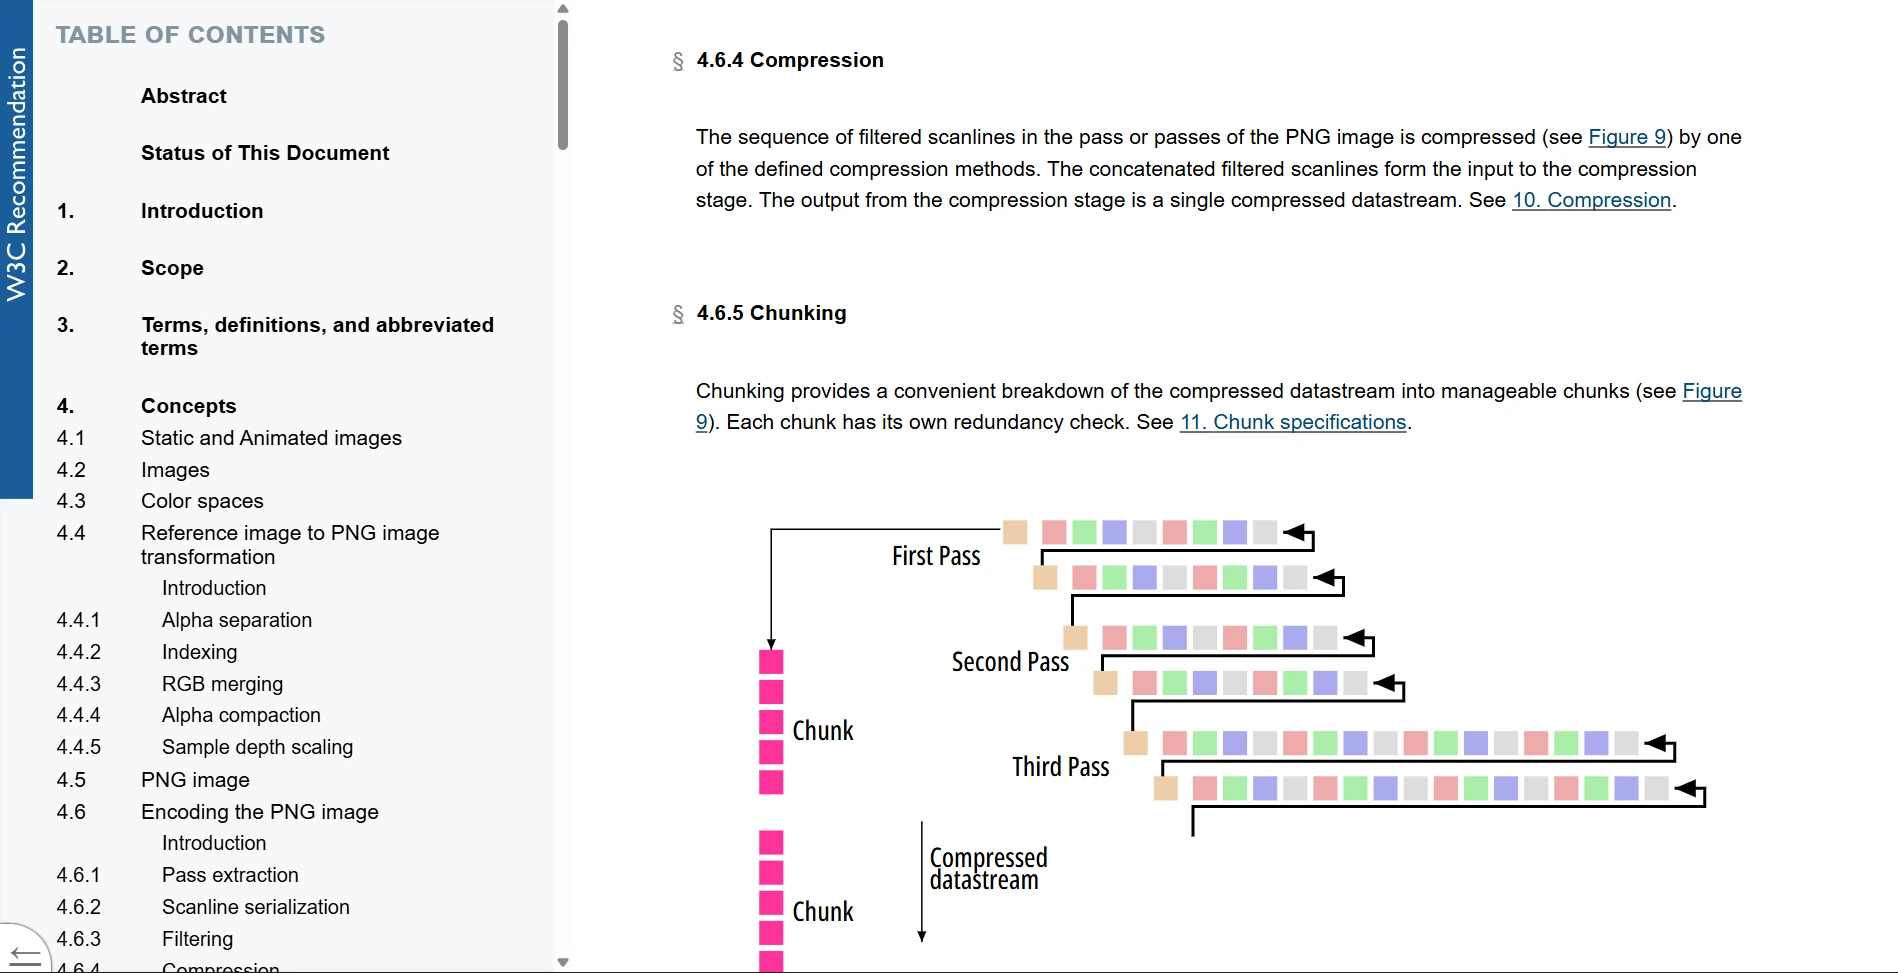
Lossless is a strong choice for screenshots with small text, pixel art, diagrams, and other images where changing individual pixels is undesirable. It is also appropriate when exact image data matters more than achieving the smallest possible delivery file.
However, lossless does not mean “dramatically smaller.” A noisy photograph contains less easily exploitable repetition than a simple diagram. An already well-compressed image may have little remaining room for lossless savings.
It also does not mean “preserves the entire original document.” Keeping a raster image’s pixels is different from retaining Photoshop layers, editing history, or every metadata field. Preserve the original working document when those things matter.
2. Lossy Compression: Trade Some Information for a Smaller File
Lossy compression stores an approximation of the input image. It deliberately removes or simplifies information so the encoded result can require fewer bytes.
The important word is approximation—not necessarily deterioration. A carefully compressed photograph can look effectively unchanged at its intended display size while using substantially less storage. Aggressive compression makes the tradeoff more visible.
Common lossy choices include:
- Ordinary JPEG photo exports. The JPEG standard’s overview describes its familiar DCT-based lossy coding system.
- Lossy WebP, which can also support transparency. WebP supports both lossy and lossless coding, so the extension alone does not identify the preservation guarantee.
- Lossy AVIF. The AVIF format also supports transparency and can be used with lossless coding configurations.
Lossy compression is usually worth evaluating for photographs and other continuous-tone delivery images. It is less forgiving when the image contains tiny lettering, sharp high-contrast edges, or details that must remain numerically exact.
When reviewing an export, look beyond whether the overall image still looks recognizable. Inspect fine textures, smooth gradients, and edges. Common problems include block patterns, smudged detail, banding, and unwanted noise or halos around lettering. Adobe’s explanation of how JPEG artifacts develop illustrates why text and strong edges deserve particular attention.
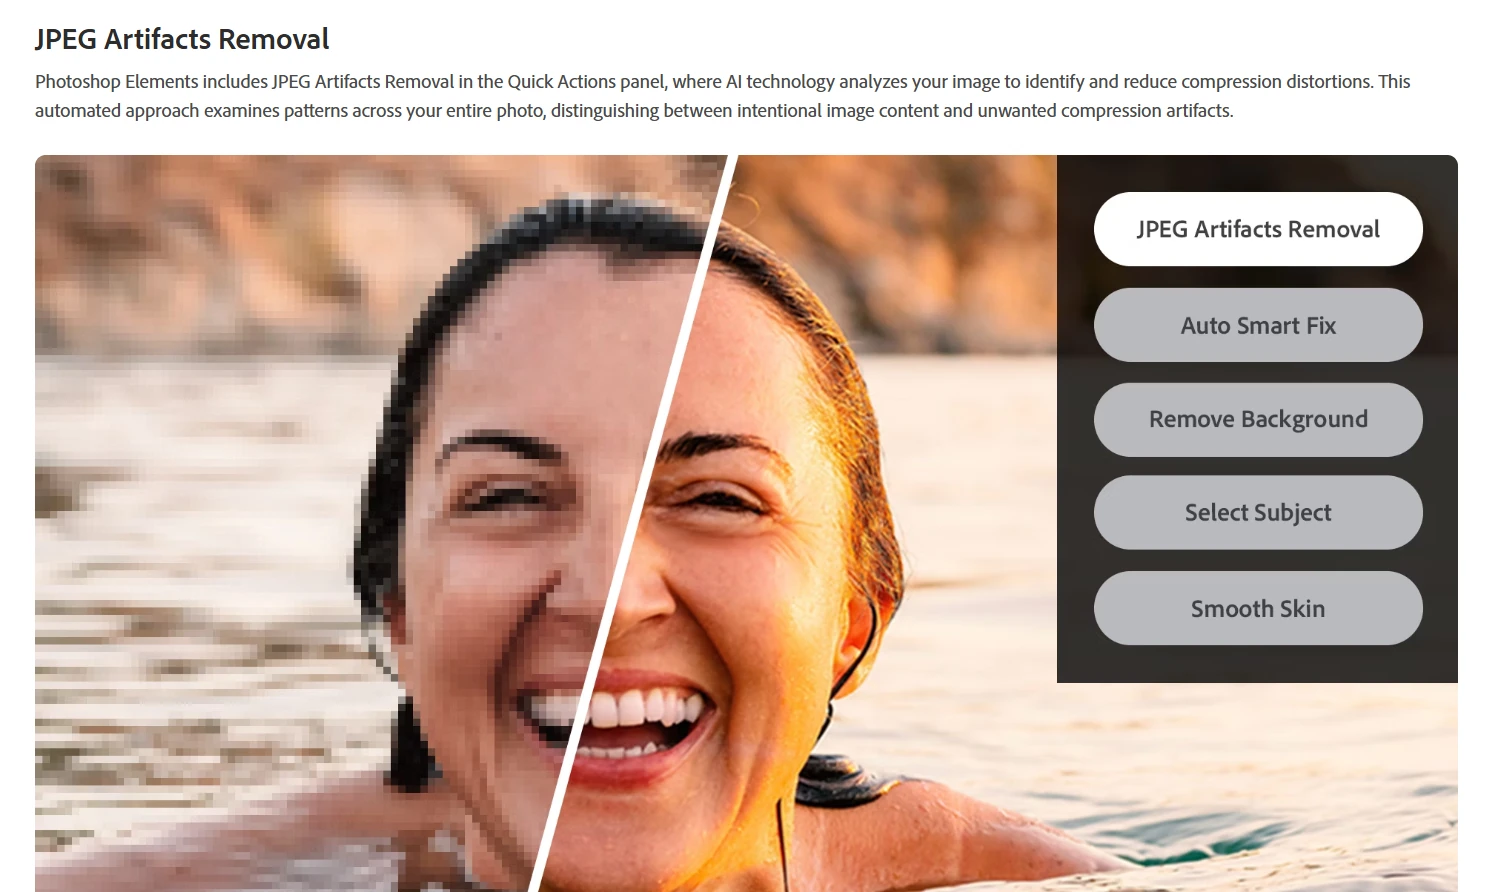
Two misconceptions are worth avoiding. First, a maximum quality setting does not necessarily make a lossy encoder lossless. Second, converting to a lossy format does not guarantee a smaller file: a simple, efficiently stored lossless graphic can be smaller than its lossy conversion.
For editing workflows, keep a master and create delivery exports from it. Repeatedly editing and re-encoding the previous lossy export can compound damage instead of giving each export a clean starting point.
3. Near-Lossless and Visually Lossless: Different Promises, Not a Third Fundamental Category
These terms sound interchangeable, but they answer different questions. Neither should automatically be interpreted as exact preservation of the original pixels.
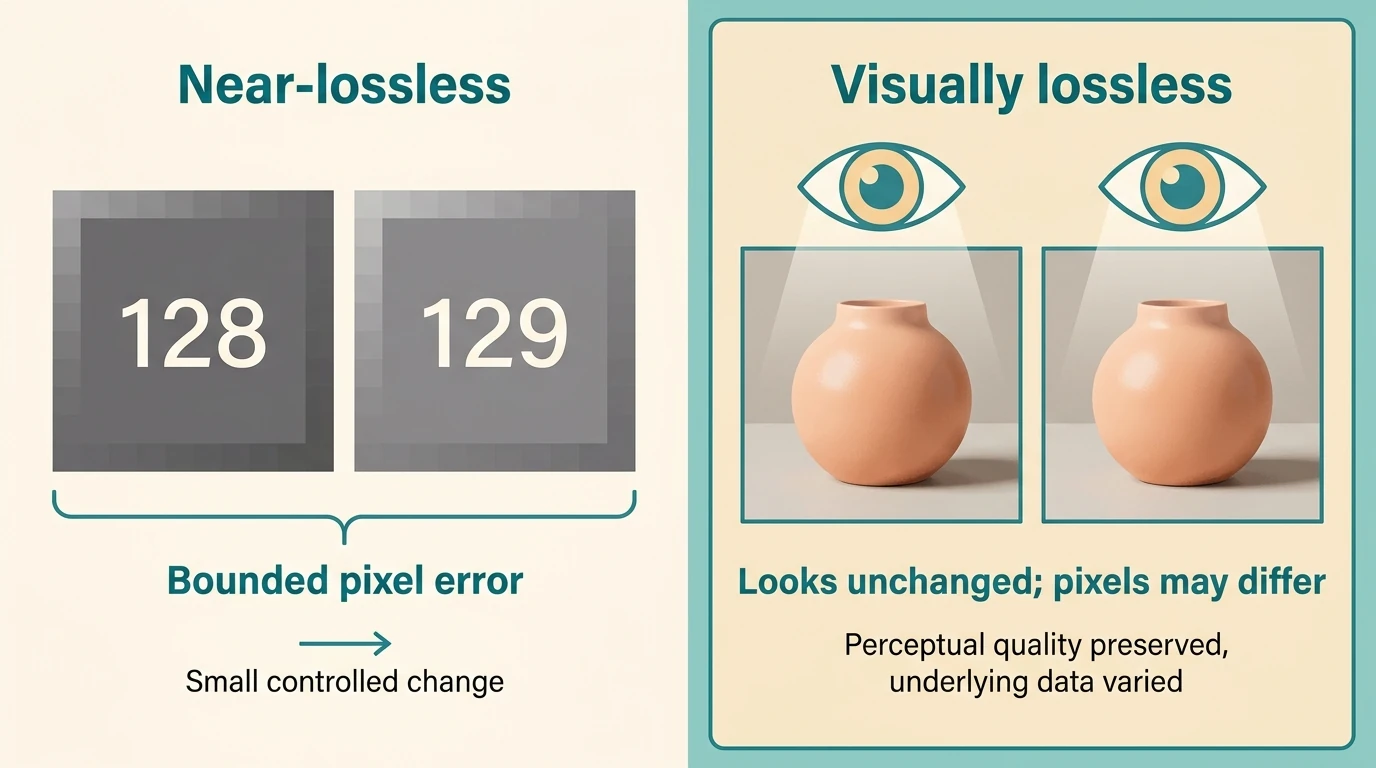
Near-lossless describes controlled changes
Near-lossless compression permits small changes rather than demanding perfect reconstruction. In a formally bounded system, the encoder limits how far reconstructed sample values may differ from their originals.
For example, JPEG-LS supports both lossless and near-lossless compression. Its near-lossless approach can control the maximum reconstruction error. That is a different promise from simply selecting a high quality setting in an ordinary JPEG exporter.
The exact meaning of “near-lossless” depends on the codec and implementation. Check what is actually constrained rather than assuming the label guarantees a particular visual result.
Visually lossless describes what someone can perceive
Visually lossless means the difference is not perceptible under the viewing conditions being considered. The encoded pixels may still differ from the source.
That qualification matters. Display size, brightness, viewing distance, and image content influence whether compression artifacts are noticeable. A result that looks unchanged in a small product listing may reveal differences when enlarged for close inspection.
For ordinary delivery images, an imperceptible difference can be an excellent outcome. For a task that requires exact pixel values, however, “I cannot see a difference” is not a substitute for true lossless preservation.
4. RLE, Dictionary Coding, Prediction, and Transforms: The Techniques Inside Compression
Lossy and lossless describe whether information survives. Terms such as RLE, LZW, and transform coding describe how an encoder represents the data. They belong to a different level of the explanation.
Common building blocks include:
- Run-length encoding, or RLE: represents repeated values as runs. Conceptually, “twenty white pixels” can be more economical than recording the same white value twenty times.
- Dictionary-based coding: replaces repeated sequences with references. LZW is used in GIF and some TIFF workflows; LZ77-style references are part of DEFLATE, which PNG uses.
- Predictive coding: predicts a value from nearby data and encodes the difference. If the difference is preserved exactly, the prediction can be reversed without losing information.
- Transform coding and quantization: expresses image information in another mathematical representation, then reduces its precision. In familiar lossy JPEG encoding, the DCT is followed by quantization that discards precision.
- Chroma subsampling: stores color information at a lower spatial resolution than brightness information. It can save data, but colorful fine details and text may become less crisp.
- Entropy coding: uses methods such as Huffman or arithmetic coding to represent symbols efficiently without discarding additional information.
These techniques are often combined. PNG prepares scanlines with reversible filtering and then compresses the resulting data. A lossy encoder can combine prediction, transforms, quantization, and lossless entropy coding within one pipeline.
Google’s illustrated explanation of WebP compression techniques is useful for seeing how those stages fit together. Adobe’s compression-type guide connects options such as RLE, LZW, ZIP, and CCITT to practical image and document workflows.
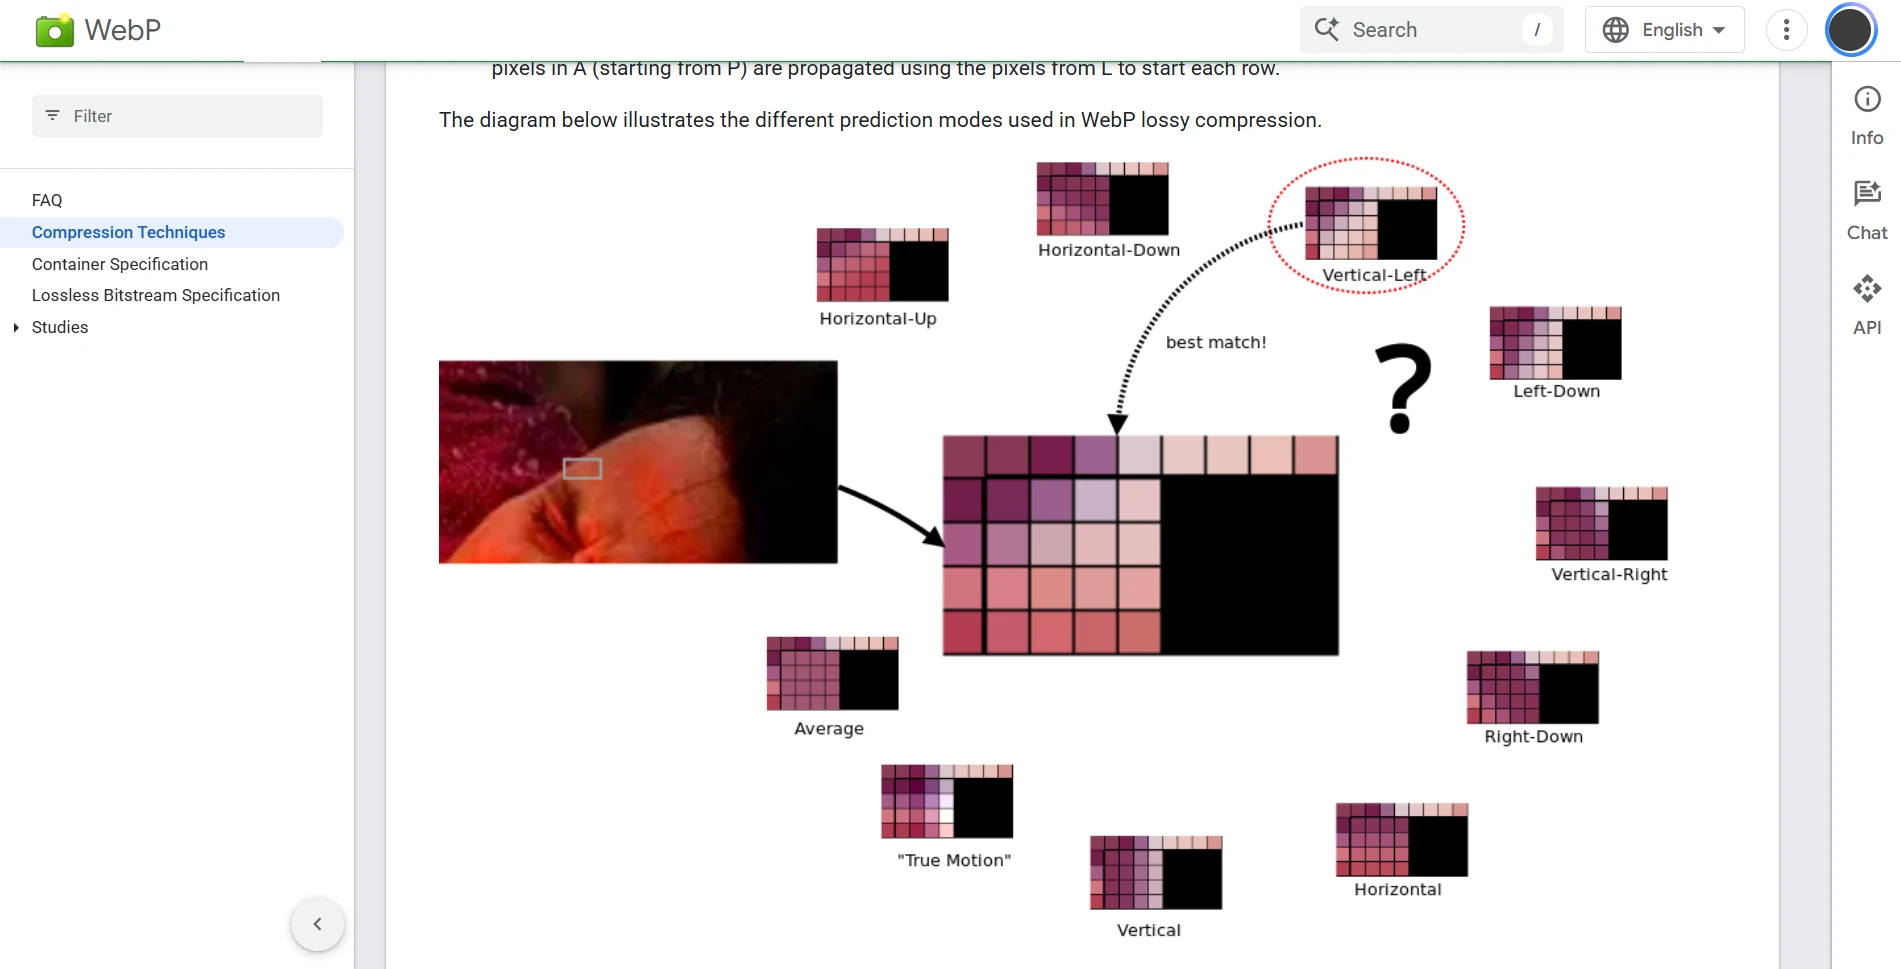
This is why “Huffman compression or lossy compression?” is not quite the right question. Huffman coding can be a lossless stage inside an overall lossy process.
Progressive encoding is another separate distinction
A progressive JPEG displays in successive stages as it downloads, rather than arriving in the same way as a baseline JPEG. That concerns how the image is organized and delivered; it does not turn the image into a lossless file or establish a particular quality level.
5. Fixed-Quality Compression: Choose the Quality and Let Filesize Vary
Fixed-quality compression is the familiar export-slider approach: choose an encoder quality setting, save the image, and accept the resulting filesize.
It works well when there is no strict per-image size requirement and you have established settings that suit the material. For example, a collection of similarly prepared photographs may use one tested export quality.
What it does not provide is uniform output size. A smooth studio background and a detailed woodland scene can produce very different files at the same dimensions and quality setting.
Quality numbers also need context. Quality 80 does not mean 80% of the original filesize, 80% of the original information, or a universal visual-quality score. The same number in two formats—or two different exporters—need not produce equivalent results.
Apply a tested quality across a Photoshop folder
Bulk Image Compressor: Batch-Reduce Filesizes is a third-party Photoshop plugin that makes this strategy practical for batches through its Standard Compression mode.
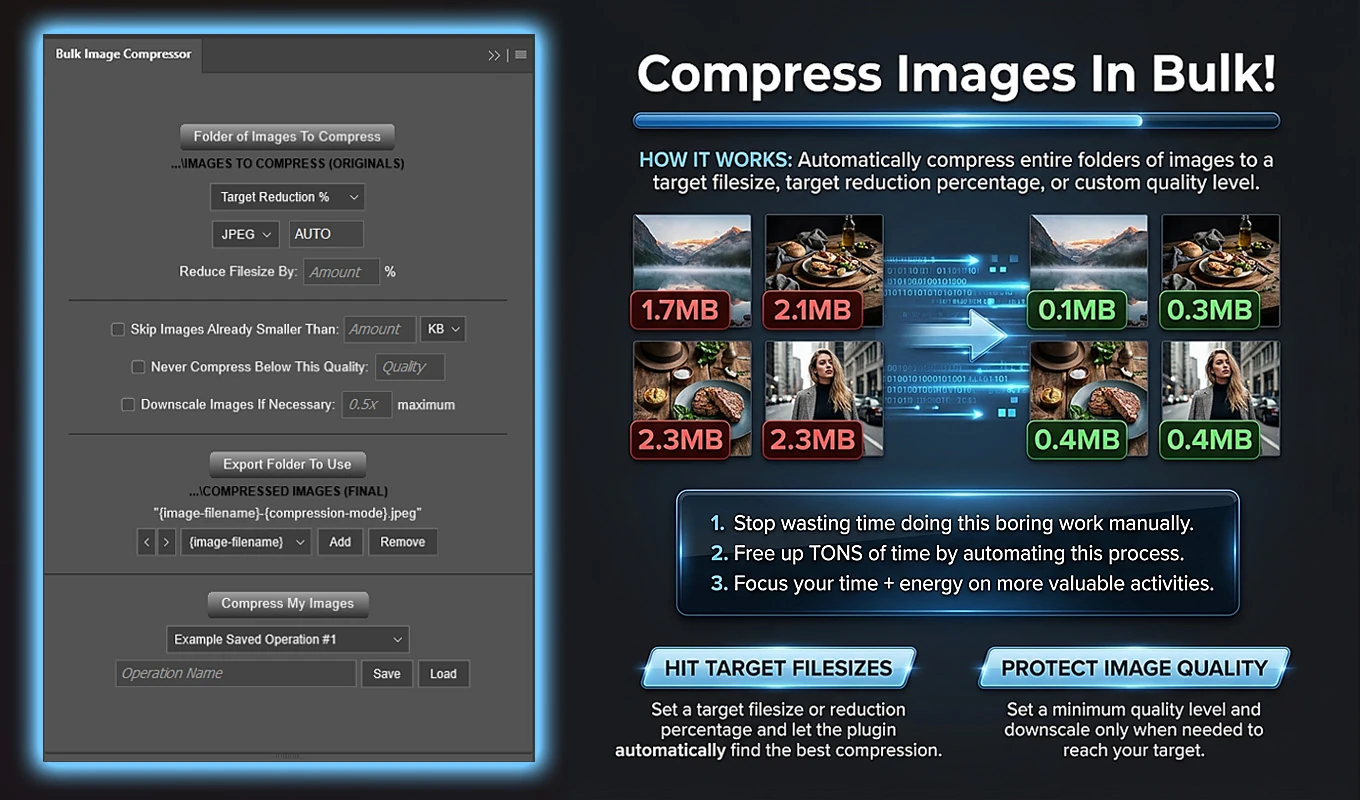
You select a source folder, choose JPEG or WebP output, enter a Quality value from 0–100, and choose an export folder. The plugin applies that configured quality to each processed image rather than asking you to open and export every file individually. It creates derivative outputs and closes the working source documents without saving changes to the originals.
One useful detail when interpreting the setting: Photoshop’s JPEG save system uses native quality levels from 0–12, so the plugin maps its 0–100 interface onto those discrete levels. WebP uses a native 0–100 quality scale. The plugin’s compressed JPEG and WebP exports are lossy; this workflow is for delivery images rather than lossless master storage.
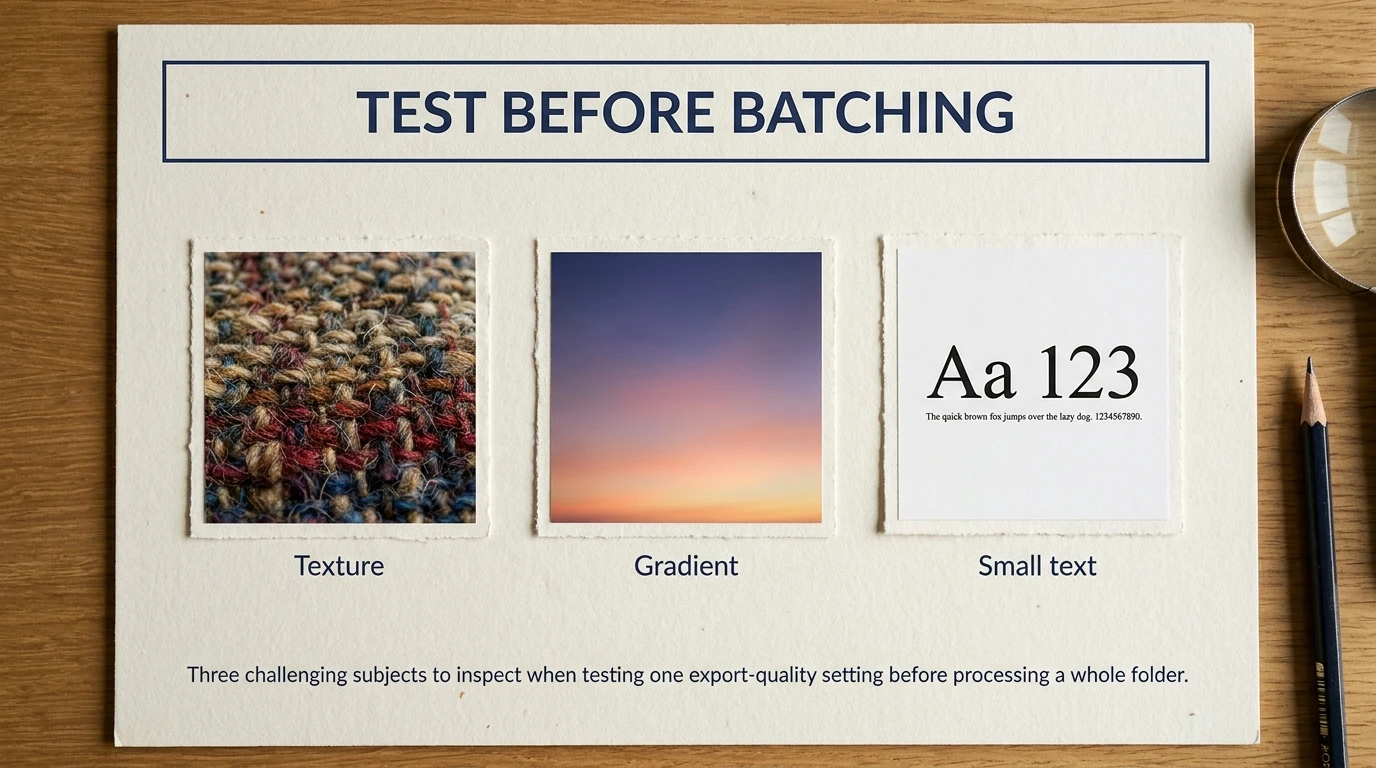
Before running a large batch, test representative difficult images: one with fine texture, one with a smooth gradient, and one with small lettering if the collection includes it. A setting chosen from the easiest image alone can be misleading.
6. Target-Filesize Compression: Choose the Byte Budget and Adapt Each Image
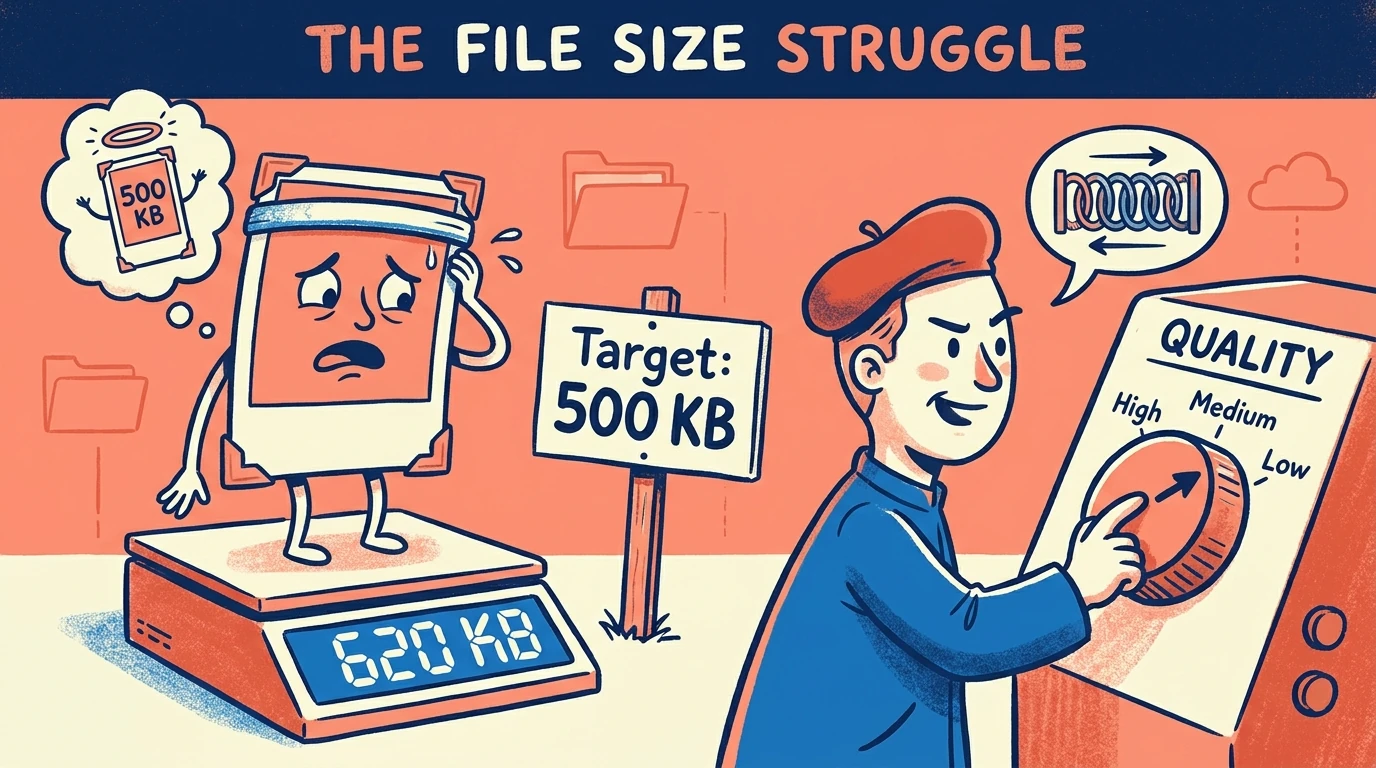
Target-filesize compression reverses the fixed-quality approach. Instead of saying “use this quality,” you say “try to make this image approximately 500 KB.” The quality becomes a variable used to pursue that goal.
This is useful when a delivery specification is expressed in KB or MB, or when you want individual images to occupy a similar storage budget.
A practical target-based process is:
- Encode a candidate at a chosen quality.
- Measure the actual saved filesize.
- Adjust quality according to whether the result is too large or too small.
- Repeat until the result is acceptable or a quality or dimension limit is reached.
The measuring step matters. Image dimensions and a quality number alone do not tell you the exact encoded size. Different images need different settings to approach the same budget.
Automate the export-and-measure loop in Photoshop
Bulk Image Compressor’s Target Filesize mode lets you enter one KB or MB goal for the batch. Quality switches to AUTO, and each processed source receives its own calibration rather than sharing one guessed quality setting.
The plugin saves temporary JPEG or WebP candidates, reads their actual filesizes, and uses a binary-search approach to narrow the quality range. That automates the repetitive part of manually exporting, checking the file, adjusting quality, and trying again.
You can also enable Never Compress Below This Quality to establish a quality floor. The plugin tries quality adjustment before changing pixel dimensions. If the lowest permitted quality is still too large, optional bounded downscaling can provide a second route toward the target.
Its success range is ±10% of the target. A 500 KB target therefore treats roughly 450–550 KB as successful. If the permitted settings cannot reach that range, it saves the closest permitted result it discovered.
That distinction is essential for strict upload limits: a target is not necessarily a hard maximum. If a destination rejects anything above 500 KB, leave headroom and verify the final files. Do not interpret “target 500 KB” as a guarantee that every output will be below 500 KB.
7. Percentage-Reduction Compression: Make Each File Smaller Relative to Its Starting Size
Percentage-reduction compression sets an individual goal from each source file’s original filesize. It answers “how much smaller should this file become?” rather than “how many KB should every output contain?”
The calculation is:
Target filesize = original filesize × (1 − reduction percentage ÷ 100).
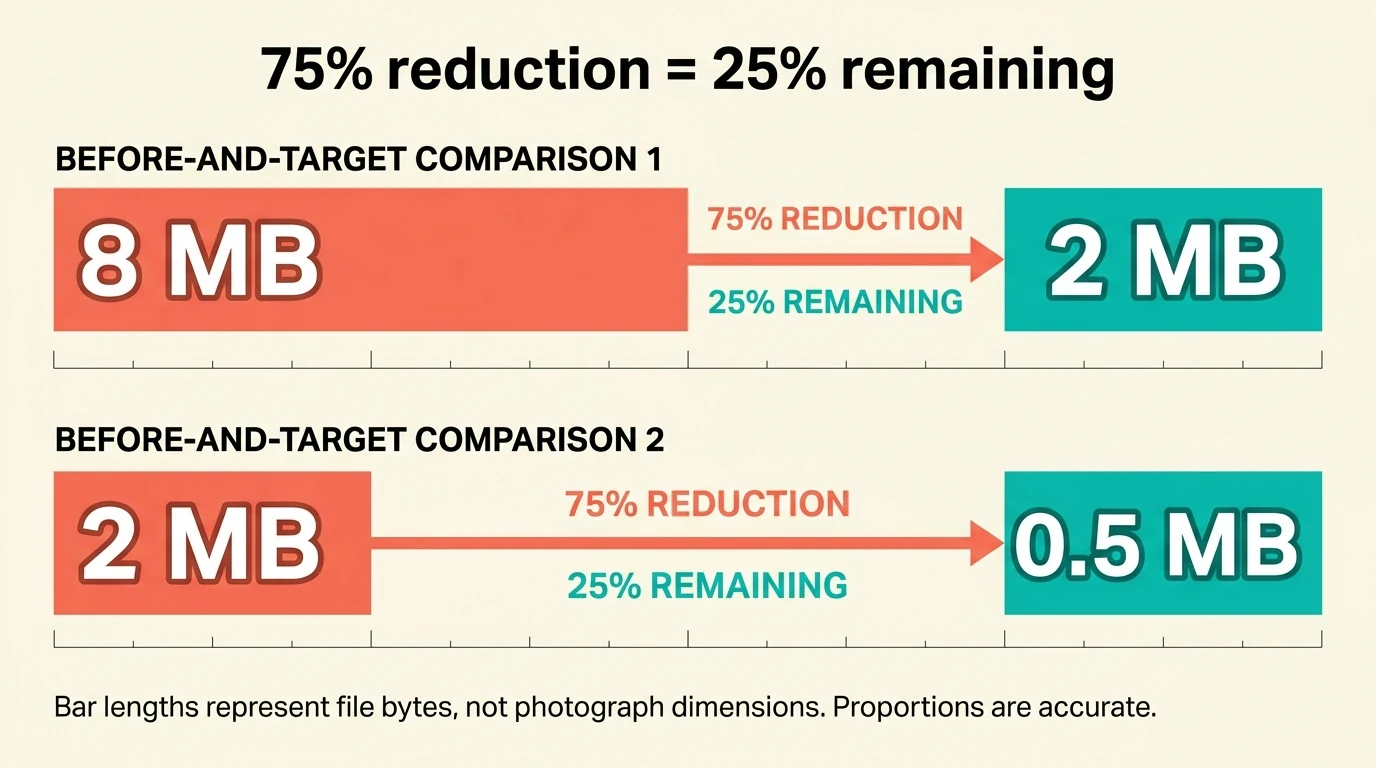
For a requested 75% reduction:
- An 8 MB source receives a target of approximately 2 MB.
- A 2 MB source receives a target of approximately 0.5 MB.
- A 400 KB source receives a target of approximately 100 KB.
A 75% reduction leaves 25% remaining. It does not leave 75%, and it has no direct relationship to selecting Quality 75.
This strategy is useful when proportional savings are the objective. It is not a substitute for a shared filesize ceiling: a large source can remain relatively large even after a substantial percentage reduction.
Give each source its own reduction target
Bulk Image Compressor’s Target Reduction % mode applies this calculation separately to every source. Entering 75 tells the plugin to pursue an output around one-quarter of each file’s original size, using automatic per-image quality calibration.
Like Target Filesize mode, it measures real encoded candidates, treats results within ±10% of the calculated target as successful, and allows a minimum-quality guardrail. You can also permit adaptive downscaling when quality adjustment alone cannot get sufficiently close.
The practical advantage is that a mixed folder does not require you to calculate individual targets or manually discover a suitable quality for each image. One percentage defines the strategy, while the plugin handles the different starting sizes.
However, the starting file matters. A large losslessly stored image and an already optimized JPEG have very different opportunities for further savings. A layered source document also contains information beyond the final flattened delivery image. Percentage reduction measures the change from that particular source file—not a standardized amount of visual-quality loss or a clean comparison of codec efficiency.
8. Downsampling: Reduce the Number of Pixels Before Encoding
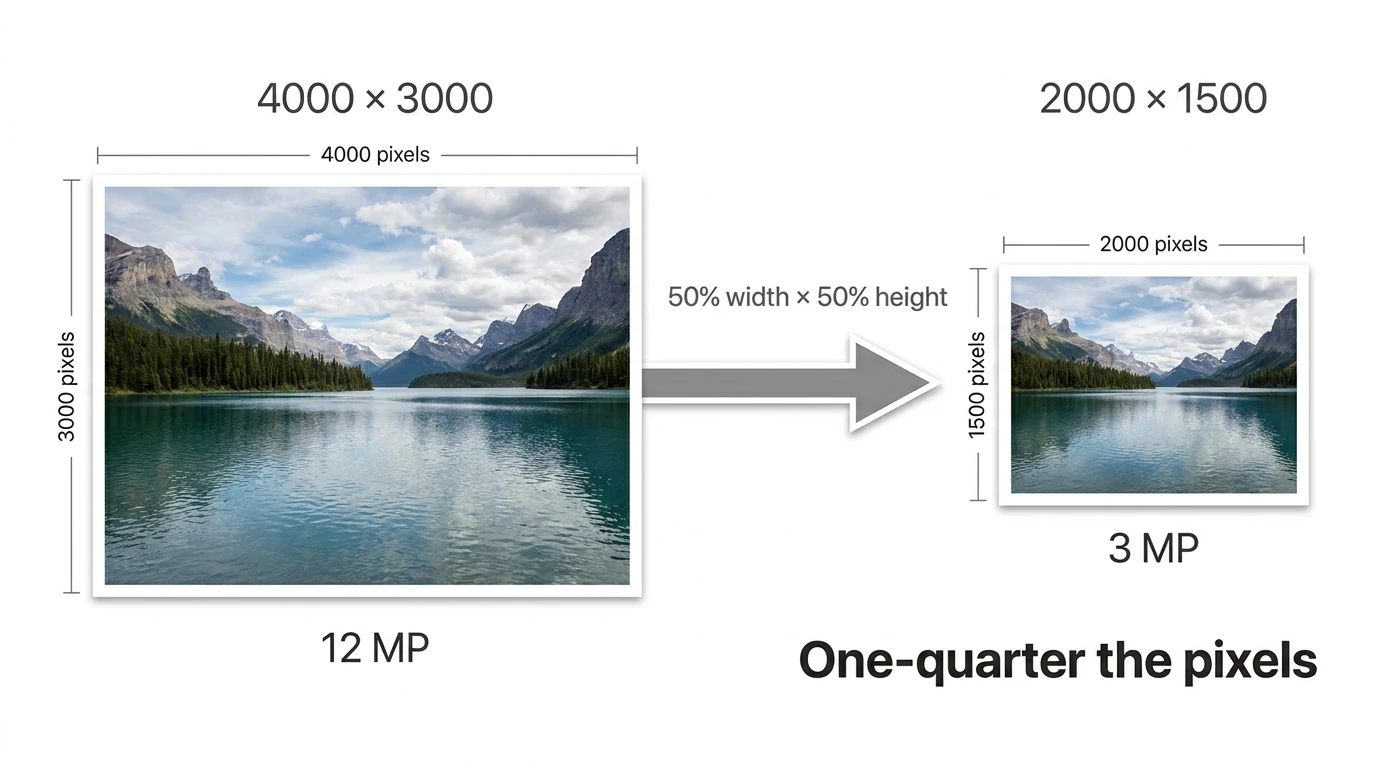
Downsampling is often discussed as image compression, although it is more precisely a reduction in image dimensions before encoding. It removes pixel information regardless of whether the smaller result is later saved losslessly or lossily.
This can be the more sensible tradeoff when an image contains far more resolution than its destination needs. Keeping unnecessary dimensions while heavily degrading compression quality is not automatically the best way to preserve a useful result.
The arithmetic is easy to underestimate:
- A 4000 × 3000 image contains 12 million pixels.
- Reducing both dimensions to 50% produces 2000 × 1500.
- The smaller image contains 3 million pixels—one-quarter as many, not one-half.
That does not guarantee a 75% reduction in encoded filesize. Compression behavior still depends on the image, format, and settings. It does show why proportional resizing can have a substantial effect.
Do not confuse downsampling with changing only the PPI or DPI setting. As Adobe explains in its guide to image size, resolution, and resampling, changing resolution without resampling leaves the pixel dimensions intact. Changing 300 PPI to 72 PPI is not, by itself, a meaningful way to remove image pixels.
Fixed resizing and conditional resizing serve different goals
Bulk Image Compressor separates these strategies. In Standard Compression, Also Downscale Images By applies one fixed multiplier to every processed image. A 0.5x setting deliberately halves both dimensions.
In its target-based modes, Downscale Images If Necessary is conditional. The plugin first tries compression quality alone. A 0.5x maximum downscaling allowance lets it search between full size and half size when needed; it does not force every output to half size. An image might remain at its original dimensions or reach its target at a larger scale such as 0.82x.
Choose required output dimensions before surrendering resolution. Downsampling is useful when those pixels are unnecessary, not simply because a smaller image is easier to compress.
9. Palette, Bit-Depth, and Metadata Optimization: Reduce What the File Needs to Store
Not every oversized image needs stronger photographic compression. Sometimes the better opportunity is to simplify the representation or remove information the delivery file does not need.
Palette and bit-depth reduction
An indexed-color image stores a palette and lets pixels refer to its entries. For a simple illustration with a small set of colors, that can be more economical than storing full RGB values for every pixel.
The preservation question depends on the conversion. If all original colors and required transparency can be represented exactly, switching to an indexed representation can preserve the image. If thousands of colors are reduced to a smaller representative palette, information is discarded.
This explains an apparent contradiction: PNG compression is lossless, but a workflow that reduces colors before writing the PNG can still be lossy overall. The encoder faithfully preserves the simplified image it receives, not the richer image that existed before preprocessing.
Reducing sample depth—such as moving from 16 bits per channel to 8—can likewise discard precision. Evaluate smooth gradients carefully, where reduced precision may appear as banding. Palette reduction is generally a more natural candidate for flat-color graphics than for photographs with subtle tonal variation.
Metadata removal
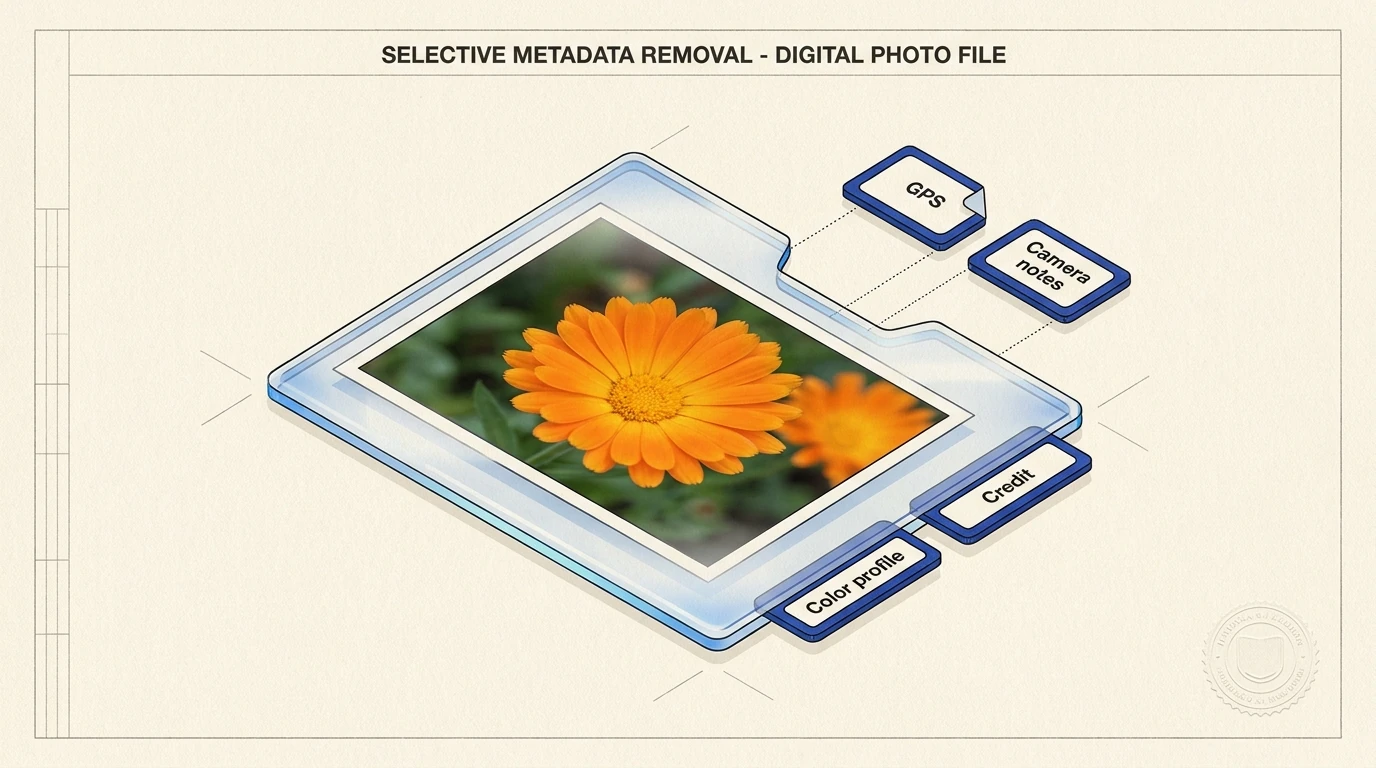
Image files can contain information beyond their pixels, including camera details, location information, descriptive text, and embedded previews. Removing unnecessary fields can reduce filesize without re-encoding the visible image data.
The amount saved depends on what is present. Metadata removal should not be presented as a guaranteed large reduction, especially when the file is dominated by encoded pixel data.
Also, not all non-pixel information is disposable. Preserve attribution or licensing information when required, and treat color profiles deliberately. Adobe’s explanation of assigning, removing, and converting color profiles shows why removing a profile is not equivalent to preserving intended color appearance.
The most useful way to choose an image-compression method is to separate the decisions. First decide whether exact image data must survive. Then choose an appropriate format and encoding mode. Finally, choose the practical control: a tested quality setting, a target filesize, or a percentage reduction—with dimensions, colors, and metadata adjusted only where the intended use allows. The smallest file is useful only if it still does the job.